CHEVROLET TRAVERSE 2021 Owner's Manual
Manufacturer: CHEVROLET, Model Year: 2021, Model line: TRAVERSE, Model: CHEVROLET TRAVERSE 2021Pages: 369, PDF Size: 8.12 MB
Page 111 of 369

Chevrolet Traverse Owner Manual (GMNA-Localizing-U.S./Canada/Mexico-
14637844) - 2021 - CRC - 3/26/21
110 Instruments and Controls
Low Fuel Warning Light (Base
Level)
Metric Shown, English Similar
This light comes on for a few seconds when
the ignition is turned on as a check to
indicate it is working. If it does not come
on, have it fixed.
The low fuel warning light comes on and a
chime sounds when the vehicle is low on
fuel. The light turns off when fuel is added
to the fuel tank.
Low Fuel Warning Light (Uplevel)
This light is near the fuel gauge and comes
on briefly when the ignition is turned on as
a check to show it is working.
It also comes on when the fuel tank is low
on fuel. The light turns off when fuel is
added. If it does not, have the vehicle
serviced.
Security Light
The security light should come on briefly as
the engine is started. If it does not come on,
have the vehicle serviced by your dealer.
If the system is working normally, the
indicator light turns off. If the light stays on and the engine does
not start, there could be a problem with the
theft-deterrent system. See
Immobilizer
Operation 026.
High-Beam On Light
This light comes on when the high-beam
headlamps are in use. See Headlamp High/
Low-Beam Changer 0123.
IntelliBeam Light
This light comes on when the IntelliBeam
system, if equipped, is enabled. See Exterior
Lamp Controls 0122.
Page 112 of 369
Chevrolet Traverse Owner Manual (GMNA-Localizing-U.S./Canada/Mexico-
14637844) - 2021 - CRC - 3/26/21
Instruments and Controls 111
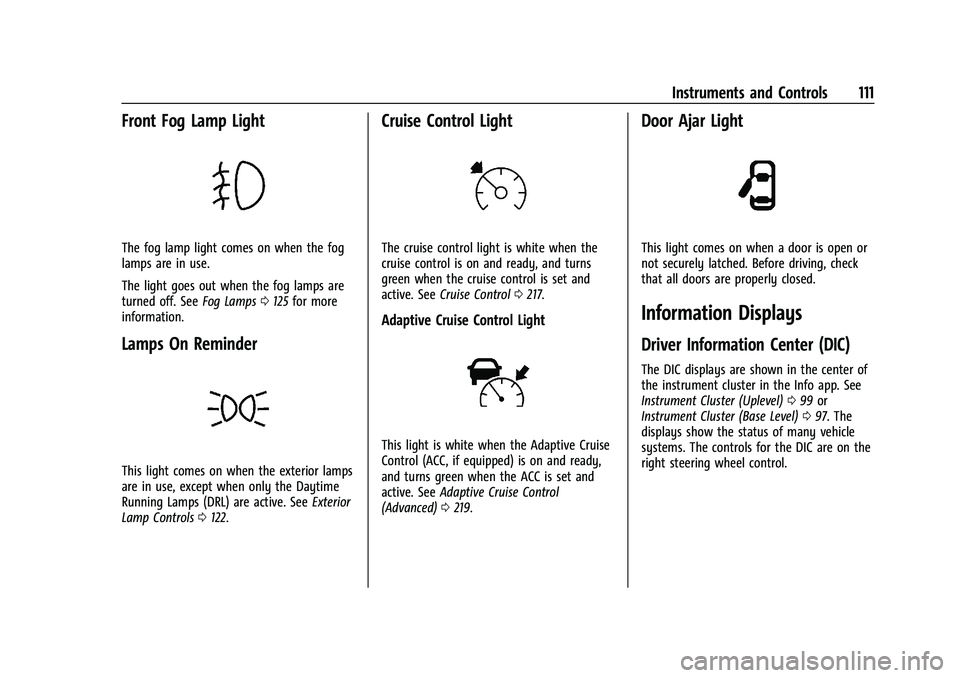
Front Fog Lamp Light
The fog lamp light comes on when the fog
lamps are in use.
The light goes out when the fog lamps are
turned off. SeeFog Lamps0125 for more
information.
Lamps On Reminder
This light comes on when the exterior lamps
are in use, except when only the Daytime
Running Lamps (DRL) are active. See Exterior
Lamp Controls 0122.
Cruise Control Light
The cruise control light is white when the
cruise control is on and ready, and turns
green when the cruise control is set and
active. See Cruise Control 0217.
Adaptive Cruise Control Light
This light is white when the Adaptive Cruise
Control (ACC, if equipped) is on and ready,
and turns green when the ACC is set and
active. See Adaptive Cruise Control
(Advanced) 0219.
Door Ajar Light
This light comes on when a door is open or
not securely latched. Before driving, check
that all doors are properly closed.
Information Displays
Driver Information Center (DIC)
The DIC displays are shown in the center of
the instrument cluster in the Info app. See
Instrument Cluster (Uplevel) 099 or
Instrument Cluster (Base Level) 097. The
displays show the status of many vehicle
systems. The controls for the DIC are on the
right steering wheel control.
Page 113 of 369
Chevrolet Traverse Owner Manual (GMNA-Localizing-U.S./Canada/Mexico-
14637844) - 2021 - CRC - 3/26/21
112 Instruments and Controls
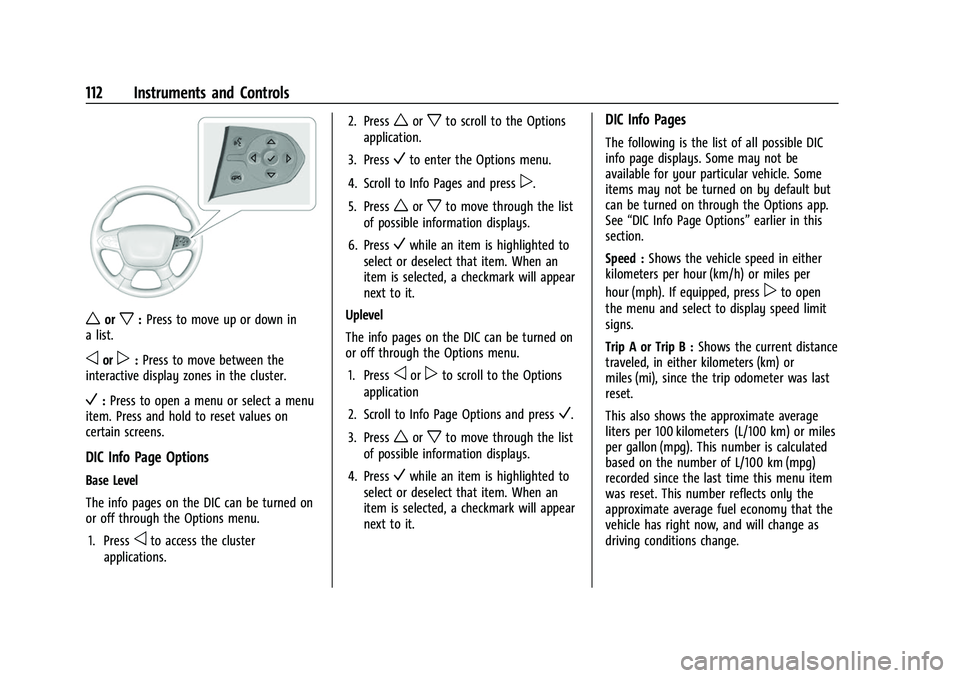
worx:Press to move up or down in
a list.
oorp: Press to move between the
interactive display zones in the cluster.
V: Press to open a menu or select a menu
item. Press and hold to reset values on
certain screens.
DIC Info Page Options
Base Level
The info pages on the DIC can be turned on
or off through the Options menu.
1. Press
oto access the cluster
applications. 2. Press
worxto scroll to the Options
application.
3. Press
Vto enter the Options menu.
4. Scroll to Info Pages and press
p.
5. Press
worxto move through the list
of possible information displays.
6. Press
Vwhile an item is highlighted to
select or deselect that item. When an
item is selected, a checkmark will appear
next to it.
Uplevel
The info pages on the DIC can be turned on
or off through the Options menu.
1. Press
oorpto scroll to the Options
application
2. Scroll to Info Page Options and press
V.
3. Press
worxto move through the list
of possible information displays.
4. Press
Vwhile an item is highlighted to
select or deselect that item. When an
item is selected, a checkmark will appear
next to it.
DIC Info Pages
The following is the list of all possible DIC
info page displays. Some may not be
available for your particular vehicle. Some
items may not be turned on by default but
can be turned on through the Options app.
See “DIC Info Page Options” earlier in this
section.
Speed : Shows the vehicle speed in either
kilometers per hour (km/h) or miles per
hour (mph). If equipped, press
pto open
the menu and select to display speed limit
signs.
Trip A or Trip B : Shows the current distance
traveled, in either kilometers (km) or
miles (mi), since the trip odometer was last
reset.
This also shows the approximate average
liters per 100 kilometers (L/100 km) or miles
per gallon (mpg). This number is calculated
based on the number of L/100 km (mpg)
recorded since the last time this menu item
was reset. This number reflects only the
approximate average fuel economy that the
vehicle has right now, and will change as
driving conditions change.
Page 114 of 369
Chevrolet Traverse Owner Manual (GMNA-Localizing-U.S./Canada/Mexico-
14637844) - 2021 - CRC - 3/26/21
Instruments and Controls 113
Press and holdVwhile this display is active
to reset the trip odometer and the average
fuel economy. Trip A and Trip B can also be
reset by pressing
pand choosing reset.
Fuel Range : Shows the approximate
distance the vehicle can be driven without
refueling. LOW will be displayed when the
vehicle is low on fuel. The fuel range
estimate is based on an average of the
vehicle's fuel economy over recent driving
history and the amount of fuel remaining in
the fuel tank.
Follow Distance : If equipped, the current
follow time to the vehicle ahead is displayed
as a time value on this page.
Remaining Oil Life : Shows an estimate of
the oil's remaining useful life. If REMAINING
OIL LIFE 99% is displayed, that means 99%
of the current oil life remains.
When the remaining oil life is low, the
CHANGE ENGINE OIL SOON message will
appear on the display. The oil should be
changed as soon as possible. See Engine Oil
0 260. In addition to the engine oil life
system monitoring the oil life, additional
maintenance is recommended in the
Maintenance Schedule. See Maintenance
Schedule 0323. The Oil Life display must be reset after each
oil change. It will not reset itself. Do not to
reset the Oil Life display at any time other
than when the oil has just been changed.
It cannot be reset accurately until the next
oil change. To reset the engine oil life
system, press and hold
Vfor several
seconds while the Oil Life display is active.
See Engine Oil Life System 0262.
Tire Pressure : Shows the approximate
pressures of all four tires. Tire pressure is
displayed in either kilopascal (kPa) or in
pounds per square inch (psi). If the pressure
is low, the value for that tire is shown in
amber. See Tire Pressure Monitor System
0 292 and
Tire Pressure Monitor Operation 0293.
Instantaneous Fuel Economy : Displays the
current fuel economy in liters per
100 kilometers (L/100 km) or miles per
gallon (mpg). This number reflects only the
approximate fuel economy that the vehicle
has right now and changes frequently as
driving conditions change. This display
cannot be reset.
Average Vehicle Speed : Displays the
average vehicle speed of the vehicle in
kilometers per hour (km/h) or miles per
hour (mph). This average is based on the various vehicle speeds recorded since the
last reset. Reset the average speed by
pressing
Vwhen it is displayed.
Fuel Economy : The center displays the
approximate instantaneous fuel economy as
a number and bar graph. Displayed above
the bar graph is a running average of fuel
economy for the most recently traveled
selected distance. Displayed below the bar
graph is the best average fuel economy that
has been achieved for the selected distance.
The selected distance is displayed at the top
of the page as “last xxx mi/km.”
Press
pto select the distance or reset best
value. Use
wandxto choose the
distance and press
V. Presswandxto
select “Reset Best Score.” Press
Vto reset
the best average fuel economy. After reset,
the best value displays “-,-”until the
selected distance has been traveled.
The display provides information on how
current driving behavior affects the running
average and how well recent driving
compares to the best that has been
achieved for the selected distance.
Page 115 of 369
Chevrolet Traverse Owner Manual (GMNA-Localizing-U.S./Canada/Mexico-
14637844) - 2021 - CRC - 3/26/21
114 Instruments and Controls
Timer :This display can be used as a timer.
To start the timer, press
Vwhile this
display is active. The display will show the
amount of time that has passed since the
timer was last reset. To stop the timer,
press
Vbriefly while this display is active
and the timer is running. To reset the timer
to zero, press and hold
Vwhile this display
is active, or press
pand select reset.
Battery Voltage : Displays the current
battery voltage, if equipped. Battery voltage
changes are normal while driving. See
Charging System Light 0104. If there is a
problem with the battery charging system,
the DIC will display a message.
Transmission Fluid Temperature : Shows the
temperature of the automatic transmission
fluid in either degrees Celsius (°C) or degrees
Fahrenheit (°F).
Off Road Page : This page shows the
traction, four wheel drive, and steering
angle states. When the front or rear axles
are locked, a lock icon is displayed.
Blank Page : Shows no information.
Vehicle Messages
Messages displayed on the DIC indicate the
status of the vehicle or some action that
may be needed to correct a condition.
Multiple messages may appear one after
another.
The messages that do not require
immediate action can be acknowledged and
cleared by pressing
V. The messages that
require immediate action cannot be cleared
until that action is performed.
All messages should be taken seriously;
clearing the message does not correct the
problem.
If a SERVICE message appears, see your
dealer.
Follow the instructions given in the
messages. The system displays messages
regarding the following topics:
.Service Messages
.Fluid Levels
.Vehicle Security
.Brakes
.Steering
.Ride Control Systems
.Driver Assistance Systems
.Cruise Control
.Lighting and Bulb Replacement
.Wiper/Washer Systems
.Doors and Windows
.Seat Belts
.Airbag Systems
.Engine and Transmission
.Tire Pressure
.Battery
Engine Power Messages
ENGINE POWER IS REDUCED
This message displays when the vehicle's
propulsion power is reduced. A reduction in
propulsion power can affect the vehicle's
ability to accelerate. If this message is on,
but there is no observed reduction in
performance, proceed to your destination.
Under certain conditions the performance
may be reduced the next time the vehicle is
driven. The vehicle may be driven while this
message is on, but maximum acceleration
and speed may be reduced. Anytime this
message stays on, or displays repeatedly,
the vehicle should be taken to your dealer
for service as soon as possible.
Page 116 of 369
Chevrolet Traverse Owner Manual (GMNA-Localizing-U.S./Canada/Mexico-
14637844) - 2021 - CRC - 3/26/21
Instruments and Controls 115
Under certain operating conditions,
propulsion will be disabled. Try restarting
after the ignition has been off for
30 seconds.
Vehicle Speed Messages
SPEED LIMITED TO XXX KM/H (MPH)
This message shows that the vehicle speed
has been limited to the speed displayed. The
limited speed is a protection for various
propulsion and vehicle systems, such as
lubrication, thermal, brakes, suspension,
Teen Driver if equipped, or tires.
Vehicle Personalization
The following are all possible vehicle
personalization features. Depending on the
vehicle, some may not be available.
For System, Apps, and Personal features and
functions, seeSettings0165.
To access the vehicle personalization menu: 1. Touch the Settings icon on the Home Page of the infotainment display.
2. Touch Vehicle to display a list of available options.
3. Touch to select the desired feature setting. 4. Touch
9orRto turn a feature off or on.
5. Touch
zto go to the top level of the
Settings menu.
The menu may contain the following:
Rear Seat Reminder
This allows for a chime and a message when
the rear door has been opened before or
during operation of the vehicle.
Touch Off or On.
Climate and Air Quality
Touch and the following may display:
.Auto Fan Speed
.Auto Cooled Seats
.Auto Heated Seats
.Auto Defog
.Auto Rear Defog
Auto Fan Speed
This setting specifies the amount of airflow
when the climate control fan setting is
Auto Fan.
Touch Low, Medium, or High. Auto Cooled Seats
This setting automatically turns on and
regulates the ventilated seats when the
cabin temperature is warm. See
Heated and
Ventilated Front Seats 041.
Touch Off or On.
Auto Heated Seats
This setting automatically turns on and
regulates the heated seats when the cabin
temperature is cool. The auto heated seats
can be turned off by using the heated seat
buttons on the center stack. See Heated and
Ventilated Front Seats 041.
If equipped with Auto Heated Steering
Wheel, this feature will turn on when the
Auto Heated Seats turn on.
Touch Off or On.
Auto Defog
This setting automatically turns the front
defogger on when the engine is started.
Touch Off or On.
Auto Rear Defog
This setting automatically turns the rear
defogger on when the engine is started.
Touch Off or On.
Page 117 of 369
Chevrolet Traverse Owner Manual (GMNA-Localizing-U.S./Canada/Mexico-
14637844) - 2021 - CRC - 3/26/21
116 Instruments and Controls
Collision / Detection Systems
Touch and the following may display:
.Forward Collision System
.Front Pedestrian Detection
.Park Assist
.Rear Cross Traffic Alert
.Adaptive Cruise Go Notifier
.Lane Change Alert
Forward Collision System
This setting can alert of a potential crash
with a detected vehicle ahead and can apply
brakes to help reduce a collision’s severity.
See Automatic Emergency Braking (AEB)
0 234.
Touch Off, Alert, or Alert and Brake.
Front Pedestrian Detection
This feature may help avoid or reduce the
harm caused by front-end crashes with
nearby pedestrians.
See Front Pedestrian Braking (FPB) System
0 236.
Touch Off, Alert, or Alert and Brake. Park Assist
If equipped, this allows the feature to be
turned on or off. See
Assistance Systems for
Parking or Backing 0228.
Touch Off or On.
Rear Cross Traffic Alert
This setting specifies if an alert will display
when the vehicle detects approaching rear
cross traffic when in R (Reverse). See
Assistance Systems for Parking or Backing
0 228.
Touch Off or On.
Adaptive Cruise Go Notifier
This setting determines if an alert will
appear when Adaptive Cruise Control brings
the vehicle to a complete stop and the
vehicle ahead of you starts moving again.
See Adaptive Cruise Control (Advanced)
0 219.
Touch Off or On.
Lane Change Alert
This setting specifies if an alert will display
on the outside mirror to help you avoid
crashing into a vehicle in your blind spot, or rapidly approaching your blind spot,
during a lane change maneuver. See
Lane
Change Alert (LCA) 0237.
When Lane Change Alert is disabled, Side
Blind Zone Alert is also disabled.
Touch Off or On.
Comfort and Convenience
Touch and the following may display:
.Chime Volume
.Hands Free Liftgate/Trunk Control
.Reverse Tilt Mirror
.Auto Wipe in Reverse Gear
Chime Volume
This setting determines the chime volume
level.
Touch the controls on the infotainment
display to adjust the volume.
Hands Free Liftgate/Trunk Control
The liftgate may be operated with a kicking
motion under the left corner of the rear
bumper. See Liftgate018.
Touch Off, On-Open and Close,
or On-Open Only.
Page 118 of 369
Chevrolet Traverse Owner Manual (GMNA-Localizing-U.S./Canada/Mexico-
14637844) - 2021 - CRC - 3/26/21
Instruments and Controls 117
Reverse Tilt Mirror
When on, the driver, passenger, or both
driver and passenger outside mirrors will tilt
downward when the vehicle is shifted into
R (Reverse) to improve visibility of the
ground near the rear wheels. They may
move from their tilted position when the
vehicle is shifted out of R (Reverse) or
turned off. SeeReverse Tilt Mirrors 027.
Touch Off, On - Driver and Passenger, On -
Driver, or On - Passenger.
Auto Wipe in Reverse Gear
When on and the front wiper is on, the rear
wiper will automatically activate when the
vehicle is shifted to R (Reverse).
Touch Off or On.
Lighting
Touch and the following may display:
.Vehicle Locator Lights
.Exit Lighting
Vehicle Locator Lights
This setting flashes the headlamps of your
vehicle when you press
Kon the Remote
Keyless Entry (RKE) transmitter.
Touch Off or On. Exit Lighting
This setting specifies how long the
headlamps stay on after the vehicle is
turned off and exited.
Touch Off, 30 Seconds, 60 Seconds,
or 120 Seconds.
Power Door Locks
Touch and the following may display:
.Open Door Anti Lock Out
.Auto Door Unlock
.Delayed Door Lock
Open Door Anti Lock Out
This setting prevents the driver door from
locking when the door is open. If this
setting is on, the Delayed Door Lock menu
will not be available.
Touch Off or On.
Auto Door Unlock
This setting allows selection of which doors
will automatically unlock when the vehicle is
shifted into P (Park).
Touch Off, All Doors, or Driver Door. Delayed Door Lock
This setting will lock the vehicle a short
time after all doors are closed.
Touch Off or On.
Remote Lock, Unlock, Start
Touch and the following may display:
.Remote Unlock Light Feedback
.Remote Lock Feedback
.Remote Door Unlock
.Remote Start Auto Cool Seats
.Remote Start Auto Heat Seats
.Remote Window Operation
.Passive Door Unlock
.Passive Door Lock
.Remote Left in Vehicle Alert
Remote Unlock Light Feedback
This setting flashes the exterior lamps when
the vehicle is unlocked with the RKE
transmitter.
Touch Off or Flash Lights.
Remote Lock Feedback
This setting specifies how the vehicle
responds when the vehicle is locked with
the RKE transmitter.
Page 119 of 369
Chevrolet Traverse Owner Manual (GMNA-Localizing-U.S./Canada/Mexico-
14637844) - 2021 - CRC - 3/26/21
118 Instruments and Controls
Touch Off, Lights and Horn, Lights Only,
or Horn Only.
Remote Door Unlock
This setting specifies whether all doors,
or just the driver door, unlock when pressing
Kon the RKE transmitter.
Touch All Doors or Driver Door.
Remote Start Auto Cool Seats
This setting automatically turns on the
ventilated seats when using the remote
start function on warm days. See Heated
and Ventilated Front Seats 041 and
Remote Vehicle Start 013.
Touch Off or On.
Remote Start Auto Heat Seats
This setting automatically turns on the
heated seats when using the remote start
function on cold days. See Heated and
Ventilated Front Seats 041 and
Remote Vehicle Start 013.
If equipped with Auto Heated Steering
Wheel, this feature will turn on when the
Remote Start Auto Heated Seats turn on.
Touch Off or On. Remote Window Operation
If equipped, this feature enables remote
operation of the windows with the RKE
transmitter. See
Remote Keyless Entry (RKE)
System Operation 07.
Touch Off or On.
Passive Door Unlock
This setting specifies which doors unlock
when using the button on the driver door
handle to unlock the vehicle.
Touch Off, All Doors or Driver Door Only.
Passive Door Lock
This setting specifies if the vehicle will
automatically lock, or lock and provide an
alert after all the doors are closed, and you
walk away from the vehicle with the RKE
transmitter. See Remote Keyless Entry (RKE)
System Operation 07.
Touch Off, On with Horn Chirp, or On.
Remote Left in Vehicle Alert
This feature sounds an alert when the RKE
transmitter is left in the vehicle. This menu
also enables Remote No Longer in Vehicle
Alert.
Touch Off or On.
Seating Position
Touch and the following may display:
.Seat Entry Memory
.Seat Exit Memory
Seat Entry Memory
This feature automatically recalls the
previously stored 1 or 2 button positions
when the ignition is changed from off to on
or ACC/ACCESSORY. See Memory Seats039.
Touch Off or On.
Seat Exit Memory
This feature automatically recalls the
previously stored exit button positions when
the ignition is changed from on or ACC/
ACCESSORY to off if the driver door is open
or opened. See Memory Seats039.
Touch Off or On.
Teen Driver
See Teen Driver 0171.
Valet Mode
This will lock the infotainment system and
steering wheel controls. It may also limit
access to vehicle storage locations,
if equipped.
Page 120 of 369
Chevrolet Traverse Owner Manual (GMNA-Localizing-U.S./Canada/Mexico-
14637844) - 2021 - CRC - 3/26/21
Instruments and Controls 119
To enable valet mode:1. Enter a four-digit code on the keypad.
2. Touch Enter to go to the confirmation screen.
3. Re-enter the four-digit code.
Touch Lock or Unlock to lock or unlock the
system. Touch Back to go back to the
previous menu.
Universal Remote System
See Radio Frequency Statement 0346.
Universal Remote System
Programming
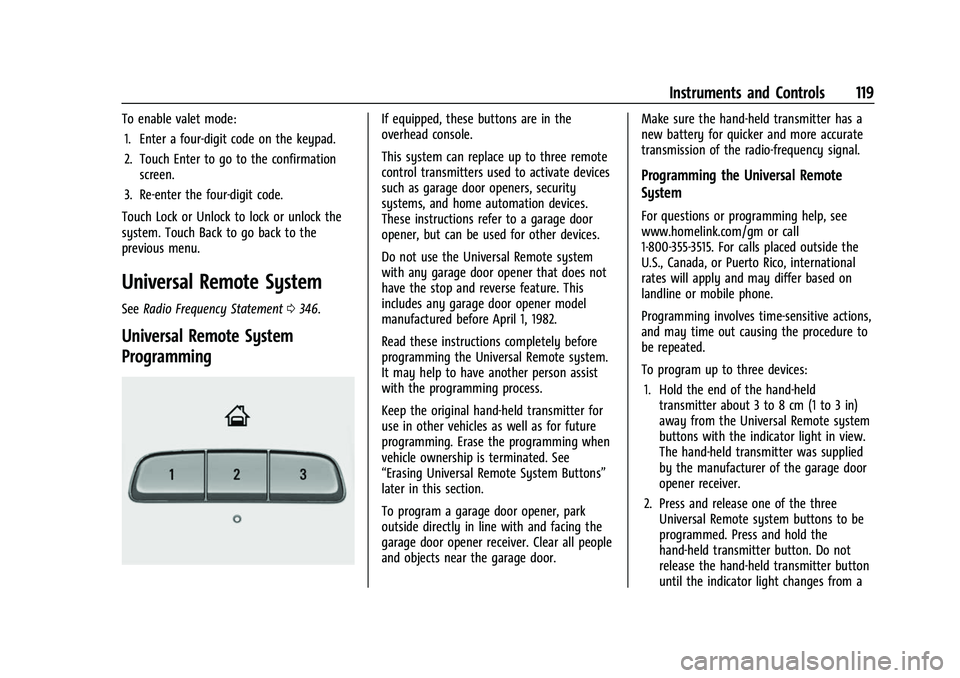
If equipped, these buttons are in the
overhead console.
This system can replace up to three remote
control transmitters used to activate devices
such as garage door openers, security
systems, and home automation devices.
These instructions refer to a garage door
opener, but can be used for other devices.
Do not use the Universal Remote system
with any garage door opener that does not
have the stop and reverse feature. This
includes any garage door opener model
manufactured before April 1, 1982.
Read these instructions completely before
programming the Universal Remote system.
It may help to have another person assist
with the programming process.
Keep the original hand-held transmitter for
use in other vehicles as well as for future
programming. Erase the programming when
vehicle ownership is terminated. See
“Erasing Universal Remote System Buttons”
later in this section.
To program a garage door opener, park
outside directly in line with and facing the
garage door opener receiver. Clear all people
and objects near the garage door. Make sure the hand-held transmitter has a
new battery for quicker and more accurate
transmission of the radio-frequency signal.
Programming the Universal Remote
System
For questions or programming help, see
www.homelink.com/gm or call
1-800-355-3515. For calls placed outside the
U.S., Canada, or Puerto Rico, international
rates will apply and may differ based on
landline or mobile phone.
Programming involves time-sensitive actions,
and may time out causing the procedure to
be repeated.
To program up to three devices:
1. Hold the end of the hand-held transmitter about 3 to 8 cm (1 to 3 in)
away from the Universal Remote system
buttons with the indicator light in view.
The hand-held transmitter was supplied
by the manufacturer of the garage door
opener receiver.
2. Press and release one of the three Universal Remote system buttons to be
programmed. Press and hold the
hand-held transmitter button. Do not
release the hand-held transmitter button
until the indicator light changes from a