towing information CHEVROLET TRAVERSE 2021 Owner's Manual
[x] Cancel search | Manufacturer: CHEVROLET, Model Year: 2021, Model line: TRAVERSE, Model: CHEVROLET TRAVERSE 2021Pages: 369, PDF Size: 8.12 MB
Page 65 of 369
Chevrolet Traverse Owner Manual (GMNA-Localizing-U.S./Canada/Mexico-
14637844) - 2021 - CRC - 3/26/21
64 Seats and Restraints
approved by GM for your specific vehicle.
SeeAdding Equipment to the
Airbag-Equipped Vehicle 064 for more
information about modifications that can
affect how the system operates.
The ON indicator may be lit if an object,
such as a briefcase, handbag, grocery bag,
laptop, or other electronic device, is put on
an unoccupied seat. If this is not desired,
remove the object from the seat.
{Warning
Stowing articles under the passenger seat
or between the passenger seat cushion
and seatback may interfere with the
proper operation of the passenger
sensing system.
Servicing the Airbag-Equipped
Vehicle
Airbags affect how the vehicle should be
serviced. There are parts of the airbag
system in several places around the vehicle.
Your dealer and the service manual have
information about servicing the vehicle and
the airbag system. To purchase a service
manual, see Publication Ordering
Information 0345.
{Warning
For up to 10 seconds after the vehicle is
turned off and the battery is
disconnected, an airbag can still inflate
during improper service. You can be
injured if you are close to an airbag
when it inflates. Avoid yellow connectors.
They are probably part of the airbag
system. Be sure to follow proper service
procedures, and make sure the person
performing work for you is qualified to
do so.
Adding Equipment to the
Airbag-Equipped Vehicle
Adding accessories that change the vehicle's
frame, bumper system, height, front end,
or side sheet metal may keep the airbag
system from working properly.
The operation of the airbag system can also
be affected by changing, including
improperly repairing or replacing, any parts
of the following:
.Airbag system, including airbag modules,
front or side impact sensors, sensing and
diagnostic module, airbag wiring, or front
center console
.Front seats, including stitching, seams or
zippers
.Seat belts
.Steering wheel, instrument panel,
overhead console, ceiling trim, or pillar
garnish trim
.Inner door seals, including speakers
Your dealer and the service manual have
information about the location of the airbag
modules and sensors, sensing and diagnostic
module, and airbag wiring along with the
proper replacement procedures.
In addition, the vehicle has a passenger
sensing system for the front outboard
passenger position, which includes sensors
that are part of the passenger's seat. The
passenger sensing system may not operate
properly if the original seat trim is replaced
with non-GM covers, upholstery, or trim,
or with GM covers, upholstery, or trim
designed for a different vehicle. Any object,
such as an aftermarket seat heater or a
comfort enhancing pad or device, installed
under or on top of the seat fabric, could
also interfere with the operation of the
passenger sensing system. This could either
prevent proper deployment of the passenger
airbag(s) or prevent the passenger sensing
Page 107 of 369
Chevrolet Traverse Owner Manual (GMNA-Localizing-U.S./Canada/Mexico-
14637844) - 2021 - CRC - 3/26/21
106 Instruments and Controls
.Critical emission control systems have not
been completely diagnosed. If this
happens, the vehicle would not be ready
for inspection and might require
several days of routine driving before the
system is ready for inspection. This can
happen if the 12-volt battery has recently
been replaced or run down, or if the
vehicle has been recently serviced.
See your dealer if the vehicle will not pass
or cannot be made ready for the test.
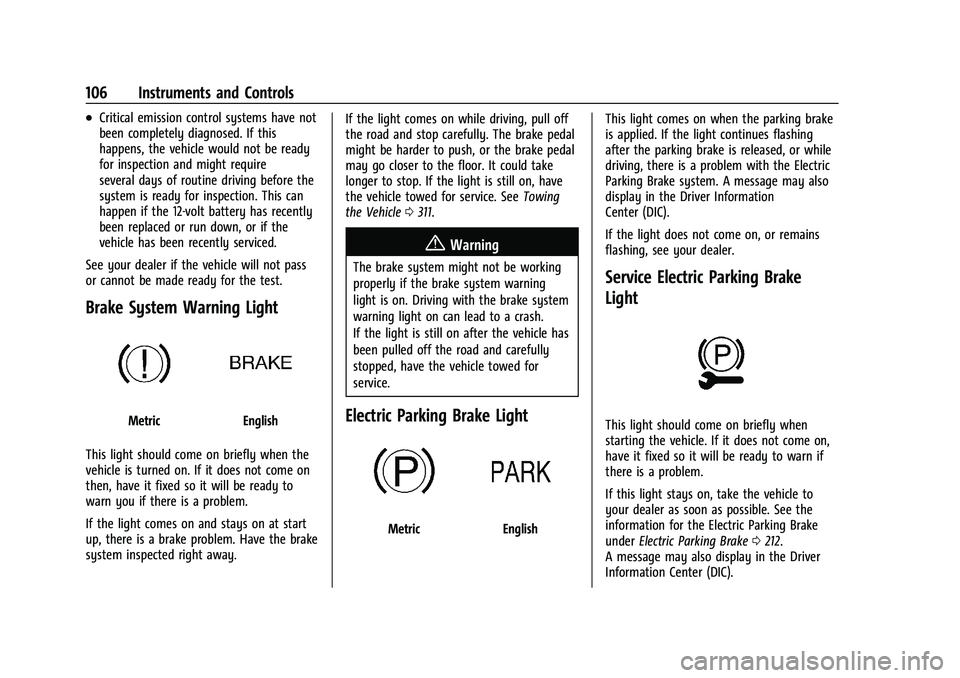
Brake System Warning Light
MetricEnglish
This light should come on briefly when the
vehicle is turned on. If it does not come on
then, have it fixed so it will be ready to
warn you if there is a problem.
If the light comes on and stays on at start
up, there is a brake problem. Have the brake
system inspected right away. If the light comes on while driving, pull off
the road and stop carefully. The brake pedal
might be harder to push, or the brake pedal
may go closer to the floor. It could take
longer to stop. If the light is still on, have
the vehicle towed for service. See
Towing
the Vehicle 0311.
{Warning
The brake system might not be working
properly if the brake system warning
light is on. Driving with the brake system
warning light on can lead to a crash.
If the light is still on after the vehicle has
been pulled off the road and carefully
stopped, have the vehicle towed for
service.
Electric Parking Brake Light
MetricEnglish This light comes on when the parking brake
is applied. If the light continues flashing
after the parking brake is released, or while
driving, there is a problem with the Electric
Parking Brake system. A message may also
display in the Driver Information
Center (DIC).
If the light does not come on, or remains
flashing, see your dealer.
Service Electric Parking Brake
Light
This light should come on briefly when
starting the vehicle. If it does not come on,
have it fixed so it will be ready to warn if
there is a problem.
If this light stays on, take the vehicle to
your dealer as soon as possible. See the
information for the Electric Parking Brake
under
Electric Parking Brake 0212.
A message may also display in the Driver
Information Center (DIC).
Page 189 of 369
Chevrolet Traverse Owner Manual (GMNA-Localizing-U.S./Canada/Mexico-
14637844) - 2021 - CRC - 3/26/21
188 Driving and Operating
Driving and Operating
Driving Information
Driving for Better Fuel Economy . . . . . . . 189
Distracted Driving . . . . . . . . . . . . . . . . . . . . . 189
Defensive Driving . . . . . . . . . . . . . . . . . . . . . . 189
Impaired Driving . . . . . . . . . . . . . . . . . . . . . . 190
Control of a Vehicle . . . . . . . . . . . . . . . . . . . 190
Braking . . . . . . . . . . . . . . . . . . . . . . . . . . . . . . . . 190
Steering . . . . . . . . . . . . . . . . . . . . . . . . . . . . . . . 190
Off-Road Recovery . . . . . . . . . . . . . . . . . . . . . 191
Loss of Control . . . . . . . . . . . . . . . . . . . . . . . . 192
Off-Road Driving . . . . . . . . . . . . . . . . . . . . . . . 192
Driving on Wet Roads . . . . . . . . . . . . . . . . . 195
Hill and Mountain Roads . . . . . . . . . . . . . . 196
Winter Driving . . . . . . . . . . . . . . . . . . . . . . . . 196
If the Vehicle Is Stuck . . . . . . . . . . . . . . . . . 197
Vehicle Load Limits . . . . . . . . . . . . . . . . . . . . 198
Starting and Operating
New Vehicle Break-In . . . . . . . . . . . . . . . . . . 201
Ignition Positions . . . . . . . . . . . . . . . . . . . . . . 201
Starting the Engine . . . . . . . . . . . . . . . . . . . 203
Stop/Start System . . . . . . . . . . . . . . . . . . . . 204
Engine Heater . . . . . . . . . . . . . . . . . . . . . . . . . 204
Retained Accessory Power (RAP) . . . . . . . 205
Shifting Into Park . . . . . . . . . . . . . . . . . . . . . 206
Shifting out of Park . . . . . . . . . . . . . . . . . . . 206
Parking over Things That Burn . . . . . . . . 207
Extended Parking . . . . . . . . . . . . . . . . . . . . . . 207
Engine Exhaust
Engine Exhaust . . . . . . . . . . . . . . . . . . . . . . . . 207
Running the Vehicle While Parked . . . . 208
Automatic Transmission
Automatic Transmission . . . . . . . . . . . . . . . 208
Manual Mode . . . . . . . . . . . . . . . . . . . . . . . . . 209
Tow/Haul Mode . . . . . . . . . . . . . . . . . . . . . . . 210
Drive Systems
All-Wheel Drive . . . . . . . . . . . . . . . . . . . . . . . . 211
Brakes
Antilock Brake System (ABS) . . . . . . . . . . . 211
Electric Parking Brake . . . . . . . . . . . . . . . . . . 212
Brake Assist . . . . . . . . . . . . . . . . . . . . . . . . . . . . 213
Hill Start Assist (HSA) . . . . . . . . . . . . . . . . . . 213
Ride Control Systems
Traction Control/Electronic StabilityControl . . . . . . . . . . . . . . . . . . . . . . . . . . . . . . 214
Driver Mode Control . . . . . . . . . . . . . . . . . . . 215
Cruise Control
Cruise Control . . . . . . . . . . . . . . . . . . . . . . . . . . 217
Adaptive Cruise Control (Advanced) . . . . 219
Driver Assistance Systems
Driver Assistance Systems . . . . . . . . . . . . . 227
Assistance Systems for Parking or Backing . . . . . . . . . . . . . . . . . . . . . . . . . . . . . . 228
Assistance Systems for Driving . . . . . . . . 232 Forward Collision Alert (FCA)
System . . . . . . . . . . . . . . . . . . . . . . . . . . . . . . 232
Automatic Emergency Braking (AEB) . . . . . . . . . . . . . . . . . . . . . . . . 234
Front Pedestrian Braking (FPB)
System . . . . . . . . . . . . . . . . . . . . . . . . . . . . . . 236
Side Blind Zone Alert (SBZA) . . . . . . . . . . . 237
Lane Change Alert (LCA) . . . . . . . . . . . . . . . 237
Lane Keep Assist (LKA) . . . . . . . . . . . . . . . . 239
Fuel
Top Tier Fuel . . . . . . . . . . . . . . . . . . . . . . . . . . 241
Recommended Fuel . . . . . . . . . . . . . . . . . . . . 241
Prohibited Fuels . . . . . . . . . . . . . . . . . . . . . . . 241
Fuels in Foreign Countries . . . . . . . . . . . . . 241
Fuel Additives . . . . . . . . . . . . . . . . . . . . . . . . . 242
Filling the Tank . . . . . . . . . . . . . . . . . . . . . . . . 242
Filling a Portable Fuel Container . . . . . . . 243
Trailer Towing
General Towing Information . . . . . . . . . . . 243
Driving Characteristics and Towing Tips . . . . . . . . . . . . . . . . . . . . . . . . . 244
Trailer Towing . . . . . . . . . . . . . . . . . . . . . . . . . 247
Towing Equipment . . . . . . . . . . . . . . . . . . . . 250
Trailer Sway Control (TSC) . . . . . . . . . . . . . 253
Conversions and Add-Ons
Add-On Electrical Equipment . . . . . . . . . . . 254
Page 199 of 369
Chevrolet Traverse Owner Manual (GMNA-Localizing-U.S./Canada/Mexico-
14637844) - 2021 - CRC - 3/26/21
198 Driving and Operating
If stuck too severely for the traction system
to free the vehicle, turn the traction system
off and use the rocking method. See
Traction Control/Electronic Stability Control
0214.
{Warning
If the vehicle's tires spin at high speed,
they can explode, and you or others
could be injured. The vehicle can
overheat, causing an engine compartment
fire or other damage. Spin the wheels as
little as possible and avoid going above
56 km/h (35 mph).
Select All-Wheel Drive (AWD) Mode. See
Driver Mode Control 0215 and
All-Wheel Drive 0211.
Rocking the Vehicle to Get it Out
Turn the steering wheel left and right to
clear the area around the front wheels. Turn
off any traction system. Shift back and forth
between R (Reverse) and a low forward gear,
spinning the wheels as little as possible. To
prevent transmission wear, wait until the
wheels stop spinning before shifting gears.
Release the accelerator pedal while shifting,
and press lightly on the accelerator pedal when the transmission is in gear. Slowly
spinning the wheels in the forward and
reverse directions causes a rocking motion
that could free the vehicle. If that does not
get the vehicle out after a few tries, it
might need to be towed out. If the vehicle
does need to be towed out, see
Towing the
Vehicle 0311.
Vehicle Load Limits
It is very important to know how much
weight the vehicle can carry. This
weight is called the vehicle capacity
weight and includes the weight of all
occupants, cargo, and all
nonfactory-installed options. Two labels
on the vehicle may show how much
weight it may properly carry, the Tire
and Loading Information label and the
Certification/Tire label.
{Warning
Do not load the vehicle any heavier
than the Gross Vehicle Weight Rating
(GVWR), or either the maximum
front or rear Gross Axle Weight
Rating (GAWR). This can cause
(Continued)
Warning (Continued)
systems to break and change the
way the vehicle handles. This could
cause loss of control and a crash.
Overloading can also reduce stopping
performance, damage the tires, and
shorten the life of the vehicle.
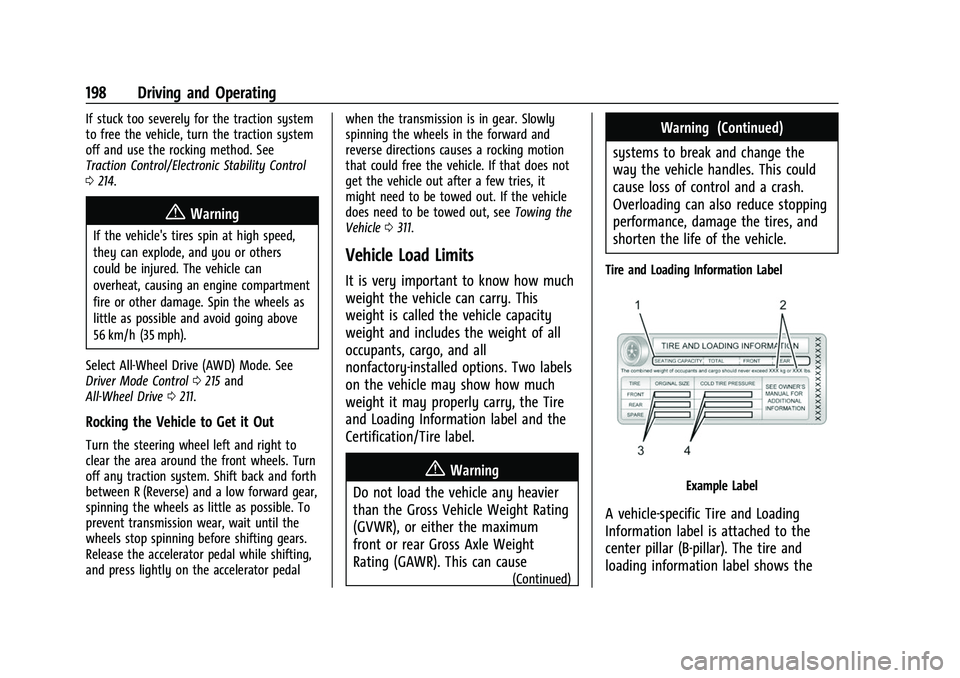
Tire and Loading Information Label
Example Label
A vehicle-specific Tire and Loading
Information label is attached to the
center pillar (B-pillar). The tire and
loading information label shows the
Page 200 of 369

Chevrolet Traverse Owner Manual (GMNA-Localizing-U.S./Canada/Mexico-
14637844) - 2021 - CRC - 3/26/21
Driving and Operating 199
number of occupant seating
positions (1), and the maximum vehicle
capacity weight (2) in kilograms and
pounds.
The Tire and Loading Information label
also shows the size of the original
equipment tires (3) and the
recommended cold tire inflation
pressures (4). For more information on
tires and inflation seeTires0284 and
Tire Pressure 0290.
There is also important loading
information on the vehicle Certification/
Tire label. It may show the Gross
Vehicle Weight Rating (GVWR) and the
Gross Axle Weight Rating (GAWR) for
the front and rear axle. See
“Certification/Tire Label” later in this
section.
“Steps for Determining Correct Load Limit–
1.
Locate the statement "The combined
weight of occupants and cargo
should never exceed XXX kg or
XXX lbs." on your vehicle’s placard.
2.Determine the combined weight of
the driver and passengers that will
be riding in your vehicle.
3.Subtract the combined weight of the
driver and passengers from XXX kg
or XXX lbs.
4.The resulting figure equals the
available amount of cargo and
luggage load capacity. For example,
if the "XXX" amount equals 1400 lbs.
and there will be five 150 lb
passengers in your vehicle, the
amount of available cargo and
luggage load capacity is 650 lbs.
(1400-750 (5 x 150) = 650 lbs.)
5.Determine the combined weight of
luggage and cargo being loaded on
the vehicle. That weight may not
safely exceed the available cargo and
luggage load capacity calculated in
Step 4.
6.If your vehicle will be towing a
trailer, load from your trailer will be
transferred to your vehicle. Consult
this manual to determine how this reduces the available cargo and
luggage load capacity of your
vehicle.”
See Trailer Towing 0247 for important
information on towing a trailer, towing
safety rules and trailering tips.
Example 1
1.Vehicle Capacity Weight for
Example 1 = 453 kg (1,000 lbs).
2.Subtract Occupant Weight @
68 kg (150 lbs) × 2 = 136 kg
(300 lbs).
3.Available Occupant and Cargo
Weight = 317 kg (700 lbs).
Page 211 of 369
Chevrolet Traverse Owner Manual (GMNA-Localizing-U.S./Canada/Mexico-
14637844) - 2021 - CRC - 3/26/21
210 Driving and Operating
trailer. The vehicle has an electronic shift
position indicator within the instrument
cluster. When using the ERS mode a number
will display next to the L, indicating the
highest gear available for the range selected.
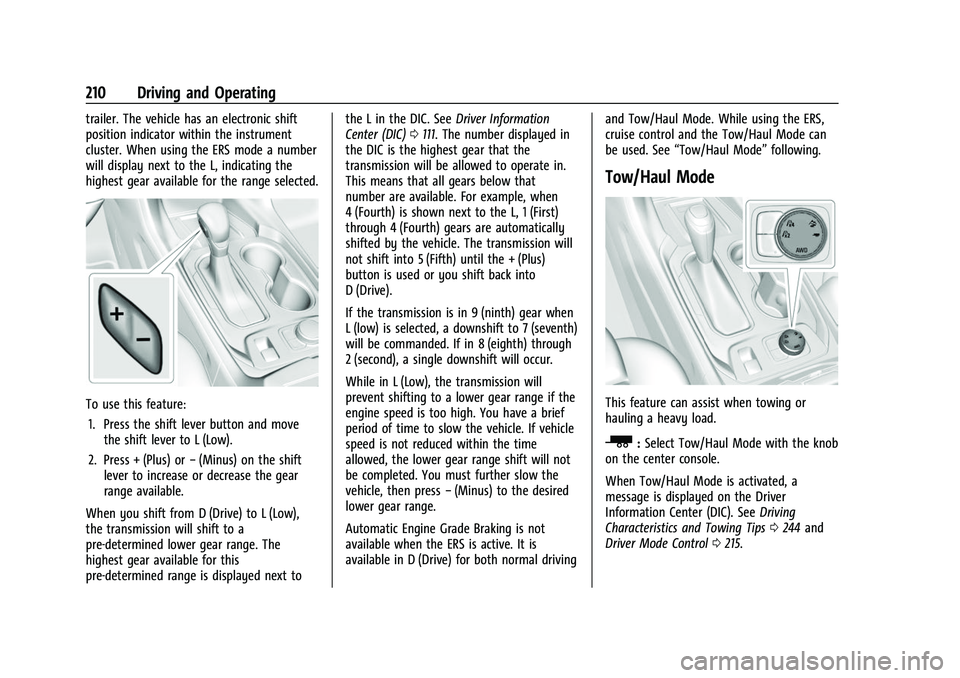
To use this feature:1. Press the shift lever button and move the shift lever to L (Low).
2. Press + (Plus) or −(Minus) on the shift
lever to increase or decrease the gear
range available.
When you shift from D (Drive) to L (Low),
the transmission will shift to a
pre-determined lower gear range. The
highest gear available for this
pre-determined range is displayed next to the L in the DIC. See
Driver Information
Center (DIC) 0111. The number displayed in
the DIC is the highest gear that the
transmission will be allowed to operate in.
This means that all gears below that
number are available. For example, when
4 (Fourth) is shown next to the L, 1 (First)
through 4 (Fourth) gears are automatically
shifted by the vehicle. The transmission will
not shift into 5 (Fifth) until the + (Plus)
button is used or you shift back into
D (Drive).
If the transmission is in 9 (ninth) gear when
L (low) is selected, a downshift to 7 (seventh)
will be commanded. If in 8 (eighth) through
2 (second), a single downshift will occur.
While in L (Low), the transmission will
prevent shifting to a lower gear range if the
engine speed is too high. You have a brief
period of time to slow the vehicle. If vehicle
speed is not reduced within the time
allowed, the lower gear range shift will not
be completed. You must further slow the
vehicle, then press −(Minus) to the desired
lower gear range.
Automatic Engine Grade Braking is not
available when the ERS is active. It is
available in D (Drive) for both normal driving and Tow/Haul Mode. While using the ERS,
cruise control and the Tow/Haul Mode can
be used. See
“Tow/Haul Mode” following.
Tow/Haul Mode
This feature can assist when towing or
hauling a heavy load.
_:Select Tow/Haul Mode with the knob
on the center console.
When Tow/Haul Mode is activated, a
message is displayed on the Driver
Information Center (DIC). See Driving
Characteristics and Towing Tips 0244 and
Driver Mode Control 0215.
Page 217 of 369
Chevrolet Traverse Owner Manual (GMNA-Localizing-U.S./Canada/Mexico-
14637844) - 2021 - CRC - 3/26/21
216 Driving and Operating
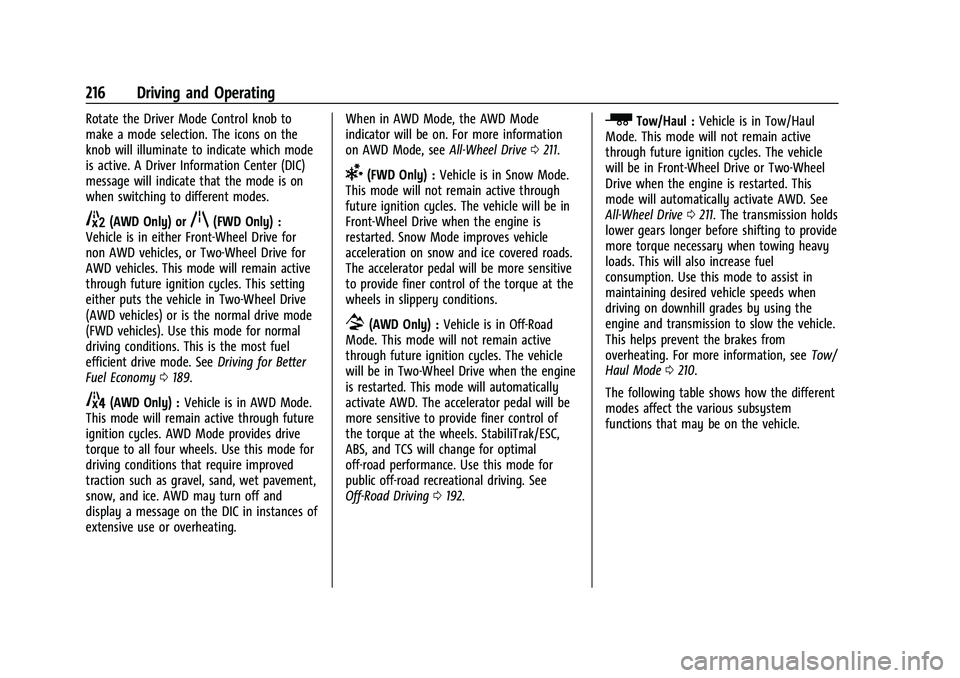
Rotate the Driver Mode Control knob to
make a mode selection. The icons on the
knob will illuminate to indicate which mode
is active. A Driver Information Center (DIC)
message will indicate that the mode is on
when switching to different modes.
5(AWD Only) orq(FWD Only) :
Vehicle is in either Front-Wheel Drive for
non AWD vehicles, or Two-Wheel Drive for
AWD vehicles. This mode will remain active
through future ignition cycles. This setting
either puts the vehicle in Two-Wheel Drive
(AWD vehicles) or is the normal drive mode
(FWD vehicles). Use this mode for normal
driving conditions. This is the most fuel
efficient drive mode. See Driving for Better
Fuel Economy 0189.
4(AWD Only) : Vehicle is in AWD Mode.
This mode will remain active through future
ignition cycles. AWD Mode provides drive
torque to all four wheels. Use this mode for
driving conditions that require improved
traction such as gravel, sand, wet pavement,
snow, and ice. AWD may turn off and
display a message on the DIC in instances of
extensive use or overheating. When in AWD Mode, the AWD Mode
indicator will be on. For more information
on AWD Mode, see
All-Wheel Drive0211.
6(FWD Only) : Vehicle is in Snow Mode.
This mode will not remain active through
future ignition cycles. The vehicle will be in
Front-Wheel Drive when the engine is
restarted. Snow Mode improves vehicle
acceleration on snow and ice covered roads.
The accelerator pedal will be more sensitive
to provide finer control of the torque at the
wheels in slippery conditions.
7(AWD Only) : Vehicle is in Off-Road
Mode. This mode will not remain active
through future ignition cycles. The vehicle
will be in Two-Wheel Drive when the engine
is restarted. This mode will automatically
activate AWD. The accelerator pedal will be
more sensitive to provide finer control of
the torque at the wheels. StabiliTrak/ESC,
ABS, and TCS will change for optimal
off-road performance. Use this mode for
public off-road recreational driving. See
Off-Road Driving 0192.
_Tow/Haul : Vehicle is in Tow/Haul
Mode. This mode will not remain active
through future ignition cycles. The vehicle
will be in Front-Wheel Drive or Two-Wheel
Drive when the engine is restarted. This
mode will automatically activate AWD. See
All-Wheel Drive 0211. The transmission holds
lower gears longer before shifting to provide
more torque necessary when towing heavy
loads. This will also increase fuel
consumption. Use this mode to assist in
maintaining desired vehicle speeds when
driving on downhill grades by using the
engine and transmission to slow the vehicle.
This helps prevent the brakes from
overheating. For more information, see Tow/
Haul Mode 0210.
The following table shows how the different
modes affect the various subsystem
functions that may be on the vehicle.
Page 233 of 369
Chevrolet Traverse Owner Manual (GMNA-Localizing-U.S./Canada/Mexico-
14637844) - 2021 - CRC - 3/26/21
232 Driving and Operating
Blocked sensors will not detect objects and
can also cause false detections. Keep the
sensors clean of mud, dirt, snow, ice, and
slush; and clean sensors after a car wash in
freezing temperatures.
{Warning
The Park Assist system does not detect
children, pedestrians, bicyclists, animals,
or objects below the bumper or that are
too close or too far from the vehicle. It is
not available at speeds greater than
8 km/h (5 mph). To prevent injury, death,
or vehicle damage, even with Park Assist,
always check the area around the vehicle
and check all mirrors before backing.
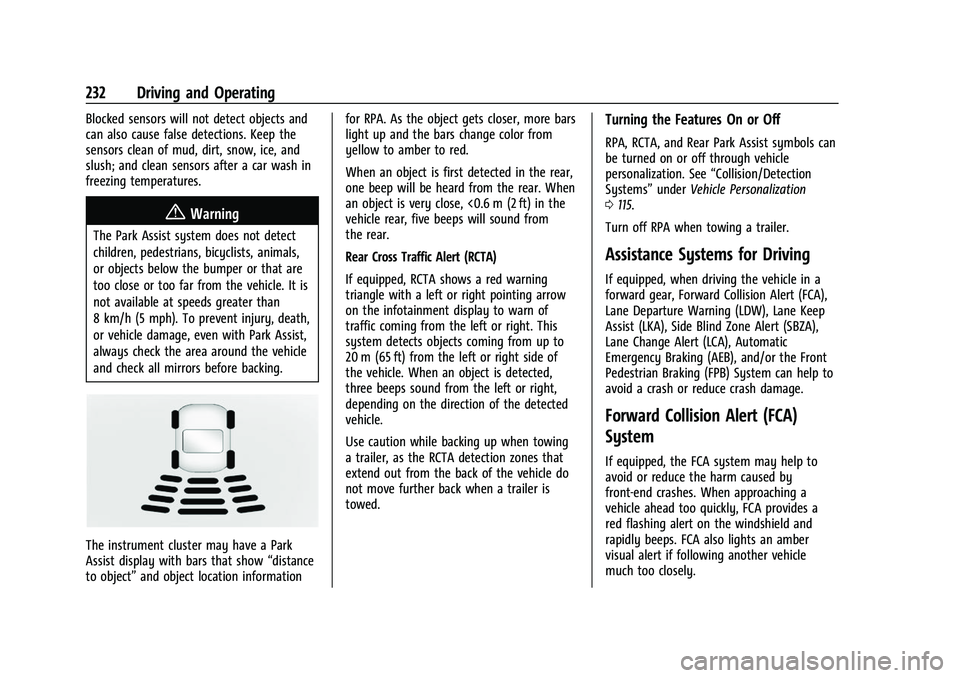
The instrument cluster may have a Park
Assist display with bars that show“distance
to object” and object location information for RPA. As the object gets closer, more bars
light up and the bars change color from
yellow to amber to red.
When an object is first detected in the rear,
one beep will be heard from the rear. When
an object is very close, <0.6 m (2 ft) in the
vehicle rear, five beeps will sound from
the rear.
Rear Cross Traffic Alert (RCTA)
If equipped, RCTA shows a red warning
triangle with a left or right pointing arrow
on the infotainment display to warn of
traffic coming from the left or right. This
system detects objects coming from up to
20 m (65 ft) from the left or right side of
the vehicle. When an object is detected,
three beeps sound from the left or right,
depending on the direction of the detected
vehicle.
Use caution while backing up when towing
a trailer, as the RCTA detection zones that
extend out from the back of the vehicle do
not move further back when a trailer is
towed.
Turning the Features On or Off
RPA, RCTA, and Rear Park Assist symbols can
be turned on or off through vehicle
personalization. See
“Collision/Detection
Systems” underVehicle Personalization
0 115.
Turn off RPA when towing a trailer.
Assistance Systems for Driving
If equipped, when driving the vehicle in a
forward gear, Forward Collision Alert (FCA),
Lane Departure Warning (LDW), Lane Keep
Assist (LKA), Side Blind Zone Alert (SBZA),
Lane Change Alert (LCA), Automatic
Emergency Braking (AEB), and/or the Front
Pedestrian Braking (FPB) System can help to
avoid a crash or reduce crash damage.
Forward Collision Alert (FCA)
System
If equipped, the FCA system may help to
avoid or reduce the harm caused by
front-end crashes. When approaching a
vehicle ahead too quickly, FCA provides a
red flashing alert on the windshield and
rapidly beeps. FCA also lights an amber
visual alert if following another vehicle
much too closely.
Page 240 of 369

Chevrolet Traverse Owner Manual (GMNA-Localizing-U.S./Canada/Mexico-
14637844) - 2021 - CRC - 3/26/21
Driving and Operating 239
LCA displays may not come on when
passing a vehicle quickly, for a stopped
vehicle, or when towing a trailer. The LCA
detection zones that extend back from the
side of the vehicle do not move further back
when a trailer is towed. Use caution while
changing lanes when towing a trailer. LCA
may alert to objects attached to the vehicle,
such as a trailer, bicycle, or object extending
out to either side of the vehicle. Attached
objects may also interfere with the
detection of vehicles. This is normal system
operation; the vehicle does not need service.
LCA may not always alert the driver to
vehicles in the next lane over, especially in
wet conditions or when driving on sharp
curves. The system does not need to be
serviced. The system may light up due to
guardrails, signs, trees, shrubs, and other
non-moving objects. This is normal system
operation; the vehicle does not need service.
LCA may not operate when the LCA sensors
in the left or right corners of the rear
bumper are covered with mud, dirt, snow,
ice, or slush, or in heavy rainstorms. For
cleaning instructions, see "Washing the
Vehicle" underExterior Care0314. If the DIC
still displays the system unavailable message after cleaning both sides of the
vehicle toward the rear corners of the
vehicle, see your dealer.
If the LCA displays do not light up when
moving vehicles are in the side blind zone or
are rapidly approaching this zone and the
system is clean, the system may need
service. Take the vehicle to your dealer.
Radio Frequency Information
See
Radio Frequency Statement 0346.
Lane Keep Assist (LKA)
If equipped, LKA may help avoid crashes due
to unintentional lane departures. This
system uses a camera to detect lane
markings between 60 km/h (37 mph) and
180 km/h (112 mph). It may assist by gently
turning the steering wheel if the vehicle
approaches a detected lane marking. It may
also provide a Lane Departure Warning
(LDW) alert if the vehicle crosses a detected
lane marking. LKA can be overridden by
turning the steering wheel. This system is
not intended to keep the vehicle centered in
the lane. LKA will not assist and alert if the
turn signal is active in the direction of lane
departure, or if it detects that you are
accelerating, braking or actively steering.
{Warning
The LKA system does not continuously
steer the vehicle. It may not keep the
vehicle in the lane or give a Lane
Departure Warning (LDW) alert, even if a
lane marking is detected.
The LKA and LDW systems may not:
.Provide an alert or enough steering
assist to avoid a lane departure or
crash.
.Detect lane markings under poor
weather or visibility conditions. This
can occur if the windshield or
headlamps are blocked by dirt, snow,
or ice; if they are not in proper
condition; or if the sun shines directly
into the camera.
.Detect road edges.
.Detect lanes on winding or hilly roads.
If LKA only detects lane markings on one
side of the road, it will only assist or
provide an LDW alert when approaching
the lane on the side where it has
detected a lane marking. Even with LKA
and LDW, you must steer the vehicle. (Continued)
Page 244 of 369
Chevrolet Traverse Owner Manual (GMNA-Localizing-U.S./Canada/Mexico-
14637844) - 2021 - CRC - 3/26/21
Driving and Operating 243
Be careful not to spill fuel. Wait five seconds
after you have finished pumping before
removing the fill nozzle. Clean fuel from
painted surfaces as soon as possible. See
Exterior Care0314. Push the fuel door
closed until it latches.
{Warning
If a fire starts while you are refueling, do
not remove the fill nozzle. Shut off the
flow of fuel by shutting off the pump or
by notifying the station attendant. Leave
the area immediately.
Filling the Tank with a Portable Fuel
Container
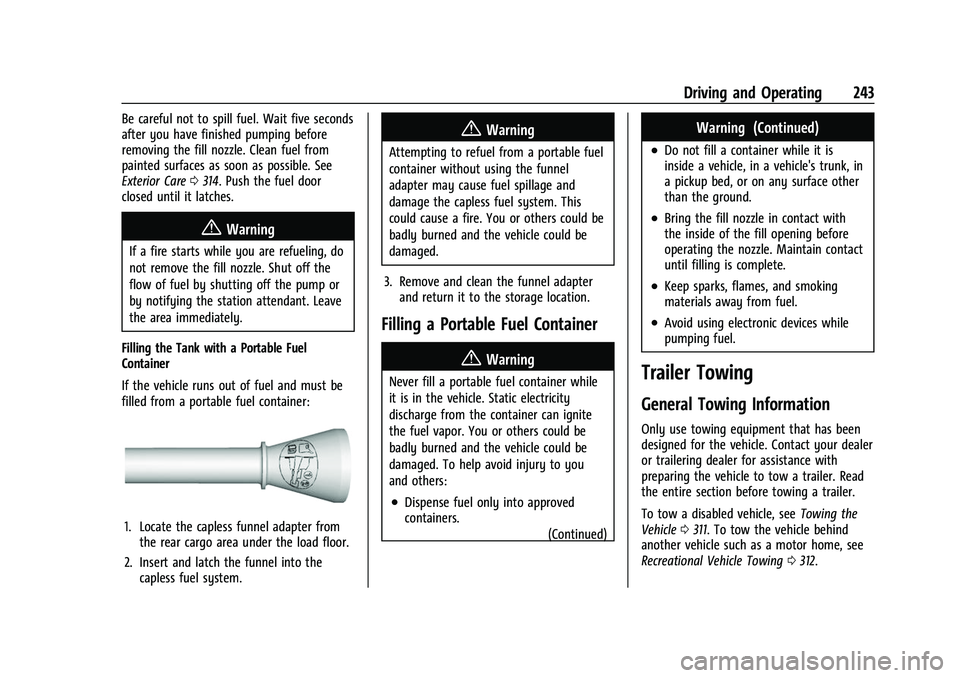
If the vehicle runs out of fuel and must be
filled from a portable fuel container:
1. Locate the capless funnel adapter from the rear cargo area under the load floor.
2. Insert and latch the funnel into the capless fuel system.
{Warning
Attempting to refuel from a portable fuel
container without using the funnel
adapter may cause fuel spillage and
damage the capless fuel system. This
could cause a fire. You or others could be
badly burned and the vehicle could be
damaged.
3. Remove and clean the funnel adapter and return it to the storage location.
Filling a Portable Fuel Container
{Warning
Never fill a portable fuel container while
it is in the vehicle. Static electricity
discharge from the container can ignite
the fuel vapor. You or others could be
badly burned and the vehicle could be
damaged. To help avoid injury to you
and others:
.Dispense fuel only into approved
containers.
(Continued)
Warning (Continued)
.Do not fill a container while it is
inside a vehicle, in a vehicle's trunk, in
a pickup bed, or on any surface other
than the ground.
.Bring the fill nozzle in contact with
the inside of the fill opening before
operating the nozzle. Maintain contact
until filling is complete.
.Keep sparks, flames, and smoking
materials away from fuel.
.Avoid using electronic devices while
pumping fuel.
Trailer Towing
General Towing Information
Only use towing equipment that has been
designed for the vehicle. Contact your dealer
or trailering dealer for assistance with
preparing the vehicle to tow a trailer. Read
the entire section before towing a trailer.
To tow a disabled vehicle, see Towing the
Vehicle 0311. To tow the vehicle behind
another vehicle such as a motor home, see
Recreational Vehicle Towing 0312.