display CHEVROLET TRAVERSE 2023 Owners Manual
[x] Cancel search | Manufacturer: CHEVROLET, Model Year: 2023, Model line: TRAVERSE, Model: CHEVROLET TRAVERSE 2023Pages: 369, PDF Size: 16.89 MB
Page 186 of 369
Chevrolet Traverse Owner Manual (GMNA-Localizing-U.S./Canada/Mexico-
16411537) - 2023 - CRC - 3/28/22
Climate Controls 185
TEMP :Turn the knob clockwise or
counterclockwise or press and hold the rear
climate display temperature controls to
adjust the rear passenger temperature. If
SYNC is lit, the rear climate temperature is
linked to the driver temperature setting.
2/\/Yor MODE : Touch the desired
mode on the rear climate display or press
MODE on the rear climate controls to
change the direction of the airflow in the
rear seating area. Repeatedly press MODE
until the desired mode appears on the
display.
MorL: If equipped, pressMorLto
heat the left or right rear outboard seat. See
Heated Rear Seats 046.
Air Vents
Use the slider switch on the air outlets to
change the direction of the airflow, or to
open and close off the airflow.
There are also outlets overhead in the rear
passenger area; adjust as needed.
Keep all outlets open whenever possible for
best system performance.
Operation Tips
.Clear away any ice, snow, or leaves from
the air inlets at the base of the
windshield that can block the flow of air
into the vehicle.
.Clear snow off the hood to improve
visibility and help decrease moisture
drawn into the vehicle.
.Use of non-GM approved hood deflectors
can adversely affect the performance of
the system.
.Keep the path under all seats clear of
objects to help circulate the air inside the
vehicle more effectively.
.If fogging reoccurs while in vent or
bi-level modes with mild temperature
throughout the vehicle, turn on the air
conditioner to reduce windshield fogging.
Maintenance
Passenger Compartment Air Filter
The filter reduces dust, pollen, and other
airborne irritants from outside air that is
pulled into the vehicle. The filter should be
replaced as part of routine scheduled
maintenance. See Maintenance Schedule
0 327. See your dealer regarding replacement of
the filter.
Service
All vehicles have a label underhood that
identifies the refrigerant used in the vehicle.
The refrigerant system should only be
serviced by trained and certified technicians.
The air conditioning evaporator should never
be repaired or replaced by one from a
salvage vehicle. It should only be replaced
by a new evaporator to ensure proper and
safe operation.
During service, all refrigerants should be
reclaimed with proper equipment. Venting
refrigerants directly to the atmosphere is
harmful to the environment and may also
create unsafe conditions based on
inhalation, combustion, frostbite, or other
health-based concerns.
The air conditioning system requires periodic
maintenance. See
Maintenance Schedule
0 327.
Page 196 of 369
Chevrolet Traverse Owner Manual (GMNA-Localizing-U.S./Canada/Mexico-
16411537) - 2023 - CRC - 3/28/22
Driving and Operating 195
.Select All-Wheel Drive (AWD) Mode. See
Driver Mode Control0214 and
All-Wheel Drive 0209.
Winter Driving
Driving on Snow or Ice
Caution
To avoid damage to the wheels and
brake components, always clear snow and
ice from inside the wheels and
underneath the vehicle before driving.
Snow or ice between the tires and the road
creates less traction or grip, so drive
carefully. Wet ice can occur at about 0 °C
(32 °F) when freezing rain begins to fall.
Avoid driving on wet ice or in freezing rain
until roads can be treated.
For Slippery Road Driving:
.Accelerate gently. Accelerating too quickly
causes the wheels to spin and makes the
surface under the tires slick.
.Turn on Traction Control. See Traction
Control/Electronic Stability Control 0212.
.The Antilock Brake System (ABS) improves
vehicle stability during hard stops, but
the brakes should be applied sooner than
when on dry pavement. See Antilock
Brake System (ABS) 0210.
.Allow greater following distance and
watch for slippery spots. Icy patches can
occur on otherwise clear roads in shaded
areas. The surface of a curve or an
overpass can remain icy when the
surrounding roads are clear. Avoid sudden
steering maneuvers and braking while
on ice.
.Turn off cruise control.
Cold Weather Mode
In very low temperatures, a cold weather
message may display on the Driver
Information Center (DIC). The engine speed,
transmission shift patterns, and cabin fan
speed may operate differently to enable the
vehicle to warm up quicker. You can
manually override the cabin fan speed in
cold weather mode.
Blizzard Conditions
Stop the vehicle in a safe place and signal
for help. Stay with the vehicle unless there
is help nearby. If possible, use Roadside Assistance. See
Roadside Assistance Program
0 341. To get help and keep everyone in the
vehicle safe:
.Turn on the hazard warning flashers.
.Tie a red cloth to an outside mirror.
{Warning
Snow can trap engine exhaust under the
vehicle. This may cause exhaust gases to
get inside. Engine exhaust contains
carbon monoxide (CO), which cannot be
seen or smelled. It can cause
unconsciousness and even death.
If the vehicle is stuck in snow:
.Clear snow from the base of the
vehicle, especially any blocking the
exhaust pipe.
.Open a window about 5 cm (2 in) on
the vehicle side that is away from the
wind, to bring in fresh air.
.Fully open the air outlets on or under
the instrument panel.
.Adjust the climate control system to
circulate the air inside the vehicle and
set the fan speed to the highest
setting. See “Climate Control Systems.”
(Continued)
Page 201 of 369
Chevrolet Traverse Owner Manual (GMNA-Localizing-U.S./Canada/Mexico-
16411537) - 2023 - CRC - 3/28/22
200 Driving and Operating
Caution (Continued)
.Avoid making hard stops for the first
300 km (200 mi) or so. During this
time the new brake linings are not yet
broken in. Hard stops with new linings
can mean premature wear and earlier
replacement. Follow this breaking-in
guideline every time you get new
brake linings.
.Do not tow a trailer during break-in.
SeeTrailer Towing 0248 for the
trailer towing capabilities of the
vehicle and more information.
Following break-in, engine speed and load
can be gradually increased.
On new vehicles, the various mechanical and
electrical systems experience a “break-in”
period during the first 6 400 km (4,000 mi)
of routine driving. As the vehicle is driven,
the mechanical systems adjust to provide
optimal fuel economy and transmission shift
performance.
Electrical systems will adapt and calibrate
during the break-in period. A one-time
occurrence of clicks and similar vehicle
noises is normal during this process. Normal driving charges the vehicle’s battery
to achieve the best operation of the vehicle,
including fuel economy and the Stop/Start
System. See
Stop/Start System 0202.
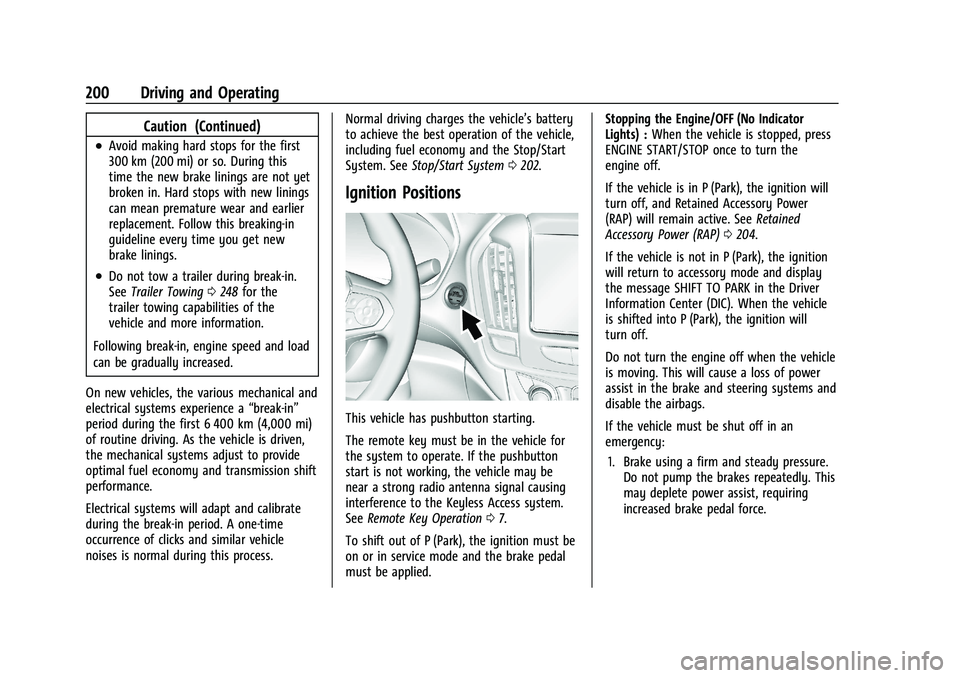
Ignition Positions
This vehicle has pushbutton starting.
The remote key must be in the vehicle for
the system to operate. If the pushbutton
start is not working, the vehicle may be
near a strong radio antenna signal causing
interference to the Keyless Access system.
See Remote Key Operation 07.
To shift out of P (Park), the ignition must be
on or in service mode and the brake pedal
must be applied. Stopping the Engine/OFF (No Indicator
Lights) :
When the vehicle is stopped, press
ENGINE START/STOP once to turn the
engine off.
If the vehicle is in P (Park), the ignition will
turn off, and Retained Accessory Power
(RAP) will remain active. See Retained
Accessory Power (RAP) 0204.
If the vehicle is not in P (Park), the ignition
will return to accessory mode and display
the message SHIFT TO PARK in the Driver
Information Center (DIC). When the vehicle
is shifted into P (Park), the ignition will
turn off.
Do not turn the engine off when the vehicle
is moving. This will cause a loss of power
assist in the brake and steering systems and
disable the airbags.
If the vehicle must be shut off in an
emergency: 1. Brake using a firm and steady pressure. Do not pump the brakes repeatedly. This
may deplete power assist, requiring
increased brake pedal force.
Page 203 of 369
Chevrolet Traverse Owner Manual (GMNA-Localizing-U.S./Canada/Mexico-
16411537) - 2023 - CRC - 3/28/22
202 Driving and Operating
Starting Procedure
1. With the Keyless Access system, theremote key must be in the vehicle. Press
ENGINE START/STOP with the brake pedal
applied. When the engine begins
cranking, let go of the button.
The idle speed will go down as the
engine gets warm. Do not race the
engine immediately after starting it.
If the remote key is not in the vehicle,
if there is interference, or if the remote
key battery is low, the Driver
Information Center (DIC) will display a
message.
Caution
Cranking the engine for long periods of
time, by trying to start the engine
immediately after cranking has ended,
can overheat and damage the cranking
motor, and drain the battery. Wait at
least 15 seconds between each try, to let
the cranking motor cool down.
2. If the engine does not start after five to 10 seconds, especially in very cold
weather (below −18 °C or 0 °F), it could
be flooded with too much gasoline. Try
pushing the accelerator pedal all the way to the floor and holding it there as you
press ENGINE START/STOP, for up to a
maximum of 15 seconds. Wait at least
15 seconds between each try, to allow
the cranking motor to cool down. When
the engine starts, let go of the button
and the accelerator. If the vehicle starts
briefly but then stops again, do the
same thing. This clears the extra gasoline
from the engine. Do not race the engine
immediately after starting it. Operate
the engine and transmission gently until
the oil warms up and lubricates all
moving parts.
Stop/Start System
This vehicle has a Stop/Start system to shut
off the engine to help conserve fuel. It has
components designed for the increased
number of starts.
{Warning
The automatic engine Stop/Start feature
causes the engine to shut off while the
vehicle is still on. Do not exit the vehicle
before shifting to P (Park). The vehicle
may restart and move unexpectedly.
Always shift to P (Park), and then turn
the ignition off before exiting the vehicle.
Auto Engine Stop/Start
When the brakes are applied and the vehicle
is at a complete stop, the engine may turn
off. When stopped, the tachometer displays
AUTO STOP. See
Tachometer0104. When
the brake pedal is released or the
accelerator pedal is pressed, the engine will
restart.
To maintain vehicle performance, other
conditions may cause the engine to
automatically restart before the brake pedal
is released.
Auto Stops may not occur and/or auto
restarts may occur because:
.The climate control settings require the
engine to be running to cool or heat the
vehicle interior.
.The vehicle battery needs to charge.
.The vehicle battery has recently been
disconnected.
.Minimum vehicle speed has not been
reached since the last Auto Stop.
.The accelerator pedal is pressed.
.The engine or transmission is not at the
required operating temperature.
.The outside temperature is not in the
required operating range.
Page 209 of 369
Chevrolet Traverse Owner Manual (GMNA-Localizing-U.S./Canada/Mexico-
16411537) - 2023 - CRC - 3/28/22
208 Driving and Operating
Caution
Shifting to R (Reverse) while the vehicle is
moving forward could damage the
transmission. The repairs would not be
covered by the vehicle warranty. Shift to
R (Reverse) only after the vehicle is
stopped.
To rock the vehicle back and forth to get
out of snow, ice, or sand without damaging
the transmission, see If the Vehicle Is Stuck
0 196.
N : In this position, the engine does not
connect with the wheels. To restart the
engine when the vehicle is already moving,
use N (Neutral) only.
{Warning
Shifting into a drive gear while the
engine is running at high speed is
dangerous. Unless your foot is firmly on
the brake pedal, the vehicle could move
very rapidly. You could lose control and
hit people or objects. Do not shift into a
drive gear while the engine is running at
high speed.
Caution
Shifting out of P (Park) or N (Neutral) with
the engine running at high speed may
damage the transmission. The repairs
would not be covered by the vehicle
warranty. Be sure the engine is not
running at high speed when shifting the
vehicle.
Caution
A transmission hot message may display
if the automatic transmission fluid is too
hot. Driving under this condition can
damage the vehicle. Stop and idle the
engine to cool the automatic
transmission fluid. This message clears
when the transmission fluid has cooled
sufficiently.
D : This position is for normal driving.
If more power is needed for passing, press
the accelerator pedal down.
Caution
If the vehicle does not shift gears, the
transmission could be damaged. Have the
vehicle serviced right away. If the vehicle is stopped on a hill, with your
foot off the brake pedal, the vehicle may
roll. This is normal and is due to the torque
converter designed to improve fuel economy
and performance. Use the brake to hold the
vehicle on a hill. Do not use the accelerator
pedal.
L :
This position gives you access to gear
ranges. This provides more engine braking
but lower fuel economy than D (Drive). You
can use it on very steep hills, or in deep
snow or mud. See Manual Mode0208.
Operating Modes : The transmission may
operate in a lower gear than normal to
improve vehicle performance. The engine
speed may be higher and there may be an
increase in noise during the following
conditions:
.When climbing a grade
.When driving downhill
.When driving in hot temperatures, or at
high altitude
Manual Mode
Electronic Range Select (ERS) Mode
ERS mode allows you to choose the top-gear
limit of the transmission and the vehicle's
speed while driving downhill or towing a
Page 210 of 369
Chevrolet Traverse Owner Manual (GMNA-Localizing-U.S./Canada/Mexico-
16411537) - 2023 - CRC - 3/28/22
Driving and Operating 209
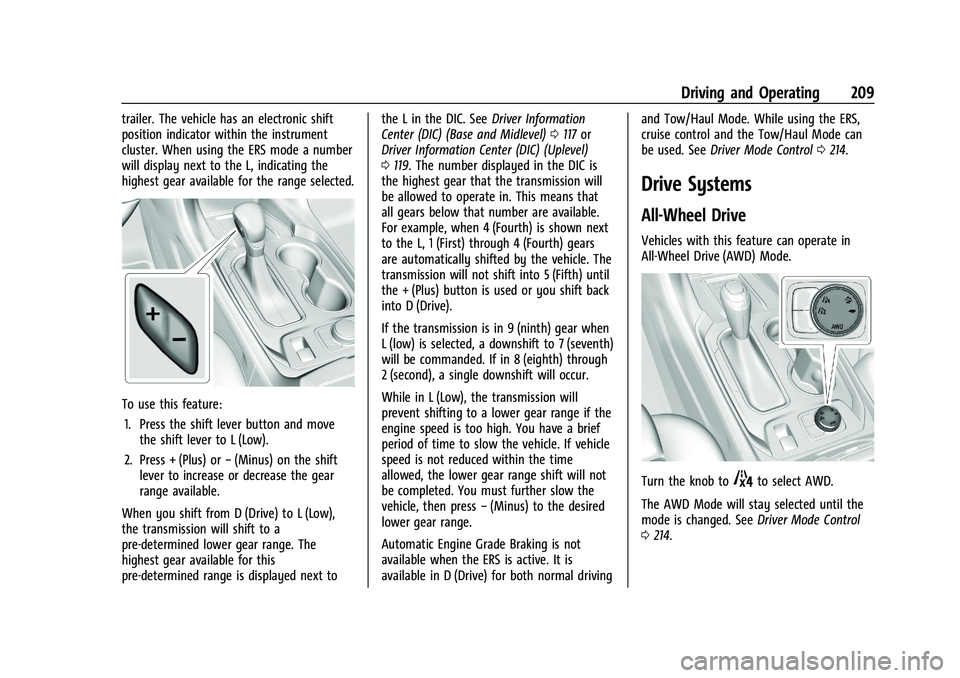
trailer. The vehicle has an electronic shift
position indicator within the instrument
cluster. When using the ERS mode a number
will display next to the L, indicating the
highest gear available for the range selected.
To use this feature:1. Press the shift lever button and move the shift lever to L (Low).
2. Press + (Plus) or −(Minus) on the shift
lever to increase or decrease the gear
range available.
When you shift from D (Drive) to L (Low),
the transmission will shift to a
pre-determined lower gear range. The
highest gear available for this
pre-determined range is displayed next to the L in the DIC. See
Driver Information
Center (DIC) (Base and Midlevel) 0117 or
Driver Information Center (DIC) (Uplevel)
0 119. The number displayed in the DIC is
the highest gear that the transmission will
be allowed to operate in. This means that
all gears below that number are available.
For example, when 4 (Fourth) is shown next
to the L, 1 (First) through 4 (Fourth) gears
are automatically shifted by the vehicle. The
transmission will not shift into 5 (Fifth) until
the + (Plus) button is used or you shift back
into D (Drive).
If the transmission is in 9 (ninth) gear when
L (low) is selected, a downshift to 7 (seventh)
will be commanded. If in 8 (eighth) through
2 (second), a single downshift will occur.
While in L (Low), the transmission will
prevent shifting to a lower gear range if the
engine speed is too high. You have a brief
period of time to slow the vehicle. If vehicle
speed is not reduced within the time
allowed, the lower gear range shift will not
be completed. You must further slow the
vehicle, then press −(Minus) to the desired
lower gear range.
Automatic Engine Grade Braking is not
available when the ERS is active. It is
available in D (Drive) for both normal driving and Tow/Haul Mode. While using the ERS,
cruise control and the Tow/Haul Mode can
be used. See
Driver Mode Control 0214.
Drive Systems
All-Wheel Drive
Vehicles with this feature can operate in
All-Wheel Drive (AWD) Mode.
Turn the knob to4to select AWD.
The AWD Mode will stay selected until the
mode is changed. See Driver Mode Control
0 214.
Page 212 of 369
Chevrolet Traverse Owner Manual (GMNA-Localizing-U.S./Canada/Mexico-
16411537) - 2023 - CRC - 3/28/22
Driving and Operating 211
Before leaving the vehicle, check the red
parking brake status light to ensure that the
parking brake is applied.
EPB Apply
To apply the EPB:1. Be sure the vehicle is at a complete stop.
2. Pull the EPB switch momentarily.
The red parking brake status light will flash
and then stay on once the EPB is fully
applied. If the red parking brake status light
flashes continuously, the EPB is only
partially applied or there is a problem with
the EPB. A DIC message will display. Release
the EPB and try to apply it again. If the
light does not come on, or keeps flashing,
have the vehicle serviced. Do not drive the
vehicle if the red parking brake status light
is flashing. See your dealer.
If the amber service parking brake warning
light is on, pull the EPB switch. Continue to
hold the switch until the red parking brake
status light remains on. If the amber service
parking brake warning light is on, see your
dealer. If the EPB is applied while the vehicle is
moving, the vehicle will decelerate as long
as the switch is pulled. If the switch is
pulled until the vehicle comes to a stop, the
EPB will remain applied.
The vehicle may automatically apply the EPB
in some situations when the vehicle is not
moving. This is normal, and is done to
periodically check the correct operation of
the EPB system, or at the request of other
safety functions that utilize the EPB.
If the EPB fails to apply, block the rear
wheels to prevent vehicle movement.
EPB Release
To release the EPB:
1. Turn the ignition on or to accessory mode.
2. Apply and hold the brake pedal.
3. Press the EPB switch momentarily.
The EPB is released when the red parking
brake status light is off.
If the amber service parking brake warning
light is on, release the EPB by pressing and
holding the EPB switch. Continue to hold the
switch until the red parking brake status
light is off. If either light stays on after
release is attempted, see your dealer.
Caution
Driving with the parking brake on can
overheat the brake system and cause
premature wear or damage to brake
system parts. Make sure that the parking
brake is fully released and the brake
warning light is off before driving.
If you are towing a trailer and parking on a
hill, see Driving Characteristics and Towing
Tips 0245.
Automatic EPB Release
The EPB will automatically release if the
vehicle is running, placed into gear, and an
attempt is made to drive away. Avoid rapid
acceleration when the EPB is applied, to
preserve parking brake lining life.
Brake Assist
Brake Assist detects rapid brake pedal
applications due to emergency braking
situations and provides additional braking to
activate the Antilock Brake System (ABS) if
the brake pedal is not pushed hard enough
to activate ABS normally. Minor noise, brake
pedal pulsation, and/or pedal movement
during this time may occur. Continue to
Page 214 of 369
Chevrolet Traverse Owner Manual (GMNA-Localizing-U.S./Canada/Mexico-
16411537) - 2023 - CRC - 3/28/22
Driving and Operating 213
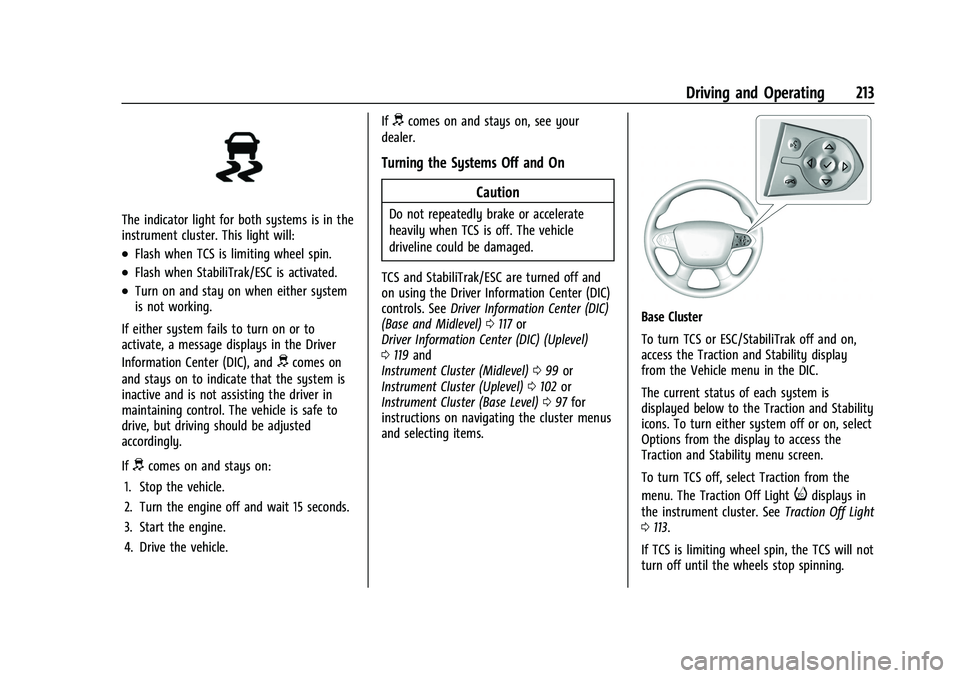
The indicator light for both systems is in the
instrument cluster. This light will:
.Flash when TCS is limiting wheel spin.
.Flash when StabiliTrak/ESC is activated.
.Turn on and stay on when either system
is not working.
If either system fails to turn on or to
activate, a message displays in the Driver
Information Center (DIC), and
dcomes on
and stays on to indicate that the system is
inactive and is not assisting the driver in
maintaining control. The vehicle is safe to
drive, but driving should be adjusted
accordingly.
If
dcomes on and stays on:
1. Stop the vehicle.
2. Turn the engine off and wait 15 seconds.
3. Start the engine.
4. Drive the vehicle. If
dcomes on and stays on, see your
dealer.
Turning the Systems Off and On
Caution
Do not repeatedly brake or accelerate
heavily when TCS is off. The vehicle
driveline could be damaged.
TCS and StabiliTrak/ESC are turned off and
on using the Driver Information Center (DIC)
controls. See Driver Information Center (DIC)
(Base and Midlevel) 0117 or
Driver Information Center (DIC) (Uplevel)
0 119 and
Instrument Cluster (Midlevel) 099 or
Instrument Cluster (Uplevel) 0102 or
Instrument Cluster (Base Level) 097 for
instructions on navigating the cluster menus
and selecting items.
Base Cluster
To turn TCS or ESC/StabiliTrak off and on,
access the Traction and Stability display
from the Vehicle menu in the DIC.
The current status of each system is
displayed below to the Traction and Stability
icons. To turn either system off or on, select
Options from the display to access the
Traction and Stability menu screen.
To turn TCS off, select Traction from the
menu. The Traction Off Light
idisplays in
the instrument cluster. See Traction Off Light
0 113.
If TCS is limiting wheel spin, the TCS will not
turn off until the wheels stop spinning.
Page 215 of 369
Chevrolet Traverse Owner Manual (GMNA-Localizing-U.S./Canada/Mexico-
16411537) - 2023 - CRC - 3/28/22
214 Driving and Operating
To turn TCS back on, select Options from the
display and then select Traction from
the menu.
To turn StabiliTrak/ESC off, select Options
from the display and then select Stability
from the menu. The StabiliTrak Off Light
g
will display in the instrument cluster. See
StabiliTrak OFF Light0113.
TCS cannot be on when StabiliTrak/ESC is
off. If TCS is on when StabiliTrak/ESC is
turned off, both systems will turn off.
To turn StabiliTrak/ESC back on, select
Options from the display and then select
Stability from the menu. StabiliTrak/ESC will
turn on, but TCS will remain off.
To turn both TCS and StabiliTrak/ESC back
on, select Options from the display and then
select Traction from the menu and both
systems will be turned back on.
Adding accessories can affect the vehicle
performance. See Accessories and
Modifications 0258.
Midlevel and Up-Level Cluster
To turn Traction (TCS) or StabiliTrak (ESC) off
and on, access the Traction and Stability
display from the Options application. The current status of each system is
displayed next to the Traction and Stability
icons. To turn either system off or on, select
Menu to access the Traction and Stability
menu screen.
To turn TCS off, select Traction Off from the
menu. The Traction Off Lightidisplays in
the instrument cluster. See Traction Off Light
0 113.
If TCS is limiting wheel spin, the TCS will not
turn off until the wheels stop spinning.
To turn TCS back on, select Traction On from
the menu.
Select Stability from the Traction and
Stability menu to access the Stability Menu.
To turn StabiliTrak/ESC off, select Stability
Off from the menu. The StabiliTrak Off Light
gwill display in the instrument cluster. See
StabiliTrak OFF Light 0113.
TCS cannot be on when StabiliTrak/ESC is
off. If TCS is on when StabiliTrak/ESC is
turned off, both systems will turn off.
To turn StabiliTrak/ESC back on, select
Stability On from the menu. TCS will
remain off. To turn both TCS and StabiliTrak/ESC back
on, select Traction On from the Traction and
Stability menu and both systems will be
turned back on.
Adding accessories can affect the vehicle
performance. See
Accessories and
Modifications 0258.
Driver Mode Control
Driver Mode Control (DMC) allows the driver
to adjust the overall driving experience to
better suit preference by selecting different
modes. These modes will then adjust
multiple systems to fit the specific driving
needs.
Drive mode availability and affected vehicle
subsystems are dependent upon vehicle trim
level, region, and optional features.
If the vehicle is in Normal Mode or AWD
Mode it will stay in that mode through
future ignition cycles. If the vehicle is in any
other mode, it will return to Normal Mode
when the vehicle is restarted. When each
mode is selected, a unique and persistent
indicator will light on the mode knob.
Page 218 of 369
Chevrolet Traverse Owner Manual (GMNA-Localizing-U.S./Canada/Mexico-
16411537) - 2023 - CRC - 3/28/22
Driving and Operating 217
SET−:Press briefly to set the speed and
activate cruise control. If the cruise control is
already active, use to decrease vehicle
speed.
*: Press to disengage cruise control
without erasing the set speed from memory.
Setting Cruise Control
If
Jis on when not in use, SET− or RES+
could get pressed and go into cruise when
not desired. Keep
Joff when cruise is not
being used.
1. Press
J.
2. Get up to the desired speed.
3. Press and release SET−. The desired set speed briefly appears in the instrument
cluster.
4. Remove your foot from the accelerator.
When the cruise control has been set to the
desired speed, a green cruise control
indicator appears on the instrument cluster.
Resuming a Set Speed
If the cruise control is set at a desired speed
and then the brakes are applied or
*is
pressed, the cruise control is disengaged
without erasing the set speed from memory. Once the vehicle speed reaches about
40 km/h (25 mph) or more, press RES+
briefly. The vehicle returns to the previous
set speed.
Increasing Speed While Using Cruise Control
If the cruise control system is already
activated:
.Press and hold RES+ up until the desired
speed is reached, then release it.
.To increase vehicle speed in small
increments, briefly press RES+. For each
press, the vehicle goes about 1 km/h
(1 mph) faster.
The speedometer reading can be displayed
in either English or metric units. See
Instrument Cluster (Midlevel) 099 or
Instrument Cluster (Uplevel) 0102 or
Instrument Cluster (Base Level) 097. The
increment value used depends on the units
displayed.
Reducing Speed While Using Cruise Control
If the cruise control system is already
activated:
.Press and hold SET− until the desired
lower speed is reached, then release it.
.To decrease the vehicle speed in small
increments, briefly press SET−. For each
press, the vehicle goes about 1 km/h
(1 mph) slower.
The speedometer reading can be displayed
in either English or metric units. See
Instrument Cluster (Midlevel) 099 or
Instrument Cluster (Uplevel) 0102 or
Instrument Cluster (Base Level) 097. The
increment value used depends on the units
displayed.
Passing Another Vehicle While Using Cruise
Control
Use the accelerator pedal to increase the
vehicle speed. When you take your foot off
the pedal, the vehicle will slow down to the
previous set cruise speed.
While pressing the accelerator pedal or
shortly following the release to override
cruise, briefly applying SET− will result in
cruise set to the current vehicle speed.
Using Cruise Control on Hills
How well the cruise control will work on
hills depends upon the vehicle speed, load,
and the steepness of the hills. When going
up steep hills, you might have to step on
the accelerator pedal to maintain your
speed. While on a hill, the transmission may