lights CHEVROLET TRAVERSE 2023 User Guide
[x] Cancel search | Manufacturer: CHEVROLET, Model Year: 2023, Model line: TRAVERSE, Model: CHEVROLET TRAVERSE 2023Pages: 369, PDF Size: 16.89 MB
Page 129 of 369
Chevrolet Traverse Owner Manual (GMNA-Localizing-U.S./Canada/Mexico-
16411537) - 2023 - CRC - 3/28/22
128 Lighting
Lights On with Wipers
If the windshield wipers are activated in
daylight with the engine on, and the
exterior lamp control is in AUTO, the
headlamps, parking lamps, and other
exterior lamps come on. The transition time
for the lamps coming on varies based on
wiper speed. When the wipers are not
operating, these lamps turn off. Move the
exterior lamp control to
Oor;to disable
this feature.
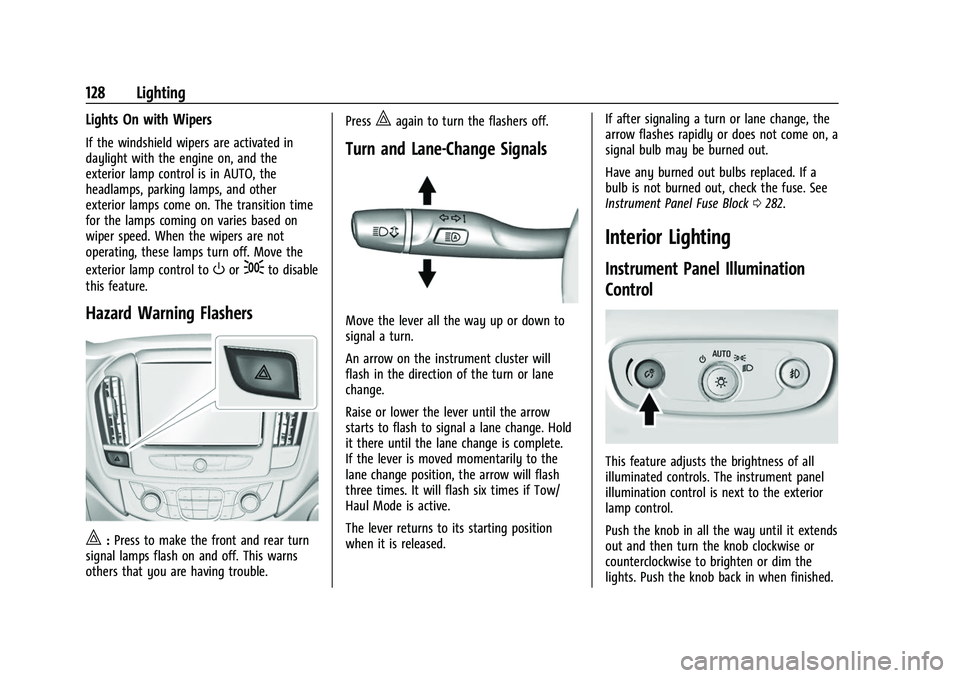
Hazard Warning Flashers
|: Press to make the front and rear turn
signal lamps flash on and off. This warns
others that you are having trouble. Press
|again to turn the flashers off.
Turn and Lane-Change Signals
Move the lever all the way up or down to
signal a turn.
An arrow on the instrument cluster will
flash in the direction of the turn or lane
change.
Raise or lower the lever until the arrow
starts to flash to signal a lane change. Hold
it there until the lane change is complete.
If the lever is moved momentarily to the
lane change position, the arrow will flash
three times. It will flash six times if Tow/
Haul Mode is active.
The lever returns to its starting position
when it is released.
If after signaling a turn or lane change, the
arrow flashes rapidly or does not come on, a
signal bulb may be burned out.
Have any burned out bulbs replaced. If a
bulb is not burned out, check the fuse. See
Instrument Panel Fuse Block
0282.
Interior Lighting
Instrument Panel Illumination
Control
This feature adjusts the brightness of all
illuminated controls. The instrument panel
illumination control is next to the exterior
lamp control.
Push the knob in all the way until it extends
out and then turn the knob clockwise or
counterclockwise to brighten or dim the
lights. Push the knob back in when finished.
Page 131 of 369
Chevrolet Traverse Owner Manual (GMNA-Localizing-U.S./Canada/Mexico-
16411537) - 2023 - CRC - 3/28/22
130 Lighting
Lighting Features
Entry Lighting
The interior lamps turn on when pressingK
on the remote key or opening any doors,
and the dome lamp control is in the door
position.
Some exterior lamps also turn on when
pressing
Kon the remote key or opening
any doors. Low-Beam lamps will only turn
on briefly at night, or in areas with limited
lighting.
All lamps will gradually fade out after about
30 seconds.
Entry lighting can be disabled manually by
closing all doors, pressing
Qon the remote
key, or starting the vehicle.
This feature can be changed. On the
infotainment home page, select the Settings
icon
TVehicleTVehicle Locator Lights.
Exit Lighting
Some exterior lamps and interior lamps turn
on when the driver door is opened after the
vehicle is turned off. The exterior and interior lamps remain on
for a set amount of time, then automatically
turn off.
The interior lights turn on when the vehicle
is turned off.
The exterior lamps turn off immediately by
turning the exterior lamp control off.
This feature can be changed. On the
infotainment home screen, select the
Settings icon
TVehicleTExit Lighting.
Battery Load Management
The vehicle has Electric Power Management
(EPM) that estimates the battery's
temperature and state of charge. It then
adjusts the voltage for best performance
and extended life of the battery.
When the battery's state of charge is low,
the voltage is raised slightly to quickly bring
the charge back up. When the state of
charge is high, the voltage is lowered
slightly to prevent overcharging. If the
vehicle has a voltmeter gauge or a voltage
display on the Driver Information Center
(DIC), you may see the voltage move up or
down. This is normal. If there is a problem,
an alert will be displayed.The battery can be discharged at idle if the
electrical loads are very high. This is true for
all vehicles. This is because the generator
(alternator) may not be spinning fast
enough at idle to produce all of the power
needed for very high electrical loads.
A high electrical load occurs when several of
the following are on, such as: headlamps,
high beams, rear window defogger, climate
control fan at high speed, heated seats,
engine cooling fans, trailer loads, and loads
plugged into accessory power outlets.
EPM works to prevent excessive discharge of
the battery. It does this by balancing the
generator's output and the vehicle's
electrical needs. It can increase engine idle
speed to generate more power whenever
needed. It can temporarily reduce the power
demands of some accessories.
Normally, these actions occur in steps or
levels, without being noticeable. In rare
cases at the highest levels of corrective
action, this action may be noticeable to the
driver. If so, a DIC battery voltage and
charging message displays. It is
recommended that the driver reduce the
electrical loads as much as possible.
Page 184 of 369
Chevrolet Traverse Owner Manual (GMNA-Localizing-U.S./Canada/Mexico-
16411537) - 2023 - CRC - 3/28/22
Climate Controls 183
Rear Window Defogger
K:Press to turn the rear window defogger
on or off. An indicator light on the button
comes on to show that the rear window
defogger is on. The rear window defogger
only works when the vehicle is on. The
defogger turns off when the vehicle is off or
in accessory mode.
To turn Auto Defog off or on, select Settings
> Climate and Air Quality > Auto Rear Defog
> Select ON or OFF. When Auto Rear Defog
is selected, the rear window defogger turns
on automatically when the interior
temperature is cold and the outside
temperature is about 7 °C (44 °F) and below.
The auto rear defogger turns off
automatically.
If the vehicle is equipped with heated
outside mirrors, they turn on when the rear
window defogger button is on and help to
clear fog or frost from the surface of the
mirror. See Heated Mirrors 028.
Caution
Do not try to clear frost or other material
from the inside of the front windshield
and rear window with a razor blade or
(Continued)
Caution (Continued)
anything else that is sharp. This may
damage the rear window defogger grid
and affect the radio's ability to pick up
stations clearly. The repairs would not be
covered by the vehicle warranty.
LorM:If equipped, pressLorMto
heat the driver or passenger seat. See
Heated and Ventilated Front Seats 042.
{orC:If equipped, press{orCto
ventilate the driver or passenger seat. See
Heated and Ventilated Front Seats 042.
Remote Start Climate Control Operation :
If equipped with remote start, the climate
control system may run when the vehicle is
started remotely. The system will use the
defrost setting if it is cold outside or turn
on using the coldest settings if it is hot
outside. The rear defog may come on during
remote start based on cold ambient
conditions. The rear defog indicator light
does not come on during a remote start.
If equipped, the heated seats will turn on if
it is cold outside or the ventilated seats will
turn on if it is hot outside. The heated and
ventilated seat indicator lights may not
come on during a remote start. If equipped, the heated steering wheel will come on in a
remote start if it is cold outside. The heated
steering wheel indicator light may not come
on. See
Remote Vehicle Start 014 and
Heated and Ventilated Front Seats 042.
Sensor
The solar sensor, on top of the instrument
panel near the windshield, monitors the
solar heat.
The climate control system uses the sensor
information to adjust the temperature, fan
speed, recirculation, and air delivery mode
for best comfort.
Do not cover the sensor; otherwise the
automatic climate control system may not
work properly.
Afterblow Feature
If equipped, under certain conditions, the
fan may stay on or may turn on and off
several times after you turn off and lock the
vehicle. This is normal.
Page 201 of 369
Chevrolet Traverse Owner Manual (GMNA-Localizing-U.S./Canada/Mexico-
16411537) - 2023 - CRC - 3/28/22
200 Driving and Operating
Caution (Continued)
.Avoid making hard stops for the first
300 km (200 mi) or so. During this
time the new brake linings are not yet
broken in. Hard stops with new linings
can mean premature wear and earlier
replacement. Follow this breaking-in
guideline every time you get new
brake linings.
.Do not tow a trailer during break-in.
SeeTrailer Towing 0248 for the
trailer towing capabilities of the
vehicle and more information.
Following break-in, engine speed and load
can be gradually increased.
On new vehicles, the various mechanical and
electrical systems experience a “break-in”
period during the first 6 400 km (4,000 mi)
of routine driving. As the vehicle is driven,
the mechanical systems adjust to provide
optimal fuel economy and transmission shift
performance.
Electrical systems will adapt and calibrate
during the break-in period. A one-time
occurrence of clicks and similar vehicle
noises is normal during this process. Normal driving charges the vehicle’s battery
to achieve the best operation of the vehicle,
including fuel economy and the Stop/Start
System. See
Stop/Start System 0202.
Ignition Positions
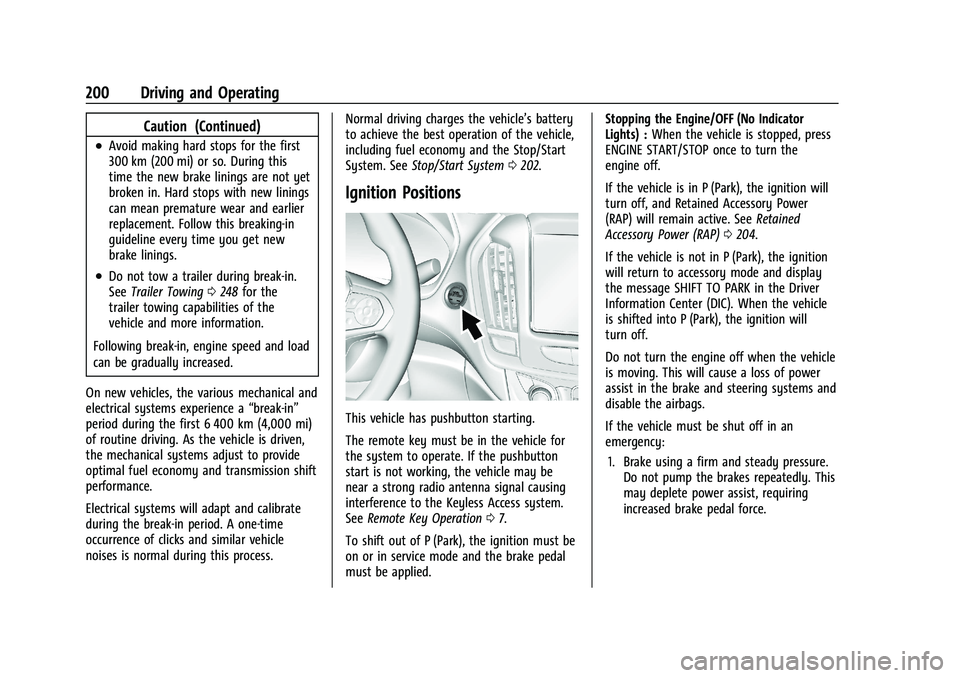
This vehicle has pushbutton starting.
The remote key must be in the vehicle for
the system to operate. If the pushbutton
start is not working, the vehicle may be
near a strong radio antenna signal causing
interference to the Keyless Access system.
See Remote Key Operation 07.
To shift out of P (Park), the ignition must be
on or in service mode and the brake pedal
must be applied. Stopping the Engine/OFF (No Indicator
Lights) :
When the vehicle is stopped, press
ENGINE START/STOP once to turn the
engine off.
If the vehicle is in P (Park), the ignition will
turn off, and Retained Accessory Power
(RAP) will remain active. See Retained
Accessory Power (RAP) 0204.
If the vehicle is not in P (Park), the ignition
will return to accessory mode and display
the message SHIFT TO PARK in the Driver
Information Center (DIC). When the vehicle
is shifted into P (Park), the ignition will
turn off.
Do not turn the engine off when the vehicle
is moving. This will cause a loss of power
assist in the brake and steering systems and
disable the airbags.
If the vehicle must be shut off in an
emergency: 1. Brake using a firm and steady pressure. Do not pump the brakes repeatedly. This
may deplete power assist, requiring
increased brake pedal force.
Page 223 of 369
Chevrolet Traverse Owner Manual (GMNA-Localizing-U.S./Canada/Mexico-
16411537) - 2023 - CRC - 3/28/22
222 Driving and Operating
Press[on the steering wheel to adjust
the following gap. Each press cycles the gap
button through three settings: Far, Medium,
or Near.
When pressed, the current gap setting
displays briefly on the instrument cluster.
The gap setting will be maintained until it is
changed.
Since each gap setting corresponds to a
following time (Far, Medium, or Near), the
following distance will vary based on vehicle
speed. The faster the vehicle speed, the
further back your vehicle will follow a
vehicle detected ahead. Consider traffic and
weather conditions when selecting the
following gap. The range of selectable gaps
may not be appropriate for all drivers and
driving conditions.
Changing the gap setting automatically
changes the alert timing sensitivity (Far,
Medium, or Near) for the Forward Collision
Alert (FCA) feature. See Forward Collision
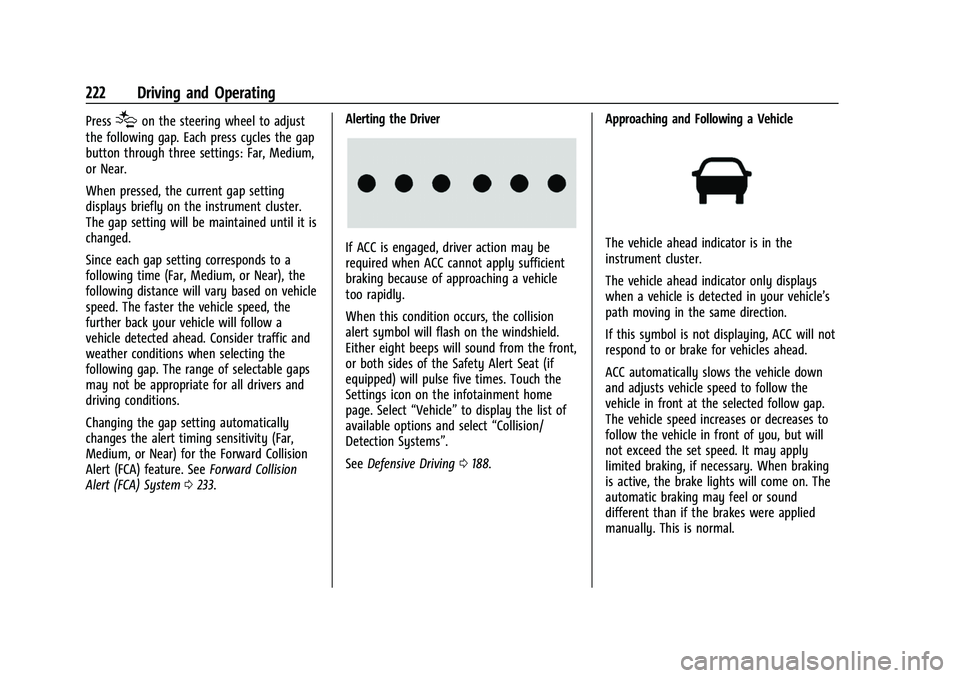
Alert (FCA) System 0233. Alerting the Driver
If ACC is engaged, driver action may be
required when ACC cannot apply sufficient
braking because of approaching a vehicle
too rapidly.
When this condition occurs, the collision
alert symbol will flash on the windshield.
Either eight beeps will sound from the front,
or both sides of the Safety Alert Seat (if
equipped) will pulse five times. Touch the
Settings icon on the infotainment home
page. Select
“Vehicle”to display the list of
available options and select “Collision/
Detection Systems”.
See Defensive Driving 0188. Approaching and Following a VehicleThe vehicle ahead indicator is in the
instrument cluster.
The vehicle ahead indicator only displays
when a vehicle is detected in your vehicle’s
path moving in the same direction.
If this symbol is not displaying, ACC will not
respond to or brake for vehicles ahead.
ACC automatically slows the vehicle down
and adjusts vehicle speed to follow the
vehicle in front at the selected follow gap.
The vehicle speed increases or decreases to
follow the vehicle in front of you, but will
not exceed the set speed. It may apply
limited braking, if necessary. When braking
is active, the brake lights will come on. The
automatic braking may feel or sound
different than if the brakes were applied
manually. This is normal.
Page 234 of 369
Chevrolet Traverse Owner Manual (GMNA-Localizing-U.S./Canada/Mexico-
16411537) - 2023 - CRC - 3/28/22
Driving and Operating 233
Warning (Continued)
action and apply the brakes. See
Defensive Driving0188. Keep the RVC,
taillamps, and back-up lamps clean and in
good repair.
Rear Pedestrian Alert can be set to Off or
Alert. To view available settings from the
infotainment screen, touch Settings >
Vehicle > Collision/Detection Systems > Rear
Pedestrian Detection.
If equipped, alerts can be set to beeps or
seat pulses. To view available settings from
the infotainment screen, touch Settings >
Vehicle > Collision/Detection Systems >
Alert Type.
Rear Cross Traffic Alert (RCTA)
System
If equipped, Rear Cross Traffic Alert (RCTA)
displays a red warning triangle with a left
or right pointing arrow on the infotainment
display to warn of traffic coming from the
left or right. This system detects objects
coming from up to 20 m (65 ft) from the left
or right side of the vehicle. When an object
is detected, either three beeps sound from
the left or right or three Safety Alert Seat pulses occur on the left or right side,
depending on the direction of the detected
vehicle.
Driving With a Trailer
Use caution while backing up when towing
a trailer. The RCTA feature is automatically
disabled when a trailer is attached to the
vehicle.
Turning the Features On or Off
The
Xbutton on the center console is
used to turn on or off Rear Park Assist (RPA)
and RCTA at the same time. The indicator
light in the button comes on when the
features are on and turns off when the
features have been disabled.
RCTA can be turned on or off using the
infotainment system. To view available
settings for this feature, touch the Settings
icon on the infotainment home page. Select
“Vehicle” to display the list of available
options and select “Collision/Detection
Systems”.
Assistance Systems for Driving
If equipped, when driving the vehicle in a
forward gear, Forward Collision Alert (FCA),
Lane Departure Warning (LDW), Lane Keep
Assist (LKA), Side Blind Zone Alert (SBZA), Lane Change Alert (LCA), Automatic
Emergency Braking (AEB), and/or the Front
Pedestrian Braking (FPB) System can help to
avoid a crash or reduce crash damage.
Forward Collision Alert (FCA)
System
If equipped, the FCA system may help to
avoid or reduce the harm caused by
front-end crashes. When approaching a
vehicle ahead too quickly, FCA provides a
red flashing alert on the windshield and
rapidly beeps or pulses the driver seat. FCA
also lights an amber visual alert if following
another vehicle much too closely.
FCA detects vehicles within a distance of
approximately 60 m (197 ft) and operates at
speeds above 8 km/h (5 mph).
If the vehicle has Adaptive Cruise Control
(ACC), it can detect vehicles to distances of
approximately 100 m (360 ft) and operates
at all speeds. See
Adaptive Cruise Control
(Advanced) 0218.
Page 240 of 369
Chevrolet Traverse Owner Manual (GMNA-Localizing-U.S./Canada/Mexico-
16411537) - 2023 - CRC - 3/28/22
Driving and Operating 239
Lane Change Alert (LCA)
If equipped, the LCA system is a
lane-changing aid that assists drivers with
avoiding lane change crashes that occur with
moving vehicles in the side blind zone (or
spot) areas or with vehicles rapidly
approaching these areas from behind. The
LCA warning display will light up in the
corresponding outside mirror and will flash
if the turn signal is on.
{Warning
LCA does not alert the driver to vehicles
outside of the system detection zones,
pedestrians, bicyclists, or animals. It may
not provide alerts when changing lanes
under all driving conditions. Failure to use
proper care when changing lanes may
result in injury, death, or vehicle damage.
Before making a lane change, always
check mirrors, glance over your shoulder,
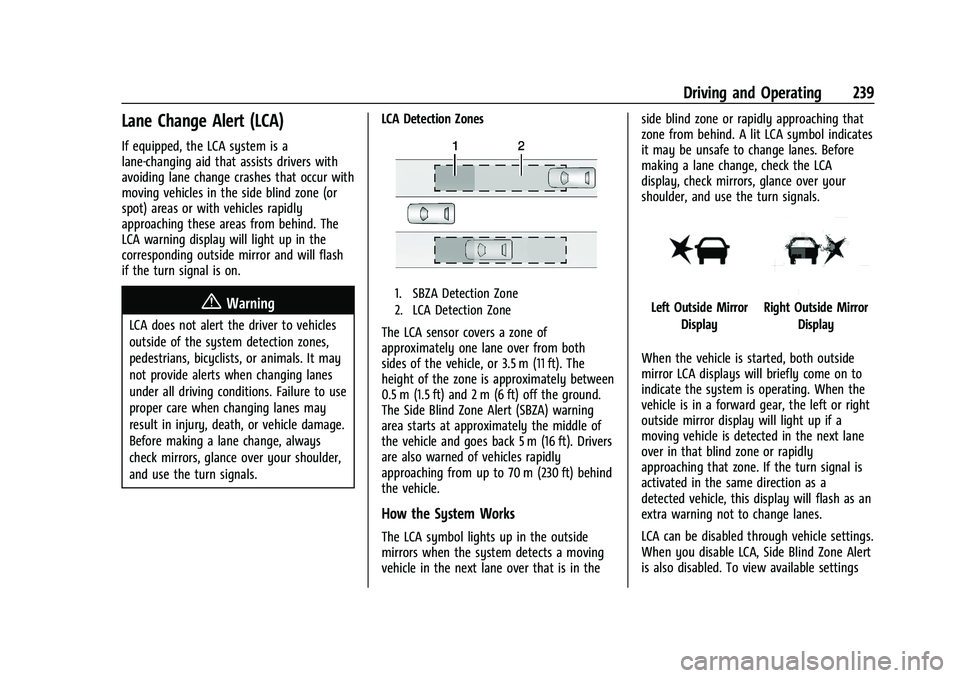
and use the turn signals.LCA Detection Zones
1. SBZA Detection Zone
2. LCA Detection Zone
The LCA sensor covers a zone of
approximately one lane over from both
sides of the vehicle, or 3.5 m (11 ft). The
height of the zone is approximately between
0.5 m (1.5 ft) and 2 m (6 ft) off the ground.
The Side Blind Zone Alert (SBZA) warning
area starts at approximately the middle of
the vehicle and goes back 5 m (16 ft). Drivers
are also warned of vehicles rapidly
approaching from up to 70 m (230 ft) behind
the vehicle.
How the System Works
The LCA symbol lights up in the outside
mirrors when the system detects a moving
vehicle in the next lane over that is in the side blind zone or rapidly approaching that
zone from behind. A lit LCA symbol indicates
it may be unsafe to change lanes. Before
making a lane change, check the LCA
display, check mirrors, glance over your
shoulder, and use the turn signals.
Left Outside Mirror
DisplayRight Outside Mirror Display
When the vehicle is started, both outside
mirror LCA displays will briefly come on to
indicate the system is operating. When the
vehicle is in a forward gear, the left or right
outside mirror display will light up if a
moving vehicle is detected in the next lane
over in that blind zone or rapidly
approaching that zone. If the turn signal is
activated in the same direction as a
detected vehicle, this display will flash as an
extra warning not to change lanes.
LCA can be disabled through vehicle settings.
When you disable LCA, Side Blind Zone Alert
is also disabled. To view available settings
Page 313 of 369
Chevrolet Traverse Owner Manual (GMNA-Localizing-U.S./Canada/Mexico-
16411537) - 2023 - CRC - 3/28/22
312 Vehicle Care
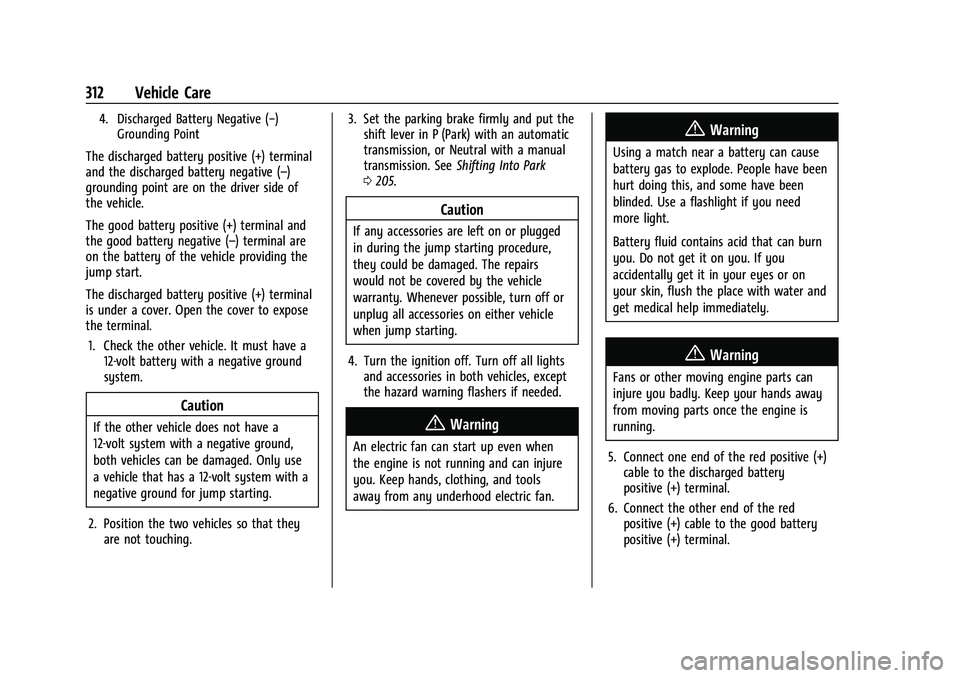
4. Discharged Battery Negative (−)Grounding Point
The discharged battery positive (+) terminal
and the discharged battery negative (–)
grounding point are on the driver side of
the vehicle.
The good battery positive (+) terminal and
the good battery negative (–) terminal are
on the battery of the vehicle providing the
jump start.
The discharged battery positive (+) terminal
is under a cover. Open the cover to expose
the terminal.
1. Check the other vehicle. It must have a 12-volt battery with a negative ground
system.
Caution
If the other vehicle does not have a
12-volt system with a negative ground,
both vehicles can be damaged. Only use
a vehicle that has a 12-volt system with a
negative ground for jump starting.
2. Position the two vehicles so that they are not touching. 3. Set the parking brake firmly and put the
shift lever in P (Park) with an automatic
transmission, or Neutral with a manual
transmission. See Shifting Into Park
0 205.
Caution
If any accessories are left on or plugged
in during the jump starting procedure,
they could be damaged. The repairs
would not be covered by the vehicle
warranty. Whenever possible, turn off or
unplug all accessories on either vehicle
when jump starting.
4. Turn the ignition off. Turn off all lights and accessories in both vehicles, except
the hazard warning flashers if needed.
{Warning
An electric fan can start up even when
the engine is not running and can injure
you. Keep hands, clothing, and tools
away from any underhood electric fan.
{Warning
Using a match near a battery can cause
battery gas to explode. People have been
hurt doing this, and some have been
blinded. Use a flashlight if you need
more light.
Battery fluid contains acid that can burn
you. Do not get it on you. If you
accidentally get it in your eyes or on
your skin, flush the place with water and
get medical help immediately.
{Warning
Fans or other moving engine parts can
injure you badly. Keep your hands away
from moving parts once the engine is
running.
5. Connect one end of the red positive (+) cable to the discharged battery
positive (+) terminal.
6. Connect the other end of the red positive (+) cable to the good battery
positive (+) terminal.
Page 330 of 369
Chevrolet Traverse Owner Manual (GMNA-Localizing-U.S./Canada/Mexico-
16411537) - 2023 - CRC - 3/28/22
Service and Maintenance 329
suitable service maintenance intervals for
your vehicle, please contact your
authorized GM Dealer.
Extreme service is for vehicles mainly
driven off-road in four-wheel drive or used
in farming, mining, forestry, or snow
plowing.
Additional Required Services—Severe
Service
Every 72 000 km (45,000 mi)
.Change automatic transmission fluid.
Every 120 000 km (75,000 mi)
.Change rear axle fluid, if equipped with
AWD. Do not directly power wash the
transfer case and/or front/rear axle
output seals. High pressure water can
overcome the seals and contaminate the
transfer case fluid. Contaminated fluid will
decrease the life of the transfer case and/
or axles and should be replaced.
Owner Checks and Services
Every Five Years
.Replace brake fluid. Every Seven Years
.Replace Air Conditioning Desiccant every
seven years. The air conditioning system
requires maintenance every seven years.
This service requires replacement of the
desiccant to help the longevity and
efficient operation of the air conditioning
system. This service can be complex. See
your dealer.
Multi-Point Vehicle
Inspection (MPVI)
A Multi Point Vehicle Inspection (MPVI)
completed by a GM dealer technician is a
maintenance assessment of your vehicle.
The benefit of the MPVI is to identify and
inform the customer of service items that
require immediate attention and those that
may require attention in the future.
The technician will perform the following
checks on your vehicle. For a complete list
of checks, inspections, and services, see your
dealer.
Some items may not apply to your vehicle
and/or region.
Diagnostics
.OnStar active, if equipped
.Service history/recall check
Engine Oil and Filter
.Engine oil
.Oil life monitor
‐
Reset oil life monitor
Exterior Lights
.Visual inspection
Windshield and Wipers
.Visual inspection
Battery
.Battery visual inspection
.Battery test results
.Battery cables and connections
Systems, Fluids, and Visible Leak
Inspection
.Engine oil
.Transmission
.Drive axle
.Transfer case
.Engine cooling system
.Power steering, if equipped
Page 362 of 369
Chevrolet Traverse Owner Manual (GMNA-Localizing-U.S./Canada/Mexico-
16411537) - 2023 - CRC - 3/28/22
Index 361
Fuel (cont'd)Gauge . . . . . . . . . . . . . . . . . . . . . . . . . . . . . . . . . 104
Low Fuel Warning Light . . . . . . . . . . . . . . . . 115
Prohibited Fuels . . . . . . . . . . . . . . . . . . . . . . . 243
Recommended . . . . . . . . . . . . . . . . . . . . . . . . . 242
Top Tier . . . . . . . . . . . . . . . . . . . . . . . . . . . . . . . 242
Fuses
Engine Compartment Fuse Block . . . . . . . 279
Fuses and Circuit Breakers . . . . . . . . . . . . . 278
Instrument Panel Fuse Block . . . . . . . . . . . 282
Rear Compartment Fuse Block . . . . . . . . . 284
G
Garage Door Opener . . . . . . . . . . . . . . . . . . . . . . 122Programming . . . . . . . . . . . . . . . . . . . . . . . . . . 122
Gas Strut(s) . . . . . . . . . . . . . . . . . . . . . . . . . . . . . . 274
Gauges Engine Coolant Temperature . . . . . . . . . . . 106
Engine Oil Temperature . . . . . . . . . . . . . . . . 105
Fuel . . . . . . . . . . . . . . . . . . . . . . . . . . . . . . . . . . . . 104
Odometer . . . . . . . . . . . . . . . . . . . . . . . . . . . . . 104
Speedometer . . . . . . . . . . . . . . . . . . . . . . . . . . 104
Tachometer . . . . . . . . . . . . . . . . . . . . . . . . . . . . 104
Trip Odometer . . . . . . . . . . . . . . . . . . . . . . . . . 104
Voltmeter . . . . . . . . . . . . . . . . . . . . . . . . . . . . . . 106
Warning Lights and Indicators . . . . . . . . . . 97
General Information Service and Maintenance . . . . . . . . . . . . . . 326 General Information (cont'd)
Towing . . . . . . . . . . . . . . . . . . . . . . . . . . . . . . . . 245
Vehicle Care . . . . . . . . . . . . . . . . . . . . . . . . . . . 258
Global Positioning System (GPS) . . . . . . . . . .154
Glove Box . . . . . . . . . . . . . . . . . . . . . . . . . . . . . . . . 84
GM Mobility Reimbursement Program . . . . . . . . . . . . . . . . . . . . . . . . . . . . . . . .341
Guidance Problems with the Route . . . . . . . . . . . . . . 154
H
Hazard Warning Flashers . . . . . . . . . . . . . . . . .128
Head Restraints . . . . . . . . . . . . . . . . . . . . . . . . . . . .35
HeadlampsAiming . . . . . . . . . . . . . . . . . . . . . . . . . . . . . . . . 275
Automatic . . . . . . . . . . . . . . . . . . . . . . . . . . . . . . 127
Bulb Replacement . . . . . . . . . . . . . . . . . . . . . . 275
Daytime Running Lamps (DRL) . . . . . . . . . . 127
Flash-to-Pass . . . . . . . . . . . . . . . . . . . . . . . . . . . 126
High-Beam On Light . . . . . . . . . . . . . . . . . . . . 116
High/Low Beam Changer . . . . . . . . . . . . . . 126
Lamps On Reminder . . . . . . . . . . . . . . . . . . . . 116
Heated Mirrors . . . . . . . . . . . . . . . . . . . . . . . . . . . . . . . . . 28
Rear Seats . . . . . . . . . . . . . . . . . . . . . . . . . . . . . . 46
Steering Wheel . . . . . . . . . . . . . . . . . . . . . . . . . 90
Ventilated Front Seats . . . . . . . . . . . . . . . . . . 42 Heater
Engine . . . . . . . . . . . . . . . . . . . . . . . . . . . . . . . . . 203
Heating . . . . . . . . . . . . . . . . . . . . . . . . . . . . . 180, 184
High Voltage Devices and Wiring . . . . . . . . 276
High-Beam On Light . . . . . . . . . . . . . . . . . . . . . . 116
High-Speed Operation . . . . . . . . . . . . . . . . . . . 293
Hill and Mountain Roads . . . . . . . . . . . . . . . . 194
Hill Start Assist (HSA) . . . . . . . . . . . . . . . . . . . . . 212
Hood . . . . . . . . . . . . . . . . . . . . . . . . . . . . . . . . . . . . 259
Horn . . . . . . . . . . . . . . . . . . . . . . . . . . . . . . . . . . . . . . .91
How to Wear Seat Belts Properly . . . . . . . . . 49
HVAC . . . . . . . . . . . . . . . . . . . . . . . . . . . . . . . 180, 184
I
If the System Needs Service . . . . . . . . . . . . . . 155
Ignition Positions . . . . . . . . . . . . . . . . . . . . . . . . 200
Immobilizer . . . . . . . . . . . . . . . . . . . . . . . . . . . . . . . 26
Indicator Pedestrian Ahead . . . . . . . . . . . . . . . . . . . . . . . 112
Vehicle Ahead . . . . . . . . . . . . . . . . . . . . . . . . . . 112
Indicators
Warning Lights and Gauges . . . . . . . . . . . . . 97
Infants and Young Children, Restraints . . . . 67
Information Publication Ordering . . . . . . . . . . . . . . . . . . . 345
Infotainment
Using the System . . . . . . . . . . . . . . . . . . . . . . 135
Infotainment System . . . . . . . . . . . . . . . . . . . . 348