remote start CHEVROLET TRAVERSE 2023 User Guide
[x] Cancel search | Manufacturer: CHEVROLET, Model Year: 2023, Model line: TRAVERSE, Model: CHEVROLET TRAVERSE 2023Pages: 369, PDF Size: 16.89 MB
Page 18 of 369

Chevrolet Traverse Owner Manual (GMNA-Localizing-U.S./Canada/Mexico-
16411537) - 2023 - CRC - 3/28/22
Keys, Doors, and Windows 17
Power Door Locks
Q:Press to lock the doors.
K:Press to unlock the doors.
Delayed Locking
This feature delays the locking of the doors
until five seconds after all doors are closed.
Delayed locking can only be turned on when
the Open Door Anti-Lockout feature has
been turned off.
When
Qis pressed on the power door lock
switch while the door is open, a chime will
sound three times indicating delayed locking
is active. The doors will lock automatically
five seconds after all doors are closed. If a
door is reopened before that time, the
five-second timer will reset when all doors
are closed again.
Press
Qon the door lock switch again or
press
Qon the remote key to lock the
doors immediately.
This feature can also be programmed. To
view available settings for this feature,
touch the Settings icon on the infotainment
home page. Select “Vehicle”to display the
list of available options and select “Power
Door Locks”.
Automatic Door Locks
The doors will lock automatically when all
doors are closed, the ignition is on, and the
vehicle is shifted out of P (Park).
If a vehicle door is unlocked and then
opened and closed, the doors will lock either
when your foot is removed from the brake
or the vehicle speed becomes faster than
13 km/h (8 mph).
To unlock the doors:
.PressKon a door.
.Shift the transmission into P (Park). Automatic door locking cannot be disabled.
Automatic door unlocking can be
programmed. To view available settings for
this feature, touch the Settings icon on the
infotainment home page. Select
“Vehicle”to
display the list of available options and
select “Power Door Locks”.
Lockout Protection
If the vehicle is started or in accessory mode
and the power door lock switch is pressed
with the driver door open, all the doors will
lock and only the driver door will unlock.
If the vehicle is off and locking is requested
while a door is open, when all doors are
closed the vehicle will check for remote keys
inside. If an remote key is detected and the
number of remote keys inside has not
reduced, the driver door will unlock and the
horn will chirp three times.
Lockout Protection can be manually
overridden with the driver door open by
pressing and holding
Qon the power door
lock switch.
Open Door Anti-Lockout
If Open Door Anti-Lockout is turned on and
the vehicle is off, the driver door is open,
and locking is requested, all the doors will
Page 21 of 369
Chevrolet Traverse Owner Manual (GMNA-Localizing-U.S./Canada/Mexico-
16411537) - 2023 - CRC - 3/28/22
20 Keys, Doors, and Windows
If equipped with a power liftgate, the power
liftgate switch is on the driver door. The
vehicle must be in P (Park).
The modes are:
.MAX: Opens to maximum height.
.3/4: Opens to a reduced height that can
be set from 3/4 to fully open. Use to
prevent the liftgate from opening into
overhead obstructions such as a garage
door or roof-mounted cargo. The liftgate
can be manually opened all the way.
.OFF: Opens manually only.
To power open or close the liftgate, select
MAX or 3/4 mode.
.Pressbtwice quickly on the remote
key until the liftgate moves.
.Press8on the driver door. The driver
door must be unlocked.
.Press the touch pad in the liftgate handle
after unlocking all doors. A locked vehicle
can be opened if the remote key is within
1 m (3 ft) of the liftgate.
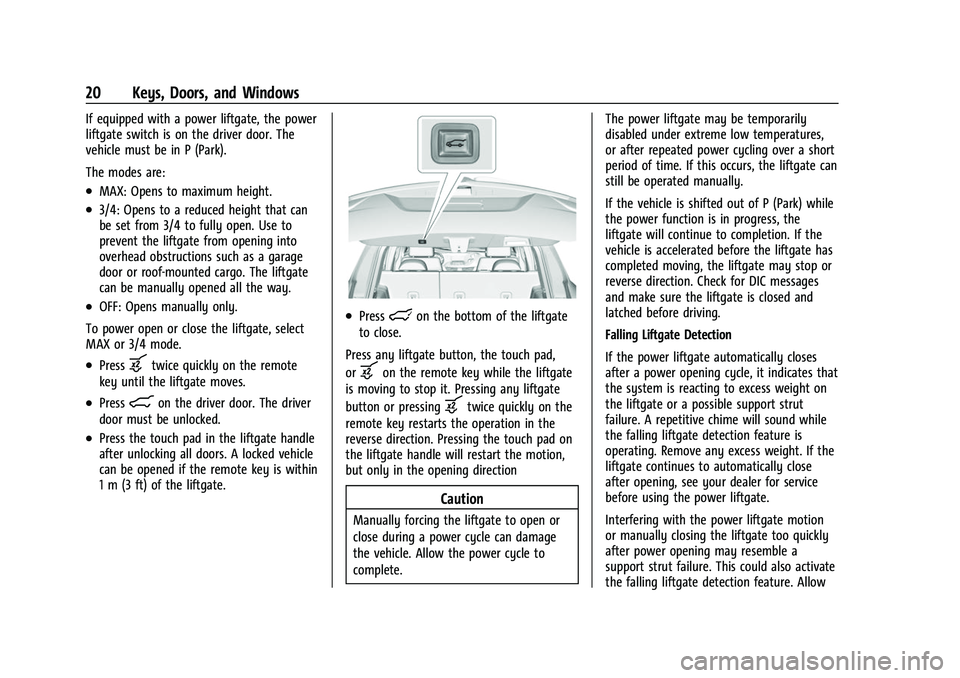
.Presslon the bottom of the liftgate
to close.
Press any liftgate button, the touch pad,
or
bon the remote key while the liftgate
is moving to stop it. Pressing any liftgate
button or pressing
btwice quickly on the
remote key restarts the operation in the
reverse direction. Pressing the touch pad on
the liftgate handle will restart the motion,
but only in the opening direction
Caution
Manually forcing the liftgate to open or
close during a power cycle can damage
the vehicle. Allow the power cycle to
complete. The power liftgate may be temporarily
disabled under extreme low temperatures,
or after repeated power cycling over a short
period of time. If this occurs, the liftgate can
still be operated manually.
If the vehicle is shifted out of P (Park) while
the power function is in progress, the
liftgate will continue to completion. If the
vehicle is accelerated before the liftgate has
completed moving, the liftgate may stop or
reverse direction. Check for DIC messages
and make sure the liftgate is closed and
latched before driving.
Falling Liftgate Detection
If the power liftgate automatically closes
after a power opening cycle, it indicates that
the system is reacting to excess weight on
the liftgate or a possible support strut
failure. A repetitive chime will sound while
the falling liftgate detection feature is
operating. Remove any excess weight. If the
liftgate continues to automatically close
after opening, see your dealer for service
before using the power liftgate.
Interfering with the power liftgate motion
or manually closing the liftgate too quickly
after power opening may resemble a
support strut failure. This could also activate
the falling liftgate detection feature. Allow
Page 23 of 369
Chevrolet Traverse Owner Manual (GMNA-Localizing-U.S./Canada/Mexico-
16411537) - 2023 - CRC - 3/28/22
22 Keys, Doors, and Windows
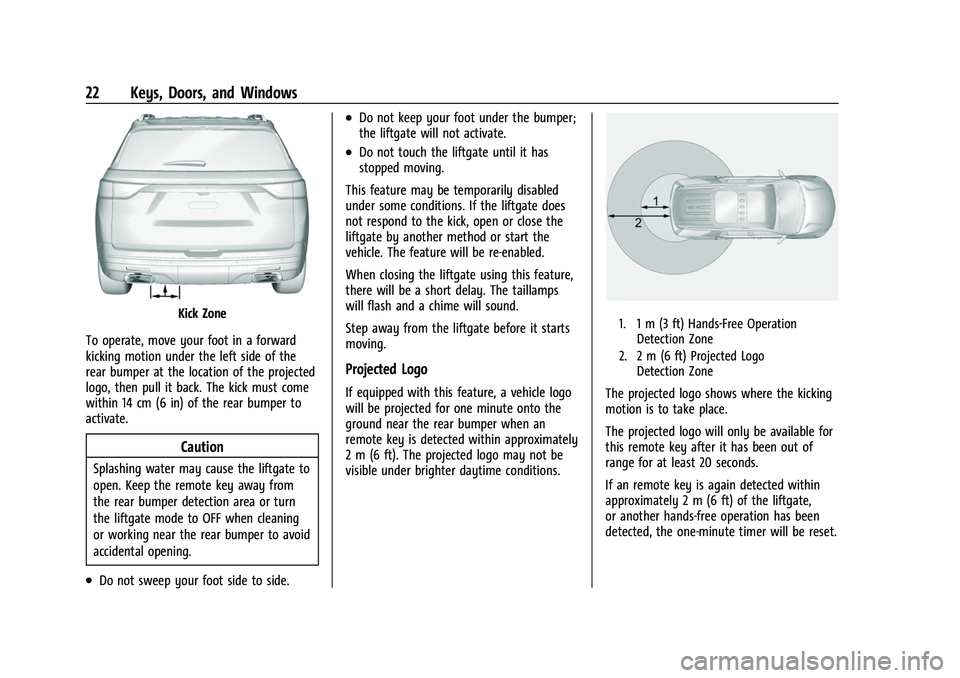
Kick Zone
To operate, move your foot in a forward
kicking motion under the left side of the
rear bumper at the location of the projected
logo, then pull it back. The kick must come
within 14 cm (6 in) of the rear bumper to
activate.
Caution
Splashing water may cause the liftgate to
open. Keep the remote key away from
the rear bumper detection area or turn
the liftgate mode to OFF when cleaning
or working near the rear bumper to avoid
accidental opening.
.Do not sweep your foot side to side.
.Do not keep your foot under the bumper;
the liftgate will not activate.
.Do not touch the liftgate until it has
stopped moving.
This feature may be temporarily disabled
under some conditions. If the liftgate does
not respond to the kick, open or close the
liftgate by another method or start the
vehicle. The feature will be re-enabled.
When closing the liftgate using this feature,
there will be a short delay. The taillamps
will flash and a chime will sound.
Step away from the liftgate before it starts
moving.
Projected Logo
If equipped with this feature, a vehicle logo
will be projected for one minute onto the
ground near the rear bumper when an
remote key is detected within approximately
2 m (6 ft). The projected logo may not be
visible under brighter daytime conditions.
1. 1 m (3 ft) Hands-Free Operation Detection Zone
2. 2 m (6 ft) Projected Logo Detection Zone
The projected logo shows where the kicking
motion is to take place.
The projected logo will only be available for
this remote key after it has been out of
range for at least 20 seconds.
If an remote key is again detected within
approximately 2 m (6 ft) of the liftgate,
or another hands-free operation has been
detected, the one-minute timer will be reset.
Page 26 of 369
Chevrolet Traverse Owner Manual (GMNA-Localizing-U.S./Canada/Mexico-
16411537) - 2023 - CRC - 3/28/22
Keys, Doors, and Windows 25
Vehicle Security
This vehicle has theft-deterrent features;
however, they do not make the vehicle
impossible to steal.
Vehicle Alarm System
This vehicle has an anti-theft alarm system.
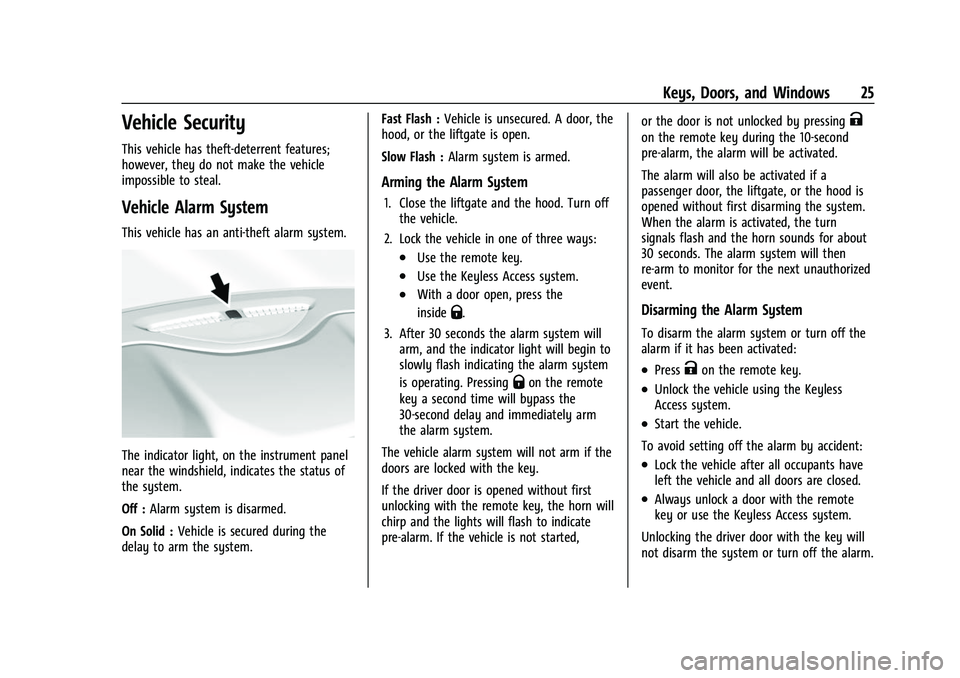
The indicator light, on the instrument panel
near the windshield, indicates the status of
the system.
Off :Alarm system is disarmed.
On Solid : Vehicle is secured during the
delay to arm the system. Fast Flash :
Vehicle is unsecured. A door, the
hood, or the liftgate is open.
Slow Flash : Alarm system is armed.
Arming the Alarm System
1. Close the liftgate and the hood. Turn off
the vehicle.
2. Lock the vehicle in one of three ways:
.Use the remote key.
.Use the Keyless Access system.
.With a door open, press the
inside
Q.
3. After 30 seconds the alarm system will arm, and the indicator light will begin to
slowly flash indicating the alarm system
is operating. Pressing
Qon the remote
key a second time will bypass the
30-second delay and immediately arm
the alarm system.
The vehicle alarm system will not arm if the
doors are locked with the key.
If the driver door is opened without first
unlocking with the remote key, the horn will
chirp and the lights will flash to indicate
pre-alarm. If the vehicle is not started, or the door is not unlocked by pressing
K
on the remote key during the 10-second
pre-alarm, the alarm will be activated.
The alarm will also be activated if a
passenger door, the liftgate, or the hood is
opened without first disarming the system.
When the alarm is activated, the turn
signals flash and the horn sounds for about
30 seconds. The alarm system will then
re-arm to monitor for the next unauthorized
event.
Disarming the Alarm System
To disarm the alarm system or turn off the
alarm if it has been activated:
.PressKon the remote key.
.Unlock the vehicle using the Keyless
Access system.
.Start the vehicle.
To avoid setting off the alarm by accident:
.Lock the vehicle after all occupants have
left the vehicle and all doors are closed.
.Always unlock a door with the remote
key or use the Keyless Access system.
Unlocking the driver door with the key will
not disarm the system or turn off the alarm.
Page 27 of 369
Chevrolet Traverse Owner Manual (GMNA-Localizing-U.S./Canada/Mexico-
16411537) - 2023 - CRC - 3/28/22
26 Keys, Doors, and Windows
How to Detect a Tamper Condition
IfKis pressed and the horn chirps and the
lights flash three times, the alarm was
activated while the alarm system was
armed.
If the alarm system has been activated, a
message will appear on the Driver
Information Center (DIC).
Immobilizer
See Radio Frequency Statement 0346.
Immobilizer Operation
This vehicle has a passive theft-deterrent
system.
The system does not have to be manually
armed or disarmed.
The vehicle is automatically immobilized
when the remote key leaves the vehicle.
The immobilization system is disarmed
when the ignition is turned on or in
accessory mode and a valid remote key is in
the vehicle.
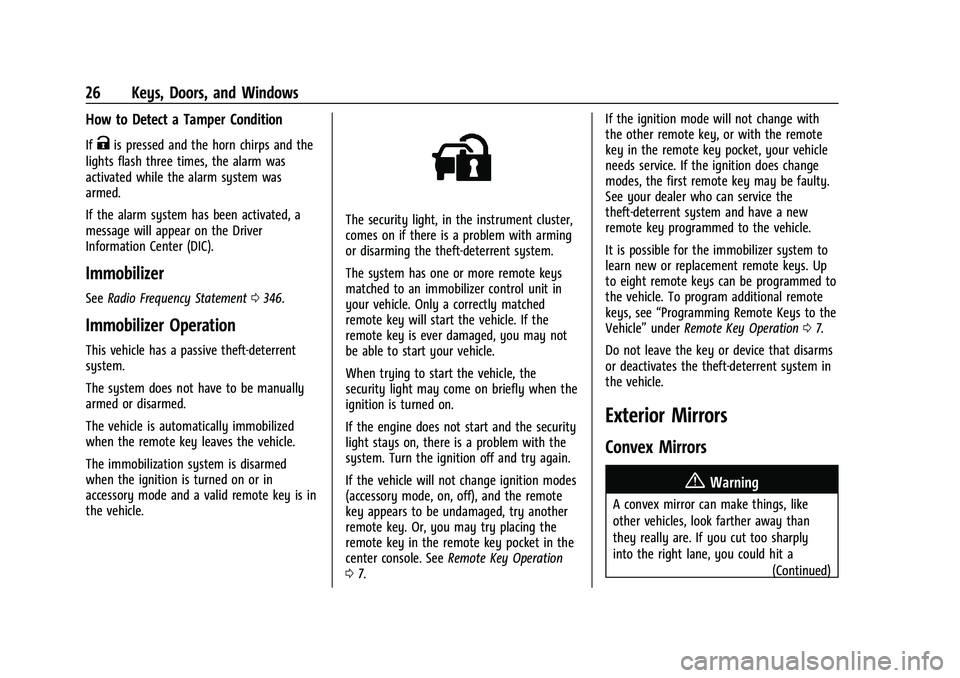
The security light, in the instrument cluster,
comes on if there is a problem with arming
or disarming the theft-deterrent system.
The system has one or more remote keys
matched to an immobilizer control unit in
your vehicle. Only a correctly matched
remote key will start the vehicle. If the
remote key is ever damaged, you may not
be able to start your vehicle.
When trying to start the vehicle, the
security light may come on briefly when the
ignition is turned on.
If the engine does not start and the security
light stays on, there is a problem with the
system. Turn the ignition off and try again.
If the vehicle will not change ignition modes
(accessory mode, on, off), and the remote
key appears to be undamaged, try another
remote key. Or, you may try placing the
remote key in the remote key pocket in the
center console. See Remote Key Operation
0 7. If the ignition mode will not change with
the other remote key, or with the remote
key in the remote key pocket, your vehicle
needs service. If the ignition does change
modes, the first remote key may be faulty.
See your dealer who can service the
theft-deterrent system and have a new
remote key programmed to the vehicle.
It is possible for the immobilizer system to
learn new or replacement remote keys. Up
to eight remote keys can be programmed to
the vehicle. To program additional remote
keys, see
“Programming Remote Keys to the
Vehicle” underRemote Key Operation 07.
Do not leave the key or device that disarms
or deactivates the theft-deterrent system in
the vehicle.
Exterior Mirrors
Convex Mirrors
{Warning
A convex mirror can make things, like
other vehicles, look farther away than
they really are. If you cut too sharply
into the right lane, you could hit a (Continued)
Page 29 of 369
Chevrolet Traverse Owner Manual (GMNA-Localizing-U.S./Canada/Mexico-
16411537) - 2023 - CRC - 3/28/22
28 Keys, Doors, and Windows
Fold and unfold the mirrors one time using
the mirror controls to reset them to their
normal position. A noise may be heard
during the resetting of the power folding
mirrors. This sound is normal after a manual
folding operation.
Remote Mirror Folding
If equipped, press and holdQon the
remote key for approximately one second to
remotely fold the exterior mirrors. Press and
hold
Kon the remote key for
approximately one second to unfold. See
Remote Key Operation 07.
This feature is turned on or off through
vehicle settings. To view available settings
for this feature, touch the Settings icon on
the infotainment home page. Select
“Vehicle” to display the list of available
options and select “Comfort and
Convenience”.
Heated Mirrors
If equipped, the heated outside mirrors turn
on when the rear window defogger is on
and help to clear fog or frost from the
surface of the mirrors.
K: This button is on the climate control
panel.
See “Rear Window Defogger” underDual
Automatic Climate Control System 0180.
Automatic Dimming Mirror
The vehicle has an automatic dimming
outside mirror on the driver side. The mirror
will adjust for the glare of headlamps
behind you.
Reverse Tilt Mirrors
If equipped with reverse tilt mirrors and
memory seats, the passenger and/or driver
mirror tilts to a preselected position when
the vehicle is in R (Reverse). This allows the
curb to be seen when parallel parking.
The mirror(s) may move from their tilted
position when:
.The vehicle is shifted out of R (Reverse),
or remains in R (Reverse) for about
30 seconds.
.The vehicle is turned off.
.The vehicle is driven in R (Reverse) above
a set speed.
To view available settings from the
infotainment screen, touch Settings >
Vehicle > Comfort and Convenience.
Interior Mirrors
Interior Rearview Mirrors
Adjust the rearview mirror for a clear view
of the area behind your vehicle.
Do not spray glass cleaner directly on the
mirror. Use a soft towel dampened with
water.
Manual Rearview Mirror
If equipped, push the tab forward for
daytime use and pull it rearward for
nighttime use to avoid glare of the
headlamps from behind.
Automatic Dimming Rearview
Mirror
If equipped, automatic dimming reduces the
glare of headlamps from behind. The
dimming feature comes on when the vehicle
is started.
Rear Camera Mirror
If equipped, this automatic dimming mirror
provides a wide angle camera view of the
area behind the vehicle.
Page 33 of 369
Chevrolet Traverse Owner Manual (GMNA-Localizing-U.S./Canada/Mexico-
16411537) - 2023 - CRC - 3/28/22
32 Keys, Doors, and Windows
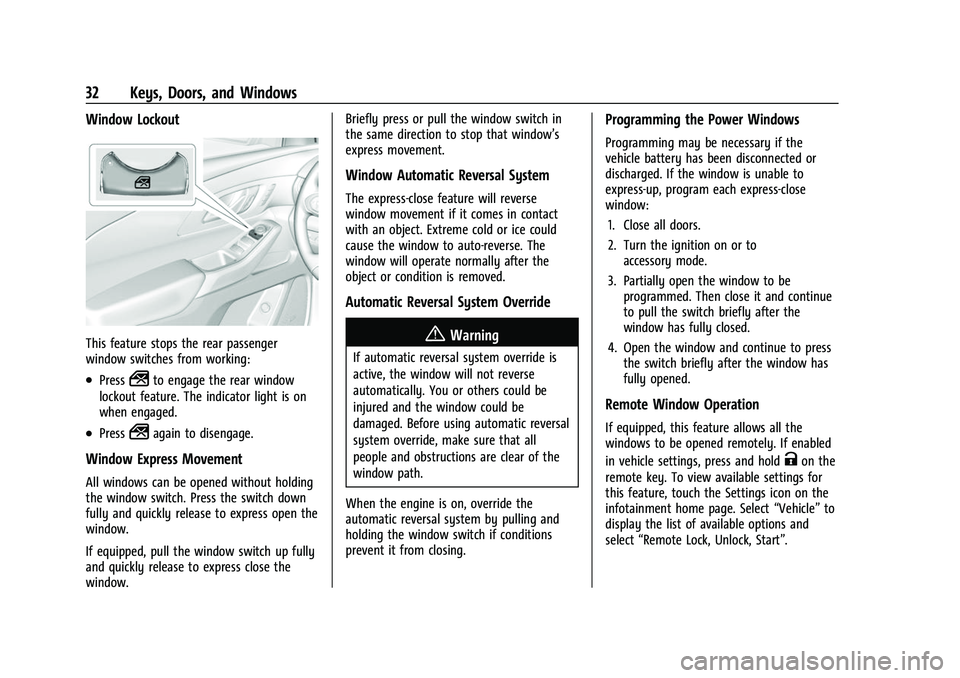
Window Lockout
This feature stops the rear passenger
window switches from working:
.Press2to engage the rear window
lockout feature. The indicator light is on
when engaged.
.Press2again to disengage.
Window Express Movement
All windows can be opened without holding
the window switch. Press the switch down
fully and quickly release to express open the
window.
If equipped, pull the window switch up fully
and quickly release to express close the
window. Briefly press or pull the window switch in
the same direction to stop that window’s
express movement.
Window Automatic Reversal System
The express-close feature will reverse
window movement if it comes in contact
with an object. Extreme cold or ice could
cause the window to auto-reverse. The
window will operate normally after the
object or condition is removed.
Automatic Reversal System Override
{Warning
If automatic reversal system override is
active, the window will not reverse
automatically. You or others could be
injured and the window could be
damaged. Before using automatic reversal
system override, make sure that all
people and obstructions are clear of the
window path.
When the engine is on, override the
automatic reversal system by pulling and
holding the window switch if conditions
prevent it from closing.
Programming the Power Windows
Programming may be necessary if the
vehicle battery has been disconnected or
discharged. If the window is unable to
express-up, program each express-close
window: 1. Close all doors.
2. Turn the ignition on or to accessory mode.
3. Partially open the window to be programmed. Then close it and continue
to pull the switch briefly after the
window has fully closed.
4. Open the window and continue to press the switch briefly after the window has
fully opened.
Remote Window Operation
If equipped, this feature allows all the
windows to be opened remotely. If enabled
in vehicle settings, press and hold
Kon the
remote key. To view available settings for
this feature, touch the Settings icon on the
infotainment home page. Select “Vehicle”to
display the list of available options and
select “Remote Lock, Unlock, Start”.
Page 41 of 369
Chevrolet Traverse Owner Manual (GMNA-Localizing-U.S./Canada/Mexico-
16411537) - 2023 - CRC - 3/28/22
40 Seats and Restraints
section. The memory recalls may be
cancelled at any time during the recall. See
“Cancel Memory Seating Recalls”later in this
section.
Identifying Driver Number
The vehicle identifies the current driver by
their remote key number 1–8. The current
remote key number may be identified by
Driver Information Center (DIC) welcome
message, “You are driver x for memory
recalls.” This message is displayed the first
few times the vehicle is turned on when a
different remote key is used. For Seat Entry
Memory to work properly, save positions to
the 1 or 2 memory button matching the
driver number of this welcome message. To
aid in identifying remote key IDs, it is
recommended to only carry one remote key
when entering the vehicle. Perform the
following if the welcome message is not
displayed:
1. Move all keys and remote keys away from the vehicle.
2. Start the vehicle with another remote key. A DIC welcome message should
display indicating the driver number of
the other remote key. Turn the vehicle
off and remove the other key or remote
key from the vehicle. 3. Start the vehicle with the initial key or
remote key. The DIC welcome message
should display the driver number of the
initial remote key.
Saving Seating Positions
Read these instructions completely before
saving memory positions.
To save preferred driving positions to
1 and 2: 1. Turn the vehicle on or to accessory mode. A DIC welcome message may
indicate the driver number of the current
remote key. See “Identifying Driver
Number” previously in this section.
2. Adjust all available memory features to the desired driving position.
3. Press and release SET; a beep will sound.
4. Immediately upon releasing SET, press and hold memory button 1 or 2 matching
the current Driver’s remote key number
until two beeps sound. If too much time
passes between releasing SET and
pressing 1 or 2, the two beeps will not
sound indicating memory position were
not saved. Repeat Steps 3 and 4 to try
again. 5. Repeat Steps 1–4 for the other remote
key 1 or 2 using the other 1 or 2 memory
button.
It is recommended to save the preferred
driving positions to both 1 and 2 if you are
the only driver.
To save the common exit seating position to
Bthat is used by all drivers for Manually
Recalling Seating Positions and Auto Seat
Exit Memory Recall features, repeat Steps 1–
4 using
B, the exit button.
Manually Recalling Seating Positions
Press and hold 1, 2, or
Bbutton until the
recall is complete, to recall the positions
previously saved to that button.
Manual Memory recall movement for 1, 2 or
Bbuttons may be initiated and will
complete to the saved memory position if
the vehicle is in or out of P (Park).
Enabling Automatic Recalls
.Seat Entry Memory moves the driver seat
to the selected 1 or 2 position when the
vehicle is started. Select Settings > Vehicle
> Seating Position > Seat Entry Memory >
ON or OFF. See “Auto Seat Entry Memory
Recall” later in this section.
Page 44 of 369
Chevrolet Traverse Owner Manual (GMNA-Localizing-U.S./Canada/Mexico-
16411537) - 2023 - CRC - 3/28/22
Seats and Restraints 43
Remote Start Heated and Ventilated Seats
During a remote start, the heated or
ventilated seats, if equipped, can be turned
on automatically. When it is cold outside,
the heated seats will turn on followed by
the heated steering wheel, if equipped.
When it is hot outside, the ventilated seats
turn on. The remote start heated or
ventilated seats may be canceled when the
vehicle is turned on. Press the heated or
ventilated seat button to use the heated or
ventilated seats after the vehicle is started.
The heated or ventilated seat indicator lights
may not turn on during a remote start.
The temperature performance of an
unoccupied seat may be reduced. This is
normal.
To enable or disable remote start heated or
ventilated seats, select Settings > Vehicle >
Remote Lock, Unlock, and Start > Remote
Start Auto Heat Seats or Remote Start Auto
Cool Seats > ON or OFF. SeeRemote Vehicle
Start 014.Rear Seats
Rear Seat Reminder
If equipped, the message REAR SEAT
REMINDER LOOK IN REAR SEAT displays
under certain conditions indicating there
may be an item or passenger in the rear
seat. Check before exiting the vehicle.
This feature will activate when a second row
door is opened while the vehicle is on or up
to 10 minutes before the vehicle is turned
on. There will be an alert when the vehicle
is turned off. The alert does not directly
detect objects in the rear seat; instead,
under certain conditions, it detects when a
rear door is opened and closed, indicating
that there may be something in the
rear seat.
The feature is active only once each time
the vehicle is turned on and off, and will
require reactivation by opening and closing
the second row doors. There may be an
alert even when there is nothing in the rear
seat; for example, if a child entered the
vehicle through the rear door and left the
vehicle without the vehicle being shut off.
The feature can be turned on or off. Select
Settings > Rear Seat Reminder > ON or OFF.
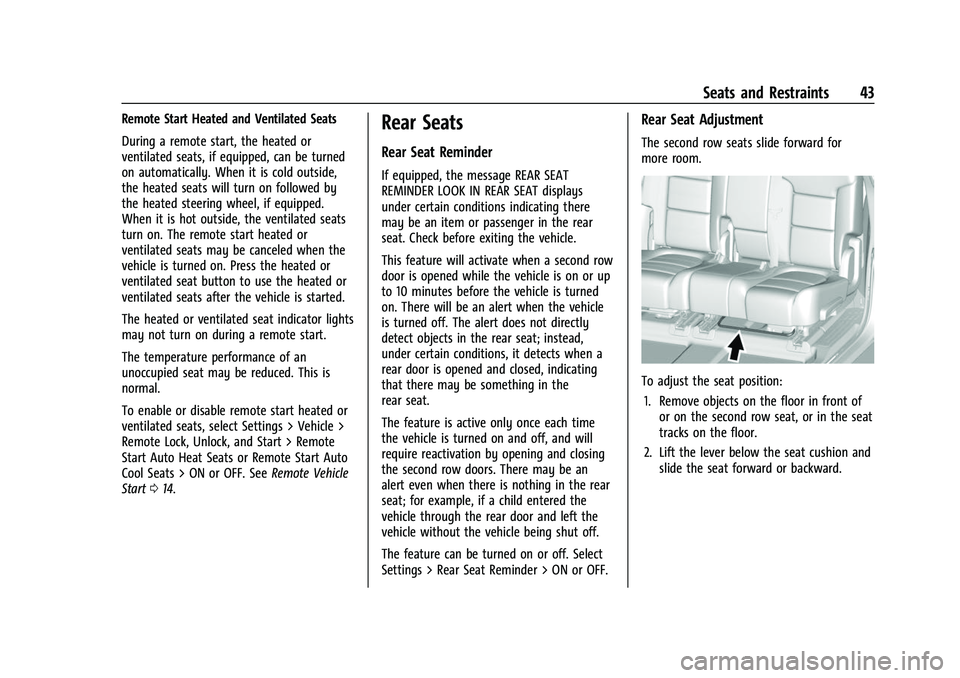
Rear Seat Adjustment
The second row seats slide forward for
more room.
To adjust the seat position:
1. Remove objects on the floor in front of or on the second row seat, or in the seat
tracks on the floor.
2. Lift the lever below the seat cushion and slide the seat forward or backward.
Page 91 of 369
Chevrolet Traverse Owner Manual (GMNA-Localizing-U.S./Canada/Mexico-
16411537) - 2023 - CRC - 3/28/22
90 Instruments and Controls
Controls
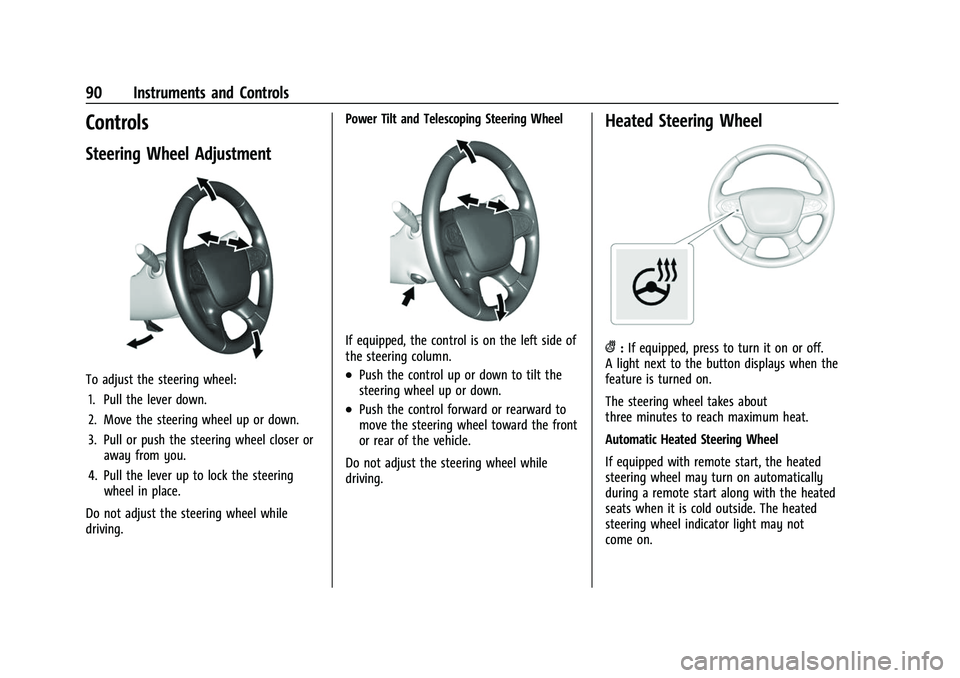
Steering Wheel Adjustment
To adjust the steering wheel:1. Pull the lever down.
2. Move the steering wheel up or down.
3. Pull or push the steering wheel closer or away from you.
4. Pull the lever up to lock the steering wheel in place.
Do not adjust the steering wheel while
driving. Power Tilt and Telescoping Steering Wheel
If equipped, the control is on the left side of
the steering column.
.Push the control up or down to tilt the
steering wheel up or down.
.Push the control forward or rearward to
move the steering wheel toward the front
or rear of the vehicle.
Do not adjust the steering wheel while
driving.
Heated Steering Wheel
(: If equipped, press to turn it on or off.
A light next to the button displays when the
feature is turned on.
The steering wheel takes about
three minutes to reach maximum heat.
Automatic Heated Steering Wheel
If equipped with remote start, the heated
steering wheel may turn on automatically
during a remote start along with the heated
seats when it is cold outside. The heated
steering wheel indicator light may not
come on.