brake light CHEVROLET TRAVERSE 2023 Owner's Manual
[x] Cancel search | Manufacturer: CHEVROLET, Model Year: 2023, Model line: TRAVERSE, Model: CHEVROLET TRAVERSE 2023Pages: 369, PDF Size: 16.89 MB
Page 223 of 369
Chevrolet Traverse Owner Manual (GMNA-Localizing-U.S./Canada/Mexico-
16411537) - 2023 - CRC - 3/28/22
222 Driving and Operating
Press[on the steering wheel to adjust
the following gap. Each press cycles the gap
button through three settings: Far, Medium,
or Near.
When pressed, the current gap setting
displays briefly on the instrument cluster.
The gap setting will be maintained until it is
changed.
Since each gap setting corresponds to a
following time (Far, Medium, or Near), the
following distance will vary based on vehicle
speed. The faster the vehicle speed, the
further back your vehicle will follow a
vehicle detected ahead. Consider traffic and
weather conditions when selecting the
following gap. The range of selectable gaps
may not be appropriate for all drivers and
driving conditions.
Changing the gap setting automatically
changes the alert timing sensitivity (Far,
Medium, or Near) for the Forward Collision
Alert (FCA) feature. See Forward Collision
Alert (FCA) System 0233. Alerting the Driver
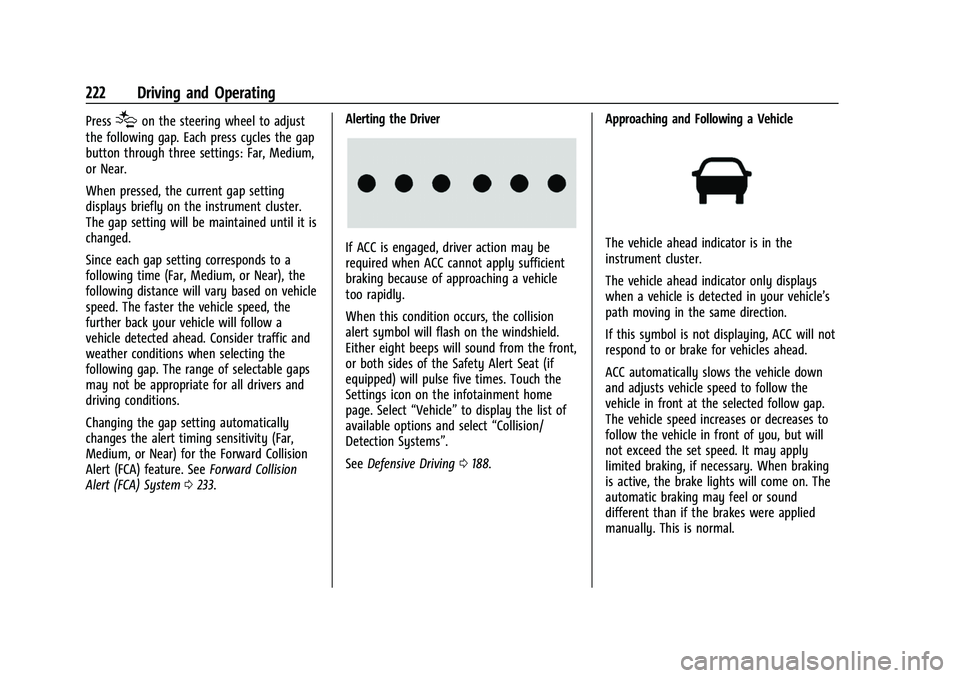
If ACC is engaged, driver action may be
required when ACC cannot apply sufficient
braking because of approaching a vehicle
too rapidly.
When this condition occurs, the collision
alert symbol will flash on the windshield.
Either eight beeps will sound from the front,
or both sides of the Safety Alert Seat (if
equipped) will pulse five times. Touch the
Settings icon on the infotainment home
page. Select
“Vehicle”to display the list of
available options and select “Collision/
Detection Systems”.
See Defensive Driving 0188. Approaching and Following a VehicleThe vehicle ahead indicator is in the
instrument cluster.
The vehicle ahead indicator only displays
when a vehicle is detected in your vehicle’s
path moving in the same direction.
If this symbol is not displaying, ACC will not
respond to or brake for vehicles ahead.
ACC automatically slows the vehicle down
and adjusts vehicle speed to follow the
vehicle in front at the selected follow gap.
The vehicle speed increases or decreases to
follow the vehicle in front of you, but will
not exceed the set speed. It may apply
limited braking, if necessary. When braking
is active, the brake lights will come on. The
automatic braking may feel or sound
different than if the brakes were applied
manually. This is normal.
Page 225 of 369
Chevrolet Traverse Owner Manual (GMNA-Localizing-U.S./Canada/Mexico-
16411537) - 2023 - CRC - 3/28/22
224 Driving and Operating
available options and select”Alert Type”and
“Adaptive Cruise Go Notifier” in“Collision/
Detection Systems”.
When the vehicle ahead drives away, ACC
resumes automatically if the stop was brief.
If necessary, press RES+ or the accelerator
pedal to resume ACC. If stopped for more
than two minutes or if the driver door is
opened and the driver seat belt is
unbuckled, the ACC automatically applies the
Electric Parking Brake (EPB) to hold the
vehicle. The EPB status light will turn on.
See Electric Parking Brake 0210. To release
the EPB, press the accelerator pedal.
A DIC warning message may display
indicating to shift to P (Park) before exiting
the vehicle. See Vehicle Messages 0121.
{Warning
If ACC has stopped the vehicle, and if ACC
is disengaged, turned off, or canceled, the
vehicle will no longer be held at a stop.
The vehicle can move. When ACC is
holding the vehicle at a stop, always be
prepared to manually apply the brakes.
{Warning
Leaving the vehicle without placing it in
P (Park) can be dangerous. Do not leave
the vehicle while it is being held at a
stop by ACC. Always place the vehicle in
P (Park) and turn off the ignition before
leaving the vehicle.
ACC Override
If using the accelerator pedal while ACC is
active, the ACC indicator turns blue on the
instrument cluster. ACC will resume
operation when the accelerator pedal is not
being pressed.
{Warning
The ACC will not automatically apply the
brakes if your foot is resting on the
accelerator pedal. You could crash into a
vehicle ahead of you. Curves in the Road
{Warning
On curves, ACC may not detect a vehicle
ahead in your lane. You could be startled
if the vehicle accelerates up to the set
speed, especially when following a vehicle
exiting or entering exit ramps. You could
lose control of the vehicle or crash. Do
not use ACC while driving on an entrance
or exit ramp. Always be ready to use the
brakes if necessary.
{Warning
On curves, ACC may respond to a vehicle
in another lane, or may not have time to
react to a vehicle in your lane. You could
crash into a vehicle ahead of you, or lose
control of your vehicle. Give extra
attention in curves and be ready to use
the brakes if necessary. Select an
appropriate speed while driving in curves.
ACC may operate differently in a sharp
curve. It may reduce the vehicle speed if the
curve is too sharp.
Page 226 of 369
Chevrolet Traverse Owner Manual (GMNA-Localizing-U.S./Canada/Mexico-
16411537) - 2023 - CRC - 3/28/22
Driving and Operating 225
ACC automatically slows the vehicle down
while navigating the curve and may increase
speed out of the curve, but will not exceed
the set speed.
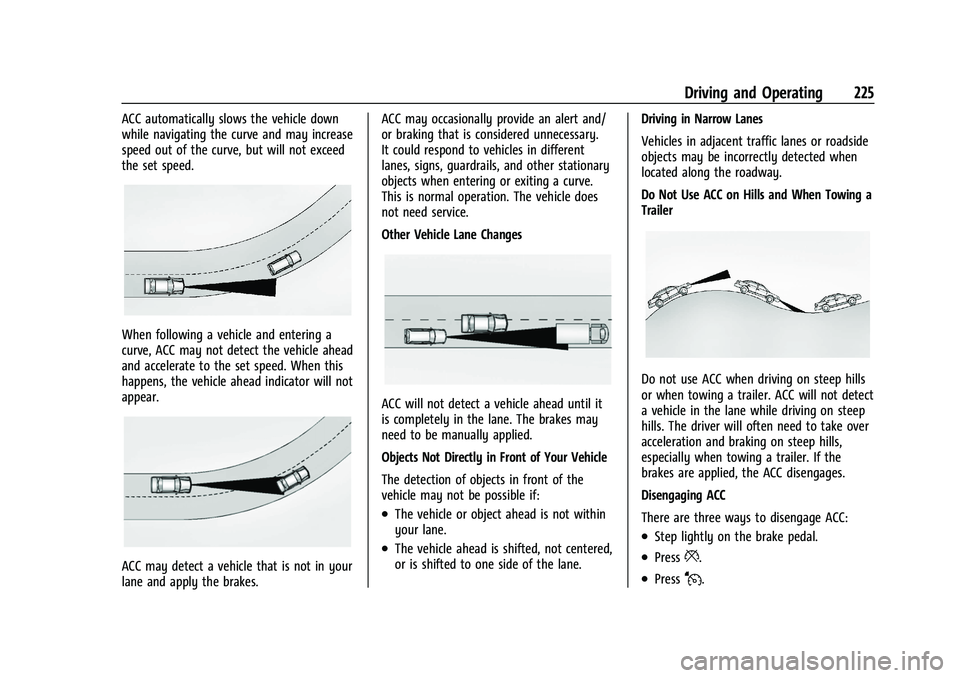
When following a vehicle and entering a
curve, ACC may not detect the vehicle ahead
and accelerate to the set speed. When this
happens, the vehicle ahead indicator will not
appear.
ACC may detect a vehicle that is not in your
lane and apply the brakes.ACC may occasionally provide an alert and/
or braking that is considered unnecessary.
It could respond to vehicles in different
lanes, signs, guardrails, and other stationary
objects when entering or exiting a curve.
This is normal operation. The vehicle does
not need service.
Other Vehicle Lane Changes
ACC will not detect a vehicle ahead until it
is completely in the lane. The brakes may
need to be manually applied.
Objects Not Directly in Front of Your Vehicle
The detection of objects in front of the
vehicle may not be possible if:
.The vehicle or object ahead is not within
your lane.
.The vehicle ahead is shifted, not centered,
or is shifted to one side of the lane.
Driving in Narrow Lanes
Vehicles in adjacent traffic lanes or roadside
objects may be incorrectly detected when
located along the roadway.
Do Not Use ACC on Hills and When Towing a
Trailer
Do not use ACC when driving on steep hills
or when towing a trailer. ACC will not detect
a vehicle in the lane while driving on steep
hills. The driver will often need to take over
acceleration and braking on steep hills,
especially when towing a trailer. If the
brakes are applied, the ACC disengages.
Disengaging ACC
There are three ways to disengage ACC:
.Step lightly on the brake pedal.
.Press*.
.PressJ.
Page 234 of 369
Chevrolet Traverse Owner Manual (GMNA-Localizing-U.S./Canada/Mexico-
16411537) - 2023 - CRC - 3/28/22
Driving and Operating 233
Warning (Continued)
action and apply the brakes. See
Defensive Driving0188. Keep the RVC,
taillamps, and back-up lamps clean and in
good repair.
Rear Pedestrian Alert can be set to Off or
Alert. To view available settings from the
infotainment screen, touch Settings >
Vehicle > Collision/Detection Systems > Rear
Pedestrian Detection.
If equipped, alerts can be set to beeps or
seat pulses. To view available settings from
the infotainment screen, touch Settings >
Vehicle > Collision/Detection Systems >
Alert Type.
Rear Cross Traffic Alert (RCTA)
System
If equipped, Rear Cross Traffic Alert (RCTA)
displays a red warning triangle with a left
or right pointing arrow on the infotainment
display to warn of traffic coming from the
left or right. This system detects objects
coming from up to 20 m (65 ft) from the left
or right side of the vehicle. When an object
is detected, either three beeps sound from
the left or right or three Safety Alert Seat pulses occur on the left or right side,
depending on the direction of the detected
vehicle.
Driving With a Trailer
Use caution while backing up when towing
a trailer. The RCTA feature is automatically
disabled when a trailer is attached to the
vehicle.
Turning the Features On or Off
The
Xbutton on the center console is
used to turn on or off Rear Park Assist (RPA)
and RCTA at the same time. The indicator
light in the button comes on when the
features are on and turns off when the
features have been disabled.
RCTA can be turned on or off using the
infotainment system. To view available
settings for this feature, touch the Settings
icon on the infotainment home page. Select
“Vehicle” to display the list of available
options and select “Collision/Detection
Systems”.
Assistance Systems for Driving
If equipped, when driving the vehicle in a
forward gear, Forward Collision Alert (FCA),
Lane Departure Warning (LDW), Lane Keep
Assist (LKA), Side Blind Zone Alert (SBZA), Lane Change Alert (LCA), Automatic
Emergency Braking (AEB), and/or the Front
Pedestrian Braking (FPB) System can help to
avoid a crash or reduce crash damage.
Forward Collision Alert (FCA)
System
If equipped, the FCA system may help to
avoid or reduce the harm caused by
front-end crashes. When approaching a
vehicle ahead too quickly, FCA provides a
red flashing alert on the windshield and
rapidly beeps or pulses the driver seat. FCA
also lights an amber visual alert if following
another vehicle much too closely.
FCA detects vehicles within a distance of
approximately 60 m (197 ft) and operates at
speeds above 8 km/h (5 mph).
If the vehicle has Adaptive Cruise Control
(ACC), it can detect vehicles to distances of
approximately 100 m (360 ft) and operates
at all speeds. See
Adaptive Cruise Control
(Advanced) 0218.
Page 239 of 369
Chevrolet Traverse Owner Manual (GMNA-Localizing-U.S./Canada/Mexico-
16411537) - 2023 - CRC - 3/28/22
238 Driving and Operating
Front Pedestrian Alert
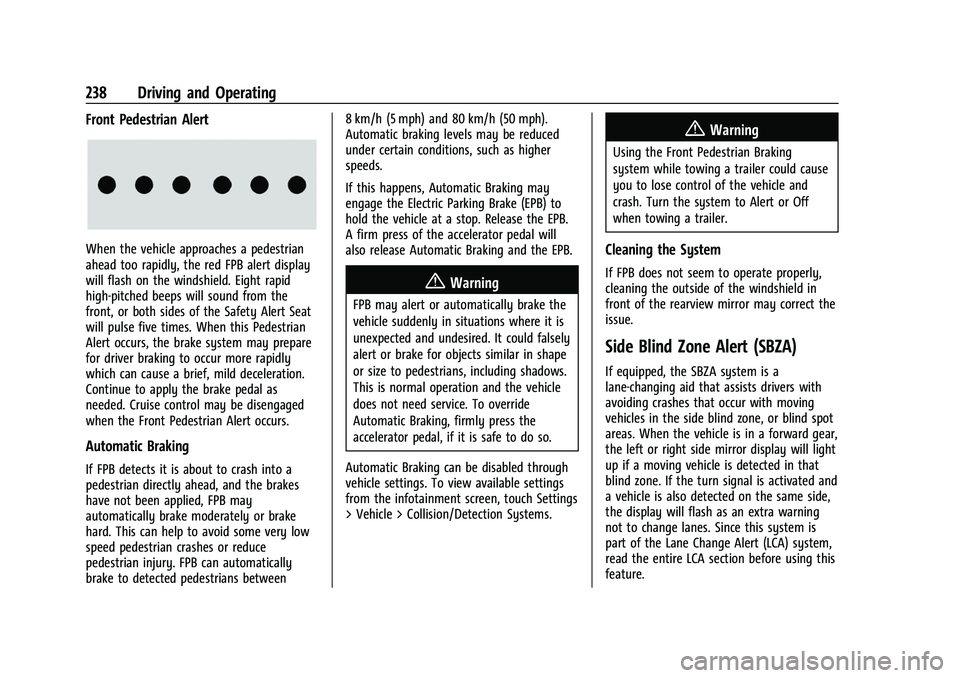
When the vehicle approaches a pedestrian
ahead too rapidly, the red FPB alert display
will flash on the windshield. Eight rapid
high-pitched beeps will sound from the
front, or both sides of the Safety Alert Seat
will pulse five times. When this Pedestrian
Alert occurs, the brake system may prepare
for driver braking to occur more rapidly
which can cause a brief, mild deceleration.
Continue to apply the brake pedal as
needed. Cruise control may be disengaged
when the Front Pedestrian Alert occurs.
Automatic Braking
If FPB detects it is about to crash into a
pedestrian directly ahead, and the brakes
have not been applied, FPB may
automatically brake moderately or brake
hard. This can help to avoid some very low
speed pedestrian crashes or reduce
pedestrian injury. FPB can automatically
brake to detected pedestrians between8 km/h (5 mph) and 80 km/h (50 mph).
Automatic braking levels may be reduced
under certain conditions, such as higher
speeds.
If this happens, Automatic Braking may
engage the Electric Parking Brake (EPB) to
hold the vehicle at a stop. Release the EPB.
A firm press of the accelerator pedal will
also release Automatic Braking and the EPB.
{Warning
FPB may alert or automatically brake the
vehicle suddenly in situations where it is
unexpected and undesired. It could falsely
alert or brake for objects similar in shape
or size to pedestrians, including shadows.
This is normal operation and the vehicle
does not need service. To override
Automatic Braking, firmly press the
accelerator pedal, if it is safe to do so.
Automatic Braking can be disabled through
vehicle settings. To view available settings
from the infotainment screen, touch Settings
> Vehicle > Collision/Detection Systems.
{Warning
Using the Front Pedestrian Braking
system while towing a trailer could cause
you to lose control of the vehicle and
crash. Turn the system to Alert or Off
when towing a trailer.
Cleaning the System
If FPB does not seem to operate properly,
cleaning the outside of the windshield in
front of the rearview mirror may correct the
issue.
Side Blind Zone Alert (SBZA)
If equipped, the SBZA system is a
lane-changing aid that assists drivers with
avoiding crashes that occur with moving
vehicles in the side blind zone, or blind spot
areas. When the vehicle is in a forward gear,
the left or right side mirror display will light
up if a moving vehicle is detected in that
blind zone. If the turn signal is activated and
a vehicle is also detected on the same side,
the display will flash as an extra warning
not to change lanes. Since this system is
part of the Lane Change Alert (LCA) system,
read the entire LCA section before using this
feature.
Page 256 of 369
Chevrolet Traverse Owner Manual (GMNA-Localizing-U.S./Canada/Mexico-
16411537) - 2023 - CRC - 3/28/22
Driving and Operating 255
controller. The wire colors on the brake
controller may be different from the vehicle.
The electric trailer brake controller should be
installed by your dealer or a qualified
service center.
If equipped, there are four blunt cut wires
inside the front driver side instrument panel.
It will be necessary to have a technician
connect the 12-volt power to the engine
compartment fuse block.
Trailer Lamps
Always check all trailer lamps are working at
the beginning of each trip, and periodically
on longer trips.
Turn Signals When Towing a Trailer
When properly connected, the trailer turn
signals will illuminate to indicate the vehicle
is turning, changing lanes, or stopping.
When towing a trailer, the arrows on the
instrument cluster will illuminate even if the
trailer is not properly connected or the bulbs
are burned out.
Tow/Haul Mode
For instructions on how to enter Tow/Haul
mode, seeDriver Mode Control 0214. Tow/Haul assists when pulling a heavy
trailer or a large or heavy load.
Tow/Haul Mode is designed to be most
effective when the vehicle and trailer
combined weight is at least 75% of the
vehicle's Gross Combined Weight Rating
(GCWR). See
“Weight of the Trailer” under
Trailer Towing 0248.
Tow/Haul Mode is most useful when pulling
a heavy trailer or a large or heavy load:
.through rolling terrain
.in stop-and-go traffic
.in busy parking lots
Operating the vehicle in Tow/Haul Mode
when lightly loaded or not towing will not
cause damage; however, it is not
recommended and may result in unpleasant
engine and transmission driving
characteristics and reduced fuel economy.
Trailer Sway Control (TSC)
Vehicles with StabiliTrak/Electronic Stability
Control (ESC) have a Trailer Sway Control
(TSC) feature. Trailer sway is unintended
side-to-side motion of a trailer while towing.
If the vehicle is towing a trailer and the TSC
detects that sway is increasing, the vehicle
brakes are selectively applied at each wheel, to help reduce excessive trailer sway.
If equipped with the Integrated Trailer Brake
Control (ITBC) system, and the trailer has an
electric brake system, StabiliTrak/ESC may
also apply the trailer brakes.
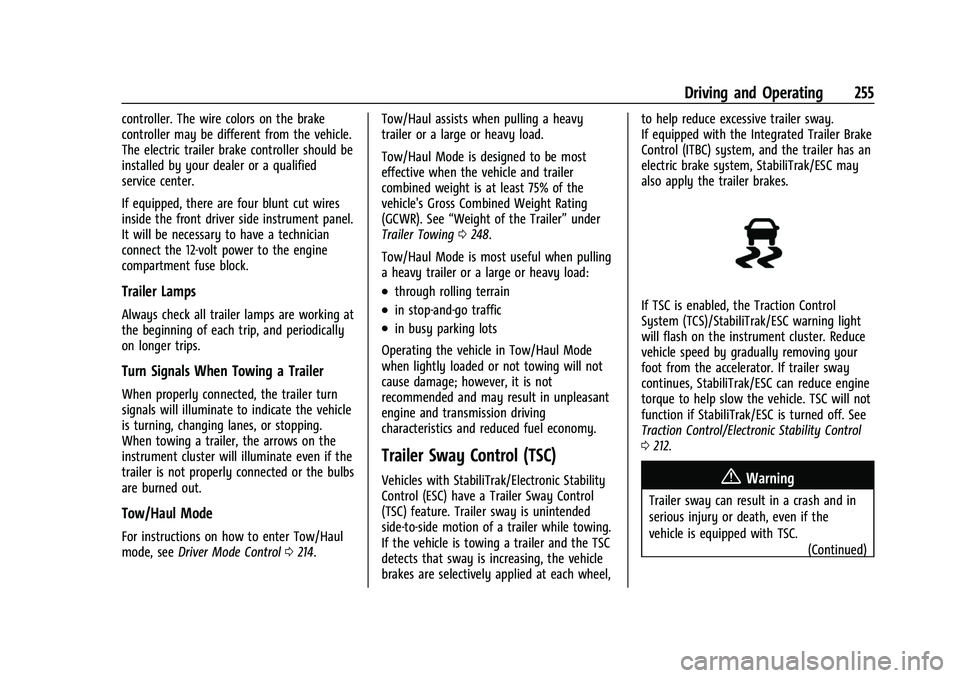
If TSC is enabled, the Traction Control
System (TCS)/StabiliTrak/ESC warning light
will flash on the instrument cluster. Reduce
vehicle speed by gradually removing your
foot from the accelerator. If trailer sway
continues, StabiliTrak/ESC can reduce engine
torque to help slow the vehicle. TSC will not
function if StabiliTrak/ESC is turned off. See
Traction Control/Electronic Stability Control
0
212.
{Warning
Trailer sway can result in a crash and in
serious injury or death, even if the
vehicle is equipped with TSC.
(Continued)
Page 258 of 369
Chevrolet Traverse Owner Manual (GMNA-Localizing-U.S./Canada/Mexico-
16411537) - 2023 - CRC - 3/28/22
Vehicle Care 257
Vehicle Care
General Information
General Information . . . . . . . . . . . . . . . . . . . 258
California Perchlorate MaterialsRequirements . . . . . . . . . . . . . . . . . . . . . . . . 258
Accessories and Modifications . . . . . . . . . 258
Vehicle Checks
Doing Your Own Service Work . . . . . . . . 258
Hood . . . . . . . . . . . . . . . . . . . . . . . . . . . . . . . . . . 259
Engine Compartment Overview . . . . . . . 260
Engine Oil . . . . . . . . . . . . . . . . . . . . . . . . . . . . . 261
Engine Oil Life System . . . . . . . . . . . . . . . . 263
Automatic Transmission Fluid . . . . . . . . . 264
Engine Air Filter Life System . . . . . . . . . . 264
Engine Air Cleaner/Filter . . . . . . . . . . . . . . 264
Cooling System . . . . . . . . . . . . . . . . . . . . . . . 265
Engine Overheating . . . . . . . . . . . . . . . . . . . 268
Washer Fluid . . . . . . . . . . . . . . . . . . . . . . . . . . 269
Brakes . . . . . . . . . . . . . . . . . . . . . . . . . . . . . . . . . 270
Brake Fluid . . . . . . . . . . . . . . . . . . . . . . . . . . . . 270
Battery - North America . . . . . . . . . . . . . . . 271
All-Wheel Drive . . . . . . . . . . . . . . . . . . . . . . . . 272
Park Brake and P (Park) Mechanism Check . . . . . . . . . . . . . . . . . . . . . . . . . . . . . . . . 272
Wiper Blade Replacement . . . . . . . . . . . . . 273
Windshield Replacement . . . . . . . . . . . . . . 274
Gas Strut(s) . . . . . . . . . . . . . . . . . . . . . . . . . . . 274
Headlamp Aiming
Front Headlamp Aiming . . . . . . . . . . . . . . . 275
Bulb Replacement
Bulb Replacement . . . . . . . . . . . . . . . . . . . . . 275
LED Lighting . . . . . . . . . . . . . . . . . . . . . . . . . . . 275
Headlamps, Front Turn Signal, and Sidemarker . . . . . . . . . . . . . . . . . . . . . . . . . . 275
License Plate Lamp . . . . . . . . . . . . . . . . . . . . 276
Electrical System
High Voltage Devices and Wiring . . . . . . 276
Electrical System Overload . . . . . . . . . . . . . 277
Fuses and Circuit Breakers . . . . . . . . . . . . . 278
Engine Compartment Fuse Block . . . . . . 279
Instrument Panel Fuse Block . . . . . . . . . . . 282
Rear Compartment Fuse Block . . . . . . . . . 284
Wheels and Tires
Tires . . . . . . . . . . . . . . . . . . . . . . . . . . . . . . . . . . 286
All-Season Tires . . . . . . . . . . . . . . . . . . . . . . . 286
Winter Tires . . . . . . . . . . . . . . . . . . . . . . . . . . . 287
Tire Sidewall Labeling . . . . . . . . . . . . . . . . . 287
Tire Designations . . . . . . . . . . . . . . . . . . . . . . 289
Tire Terminology and Definitions . . . . . . 289
Tire Pressure . . . . . . . . . . . . . . . . . . . . . . . . . . 291
Tire Pressure for High-Speed Operation . . . . . . . . . . . . . . . . . . . . . . . . . . . 293
Tire Pressure Monitor System . . . . . . . . . 294
Tire Pressure Monitor Operation . . . . . . 295
Tire Inspection . . . . . . . . . . . . . . . . . . . . . . . . 298 Tire Rotation . . . . . . . . . . . . . . . . . . . . . . . . . . 298
When It Is Time for New Tires . . . . . . . . 299
Buying New Tires . . . . . . . . . . . . . . . . . . . . . 300
Different Size Tires and Wheels . . . . . . . 301
Uniform Tire Quality Grading . . . . . . . . . . 301
Wheel Alignment and Tire Balance . . . . 302
Wheel Replacement . . . . . . . . . . . . . . . . . . . 302
Tire Chains . . . . . . . . . . . . . . . . . . . . . . . . . . . . 303
If a Tire Goes Flat . . . . . . . . . . . . . . . . . . . . . 304
Tire Changing . . . . . . . . . . . . . . . . . . . . . . . . . 305
Compact Spare Tire . . . . . . . . . . . . . . . . . . . . 310
Jump Starting
Jump Starting - North America . . . . . . . . . 311
Towing the Vehicle
Transporting a Disabled Vehicle . . . . . . . . 313
Recreational Vehicle Towing . . . . . . . . . . . 315
Appearance Care
Exterior Care . . . . . . . . . . . . . . . . . . . . . . . . . . . 317
Interior Care . . . . . . . . . . . . . . . . . . . . . . . . . . . 321
Floor Mats . . . . . . . . . . . . . . . . . . . . . . . . . . . . 324
Page 272 of 369
Chevrolet Traverse Owner Manual (GMNA-Localizing-U.S./Canada/Mexico-
16411537) - 2023 - CRC - 3/28/22
Vehicle Care 271
The brake master cylinder reservoir is filled
with GM approved DOT 4 brake fluid as
indicated on the reservoir cap. SeeEngine
Compartment Overview 0260 for the
location of the reservoir.
Checking Brake Fluid
With the vehicle in P (Park) on a level
surface, the brake fluid level should be
between the minimum and maximum marks
on the brake fluid reservoir.
There are only two reasons why the brake
fluid level in the reservoir may go down:
.Normal brake lining wear. When new
linings are installed, the fluid level goes
back up.
.A fluid leak in the brake hydraulic system.
Have the brake hydraulic system fixed.
With a leak, the brakes will not
work well.
Always clean the brake fluid reservoir cap
and the area around the cap before
removing it.
Do not top off the brake fluid. Adding fluid
does not correct a leak. If fluid is added
when the linings are worn, there will be too
much fluid when new brake linings are installed. Add or remove fluid, as necessary,
only when work is done on the brake
hydraulic system.
{Warning
If too much brake fluid is added, it can
spill on the engine and burn, if the
engine is hot enough. You or others could
be burned, and the vehicle could be
damaged. Add brake fluid only when
work is done on the brake hydraulic
system.
When the brake fluid falls to a low level,
the brake warning light comes on. See Brake
System Warning Light 0110.
Brake fluid absorbs water over time which
degrades the effectiveness of the brake fluid.
Replace brake fluid at the specified intervals
to prevent increased stopping distance. See
Maintenance Schedule 0327.
What to Add
Use only GM approved DOT 4 brake fluid
from a clean, sealed container. See
Recommended Fluids and Lubricants 0331.
{Warning
The wrong or contaminated brake fluid
could result in damage to the brake
system. This could result in the loss of
braking leading to a possible injury.
Always use the proper GM approved
brake fluid.
Caution
If brake fluid is spilled on the vehicle's
painted surfaces, the paint finish can be
damaged. Immediately wash off any
painted surface.
Battery - North America
The original equipment battery is
maintenance free. Do not remove the cap
and do not add fluid.
Refer to the replacement number on the
original battery label when a new battery is
needed. For replacement of the battery, see
your dealer.
The vehicle has an Absorbent Glass Mat
(AGM) 12-volt battery. Installation of a
standard 12-volt battery will result in
reduced 12-volt battery life.
Page 282 of 369
Chevrolet Traverse Owner Manual (GMNA-Localizing-U.S./Canada/Mexico-
16411537) - 2023 - CRC - 3/28/22
Vehicle Care 281
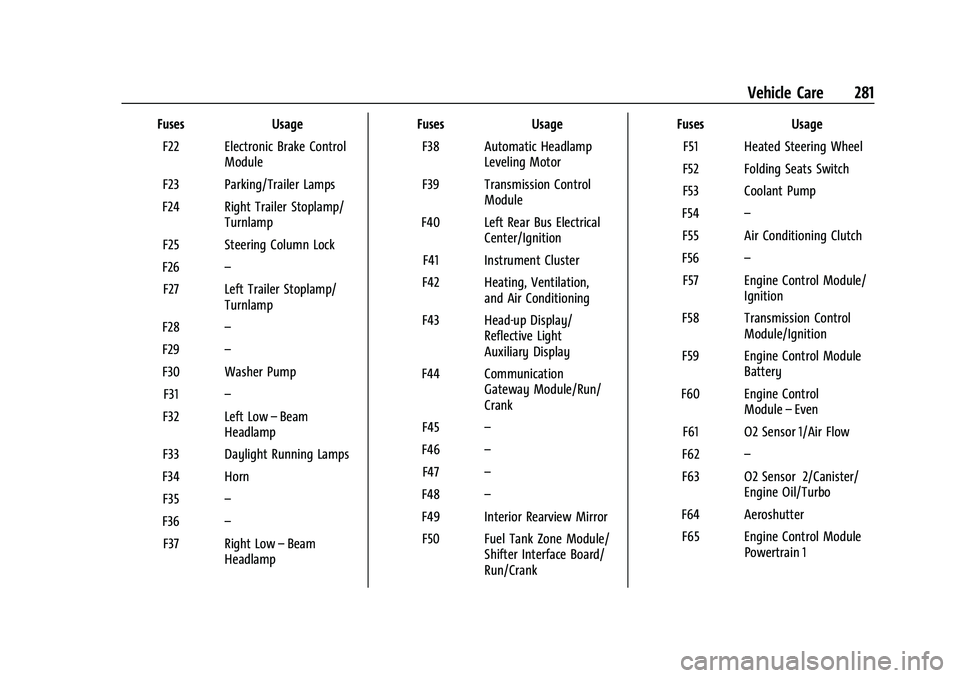
FusesUsage
F22 Electronic Brake Control Module
F23 Parking/Trailer Lamps
F24 Right Trailer Stoplamp/ Turnlamp
F25 Steering Column Lock
F26 –
F27 Left Trailer Stoplamp/ Turnlamp
F28 –
F29 –
F30 Washer Pump F31 –
F32 Left Low –Beam
Headlamp
F33 Daylight Running Lamps
F34 Horn F35 –
F36 –
F37 Right Low –Beam
Headlamp Fuses
Usage
F38 Automatic Headlamp Leveling Motor
F39 Transmission Control Module
F40 Left Rear Bus Electrical Center/Ignition
F41 Instrument Cluster
F42 Heating, Ventilation, and Air Conditioning
F43 Head-up Display/ Reflective Light
Auxiliary Display
F44 Communication Gateway Module/Run/
Crank
F45 –
F46 –
F47 –
F48 –
F49 Interior Rearview Mirror F50 Fuel Tank Zone Module/ Shifter Interface Board/
Run/Crank Fuses
Usage
F51 Heated Steering Wheel
F52 Folding Seats Switch
F53 Coolant Pump
F54 –
F55 Air Conditioning Clutch
F56 –
F57 Engine Control Module/ Ignition
F58 Transmission Control Module/Ignition
F59 Engine Control Module Battery
F60 Engine Control Module–Even
F61 O2 Sensor 1/Air Flow
F62 –
F63 O2 Sensor 2/Canister/ Engine Oil/Turbo
F64 Aeroshutter F65 Engine Control Module Powertrain 1
Page 297 of 369
Chevrolet Traverse Owner Manual (GMNA-Localizing-U.S./Canada/Mexico-
16411537) - 2023 - CRC - 3/28/22
296 Vehicle Care
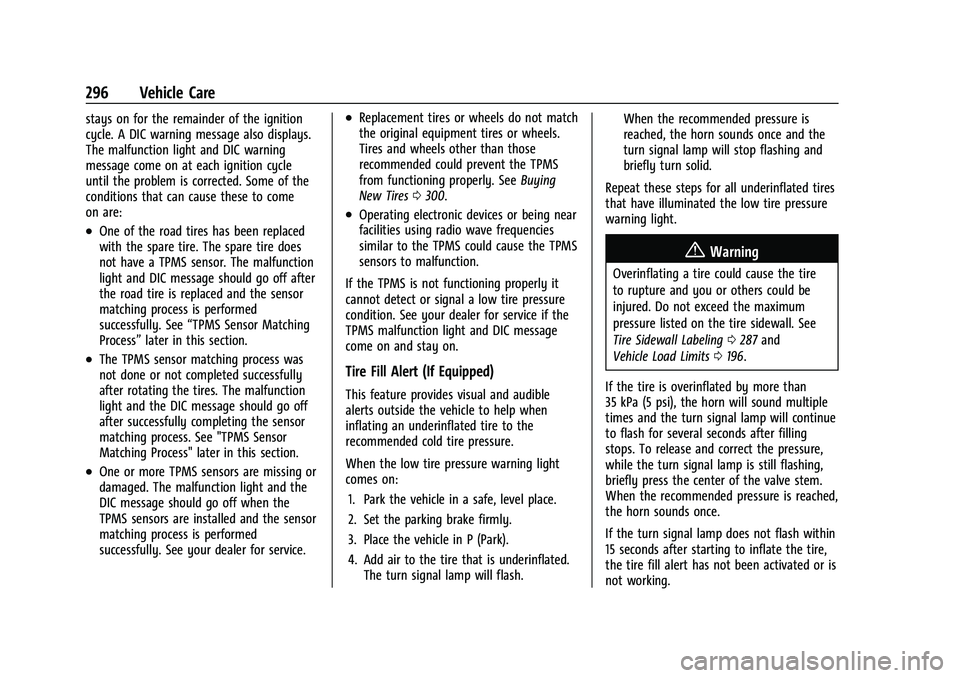
stays on for the remainder of the ignition
cycle. A DIC warning message also displays.
The malfunction light and DIC warning
message come on at each ignition cycle
until the problem is corrected. Some of the
conditions that can cause these to come
on are:
.One of the road tires has been replaced
with the spare tire. The spare tire does
not have a TPMS sensor. The malfunction
light and DIC message should go off after
the road tire is replaced and the sensor
matching process is performed
successfully. See“TPMS Sensor Matching
Process” later in this section.
.The TPMS sensor matching process was
not done or not completed successfully
after rotating the tires. The malfunction
light and the DIC message should go off
after successfully completing the sensor
matching process. See "TPMS Sensor
Matching Process" later in this section.
.One or more TPMS sensors are missing or
damaged. The malfunction light and the
DIC message should go off when the
TPMS sensors are installed and the sensor
matching process is performed
successfully. See your dealer for service.
.Replacement tires or wheels do not match
the original equipment tires or wheels.
Tires and wheels other than those
recommended could prevent the TPMS
from functioning properly. See Buying
New Tires 0300.
.Operating electronic devices or being near
facilities using radio wave frequencies
similar to the TPMS could cause the TPMS
sensors to malfunction.
If the TPMS is not functioning properly it
cannot detect or signal a low tire pressure
condition. See your dealer for service if the
TPMS malfunction light and DIC message
come on and stay on.
Tire Fill Alert (If Equipped)
This feature provides visual and audible
alerts outside the vehicle to help when
inflating an underinflated tire to the
recommended cold tire pressure.
When the low tire pressure warning light
comes on: 1. Park the vehicle in a safe, level place.
2. Set the parking brake firmly.
3. Place the vehicle in P (Park).
4. Add air to the tire that is underinflated. The turn signal lamp will flash. When the recommended pressure is
reached, the horn sounds once and the
turn signal lamp will stop flashing and
briefly turn solid.
Repeat these steps for all underinflated tires
that have illuminated the low tire pressure
warning light.
{Warning
Overinflating a tire could cause the tire
to rupture and you or others could be
injured. Do not exceed the maximum
pressure listed on the tire sidewall. See
Tire Sidewall Labeling 0287 and
Vehicle Load Limits 0196.
If the tire is overinflated by more than
35 kPa (5 psi), the horn will sound multiple
times and the turn signal lamp will continue
to flash for several seconds after filling
stops. To release and correct the pressure,
while the turn signal lamp is still flashing,
briefly press the center of the valve stem.
When the recommended pressure is reached,
the horn sounds once.
If the turn signal lamp does not flash within
15 seconds after starting to inflate the tire,
the tire fill alert has not been activated or is
not working.