manual transmission CHEVROLET TRAVERSE 2023 Owner's Guide
[x] Cancel search | Manufacturer: CHEVROLET, Model Year: 2023, Model line: TRAVERSE, Model: CHEVROLET TRAVERSE 2023Pages: 369, PDF Size: 16.89 MB
Page 256 of 369
Chevrolet Traverse Owner Manual (GMNA-Localizing-U.S./Canada/Mexico-
16411537) - 2023 - CRC - 3/28/22
Driving and Operating 255
controller. The wire colors on the brake
controller may be different from the vehicle.
The electric trailer brake controller should be
installed by your dealer or a qualified
service center.
If equipped, there are four blunt cut wires
inside the front driver side instrument panel.
It will be necessary to have a technician
connect the 12-volt power to the engine
compartment fuse block.
Trailer Lamps
Always check all trailer lamps are working at
the beginning of each trip, and periodically
on longer trips.
Turn Signals When Towing a Trailer
When properly connected, the trailer turn
signals will illuminate to indicate the vehicle
is turning, changing lanes, or stopping.
When towing a trailer, the arrows on the
instrument cluster will illuminate even if the
trailer is not properly connected or the bulbs
are burned out.
Tow/Haul Mode
For instructions on how to enter Tow/Haul
mode, seeDriver Mode Control 0214. Tow/Haul assists when pulling a heavy
trailer or a large or heavy load.
Tow/Haul Mode is designed to be most
effective when the vehicle and trailer
combined weight is at least 75% of the
vehicle's Gross Combined Weight Rating
(GCWR). See
“Weight of the Trailer” under
Trailer Towing 0248.
Tow/Haul Mode is most useful when pulling
a heavy trailer or a large or heavy load:
.through rolling terrain
.in stop-and-go traffic
.in busy parking lots
Operating the vehicle in Tow/Haul Mode
when lightly loaded or not towing will not
cause damage; however, it is not
recommended and may result in unpleasant
engine and transmission driving
characteristics and reduced fuel economy.
Trailer Sway Control (TSC)
Vehicles with StabiliTrak/Electronic Stability
Control (ESC) have a Trailer Sway Control
(TSC) feature. Trailer sway is unintended
side-to-side motion of a trailer while towing.
If the vehicle is towing a trailer and the TSC
detects that sway is increasing, the vehicle
brakes are selectively applied at each wheel, to help reduce excessive trailer sway.
If equipped with the Integrated Trailer Brake
Control (ITBC) system, and the trailer has an
electric brake system, StabiliTrak/ESC may
also apply the trailer brakes.
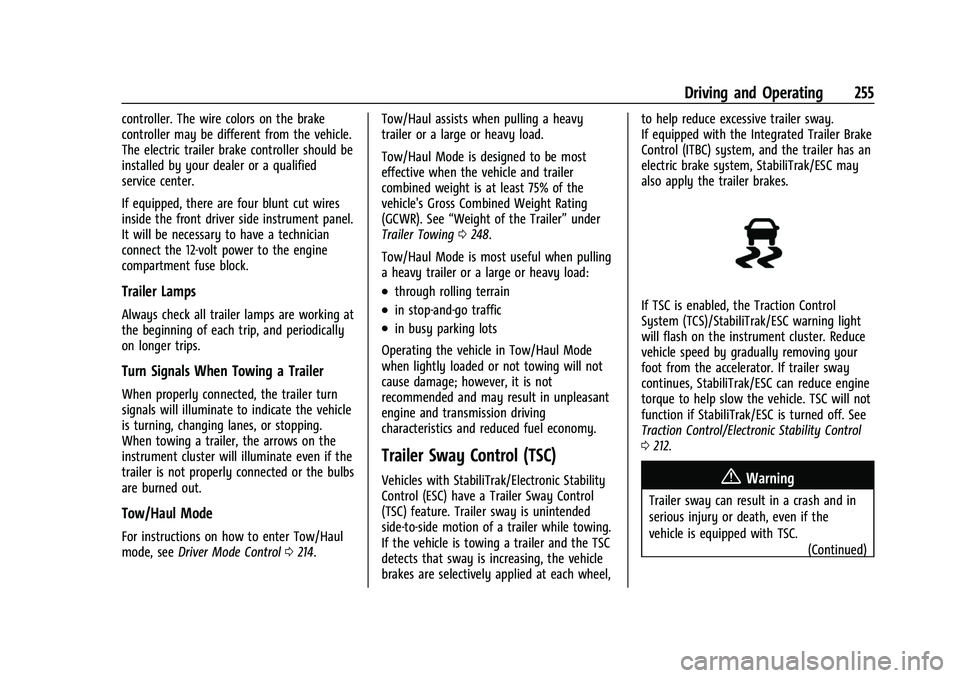
If TSC is enabled, the Traction Control
System (TCS)/StabiliTrak/ESC warning light
will flash on the instrument cluster. Reduce
vehicle speed by gradually removing your
foot from the accelerator. If trailer sway
continues, StabiliTrak/ESC can reduce engine
torque to help slow the vehicle. TSC will not
function if StabiliTrak/ESC is turned off. See
Traction Control/Electronic Stability Control
0
212.
{Warning
Trailer sway can result in a crash and in
serious injury or death, even if the
vehicle is equipped with TSC.
(Continued)
Page 258 of 369
Chevrolet Traverse Owner Manual (GMNA-Localizing-U.S./Canada/Mexico-
16411537) - 2023 - CRC - 3/28/22
Vehicle Care 257
Vehicle Care
General Information
General Information . . . . . . . . . . . . . . . . . . . 258
California Perchlorate MaterialsRequirements . . . . . . . . . . . . . . . . . . . . . . . . 258
Accessories and Modifications . . . . . . . . . 258
Vehicle Checks
Doing Your Own Service Work . . . . . . . . 258
Hood . . . . . . . . . . . . . . . . . . . . . . . . . . . . . . . . . . 259
Engine Compartment Overview . . . . . . . 260
Engine Oil . . . . . . . . . . . . . . . . . . . . . . . . . . . . . 261
Engine Oil Life System . . . . . . . . . . . . . . . . 263
Automatic Transmission Fluid . . . . . . . . . 264
Engine Air Filter Life System . . . . . . . . . . 264
Engine Air Cleaner/Filter . . . . . . . . . . . . . . 264
Cooling System . . . . . . . . . . . . . . . . . . . . . . . 265
Engine Overheating . . . . . . . . . . . . . . . . . . . 268
Washer Fluid . . . . . . . . . . . . . . . . . . . . . . . . . . 269
Brakes . . . . . . . . . . . . . . . . . . . . . . . . . . . . . . . . . 270
Brake Fluid . . . . . . . . . . . . . . . . . . . . . . . . . . . . 270
Battery - North America . . . . . . . . . . . . . . . 271
All-Wheel Drive . . . . . . . . . . . . . . . . . . . . . . . . 272
Park Brake and P (Park) Mechanism Check . . . . . . . . . . . . . . . . . . . . . . . . . . . . . . . . 272
Wiper Blade Replacement . . . . . . . . . . . . . 273
Windshield Replacement . . . . . . . . . . . . . . 274
Gas Strut(s) . . . . . . . . . . . . . . . . . . . . . . . . . . . 274
Headlamp Aiming
Front Headlamp Aiming . . . . . . . . . . . . . . . 275
Bulb Replacement
Bulb Replacement . . . . . . . . . . . . . . . . . . . . . 275
LED Lighting . . . . . . . . . . . . . . . . . . . . . . . . . . . 275
Headlamps, Front Turn Signal, and Sidemarker . . . . . . . . . . . . . . . . . . . . . . . . . . 275
License Plate Lamp . . . . . . . . . . . . . . . . . . . . 276
Electrical System
High Voltage Devices and Wiring . . . . . . 276
Electrical System Overload . . . . . . . . . . . . . 277
Fuses and Circuit Breakers . . . . . . . . . . . . . 278
Engine Compartment Fuse Block . . . . . . 279
Instrument Panel Fuse Block . . . . . . . . . . . 282
Rear Compartment Fuse Block . . . . . . . . . 284
Wheels and Tires
Tires . . . . . . . . . . . . . . . . . . . . . . . . . . . . . . . . . . 286
All-Season Tires . . . . . . . . . . . . . . . . . . . . . . . 286
Winter Tires . . . . . . . . . . . . . . . . . . . . . . . . . . . 287
Tire Sidewall Labeling . . . . . . . . . . . . . . . . . 287
Tire Designations . . . . . . . . . . . . . . . . . . . . . . 289
Tire Terminology and Definitions . . . . . . 289
Tire Pressure . . . . . . . . . . . . . . . . . . . . . . . . . . 291
Tire Pressure for High-Speed Operation . . . . . . . . . . . . . . . . . . . . . . . . . . . 293
Tire Pressure Monitor System . . . . . . . . . 294
Tire Pressure Monitor Operation . . . . . . 295
Tire Inspection . . . . . . . . . . . . . . . . . . . . . . . . 298 Tire Rotation . . . . . . . . . . . . . . . . . . . . . . . . . . 298
When It Is Time for New Tires . . . . . . . . 299
Buying New Tires . . . . . . . . . . . . . . . . . . . . . 300
Different Size Tires and Wheels . . . . . . . 301
Uniform Tire Quality Grading . . . . . . . . . . 301
Wheel Alignment and Tire Balance . . . . 302
Wheel Replacement . . . . . . . . . . . . . . . . . . . 302
Tire Chains . . . . . . . . . . . . . . . . . . . . . . . . . . . . 303
If a Tire Goes Flat . . . . . . . . . . . . . . . . . . . . . 304
Tire Changing . . . . . . . . . . . . . . . . . . . . . . . . . 305
Compact Spare Tire . . . . . . . . . . . . . . . . . . . . 310
Jump Starting
Jump Starting - North America . . . . . . . . . 311
Towing the Vehicle
Transporting a Disabled Vehicle . . . . . . . . 313
Recreational Vehicle Towing . . . . . . . . . . . 315
Appearance Care
Exterior Care . . . . . . . . . . . . . . . . . . . . . . . . . . . 317
Interior Care . . . . . . . . . . . . . . . . . . . . . . . . . . . 321
Floor Mats . . . . . . . . . . . . . . . . . . . . . . . . . . . . 324
Page 265 of 369
Chevrolet Traverse Owner Manual (GMNA-Localizing-U.S./Canada/Mexico-
16411537) - 2023 - CRC - 3/28/22
264 Vehicle Care
Automatic Transmission Fluid
It is not necessary to check the transmission
fluid level. A transmission fluid leak is the
only reason for fluid loss. If a leak occurs,
take the vehicle to the dealer and have it
repaired as soon as possible.
Change the fluid at the intervals listed in
Maintenance Schedule0327, and be sure to
use the transmission fluid listed in
Recommended Fluids and Lubricants 0331.
Caution
Use of the incorrect automatic
transmission fluid may damage the
vehicle, and the damage may not be
covered by the vehicle warranty. Always
use the correct automatic transmission
fluid. See Recommended Fluids and
Lubricants 0331.
If you need to check the transmission fluid
level, take the vehicle to your dealer.
Engine Air Filter Life System
If equipped, this feature provides the engine
air filter’s remaining life and best timing for
a change. The timing to change an engine
air filter depends on driving and
environmental conditions.
When to Change Engine Air Filter
When the REPLACE AT NEXT OIL CHANGE
message displays, the engine air filter
should be replaced at the next engine oil
change.
When the REPLACE ENGINE AIR FILTER SOON
message displays, the engine air filter
should be replaced at the earliest
convenience. The system must be reset after
the engine air filter is changed.
If the CHECK AIR FILTER SYSTEM message
displays, see your dealer.
How to Reset Engine Air Filter Life
System
Reset the system whenever the engine air
filter is replaced so that the system can
calculate the next engine air filter change.
To reset: 1. Place the vehicle in P (Park). 2. Display the Air Filter Life on the DIC. See
Driver Information Center (DIC) (Base and
Midlevel) 0117 or
Driver Information Center (DIC) (Uplevel)
0 119.
3. Press
pto move to the Reset/Disable
display area. Select Reset then press
V
for several seconds.
4. Press
Vto confirm the reset.
Engine Air Cleaner/Filter
The engine air cleaner/filter is in the engine
compartment on the passenger side of the
vehicle. See Engine Compartment Overview
0 260.
When to Inspect the Engine Air Cleaner/
Filter
.For intervals on changing and inspecting
the engine air filter, see Maintenance
Schedule 0327.
.If equipped with Engine Air Filter Life
System, see Engine Air Filter Life System
0 264.
.If driving in very dusty areas, follow the
engine air filter inspecting and changing
intervals, see Maintenance Schedule
0 327.
Page 273 of 369
Chevrolet Traverse Owner Manual (GMNA-Localizing-U.S./Canada/Mexico-
16411537) - 2023 - CRC - 3/28/22
272 Vehicle Care
When using a 12-volt battery charger on the
12-volt AGM battery, some chargers have an
AGM battery setting on the charger.
If available, use the AGM setting on the
charger, to limit charge voltage to 14.8 volts.
{Warning
WARNING:Battery posts, terminals and
related accessories can expose you to
chemicals including lead and lead
compounds, which are known to the
State of California to cause cancer and
birth defects or other reproductive harm.
Wash hands after handling. For more
information go to
www.P65Warnings.ca.gov.
See California Proposition 65 Warning 01.
Stop/Start System
This vehicle has a Stop/Start system to shut
off the engine to help conserve fuel. See
Stop/Start System 0202.
Vehicle Storage
{Warning
Batteries have acid that can burn you and
gas that can explode. You can be badly
hurt if you are not careful. Always wear
eye protection. See Jump Starting - North
America 0311 for tips on working around
a battery without getting hurt.
Infrequent Usage: Remove the black,
negative (−) cable from the battery to keep
the battery from running down.
Extended Storage: Remove the black,
negative (−) cable from the battery or use a
battery trickle charger.
All-Wheel Drive
Transfer Case
Under normal driving conditions, transfer
case fluid does not require maintenance
unless there is a fluid leak or unusual noise.
If required, have the transfer case serviced
by your dealer.
Park Brake and P (Park)
Mechanism Check
{Warning
When you are doing this check, the
vehicle could begin to move. You or
others could be injured and property
could be damaged. Make sure there is
room in front of the vehicle in case it
begins to roll. Be ready to apply the
regular brake at once should the vehicle
begin to move.
Park on a fairly steep hill, with the vehicle
facing downhill. Keeping your foot on the
regular brake, set the parking brake.
.To check the parking brake's holding
ability: With the engine running and the
transmission in N (Neutral), slowly remove
foot pressure from the regular brake
pedal. Do this until the vehicle is held by
the parking brake only.
.To check the P (Park) mechanism's holding
ability: With the engine running, shift to
P (Park). Then release the parking brake
followed by the regular brake.
Contact your dealer if service is required.
Page 282 of 369
Chevrolet Traverse Owner Manual (GMNA-Localizing-U.S./Canada/Mexico-
16411537) - 2023 - CRC - 3/28/22
Vehicle Care 281
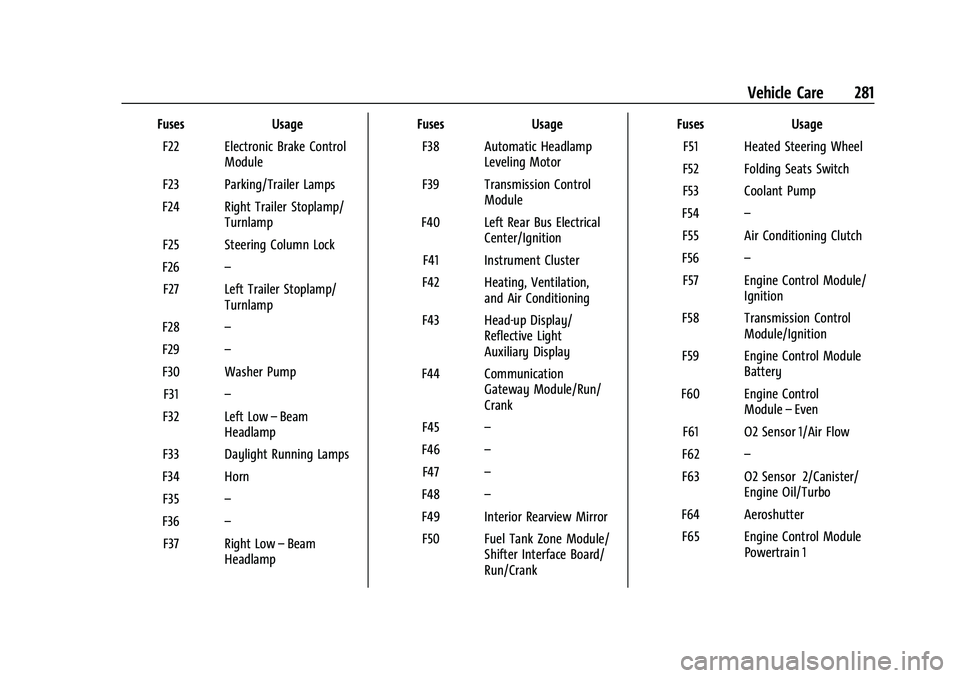
FusesUsage
F22 Electronic Brake Control Module
F23 Parking/Trailer Lamps
F24 Right Trailer Stoplamp/ Turnlamp
F25 Steering Column Lock
F26 –
F27 Left Trailer Stoplamp/ Turnlamp
F28 –
F29 –
F30 Washer Pump F31 –
F32 Left Low –Beam
Headlamp
F33 Daylight Running Lamps
F34 Horn F35 –
F36 –
F37 Right Low –Beam
Headlamp Fuses
Usage
F38 Automatic Headlamp Leveling Motor
F39 Transmission Control Module
F40 Left Rear Bus Electrical Center/Ignition
F41 Instrument Cluster
F42 Heating, Ventilation, and Air Conditioning
F43 Head-up Display/ Reflective Light
Auxiliary Display
F44 Communication Gateway Module/Run/
Crank
F45 –
F46 –
F47 –
F48 –
F49 Interior Rearview Mirror F50 Fuel Tank Zone Module/ Shifter Interface Board/
Run/Crank Fuses
Usage
F51 Heated Steering Wheel
F52 Folding Seats Switch
F53 Coolant Pump
F54 –
F55 Air Conditioning Clutch
F56 –
F57 Engine Control Module/ Ignition
F58 Transmission Control Module/Ignition
F59 Engine Control Module Battery
F60 Engine Control Module–Even
F61 O2 Sensor 1/Air Flow
F62 –
F63 O2 Sensor 2/Canister/ Engine Oil/Turbo
F64 Aeroshutter F65 Engine Control Module Powertrain 1
Page 313 of 369
Chevrolet Traverse Owner Manual (GMNA-Localizing-U.S./Canada/Mexico-
16411537) - 2023 - CRC - 3/28/22
312 Vehicle Care
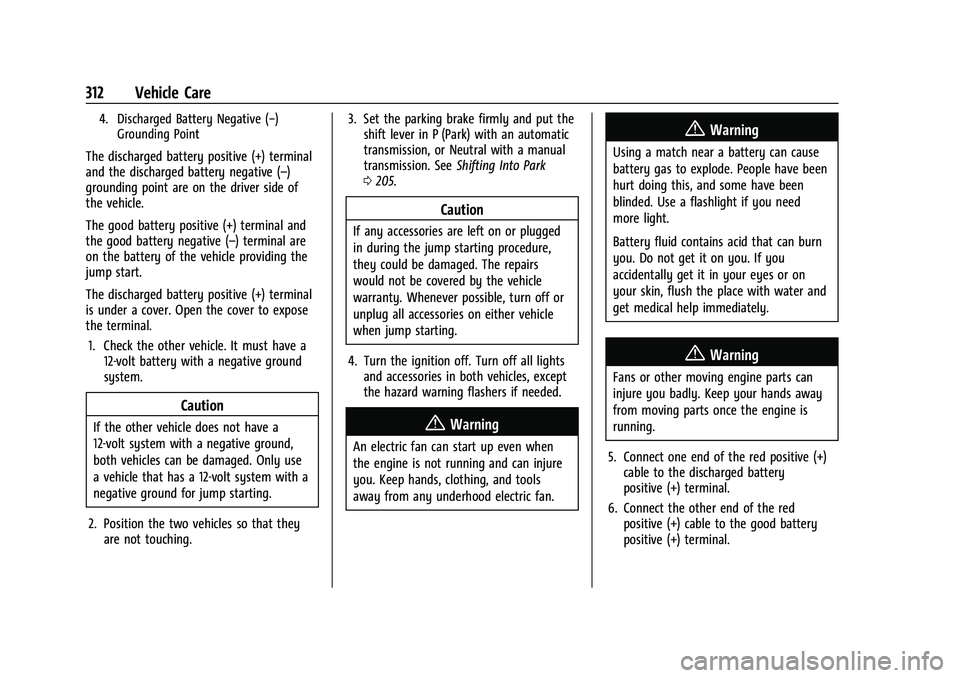
4. Discharged Battery Negative (−)Grounding Point
The discharged battery positive (+) terminal
and the discharged battery negative (–)
grounding point are on the driver side of
the vehicle.
The good battery positive (+) terminal and
the good battery negative (–) terminal are
on the battery of the vehicle providing the
jump start.
The discharged battery positive (+) terminal
is under a cover. Open the cover to expose
the terminal.
1. Check the other vehicle. It must have a 12-volt battery with a negative ground
system.
Caution
If the other vehicle does not have a
12-volt system with a negative ground,
both vehicles can be damaged. Only use
a vehicle that has a 12-volt system with a
negative ground for jump starting.
2. Position the two vehicles so that they are not touching. 3. Set the parking brake firmly and put the
shift lever in P (Park) with an automatic
transmission, or Neutral with a manual
transmission. See Shifting Into Park
0 205.
Caution
If any accessories are left on or plugged
in during the jump starting procedure,
they could be damaged. The repairs
would not be covered by the vehicle
warranty. Whenever possible, turn off or
unplug all accessories on either vehicle
when jump starting.
4. Turn the ignition off. Turn off all lights and accessories in both vehicles, except
the hazard warning flashers if needed.
{Warning
An electric fan can start up even when
the engine is not running and can injure
you. Keep hands, clothing, and tools
away from any underhood electric fan.
{Warning
Using a match near a battery can cause
battery gas to explode. People have been
hurt doing this, and some have been
blinded. Use a flashlight if you need
more light.
Battery fluid contains acid that can burn
you. Do not get it on you. If you
accidentally get it in your eyes or on
your skin, flush the place with water and
get medical help immediately.
{Warning
Fans or other moving engine parts can
injure you badly. Keep your hands away
from moving parts once the engine is
running.
5. Connect one end of the red positive (+) cable to the discharged battery
positive (+) terminal.
6. Connect the other end of the red positive (+) cable to the good battery
positive (+) terminal.
Page 314 of 369
Chevrolet Traverse Owner Manual (GMNA-Localizing-U.S./Canada/Mexico-
16411537) - 2023 - CRC - 3/28/22
Vehicle Care 313
7. Connect one end of the black negative(–) cable to the good battery negative
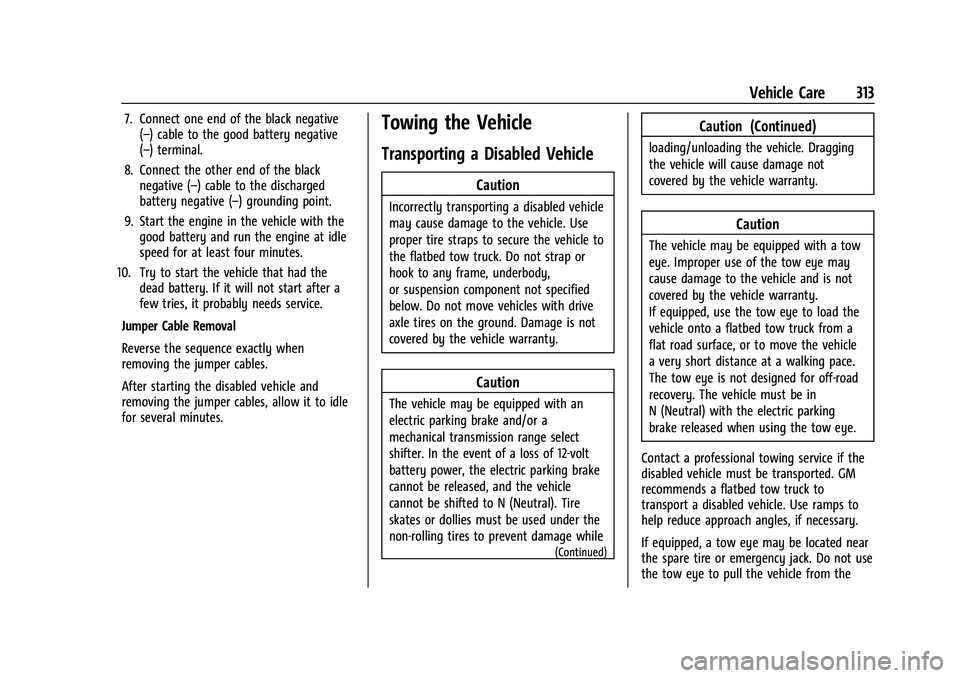
(–) terminal.
8. Connect the other end of the black negative (–) cable to the discharged
battery negative (–) grounding point.
9. Start the engine in the vehicle with the good battery and run the engine at idle
speed for at least four minutes.
10. Try to start the vehicle that had the dead battery. If it will not start after a
few tries, it probably needs service.
Jumper Cable Removal
Reverse the sequence exactly when
removing the jumper cables.
After starting the disabled vehicle and
removing the jumper cables, allow it to idle
for several minutes.Towing the Vehicle
Transporting a Disabled Vehicle
Caution
Incorrectly transporting a disabled vehicle
may cause damage to the vehicle. Use
proper tire straps to secure the vehicle to
the flatbed tow truck. Do not strap or
hook to any frame, underbody,
or suspension component not specified
below. Do not move vehicles with drive
axle tires on the ground. Damage is not
covered by the vehicle warranty.
Caution
The vehicle may be equipped with an
electric parking brake and/or a
mechanical transmission range select
shifter. In the event of a loss of 12-volt
battery power, the electric parking brake
cannot be released, and the vehicle
cannot be shifted to N (Neutral). Tire
skates or dollies must be used under the
non-rolling tires to prevent damage while
(Continued)
Caution (Continued)
loading/unloading the vehicle. Dragging
the vehicle will cause damage not
covered by the vehicle warranty.
Caution
The vehicle may be equipped with a tow
eye. Improper use of the tow eye may
cause damage to the vehicle and is not
covered by the vehicle warranty.
If equipped, use the tow eye to load the
vehicle onto a flatbed tow truck from a
flat road surface, or to move the vehicle
a very short distance at a walking pace.
The tow eye is not designed for off-road
recovery. The vehicle must be in
N (Neutral) with the electric parking
brake released when using the tow eye.
Contact a professional towing service if the
disabled vehicle must be transported. GM
recommends a flatbed tow truck to
transport a disabled vehicle. Use ramps to
help reduce approach angles, if necessary.
If equipped, a tow eye may be located near
the spare tire or emergency jack. Do not use
the tow eye to pull the vehicle from the
Page 316 of 369
Chevrolet Traverse Owner Manual (GMNA-Localizing-U.S./Canada/Mexico-
16411537) - 2023 - CRC - 3/28/22
Vehicle Care 315
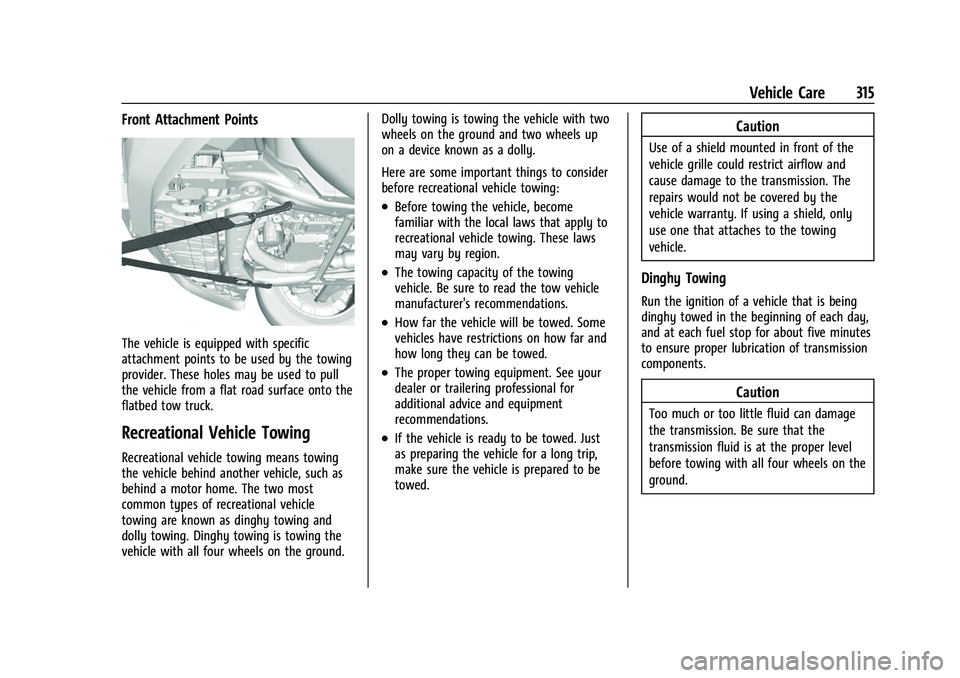
Front Attachment Points
The vehicle is equipped with specific
attachment points to be used by the towing
provider. These holes may be used to pull
the vehicle from a flat road surface onto the
flatbed tow truck.
Recreational Vehicle Towing
Recreational vehicle towing means towing
the vehicle behind another vehicle, such as
behind a motor home. The two most
common types of recreational vehicle
towing are known as dinghy towing and
dolly towing. Dinghy towing is towing the
vehicle with all four wheels on the ground.Dolly towing is towing the vehicle with two
wheels on the ground and two wheels up
on a device known as a dolly.
Here are some important things to consider
before recreational vehicle towing:
.Before towing the vehicle, become
familiar with the local laws that apply to
recreational vehicle towing. These laws
may vary by region.
.The towing capacity of the towing
vehicle. Be sure to read the tow vehicle
manufacturer's recommendations.
.How far the vehicle will be towed. Some
vehicles have restrictions on how far and
how long they can be towed.
.The proper towing equipment. See your
dealer or trailering professional for
additional advice and equipment
recommendations.
.If the vehicle is ready to be towed. Just
as preparing the vehicle for a long trip,
make sure the vehicle is prepared to be
towed.
Caution
Use of a shield mounted in front of the
vehicle grille could restrict airflow and
cause damage to the transmission. The
repairs would not be covered by the
vehicle warranty. If using a shield, only
use one that attaches to the towing
vehicle.
Dinghy Towing
Run the ignition of a vehicle that is being
dinghy towed in the beginning of each day,
and at each fuel stop for about five minutes
to ensure proper lubrication of transmission
components.
Caution
Too much or too little fluid can damage
the transmission. Be sure that the
transmission fluid is at the proper level
before towing with all four wheels on the
ground.
Page 317 of 369
Chevrolet Traverse Owner Manual (GMNA-Localizing-U.S./Canada/Mexico-
16411537) - 2023 - CRC - 3/28/22
316 Vehicle Care
Caution
Do not tow a vehicle with the front drive
wheels on the ground if one of the front
tires is a compact spare tire. Towing with
two different tire sizes on the front of
the vehicle can cause severe damage to
the transmission.
To dinghy tow: 1. Position the front of the vehicle being towed—with all four wheels on the
ground—behind the towing vehicle.
2. Secure it to the towing vehicle.
3. Put the vehicle in N (Neutral).
4. Shut engine off (vehicle will remain in accessory mode).
5. Disconnect the negative (-) terminal connector from the 12-volt battery.
6. Close the hood of the vehicle.
Caution
If the vehicle is towed without
performing each of the steps listed under
“Dinghy Towing,” the automatic
transmission could be damaged. Be sure
(Continued)
Caution (Continued)
to follow all steps of the dinghy towing
procedure prior to and after towing the
vehicle.
Caution
If 105 km/h (65 mph) is exceeded while
towing the vehicle, it could be damaged.
Never exceed 105 km/h (65 mph) while
towing the vehicle.
Once the destination is reached: 1. Shift the vehicle to P (Park).
2. Reconnect the negative (-) terminal connector to the 12-volt battery.
3. Start the engine and let it idle for more than three minutes before driving the
vehicle.
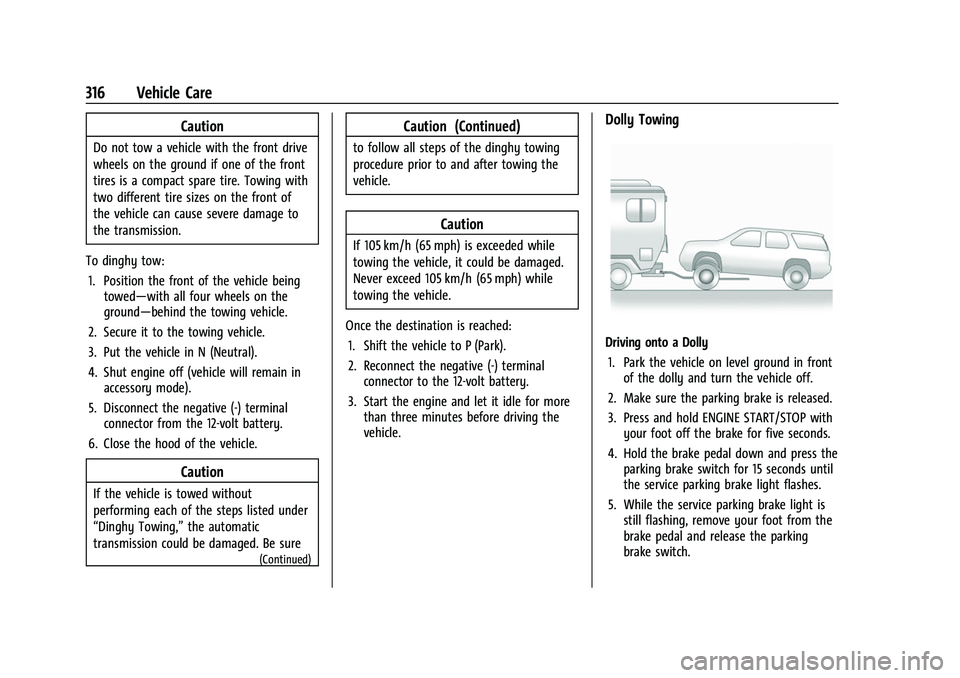
Dolly Towing
Driving onto a Dolly
1. Park the vehicle on level ground in front of the dolly and turn the vehicle off.
2. Make sure the parking brake is released.
3. Press and hold ENGINE START/STOP with your foot off the brake for five seconds.
4. Hold the brake pedal down and press the parking brake switch for 15 seconds until
the service parking brake light flashes.
5. While the service parking brake light is still flashing, remove your foot from the
brake pedal and release the parking
brake switch.
Page 330 of 369
Chevrolet Traverse Owner Manual (GMNA-Localizing-U.S./Canada/Mexico-
16411537) - 2023 - CRC - 3/28/22
Service and Maintenance 329
suitable service maintenance intervals for
your vehicle, please contact your
authorized GM Dealer.
Extreme service is for vehicles mainly
driven off-road in four-wheel drive or used
in farming, mining, forestry, or snow
plowing.
Additional Required Services—Severe
Service
Every 72 000 km (45,000 mi)
.Change automatic transmission fluid.
Every 120 000 km (75,000 mi)
.Change rear axle fluid, if equipped with
AWD. Do not directly power wash the
transfer case and/or front/rear axle
output seals. High pressure water can
overcome the seals and contaminate the
transfer case fluid. Contaminated fluid will
decrease the life of the transfer case and/
or axles and should be replaced.
Owner Checks and Services
Every Five Years
.Replace brake fluid. Every Seven Years
.Replace Air Conditioning Desiccant every
seven years. The air conditioning system
requires maintenance every seven years.
This service requires replacement of the
desiccant to help the longevity and
efficient operation of the air conditioning
system. This service can be complex. See
your dealer.
Multi-Point Vehicle
Inspection (MPVI)
A Multi Point Vehicle Inspection (MPVI)
completed by a GM dealer technician is a
maintenance assessment of your vehicle.
The benefit of the MPVI is to identify and
inform the customer of service items that
require immediate attention and those that
may require attention in the future.
The technician will perform the following
checks on your vehicle. For a complete list
of checks, inspections, and services, see your
dealer.
Some items may not apply to your vehicle
and/or region.
Diagnostics
.OnStar active, if equipped
.Service history/recall check
Engine Oil and Filter
.Engine oil
.Oil life monitor
‐
Reset oil life monitor
Exterior Lights
.Visual inspection
Windshield and Wipers
.Visual inspection
Battery
.Battery visual inspection
.Battery test results
.Battery cables and connections
Systems, Fluids, and Visible Leak
Inspection
.Engine oil
.Transmission
.Drive axle
.Transfer case
.Engine cooling system
.Power steering, if equipped