sensor CHEVROLET TRAX 2013 1.G User Guide
[x] Cancel search | Manufacturer: CHEVROLET, Model Year: 2013, Model line: TRAX, Model: CHEVROLET TRAX 2013 1.GPages: 408, PDF Size: 6.59 MB
Page 137 of 408
Black plate (33,1)Chevrolet TRAX Owner Manual - 2013 - CRC - 3/6/13
Instruments and Controls 5-33
Press Auto Fan Speed when
highlighted. Select Low, Medium,
or High. Press
4.
Auto Compartment Zone Temp
This allows the selection of the
compartment zone temperature
setting when the vehicle is
restarted.
Press Auto Compartment Zone
Temp when highlighted. Select
Single Zone, Dual Zone, or Last
Setting. Press
4.
Rear Zone Temp
This allows the selection of the rear
temperature setting when the
vehicle is restarted.
Press Rear Zone Temp when
highlighted. Select Off, Rear Mimic
Front, or Rear Last Known.
Press
4.
Air Quality Sensor
This allows the selection of whether
the system will operate at high or
low sensitivity. Press Air Quality Sensor when
highlighted. Select Off, Low
Sensitivity, High Sensitivity.
Press
4.
Air Conditioning Mode
This allows the selection of
automatic start of the air
conditioning upon vehicle start.
Selecting On indicates the air
conditioning will be on when the
vehicle is started. Selecting Off
turns the air conditioning off each
time the vehicle is started. Last
Setting will resume the last setting
when the vehicle was shut off.
Press Air Conditioning Mode when
highlighted. Select Off, On, or Last
Setting. Press
4.
Auto Defog
This allows the auto defog to be
turned on or off.
Press Auto Defog when highlighted.
Select On or Off. Press
4. Auto Rear Defog
This allows the auto rear defog to
be turned on or off. This feature will
automatically turn on the rear
window defogger when it is cold
outside.
Press Auto Rear Defog when
highlighted. Select On or Off.
Press
4.
Auto Cooled Vented Seats
When on, this feature will turn the
cooled seats on when using remote
start on warm days.
Press Auto Cooled Vented Seats
when highlighted. Select On or Off.
Press
4.
Auto Heated Seats
When on, this feature will turn the
heated seats on.
Press Auto Heated Seats when
highlighted. Select On or Off.
Press
4.
Page 146 of 408
Black plate (2,1)Chevrolet TRAX Owner Manual - 2013 - CRC - 3/6/13
6-2 Lighting
5(Headlamps):Turns the
headlamps on together with the
lamps listed below. A warning chime
sounds if the driver door is opened
when the ignition switch is off and
the headlamps are on.
.Parking Lamps
.Taillamps
.License Plate Lamps
.Instrument Panel Lights
.Sidemarker Lamps
#(Front Fog Lamps): For
vehicles with fog lamps, press to
turn the lamps on or off.
See Front Fog Lamps on page 6‑4.
When the lights are on,
;will be
lit. See Lamps On Reminder on
page 5‑23.
Headlamp High/
Low-Beam Changer
3
(Headlamp High/Low-Beam
Changer): Push the turn signal
lever away from you and release, to
turn the high beams on.
To return to low beams, push the
lever again or pull it toward you and
release.
This indicator light turns on in the
instrument cluster when the
high-beam headlamps are on.
Flash-to-Pass
To flash the high beams, pull the
turn signal lever all the way toward
you. Then release it.
Daytime Running
Lamps (DRL)
Daytime Running Lamps can make
it easier for others to see the front of
your vehicle during the day. Fully
functional daytime running lamps
are required on all vehicles first sold
in Canada.
A light sensor on top of the
instrument panel makes the DRL
work, so be sure it is not covered.
Page 147 of 408
Black plate (3,1)Chevrolet TRAX Owner Manual - 2013 - CRC - 3/6/13
Lighting 6-3
The DRL system makes the
low-beam headlamps come on at a
reduced brightness when the
following conditions are met:
.The ignition is in the ON/
RUN mode.
.The exterior lamp control is
in AUTO.
.The engine is running.
When the DRL are on, only the
low-beam headlamps, at a reduced
level of brightness, will be on. The
taillamps, sidemarker, instrument
panel, and other lamps will not
be on.
The headlamps automatically
change from DRL to the regular
headlamps depending on the
darkness of the surroundings. The
other lamps that come on with the
headlamps will also come on.
When it is bright enough outside,
the headlamps go off and the DRL
come on. To turn the DRL off or on again, turn
the exterior lamp control to the off
position and then release. For
vehicles first sold in Canada, the
DRL cannot be turned off.
Automatic Headlamp
System
When it is dark enough outside and
the exterior lamp control is in the
automatic position, the headlamps
come on automatically. See
Exterior
Lamp Controls on page 6‑1.
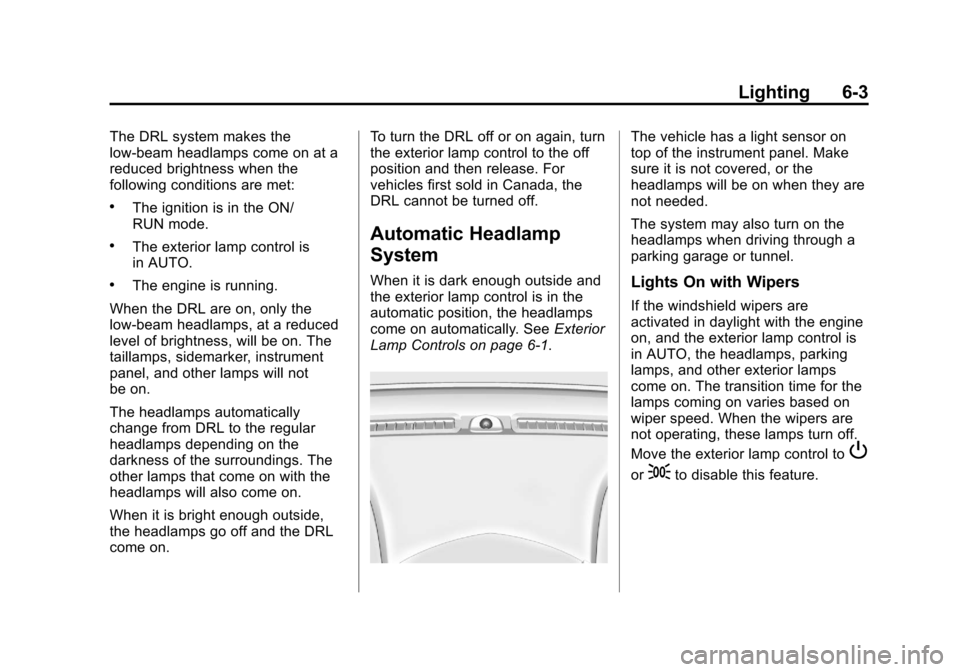
The vehicle has a light sensor on
top of the instrument panel. Make
sure it is not covered, or the
headlamps will be on when they are
not needed.
The system may also turn on the
headlamps when driving through a
parking garage or tunnel.
Lights On with Wipers
If the windshield wipers are
activated in daylight with the engine
on, and the exterior lamp control is
in AUTO, the headlamps, parking
lamps, and other exterior lamps
come on. The transition time for the
lamps coming on varies based on
wiper speed. When the wipers are
not operating, these lamps turn off.
Move the exterior lamp control to
P
or;to disable this feature.
Page 256 of 408
Black plate (36,1)Chevrolet TRAX Owner Manual - 2013 - CRC - 3/6/13
9-36 Driving and Operating
Ending Cruise Control
There are three ways to end cruise
control:
.To disengage cruise control,
step lightly on the brake pedal or
clutch for manual transmission.
.Press*on the steering wheel.
.To turn off cruise control, press1on the steering wheel.
Erasing Speed Memory
The cruise control set speed is
erased from memory if the
1button
is pressed or if the ignition is
turned off.
Object Detection
Systems
Ultrasonic Parking Assist
For vehicles with the Ultrasonic
Rear Parking Assist (URPA) system,
it assists the driver with parking and
avoiding objects while in
R (Reverse). URPA operates at
speeds less than 8 km/h (5 mph),
and the sensors on the rear bumper
detect objects up to 2.5 m (8 ft)
behind the vehicle, and at least
20 cm (8 in) off the ground.
{WARNING
The URPA system does not
detect children, pedestrians,
bicyclists, animals, or objects
below the bumper or that are too
close or too far from the vehicle.
It is not available at speeds
greater than 8 km/h (5 mph). To
prevent injury, death, or vehicle
(Continued)
WARNING (Continued)
damage, even with URPA, always
check the area around the vehicle
and check all mirrors before
backing.
How the System Works
URPA comes on automatically when
the shift lever is moved into
R (Reverse).
URPA operates only at speeds less
than 8 km/h (5 mph).
An obstacle is indicated by audible
beeps. The interval between the
beeps becomes shorter as the
vehicle gets closer to the obstacle.
When the distance is less than
40 cm (16 in) the beeping is a
continuous tone for five seconds.
To be detected, objects must be at
least 20 cm (8 in) off the ground and
below liftgate level. Objects must
also be within 2.5 m (8 ft) from the
Page 257 of 408
Black plate (37,1)Chevrolet TRAX Owner Manual - 2013 - CRC - 3/6/13
Driving and Operating 9-37
rear bumper. The distance objects
can be detected may be less during
warmer or humid weather.
Turning the System On and Off
The URPA system can be turned on
and off using the infotainment
system controls. SeeVehicle
Personalization on page 5‑27 for
more information.
When the System Does Not
Seem to Work Properly
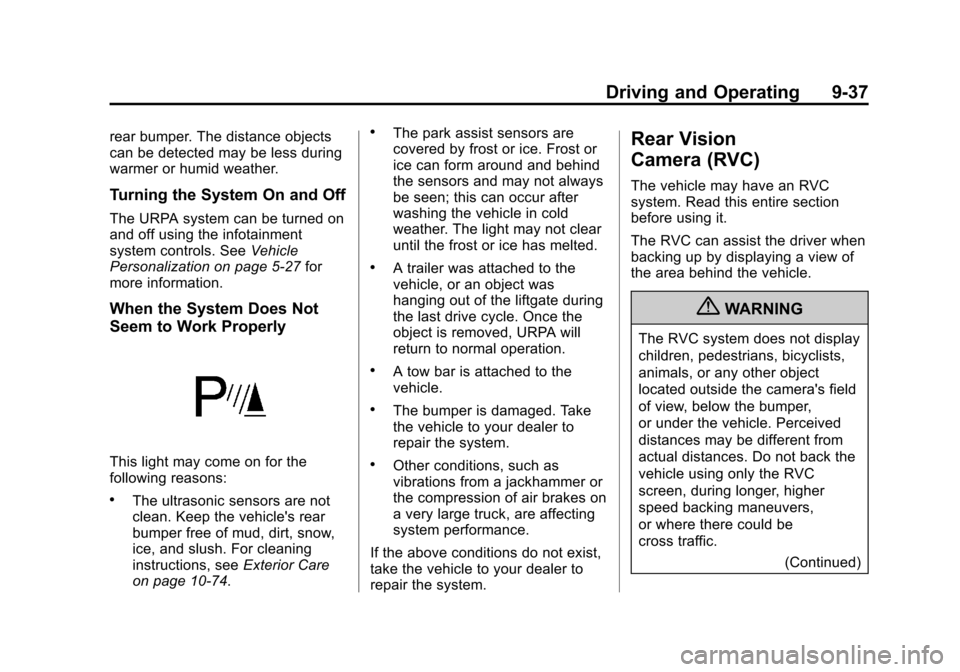
This light may come on for the
following reasons:
.The ultrasonic sensors are not
clean. Keep the vehicle's rear
bumper free of mud, dirt, snow,
ice, and slush. For cleaning
instructions, see Exterior Care
on page 10‑74.
.The park assist sensors are
covered by frost or ice. Frost or
ice can form around and behind
the sensors and may not always
be seen; this can occur after
washing the vehicle in cold
weather. The light may not clear
until the frost or ice has melted.
.A trailer was attached to the
vehicle, or an object was
hanging out of the liftgate during
the last drive cycle. Once the
object is removed, URPA will
return to normal operation.
.A tow bar is attached to the
vehicle.
.The bumper is damaged. Take
the vehicle to your dealer to
repair the system.
.Other conditions, such as
vibrations from a jackhammer or
the compression of air brakes on
a very large truck, are affecting
system performance.
If the above conditions do not exist,
take the vehicle to your dealer to
repair the system.
Rear Vision
Camera (RVC)
The vehicle may have an RVC
system. Read this entire section
before using it.
The RVC can assist the driver when
backing up by displaying a view of
the area behind the vehicle.
{WARNING
The RVC system does not display
children, pedestrians, bicyclists,
animals, or any other object
located outside the camera's field
of view, below the bumper,
or under the vehicle. Perceived
distances may be different from
actual distances. Do not back the
vehicle using only the RVC
screen, during longer, higher
speed backing maneuvers,
or where there could be
cross traffic. (Continued)
Page 298 of 408
Black plate (34,1)Chevrolet TRAX Owner Manual - 2013 - CRC - 3/6/13
10-34 Vehicle Care
Mini Fuses Usage1 Sunroof
2 Outside Rearview Mirror Switch
3 Canister Vent Solenoid (1.4L Only)
4 Not Used
5 Electronic Brake Control Module
Valve
6 Not Used
7 Not Used
8 Transmission Control Module
Battery
9 Not Used
10 Fuel System Control Module
R/C (1.4L Only)/
Headlamp Leveling
11 Rear Wiper Mini Fuses Usage
12 Rear Window Defogger
13 Not Used
14 Outside Rearview Mirror Heater
15 Fuel System Control Module Battery
(1.4L Only)
16 Heated Seat Module
17 Transmission Control Module R/C
18 Engine Control Module R/C
19 Fuel Pump (1.8L Only)
20 Not Used
21 Fan Relay (Auxiliary Fuse Block –1.4L)/
Fan 3 Relay
85 (1.8L)
22 Cold Start Pump (1.8L Only) Mini Fuses Usage
23 Ignition Coil/Injectors
24 Washer Pump
25 Not Used
26 Canister Purge Solenoid/Water
Valve Solenoid/
Oxygen Sensors –
Pre and Post/
Turbo Wastegate
Solenoid (1.4L)/
Turbo Bypass
Solenoid (1.4L)/
IMTV
Solenoid (1.8L)
27 Not Used
28 Not Used
29 Engine Control Module Powertrain
Ignition 1/Ignition 2
30 Mass Air Flow Sensor
31 Left High-Beam Headlamp
Page 301 of 408
Black plate (37,1)Chevrolet TRAX Owner Manual - 2013 - CRC - 3/6/13
Vehicle Care 10-37
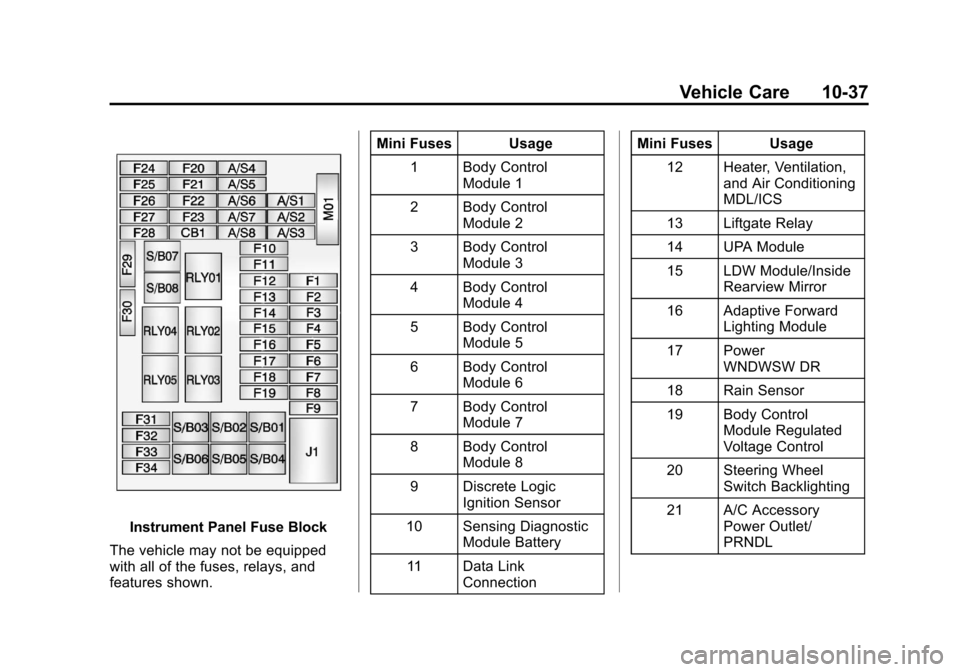
Instrument Panel Fuse Block
The vehicle may not be equipped
with all of the fuses, relays, and
features shown. Mini Fuses Usage
1 Body Control Module 1
2 Body Control Module 2
3 Body Control Module 3
4 Body Control Module 4
5 Body Control Module 5
6 Body Control Module 6
7 Body Control Module 7
8 Body Control Module 8
9 Discrete Logic Ignition Sensor
10 Sensing Diagnostic Module Battery
11 Data Link Connection Mini Fuses Usage
12 Heater, Ventilation, and Air Conditioning
MDL/ICS
13 Liftgate Relay
14 UPA Module
15 LDW Module/Inside Rearview Mirror
16 Adaptive Forward Lighting Module
17 Power WNDWSW DR
18 Rain Sensor
19 Body Control Module Regulated
Voltage Control
20 Steering Wheel Switch Backlighting
21 A/C Accessory Power Outlet/
PRNDL
Page 304 of 408
Black plate (40,1)Chevrolet TRAX Owner Manual - 2013 - CRC - 3/6/13
10-40 Vehicle Care
Mini Fuses Usage14 Trailer Socket
15 EVP Switch
16 Water In Fuel Sensor
17 Inside Rearview Mirror/Regulated
Voltage Control
18 Spare
S/B Fuses Usage 1 Driver Power Seat Switch/Memory
Module
2 Passenger Power Seat Switch
3 Trailer Module S/B Fuses Usage
4 A/C-D/C Inverter
5 Battery
6 Headlamp Washer
7 Spare
8 Spare
9 Spare
Relays Usage 1 Ignition Relay
2 Run RelayWheels and Tires
Tires
Every new GM vehicle has
high-quality tires made by a
leading tire manufacturer.
See the warranty manual for
information regarding the tire
warranty and where to get
service. For additional
information refer to the tire
manufacturer.
{WARNING
.Poorly maintained and
improperly used tires are
dangerous.
.Overloading the tires can
cause overheating as a
result of too much flexing.
(Continued)
Page 313 of 408
Black plate (49,1)Chevrolet TRAX Owner Manual - 2013 - CRC - 3/6/13
Vehicle Care 10-49
at 420 kPa (60 psi). See
Compact Spare Tire on
page 10‑67andFull-Size Spare
Tire on page 10‑67 for additional
information.
How to Check
Use a good quality pocket-type
gauge to check tire pressure.
Proper tire inflation cannot be
determined by looking at the tire.
Check the tire inflation pressure
when the tires are cold, meaning
the vehicle has not been driven
for at least three hours or no
more than 1.6 km (1 mi).
Remove the valve cap from the
tire valve stem. Press the tire
gauge firmly onto the valve to
get a pressure measurement.
If the cold tire inflation pressure
matches the recommended
pressure on the Tire and
Loading Information label, no
further adjustment is necessary. If the inflation pressure is low,
add air until the recommended
pressure is reached. If the
inflation pressure is high, press
on the metal stem in the center
of the tire valve to release air.
Re-check the tire pressure with
the tire gauge.
Return the valve caps on the
valve stems to prevent leaks
and keep out dirt and moisture.
Tire Pressure Monitor
System
The Tire Pressure Monitor System
(TPMS) uses radio and sensor
technology to check tire pressure
levels. The TPMS sensors monitor
the air pressure in your tires and
transmit tire pressure readings to a
receiver located in the vehicle.
Each tire, including the spare
(if provided), should be checked
monthly when cold and inflated to
the inflation pressure recommended by the vehicle manufacturer on the
vehicle placard or tire inflation
pressure label. (If your vehicle has
tires of a different size than the size
indicated on the vehicle placard or
tire inflation pressure label, you
should determine the proper tire
inflation pressure for those tires.)
As an added safety feature, your
vehicle has been equipped with a
tire pressure monitoring system
(TPMS) that illuminates a low tire
pressure telltale when one or more
of your tires is significantly
under-inflated.
Accordingly, when the low tire
pressure telltale illuminates, you
should stop and check your tires as
soon as possible, and inflate them
to the proper pressure. Driving on a
significantly under-inflated tire
causes the tire to overheat and can
lead to tire failure. Under-inflation
also reduces fuel efficiency and tire
tread life, and may affect the
vehicle's handling and stopping
ability.
Page 314 of 408
Black plate (50,1)Chevrolet TRAX Owner Manual - 2013 - CRC - 3/6/13
10-50 Vehicle Care
Please note that the TPMS is
not a substitute for proper tire
maintenance, and it is the driver's
responsibility to maintain correct tire
pressure, even if under-inflation has
not reached the level to trigger
illumination of the TPMS low tire
pressure telltale.
Your vehicle has also been
equipped with a TPMS malfunction
indicator to indicate when the
system is not operating properly.
The TPMS malfunction indicator is
combined with the low tire pressure
telltale. When the system detects a
malfunction, the telltale will flash for
approximately one minute and then
remain continuously illuminated.
This sequence will continue upon
subsequent vehicle start-ups as
long as the malfunction exists.
When the malfunction indicator
is illuminated, the system may not
be able to detect or signal low tire
pressure as intended.TPMS malfunctions may occur for a
variety of reasons, including the
installation of replacement or
alternate tires or wheels on the
vehicle that prevent the TPMS from
functioning properly. Always check
the TPMS malfunction telltale after
replacing one or more tires or
wheels on your vehicle to ensure
that the replacement or alternate
tires and wheels allow the TPMS to
continue to function properly.
See
Tire Pressure Monitor
Operation on page 10‑50.
Federal Communications
Commission (FCC) Rules and
with Industry Canada
Standards
See Radio Frequency Statement
(Canada) on page 13‑18 for
information regarding Part 15 of
the Federal Communications
Commission (FCC) Rules and with
Industry Canada Standards
RSS-GEN/210/220/310.
Tire Pressure Monitor
Operation
This vehicle may have a Tire
Pressure Monitor System (TPMS).
The TPMS is designed to warn the
driver when a low tire pressure
condition exists. TPMS sensors are
mounted onto each tire and wheel
assembly, excluding the spare tire
and wheel assembly. The TPMS
sensors monitor the air pressure in
the tires and transmit the tire
pressure readings to a receiver
located in the vehicle.
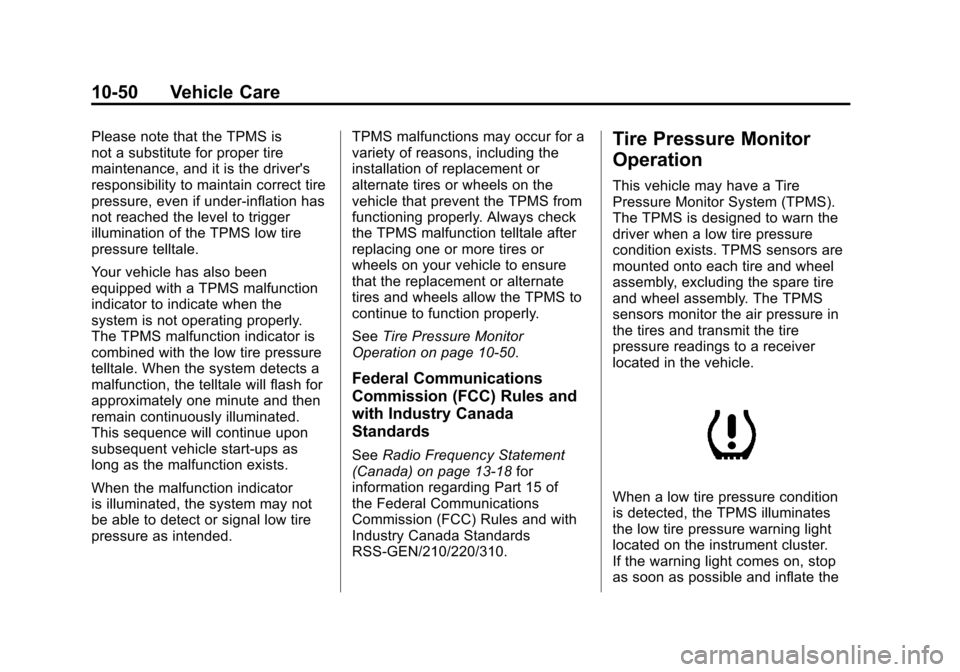
When a low tire pressure condition
is detected, the TPMS illuminates
the low tire pressure warning light
located on the instrument cluster.
If the warning light comes on, stop
as soon as possible and inflate the