air condition CHEVROLET TRAX 2020 Owners Manual
[x] Cancel search | Manufacturer: CHEVROLET, Model Year: 2020, Model line: TRAX, Model: CHEVROLET TRAX 2020Pages: 355, PDF Size: 5.75 MB
Page 4 of 355
Chevrolet TRAX Owner Manual (GMNA-Localizing-U.S./Canada/Mexico-
13556235) - 2020 - CRC - 9/19/19
Introduction 3
Danger, Warning, and
Caution
Warning messages found on vehicle
labels and in this manual describe
hazards and what to do to avoid or
reduce them.
{Danger
Danger indicates a hazard with a
high level of risk which will result
in serious injury or death.
{Warning
Warning indicates a hazard that
could result in injury or death.
Caution
Caution indicates a hazard that
could result in property or vehicle
damage.
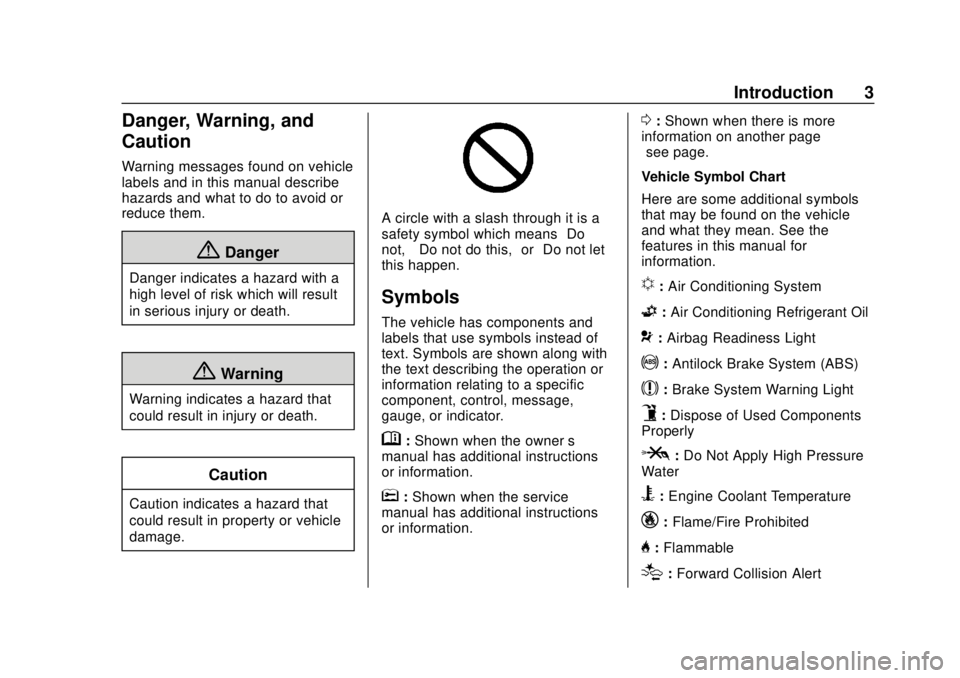
A circle with a slash through it is a
safety symbol which means“Do
not,” “Do not do this,” or“Do not let
this happen.”
Symbols
The vehicle has components and
labels that use symbols instead of
text. Symbols are shown along with
the text describing the operation or
information relating to a specific
component, control, message,
gauge, or indicator.
M: Shown when the owner ’s
manual has additional instructions
or information.
*: Shown when the service
manual has additional instructions
or information.
0: Shown when there is more
information on another page —
“see page.”
Vehicle Symbol Chart
Here are some additional symbols
that may be found on the vehicle
and what they mean. See the
features in this manual for
information.
u: Air Conditioning System
G: Air Conditioning Refrigerant Oil
9:Airbag Readiness Light
!: Antilock Brake System (ABS)
$:Brake System Warning Light
9:Dispose of Used Components
Properly
P: Do Not Apply High Pressure
Water
B: Engine Coolant Temperature
_: Flame/Fire Prohibited
H:Flammable
[:Forward Collision Alert
Page 62 of 355

Chevrolet TRAX Owner Manual (GMNA-Localizing-U.S./Canada/Mexico-
13556235) - 2020 - CRC - 9/19/19
Seats and Restraints 61
crash. SeeVehicle Data
Recording and Privacy 0329
and
Event Data Recorders 0329.
. Let only qualified technicians
work on the airbag systems.
Improper service can mean that
an airbag system will not work
properly. See your dealer for
service.
Passenger Sensing
System
The vehicle has a passenger
sensing system for the front
outboard passenger position. The
passenger airbag status indicator
will light on the instrument panel
when the vehicle is started.
United States
Canada
The words ON and OFF, or the
symbols for on and off, will be
visible during the system check.
When the system check is
complete, either the word ON or
OFF, or the symbol for on or off, will
be visible. See Passenger Airbag
Status Indicator 0101.
The passenger sensing system
turns off the front outboard
passenger frontal airbag and knee
airbag under certain conditions. No
other airbag is affected by the
passenger sensing system.
The passenger sensing system
works with sensors that are part of
the front outboard passenger seat.
The sensors are designed to detect
the presence of a properly seated
occupant and determine if the front outboard passenger frontal airbag
and knee airbag should be allowed
to inflate or not.
According to accident statistics,
children are safer when properly
secured in a rear seat in the correct
child restraint for their weight
and size.
Whenever possible, children aged
12 and under should be secured in
a rear seating position.
Never put a rear-facing child seat in
the front. This is because the risk to
the rear-facing child is so great,
if the airbag inflates.
{Warning
A child in a rear-facing child
restraint can be seriously injured
or killed if the passenger frontal
airbag inflates. This is because
the back of the rear-facing child
restraint would be very close to
the inflating airbag. A child in a
forward-facing child restraint can
be seriously injured or killed if the
(Continued)
Page 85 of 355
Chevrolet TRAX Owner Manual (GMNA-Localizing-U.S./Canada/Mexico-
13556235) - 2020 - CRC - 9/19/19
84 Seats and Restraints
6. If the child restraint has a toptether, follow the child restraint
manufacturer's instructions
regarding the use of the top
tether. See Lower Anchors and
Tethers for Children (LATCH
System) 073.
7. Before placing a child in the child restraint, make sure it is
securely held in place. To
check, grasp the child restraint
at the seat belt path and
attempt to move it side to side
and back and forth. When the
child restraint is properly
installed, there should be no
more than 2.5 cm (1 in) of
movement.
To remove the child restraint,
unbuckle the vehicle seat belt and
let it return to the stowed position.
If the top tether is attached to a top
tether anchor, disconnect it.
If the head restraint was removed,
reinstall it before the seating
position is used. See "Head
Restraint Removal and Reinstallation" under
Lower Anchors
and Tethers for Children (LATCH
System) 073 for additional
information on installing the head
restraint properly.
Securing Child Restraints
(With the Seat Belt in the
Front Seat)
This vehicle has airbags. A rear
seat is a safer place to secure a
forward-facing child restraint. See
Where to Put the Restraint 072.
In addition, the vehicle has a
passenger sensing system which is
designed to turn off the front
outboard passenger frontal airbag
and knee airbag under certain
conditions. See Passenger Sensing
System 061 and
Passenger Airbag Status Indicator
0 101 for more information,
including important safety
information.
Never put a rear-facing child seat in
the front. This is because the risk to
the rear-facing child is so great if the
airbag deploys.
{Warning
A child in a rear-facing child
restraint can be seriously injured
or killed if the front outboard
passenger frontal airbag inflates.
This is because the back of the
rear-facing child restraint would
be very close to the inflating
airbag. A child in a forward-facing
child restraint can be seriously
injured or killed if the front
outboard passenger frontal airbag
inflates and the passenger seat is
in a forward position.
Even if the passenger sensing
system has turned off the front
outboard passenger airbag(s), no
system is fail-safe. No one can
guarantee that an airbag will not
deploy under some unusual
circumstance, even though the
airbag(s) are off.
Secure rear-facing child restraints
in a rear seat, even if the
airbag(s) are off. If you secure a
(Continued)
Page 103 of 355
Chevrolet TRAX Owner Manual (GMNA-Localizing-U.S./Canada/Mexico-
13556235) - 2020 - CRC - 9/19/19
102 Instruments and Controls
outboard passenger frontal airbag
and knee airbag are allowed to
inflate.
If the word OFF or the off symbol is
lit on the passenger airbag status
indicator, it means that the
passenger sensing system has
turned off the front outboard
passenger frontal airbag and
passenger knee airbag.
If, after several seconds, both status
indicator lights remain on, or if there
are no lights at all, there may be a
problem with the lights or the
passenger sensing system. See
your dealer for service.
{Warning
If the airbag readiness light ever
comes on and stays on, it means
that something may be wrong
with the airbag system. To help
avoid injury to yourself or others,
have the vehicle serviced right(Continued)
Warning (Continued)
away. SeeAirbag Readiness
Light 0101 for more information,
including important safety
information.
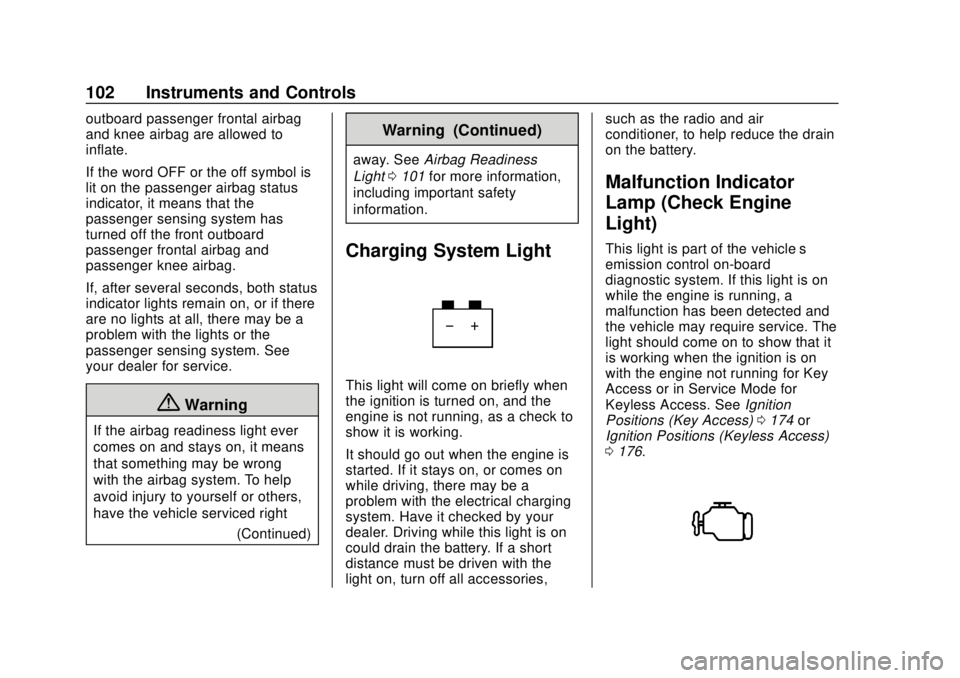
Charging System Light
This light will come on briefly when
the ignition is turned on, and the
engine is not running, as a check to
show it is working.
It should go out when the engine is
started. If it stays on, or comes on
while driving, there may be a
problem with the electrical charging
system. Have it checked by your
dealer. Driving while this light is on
could drain the battery. If a short
distance must be driven with the
light on, turn off all accessories, such as the radio and air
conditioner, to help reduce the drain
on the battery.
Malfunction Indicator
Lamp (Check Engine
Light)
This light is part of the vehicle’s
emission control on-board
diagnostic system. If this light is on
while the engine is running, a
malfunction has been detected and
the vehicle may require service. The
light should come on to show that it
is working when the ignition is on
with the engine not running for Key
Access or in Service Mode for
Keyless Access. See
Ignition
Positions (Key Access) 0174 or
Ignition Positions (Keyless Access)
0 176.
Page 117 of 355
Chevrolet TRAX Owner Manual (GMNA-Localizing-U.S./Canada/Mexico-
13556235) - 2020 - CRC - 9/19/19
116 Instruments and Controls
Remember, the Oil Life display must
be reset after each oil change. It will
not reset itself. Also, be careful not
to reset the Oil Life display
accidentally at any time other than
when the oil has just been changed.
It cannot be reset accurately until
the next oil change. To reset the
engine oil life system, press SET/
CLR while the Oil Life display is
active. SeeEngine Oil Life System
0 223.Vehicle Messages
Vehicle Messages
(Uplevel)
Messages displayed on the DIC
indicate the status of the vehicle or
some action that may be needed to
correct a condition. Multiple
messages may appear one after
another.
The messages that do not require
immediate action can be
acknowledged and cleared by
pressing SET/CLR. The messages
that require immediate action cannot
be cleared until that action is
performed.
All messages should be taken
seriously; clearing the message
does not correct the problem.
If a SERVICE message appears,
see your dealer.
Follow the instructions given in the
messages. The system displays
messages regarding the following
topics:
.
Service Messages .
Fluid Levels
. Vehicle Security
. Brakes
. Ride Control Systems
. Driver Assistance Systems
. Cruise Control
. Lighting and Bulb Replacement
. Wiper/Washer Systems
. Doors and Windows
. Seat Belts
. Airbag Systems
. Engine and Transmission
. Tire Pressure
. Battery
Vehicle Messages (Base
Level)
DIC messages display when the
status of the vehicle has changed
and action may be needed to
correct the condition. Multiple
messages appear one after another.
All messages should be taken
seriously.
Page 119 of 355

Chevrolet TRAX Owner Manual (GMNA-Localizing-U.S./Canada/Mexico-
13556235) - 2020 - CRC - 9/19/19
118 Instruments and Controls
LF XX, RF XX, LR XX,
or RR XX
A message displays when the tire
pressure is low. It shows the
location of the low tire and the
approximate pressure of the low tire.
If a tire pressure message appears,
stop as soon as you can. Inflate the
tires by adding air until the tire
pressure is equal to the values
shown on the Tire and Loading
Information label. SeeTires0255,
Vehicle Load Limits 0169, and Tire
Pressure 0262.
Engine Power Messages
ENGINE POWER IS REDUCED
This message displays when the
vehicle's propulsion power is
reduced. A reduction in propulsion
power can affect the vehicle's ability
to accelerate. If this message is on,
but there is no observed reduction
in performance, proceed to your
destination. The performance may
be reduced the next time the vehicle
is driven. The vehicle may be driven
while this message is on, but maximum acceleration and speed
may be reduced. Anytime this
message stays on, or displays
repeatedly, the vehicle should be
taken to your dealer for service as
soon as possible.
Under certain operating conditions,
propulsion will be disabled. Try
restarting after the vehicle has been
off for 30 seconds.
Vehicle Speed Messages
SPEED LIMITED TO XXX KM/
H (MPH)
This message shows that the
vehicle speed has been limited to
the speed displayed. The limited
speed is a protection for various
propulsion and vehicle systems,
such as lubrication, brakes, thermal,
suspension, Teen Driver if
equipped, or tires.
Vehicle
Personalization
The following are all possible
vehicle personalization features.
Depending on the vehicle, some
may not be available.
For System and Apps features and
functions, see
Settings0149.
To access the vehicle
personalization menu: 1. Touch the Settings icon on the Home Page on the
infotainment display.
2. Touch the desired category to display a list of available
options.
3. Touch to select the desired feature setting.
4. Touch
9orRto turn off or on a
feature.
5. Touch
zto go to the top level
of the SETTINGS menu.
The menu may contain the
following:
Page 142 of 355
Chevrolet TRAX Owner Manual (GMNA-Localizing-U.S./Canada/Mexico-
13556235) - 2020 - CRC - 9/19/19
Infotainment System 141
If Bluetooth is selected and no
volume is present, check the
volume setting on both your phone/
device and the infotainment system.
Music can be launched by touching
Bluetooth from the recent sources
list on the left of the screen or touch
More and select the Bluetooth
device.
To play music via Bluetooth:1. Power on the device, and pair to connect the device.
2. Once paired, touch Audio from the Home Page, and touch
Bluetooth.
Bluetooth Sound Menu
See “Infotainment System Sound
Menu” underAM-FM Radio 0134.
Manage Bluetooth Devices
From the Home Page: 1. Touch Audio.
2. Touch More.
3. Touch Bluetooth.
4. Touch Devices to add or delete devices. When selecting Bluetooth, the radio
may not be able to launch the audio
player on the connected device to
start playing. When the vehicle is
not moving, use the phone to begin
playback.
All devices launch audio differently.
When selecting Bluetooth as a
source, the radio may show as
paused on the screen. Press play
on the device or touch
pon the
screen to begin playback.
Browse functionality will be provided
where supported by the Bluetooth
device. This media content will not
be part of the MyMedia
source mode.
Some phones support sending
Bluetooth music information to
display on the radio. When the radio
receives this information, it will
check to see if any is available and
display it. For more information
about supported Bluetooth features,
see my.chevrolet.com/learn.
OnStar System
4G LTE
If equipped with 4G LTE, up to
seven devices, such as
smartphones, tablets, and laptops,
can be connected to high-speed
Internet through the vehicle’s built-in
Wi-Fi hotspot.
Call 1-888-4ONSTAR
(1-888-466-7827) to connect to an
OnStar Advisor for assistance. See
www.onstar.com for vehicle
availability, details, and system
limitations. Service and connectivity
may vary by make, model, year,
carrier, availability, and conditions.
4G LTE service is available in select
markets. 4G LTE performance is
based on industry averages and
vehicle systems design. Some
services require a data plan.
The OnStar App
If equipped, the infotainment system
has OnStar controls in the
embedded OnStar app on the Home
Page. All OnStar functions that can
be performed with the buttons can
Page 156 of 355
Chevrolet TRAX Owner Manual (GMNA-Localizing-U.S./Canada/Mexico-
13556235) - 2020 - CRC - 9/19/19
Climate Controls 155
Climate Controls
Climate Control Systems
Climate Control Systems . . . . . 155
Air Vents
Air Vents . . . . . . . . . . . . . . . . . . . . . 157
Maintenance
Air Intake . . . . . . . . . . . . . . . . . . . . . 158
Passenger Compartment AirFilter . . . . . . . . . . . . . . . . . . . . . . . . 158
Service . . . . . . . . . . . . . . . . . . . . . . . 159
Climate Control
Systems
If equipped with these climate
control systems, the heating,
cooling, and ventilation can be
controlled for the vehicle.
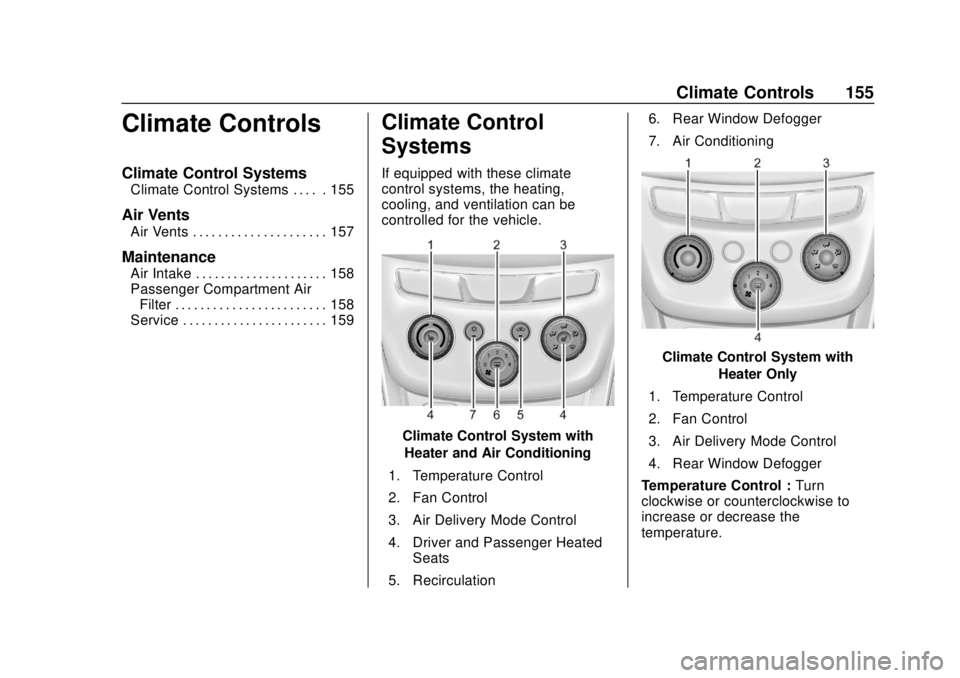
Climate Control System with
Heater and Air Conditioning
1. Temperature Control
2. Fan Control
3. Air Delivery Mode Control
4. Driver and Passenger Heated Seats
5. Recirculation 6. Rear Window Defogger
7. Air Conditioning
Climate Control System with
Heater Only
1. Temperature Control
2. Fan Control
3. Air Delivery Mode Control
4. Rear Window Defogger
Temperature Control : Turn
clockwise or counterclockwise to
increase or decrease the
temperature.
Page 157 of 355
Chevrolet TRAX Owner Manual (GMNA-Localizing-U.S./Canada/Mexico-
13556235) - 2020 - CRC - 9/19/19
156 Climate Controls
A:Turn clockwise or
counterclockwise to increase or
decrease the fan speed. Turning the
fan control to 0 turns the fan off. The
fan must be turned on to run the air
conditioning compressor.
Air Delivery Mode Control : Turn
clockwise or counterclockwise to
change the current airflow mode.
Select from the following air delivery
modes:
Y: Air is directed to the instrument
panel outlets.
\: Air is divided between the
instrument panel and floor outlets.
[: Air is directed to the floor
outlets, with some air directed to the
rear outlets.
W: This mode clears the windows
of fog or moisture. Air is directed to
the floor, windshield, and side
window outlets.
1: This mode clears the
windshield of fog or frost more
quickly. Air is directed to the
windshield and side window outlets. Do not drive the vehicle until all
windows are clear.
In defrost or defog mode, excessive
air conditioning use can cause the
windows to fog. If this happens,
change the air delivery mode to
Y
and reduce the fan speed.
#:
If equipped with air
conditioning, follow these steps to
use the system. Turn
Ato the
desired speed. The air conditioning
does not operate when the fan
control knob is in the off position.
Press
#to turn the air conditioning
on and off. When
#is pressed, an
indicator light comes on to show
that the air conditioning is on.
For quick cool down on hot days:
1. Open the windows to let hot air escape.
2. Press
M.
3. Press
#.
4. Select the coolest temperature.
5. Select the highest
Aspeed. Using these settings together for
long periods of time may cause the
air inside the vehicle to become too
dry. To prevent this from happening,
after the air in the vehicle has
cooled, turn the recirculation
mode off.
M:
This mode recirculates and
helps to quickly cool the air inside
the vehicle. It can be used to
prevent outside air and odors from
entering the vehicle.
Press the button to turn the
recirculation mode on. An indicator
light comes on to show that the
recirculation is on. Press the button
again to return to outside air mode.
Using the recirculation mode for
extended periods may cause the
windows to fog. If this happens,
select the defrost mode.
Max
#is available when the air
conditioning is selected and the
temperature is set to the coolest
setting while the outside air
temperature is warm. When Max
#
is activated, the air inside the
vehicle is automatically recirculated,
Page 158 of 355
Chevrolet TRAX Owner Manual (GMNA-Localizing-U.S./Canada/Mexico-
13556235) - 2020 - CRC - 9/19/19
Climate Controls 157
which helps to quickly cool the
vehicle. The recirculation indicator
will not be lit.
To allow outside air to enter in these
conditions, press the recirculation
button twice. The recirculation
indicator will not be lit.
MorL:If equipped, press to heat
the driver or passenger seat. See
Heated Front Seats 040.
Rear Window and Outside
Mirror Defogger
1:Press to turn the rear window
and outside mirror defogger on or
off. An indicator light comes on to
show that the feature is on.
The rear window defogger turns off
after about 10 minutes. It can also
be turned off by pressing
1again
or by turning the ignition off or to
ACC/ACCESSORY. If turned on
again it runs for about five minutes
before turning off. If equipped with heated outside
mirrors, they turn on with the rear
window defogger and help to clear
fog or frost from the surface of the
mirror. See
Heated Mirrors 030.
Caution
Using a razor blade or sharp
object on the inside rear window
can damage the antenna or
defogger. Repairs would not be
covered by the vehicle warranty.
Do not stick anything to the rear
window.
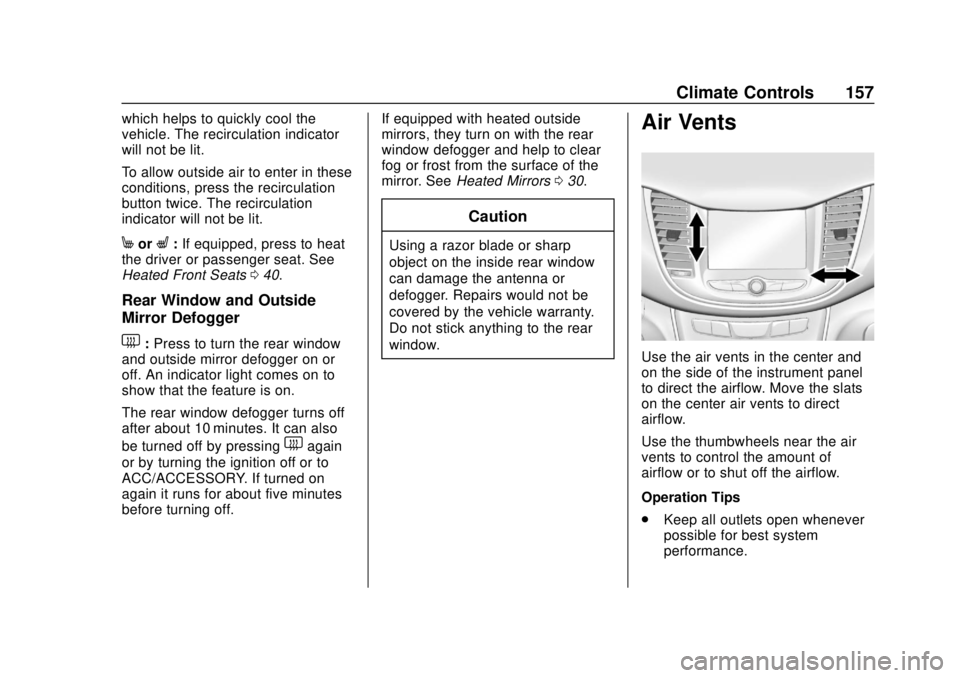
Air Vents
Use the air vents in the center and
on the side of the instrument panel
to direct the airflow. Move the slats
on the center air vents to direct
airflow.
Use the thumbwheels near the air
vents to control the amount of
airflow or to shut off the airflow.
Operation Tips
.
Keep all outlets open whenever
possible for best system
performance.