clutch CHEVROLET TRAX 2020 Owners Manual
[x] Cancel search | Manufacturer: CHEVROLET, Model Year: 2020, Model line: TRAX, Model: CHEVROLET TRAX 2020Pages: 355, PDF Size: 5.75 MB
Page 107 of 355
Chevrolet TRAX Owner Manual (GMNA-Localizing-U.S./Canada/Mexico-
13556235) - 2020 - CRC - 9/19/19
106 Instruments and Controls
have antilock brakes and there is a
problem with the regular brakes.
SeeBrake System Warning Light
0 105.
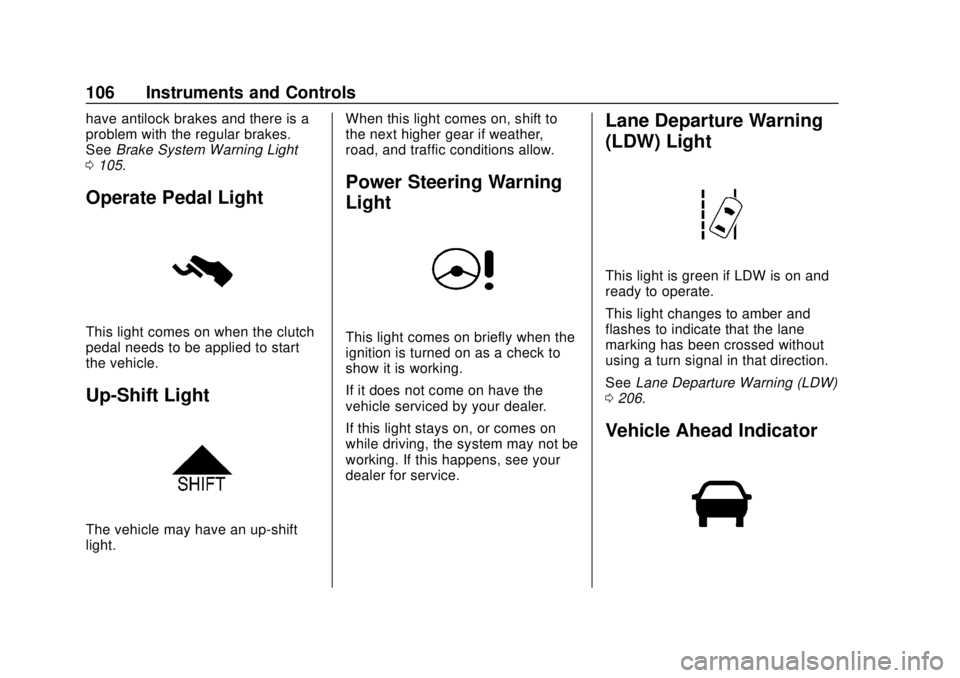
Operate Pedal Light
This light comes on when the clutch
pedal needs to be applied to start
the vehicle.
Up-Shift Light
The vehicle may have an up-shift
light. When this light comes on, shift to
the next higher gear if weather,
road, and traffic conditions allow.
Power Steering Warning
Light
This light comes on briefly when the
ignition is turned on as a check to
show it is working.
If it does not come on have the
vehicle serviced by your dealer.
If this light stays on, or comes on
while driving, the system may not be
working. If this happens, see your
dealer for service.
Lane Departure Warning
(LDW) Light
This light is green if LDW is on and
ready to operate.
This light changes to amber and
flashes to indicate that the lane
marking has been crossed without
using a turn signal in that direction.
See
Lane Departure Warning (LDW)
0 206.
Vehicle Ahead Indicator
Page 118 of 355
Chevrolet TRAX Owner Manual (GMNA-Localizing-U.S./Canada/Mexico-
13556235) - 2020 - CRC - 9/19/19
Instruments and Controls 117
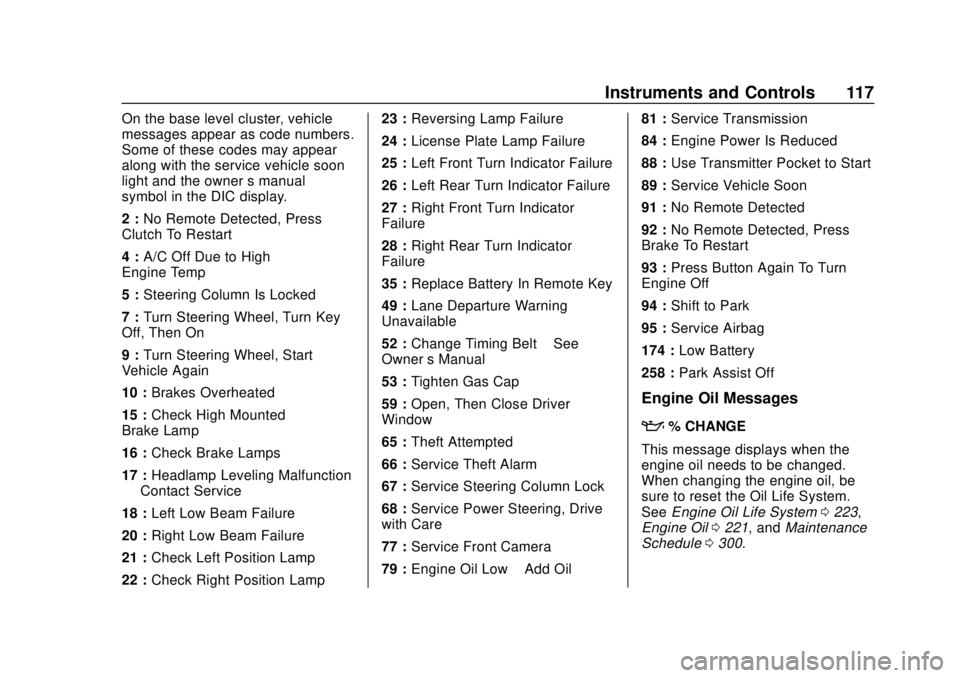
On the base level cluster, vehicle
messages appear as code numbers.
Some of these codes may appear
along with the service vehicle soon
light and the owner’s manual
symbol in the DIC display.
2 : No Remote Detected, Press
Clutch To Restart
4 : A/C Off Due to High
Engine Temp
5 : Steering Column Is Locked
7 : Turn Steering Wheel, Turn Key
Off, Then On
9 : Turn Steering Wheel, Start
Vehicle Again
10 : Brakes Overheated
15 : Check High Mounted
Brake Lamp
16 : Check Brake Lamps
17 : Headlamp Leveling Malfunction
— Contact Service
18 : Left Low Beam Failure
20 : Right Low Beam Failure
21 : Check Left Position Lamp
22 : Check Right Position Lamp 23 :
Reversing Lamp Failure
24 : License Plate Lamp Failure
25 : Left Front Turn Indicator Failure
26 : Left Rear Turn Indicator Failure
27 : Right Front Turn Indicator
Failure
28 : Right Rear Turn Indicator
Failure
35 : Replace Battery In Remote Key
49 : Lane Departure Warning
Unavailable
52 : Change Timing Belt –See
Owner ’s Manual
53 : Tighten Gas Cap
59 : Open, Then Close Driver
Window
65 : Theft Attempted
66 : Service Theft Alarm
67 : Service Steering Column Lock
68 : Service Power Steering, Drive
with Care
77 : Service Front Camera
79 : Engine Oil Low –Add Oil 81 :
Service Transmission
84 : Engine Power Is Reduced
88 : Use Transmitter Pocket to Start
89 : Service Vehicle Soon
91 : No Remote Detected
92 : No Remote Detected, Press
Brake To Restart
93 : Press Button Again To Turn
Engine Off
94 : Shift to Park
95 : Service Airbag
174 : Low Battery
258 : Park Assist Off
Engine Oil Messages
:% CHANGE
This message displays when the
engine oil needs to be changed.
When changing the engine oil, be
sure to reset the Oil Life System.
See Engine Oil Life System 0223,
Engine Oil 0221, and Maintenance
Schedule 0300.
Page 179 of 355

Chevrolet TRAX Owner Manual (GMNA-Localizing-U.S./Canada/Mexico-
13556235) - 2020 - CRC - 9/19/19
178 Driving and Operating
With the vehicle off, and the brake
pedal not applied, pressing and
holding ENGINE START/STOP for
more than five seconds will place
the vehicle in Service Mode.
The instruments and audio system
will operate as they do in ON/RUN,
but the vehicle will not be able to be
driven. The engine will not start in
Service Mode.
Press ENGINE START/STOP again
to turn the vehicle off.
Starting the Engine
Place the transmission in the
proper gear.
Caution
If you add electrical parts or
accessories, you could change
the way the engine operates. Any
resulting damage would not be
covered by the vehicle warranty.
SeeAdd-On Electrical Equipment
0 212.
Caution
If the steering wheel is turned
until it reaches the end of its
travel, and is held in that position
while starting the vehicle, damage
may occur to the hydraulic power
steering system and there may be
loss of power steering assist.
Automatic Transmission
Move the shift lever to P (Park) or
N (Neutral). To restart the vehicle
when it is already moving, use
N (Neutral) only.
Caution
Do not try to shift to P (Park) if the
vehicle is moving. If you do, you
could damage the transmission.
Shift to P (Park) only when the
vehicle is stopped. Manual Transmission
The shift lever should be in Neutral
and the parking brake engaged.
Hold the clutch pedal down to the
floor, press the brake pedal and
start the engine.
Starting Procedure (Key Access)
1. With your foot off the accelerator pedal, turn the
ignition key to START. When
the engine starts, let go of the
ignition.
The idle speed will go down as
the engine gets warm. Do not
race the engine immediately
after starting it. Operate the
engine and transmission gently
to allow the oil to warm up and
lubricate all moving parts.
Caution
Cranking the engine for long
periods of time, by returning the
ignition to the START position
immediately after cranking has
(Continued)
Page 180 of 355

Chevrolet TRAX Owner Manual (GMNA-Localizing-U.S./Canada/Mexico-
13556235) - 2020 - CRC - 9/19/19
Driving and Operating 179
Caution (Continued)
ended, can overheat and damage
the cranking motor, and drain the
battery. Wait at least 15 seconds
between each try, to let the
cranking motor cool down.
2. If the engine does not start after five to 10 seconds,
especially in very cold weather
(below −18 °C or 0 °F), it could
be flooded with too much
gasoline. Try pushing the
accelerator pedal all the way to
the floor and holding it there as
you hold the key in START for
up to a maximum of
15 seconds. Wait at least
15 seconds between each try,
to allow the cranking motor to
cool down. When the engine
starts, let go of the key and the
accelerator. If the vehicle starts
briefly but then stops again, do
the same thing. This clears the
extra gasoline from the engine.
Do not race the engine
immediately after starting it. Operate the engine and
transmission gently until the oil
warms up and lubricates all
moving parts.
Starting Procedure (Keyless
Access) 1. For vehicles with an automatic transmission, press the brake
pedal, then press ENGINE
START/STOP on the
instrument panel. For vehicles
with a manual transmission,
press the clutch pedal and the
brake pedal first, then press
ENGINE START/STOP.
The idle speed will go down as
the engine gets warm. Do not
race the engine immediately
after starting it.
If the RKE transmitter is not in
the vehicle, if there is
interference, or if the RKE
transmitter battery is low, the
Driver Information Center (DIC) will display a message. See
Driver Information Center (DIC)
0
111 and
Remote Keyless Entry (RKE)
System Operation (Keyless
Access) 010 or
Remote Keyless Entry (RKE)
System Operation (Key
Access) 017.
Caution
Cranking the engine for long
periods of time, by trying to start
the engine immediately after
cranking has ended, can overheat
and damage the cranking motor,
and drain the battery. Wait at
least 15 seconds between each
try, to let the cranking motor
cool down.
2. If the engine does not start after five to 10 seconds,
especially in very cold weather
(below −18 °C or 0 °F), it could
be flooded with too much
gasoline. Try pushing the
accelerator pedal all the way to
Page 190 of 355
Chevrolet TRAX Owner Manual (GMNA-Localizing-U.S./Canada/Mexico-
13556235) - 2020 - CRC - 9/19/19
Driving and Operating 189
improve with the normal gear
shifting as the transmission learns
and adapts.Manual Transmission
The vehicle may be equipped with a
5-speed or 6-speed manual
transmission.
Caution
Do not rest your hand on the shift
lever while driving. The pressure
could cause premature wear in
the transmission. The repairs
would not be covered by the
vehicle warranty.
Caution
Do not rest your foot on the clutch
pedal while driving or while
stopped. The pressure can cause
premature wear in the clutch. The
repairs would not be covered by
the vehicle warranty.
Caution
Shifting the vehicle initially into
any gear other than 1 (First) or
R (Reverse) can damage the
clutch. Shift the manual
transmission in the proper
sequence, and time the gear
shifting with the accelerator to
avoid revving the engine and
damaging the clutch.
1 (First) : Press the clutch pedal
fully to the pedal stop and shift into
1 (First). Then slowly let up on the
clutch pedal as you press the
accelerator pedal.
If you have come to a complete stop
and it is hard to shift into 1 (First),
put the shift lever in Neutral and let
up on the clutch. Press the clutch
pedal back down. Then shift into
1 (First).
2 (Second) : Press the clutch pedal
fully to the pedal stop as you let up
on the accelerator pedal and shift
Page 191 of 355

Chevrolet TRAX Owner Manual (GMNA-Localizing-U.S./Canada/Mexico-
13556235) - 2020 - CRC - 9/19/19
190 Driving and Operating
into 2 (Second). Then, slowly let up
on the clutch pedal as you press the
accelerator pedal.
3 (Third), 4 (Fourth), 5 (Fifth), and
6 (Sixth) :Shift into 3 (Third),
4 (Fourth), 5 (Fifth), and 6 (Sixth) (if
equipped) the same way as for
2 (Second). Slowly let up on the
clutch pedal as you press the
accelerator pedal. Upshifts should
occur between 2000 and 3000 rpm
and downshifts should occur
between 2000 and 1000 rpm.
To stop, let up on the accelerator
pedal and press the brake pedal.
Just before the vehicle stops, press
the clutch pedal and the brake
pedal, and shift to Neutral.
Neutral : Use this position when
you start or idle the engine. The
shift lever is in Neutral when it is
centered in the shift pattern, not in
any gear.
R (Reverse) : To engage
R (Reverse), with the vehicle
stationary, pull up on the button on
the shift lever and engage the gear.
If the gear does not engage, set the
lever in Neutral, release the clutch
pedal, and apply it again; then
repeat gear selection.
Caution
Shifting to R (Reverse) while the
vehicle is moving forward could
damage the transmission. The
repairs would not be covered by
(Continued)
Caution (Continued)
the vehicle warranty. Shift to
R (Reverse) only after the vehicle
is stopped.
Shift Speeds
Caution
Do not skip gears while
upshifting. This can cause
premature wear in the
transmission. The repairs would
not be covered by the vehicle
warranty.
{Warning
If you skip a gear when
downshifting, you could lose
control of the vehicle. You could
injure yourself or others. Do not
shift down more than one gear at
a time when downshifting.
Page 198 of 355
Chevrolet TRAX Owner Manual (GMNA-Localizing-U.S./Canada/Mexico-
13556235) - 2020 - CRC - 9/19/19
Driving and Operating 197
The cruise control indicator on the
instrument cluster turns green after
cruise control has been set to the
desired speed. SeeInstrument
Cluster 097.
Resuming a Set Speed
If the cruise control is set at a
desired speed and then the brakes
or clutch for manual transmissions
are applied, the cruise control is
disengaged without erasing the set
speed from memory.
Once the vehicle reaches about
40 km/h (25 mph) or more, move the
thumbwheel up toward RES/+
briefly. The vehicle returns to the
previous set speed.
Increasing Speed While Using
Cruise Control
If the cruise control system is
already activated:
. Move the thumbwheel up toward
RES/+ and hold it until the
desired speed is reached, then
release it. .
To increase vehicle speed in
small increments, move the
thumbwheel up toward RES/+
briefly. For each press, the
vehicle goes about 1 km/h
(1 mph) faster.
The speedometer reading can be
displayed in either English or metric
units. See Instrument Cluster 097.
The increment value used depends
on the units displayed.
Reducing Speed While Using
Cruise Control
If the cruise control system is
already activated:
. Move the thumbwheel toward
SET/− and hold until the desired
lower speed is reached, then
release it.
. To decrease the vehicle speed in
small increments, move the
thumbwheel toward SET/−
briefly. For each press, the
vehicle goes about 1 km/h
(1 mph) slower. The speedometer reading can be
displayed in either English or metric
units. See
Instrument Cluster 097.
The increment value used depends
on the units displayed.
Passing Another Vehicle While
Using Cruise Control
Use the accelerator pedal to
increase the vehicle speed. When
you take your foot off the pedal, the
vehicle slows down to the previously
set cruise control speed. While
pressing the accelerator pedal or
shortly following the release to
override cruise, briefly moving the
thumbwheel toward SET/− will result
in cruise set to the current vehicle
speed.
Using Cruise Control on Hills
How well cruise control works on
hills depends on the vehicle speed,
load, and the steepness of the hills.
When going up steep hills, you
might have to step on the
accelerator pedal to maintain the
vehicle speed. When going
downhill, you might have to brake or
shift to a lower gear to keep your
Page 214 of 355
Chevrolet TRAX Owner Manual (GMNA-Localizing-U.S./Canada/Mexico-
13556235) - 2020 - CRC - 9/19/19
Vehicle Care 213
Vehicle Care
General Information
General Information . . . . . . . . . . 214
California Proposition65 Warning . . . . . . . . . . . . . . . . . 214
California Perchlorate Materials Requirements . . . . . 215
Accessories and Modifications . . . . . . . . . . . . . . . . 215
Vehicle Checks
Doing Your OwnService Work . . . . . . . . . . . . . . . 215
Hood . . . . . . . . . . . . . . . . . . . . . . . . . 216
Engine Compartment Overview . . . . . . . . . . . . . . . . . . . . 218
Engine Oil . . . . . . . . . . . . . . . . . . . . 221
Engine Oil Life System . . . . . . . 223
Automatic Transmission Fluid . . . . . . . . . . . . . . . . . . . . . . . . 224
Manual Transmission Fluid . . . 225
Hydraulic Clutch . . . . . . . . . . . . . . 225
Engine Air Cleaner/Filter . . . . . . 225
Cooling System . . . . . . . . . . . . . . 227
Engine Overheating . . . . . . . . . . 231
Power Steering Fluid (1.4L L4 Engine (LUV)) . . . . . . . . . . . . . . . 232 Power Steering Fluid (1.8L L4
Engine) . . . . . . . . . . . . . . . . . . . . . 232
Washer Fluid . . . . . . . . . . . . . . . . . 233
Brakes . . . . . . . . . . . . . . . . . . . . . . . 234
Brake Fluid . . . . . . . . . . . . . . . . . . . 234
Battery - North America . . . . . . 236
All-Wheel Drive . . . . . . . . . . . . . . . 236
Starter Switch Check . . . . . . . . . 237
Automatic Transmission Shift Lock Control Function
Check . . . . . . . . . . . . . . . . . . . . . . . 237
Ignition Transmission Lock Check . . . . . . . . . . . . . . . . . . . . . . . 237
Park Brake and P (Park) Mechanism Check . . . . . . . . . . 238
Wiper Blade Replacement . . . . 238
Windshield Replacement . . . . . 239
Gas Strut(s) . . . . . . . . . . . . . . . . . . 240
Headlamp Aiming
Front Headlamp Aiming . . . . . . 241
Bulb Replacement
Bulb Replacement . . . . . . . . . . . . 241
Halogen Bulbs . . . . . . . . . . . . . . . . 241
LED Lighting . . . . . . . . . . . . . . . . . 242
Headlamps, Front Turn Signal and Parking Lamps . . . . . . . . . 242
Taillamps, Turn Signal,
Sidemarker, Stoplamps, and
Back-Up Lamps . . . . . . . . . . . . . 245 License Plate Lamp . . . . . . . . . . 247
Electrical System
Electrical System Overload . . . 248
Fuses and Circuit Breakers . . . 248
Engine Compartment Fuse
Block . . . . . . . . . . . . . . . . . . . . . . . . 249
Instrument Panel Fuse Block . . . . . . . . . . . . . . . . . . . . . . . . 252
Rear Compartment Fuse Block . . . . . . . . . . . . . . . . . . . . . . . . 254
Wheels and Tires
Tires . . . . . . . . . . . . . . . . . . . . . . . . . . 255
All-Season Tires . . . . . . . . . . . . . . 256
Winter Tires . . . . . . . . . . . . . . . . . . 256
Tire Sidewall Labeling . . . . . . . . 257
Tire Designations . . . . . . . . . . . . . 259
Tire Terminology andDefinitions . . . . . . . . . . . . . . . . . . 260
Tire Pressure . . . . . . . . . . . . . . . . . 262
Tire Pressure Monitor System . . . . . . . . . . . . . . . . . . . . . . 263
Tire Pressure Monitor Operation . . . . . . . . . . . . . . . . . . . 264
Tire Inspection . . . . . . . . . . . . . . . . 267
Tire Rotation . . . . . . . . . . . . . . . . . 268
When It Is Time for New Tires . . . . . . . . . . . . . . . . . . . . . . . . 269
Buying New Tires . . . . . . . . . . . . . 270
Page 220 of 355

Chevrolet TRAX Owner Manual (GMNA-Localizing-U.S./Canada/Mexico-
13556235) - 2020 - CRC - 9/19/19
Vehicle Care 219
1.Engine Air Cleaner/Filter 0225.
2. Engine Oil Dipstick. See Engine Oil 0221.
3. Engine Cooling Fan (Out of View). See Cooling System
0 227.
4. Engine Oil Fill Cap. See Engine Oil 0221.
5. Engine Coolant Surge Tank and Pressure Cap. See
Cooling System 0227.
6. Brake/Clutch Fluid Reservoir. See Brake Fluid 0234 and
Hydraulic Clutch 0225.
7. Auxiliary Fuse Block. See Engine Compartment Fuse
Block 0249.
8. Battery - North America 0236.
9. Windshield Washer Fluid Reservoir. See Washer Fluid
0 233.
10. Engine Compartment Fuse
Block 0249.
Page 222 of 355
Chevrolet TRAX Owner Manual (GMNA-Localizing-U.S./Canada/Mexico-
13556235) - 2020 - CRC - 9/19/19
Vehicle Care 221
1.Engine Air Cleaner/Filter 0225.
2. Power Steering Fluid Reservoir. See Power Steering
Fluid (1.4L L4 Engine (LUV))
0 232 or
Power Steering Fluid (1.8L L4
Engine) 0232.
3. Engine Oil Dipstick. See Engine Oil 0221.
4. Engine Cooling Fan (Out of View). See Cooling System
0 227.
5. Engine Oil Fill Cap. See Engine Oil 0221.
6. Engine Coolant Surge Tank and Pressure Cap. See
Cooling System 0227.
7. Brake/Clutch Fluid Reservoir. See Brake Fluid 0234 and
Hydraulic Clutch 0225.
8. Auxiliary Fuse Block. See Engine Compartment Fuse
Block 0249.
9. Battery - North America 0236. 10. Windshield Washer Fluid
Reservoir. See Washer Fluid
0 233.
11. Engine Compartment Fuse
Block 0249.
Engine Oil
To ensure proper engine
performance and long life, careful
attention must be paid to engine oil.
Following these simple, but
important steps will help protect
your investment:
.
Use engine oil approved to the
proper specification and of the
proper viscosity grade. See
“Selecting the Right Engine Oil”
in this section.
. Check the engine oil level
regularly and maintain the
proper oil level. See “Checking
Engine Oil” and“When to Add
Engine Oil” in this section.
. Change the engine oil at the
appropriate time. See Engine Oil
Life System 0223. .
Always dispose of engine oil
properly. See “What to Do with
Used Oil” in this section.
Checking Engine Oil
Check the engine oil level regularly,
every 650 km (400 mi), especially
prior to a long trip. The engine oil
dipstick handle is a loop. See
Engine Compartment Overview
0218 for the location.
{Warning
The engine oil dipstick handle
may be hot; it could burn you.
Use a towel or glove to touch the
dipstick handle.
If a low oil Driver Information Center
(DIC) message displays, check the
oil level.
Follow these guidelines:
. To get an accurate reading, park
the vehicle on level ground.
Check the engine oil level after
the engine has been off for at
least two hours. Checking the