Temp CHEVROLET TRAX 2021 Owner's Manual
[x] Cancel search | Manufacturer: CHEVROLET, Model Year: 2021, Model line: TRAX, Model: CHEVROLET TRAX 2021Pages: 280, PDF Size: 8.76 MB
Page 3 of 280
Chevrolet TRAX Owner Manual (GMNA-Localizing-U.S./Canada-14609828) -
2021 - CRC - 8/21/20
2 Introduction
Using this Manual
To quickly locate information about the
vehicle, use the Index in the back of the
manual. It is an alphabetical list of what is
in the manual and the page number where
it can be found.
About Driving the Vehicle
As with other vehicles of this type, failure to
operate this vehicle correctly may result in
loss of control or a crash. Be sure to read
the driving guidelines in this manual in the
section called“Driving and Operating” and
specifically Driver Behavior 0128, Driving
Environment 0128, and Vehicle Design
0 128.
Danger, Warning, and Caution
Warning messages found on vehicle labels
and in this manual describe hazards and
what to do to avoid or reduce them.
{Danger
Danger indicates a hazard with a high
level of risk which will result in serious
injury or death.
{Warning
Warning indicates a hazard that could
result in injury or death.
Caution
Caution indicates a hazard that could
result in property or vehicle damage.
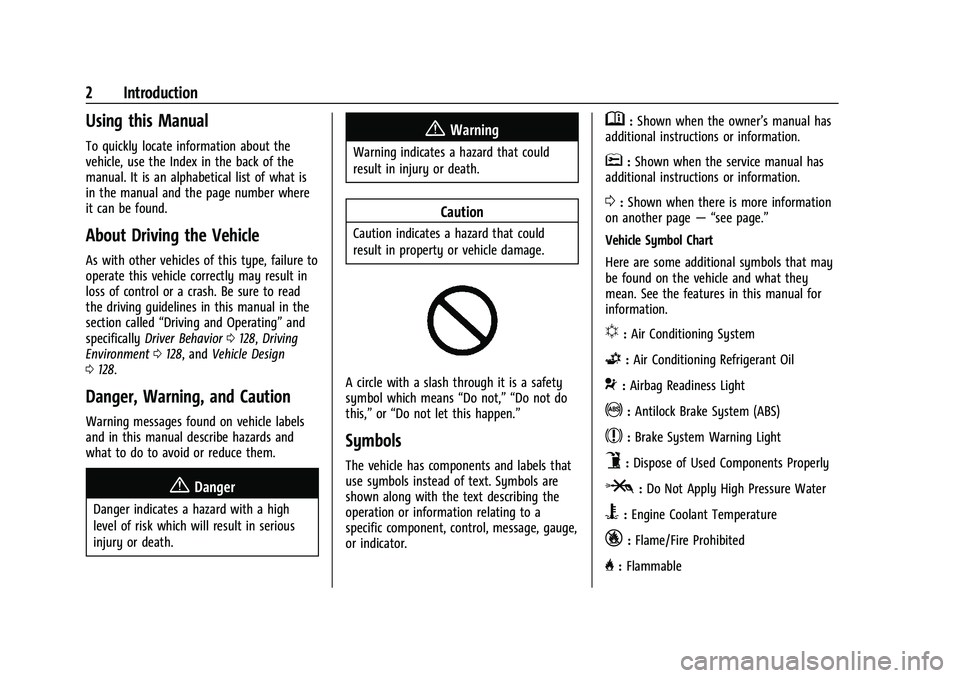
A circle with a slash through it is a safety
symbol which means “Do not,” “Do not do
this,” or“Do not let this happen.”
Symbols
The vehicle has components and labels that
use symbols instead of text. Symbols are
shown along with the text describing the
operation or information relating to a
specific component, control, message, gauge,
or indicator.
M:Shown when the owner’s manual has
additional instructions or information.
*: Shown when the service manual has
additional instructions or information.
0: Shown when there is more information
on another page — “see page.”
Vehicle Symbol Chart
Here are some additional symbols that may
be found on the vehicle and what they
mean. See the features in this manual for
information.
u: Air Conditioning System
G:Air Conditioning Refrigerant Oil
9:Airbag Readiness Light
!:Antilock Brake System (ABS)
$:Brake System Warning Light
9:Dispose of Used Components Properly
P:Do Not Apply High Pressure Water
B:Engine Coolant Temperature
_:Flame/Fire Prohibited
H: Flammable
Page 12 of 280
Chevrolet TRAX Owner Manual (GMNA-Localizing-U.S./Canada-14609828) -
2021 - CRC - 8/21/20
Keys, Doors, and Windows 11
Battery Replacement
{Warning
Never allow children to play with the RKE
transmitter. The transmitter contains a
small battery, which can be a choking
hazard. If swallowed, internal burns can
occur, resulting in severe injury or death.
Seek medical attention immediately if a
battery is swallowed.
{Warning
To avoid personal injury, do not touch
metal surfaces on the RKE transmitter
when it has been exposed to extreme
heat. These surfaces can be hot to the
touch at temperatures above 59 °C (138
°F).
Caution
When replacing the battery, do not touch
any of the circuitry on the transmitter.
Static from your body could damage the
transmitter.
Caution
Always replace the battery with the
correct type. Replacing the battery with
an incorrect type could potentially create
a risk of battery explosion. Dispose of
used batteries according to instructions
and local laws. Do not attempt to burn,
crush, or cut the used battery, and avoid
exposing the battery to environments
with extremely low air pressures or high
temperatures.
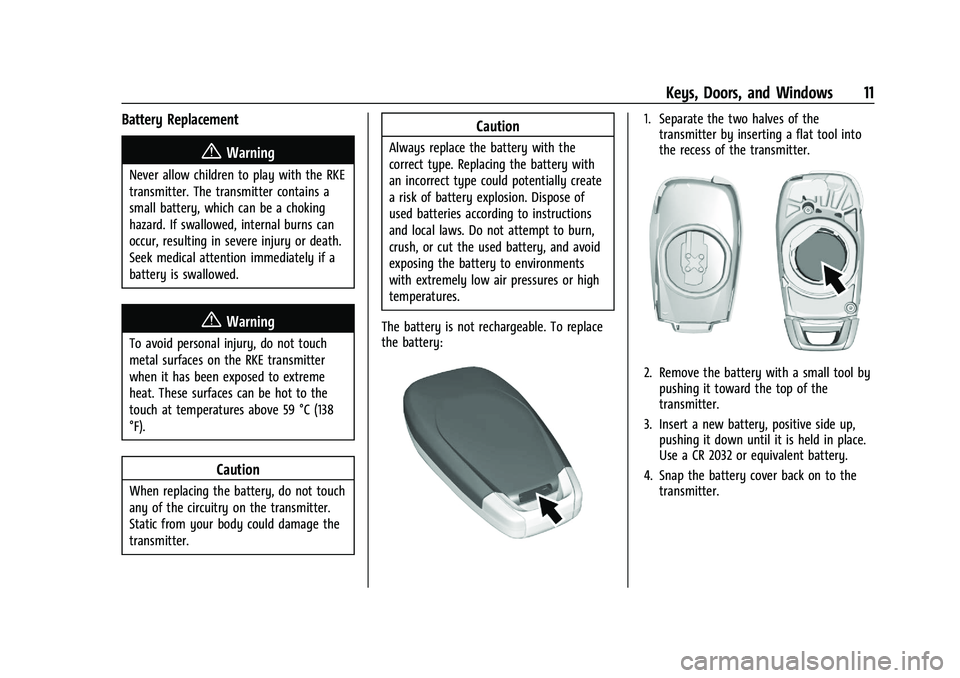
The battery is not rechargeable. To replace
the battery:
1. Separate the two halves of the transmitter by inserting a flat tool into
the recess of the transmitter.
2. Remove the battery with a small tool bypushing it toward the top of the
transmitter.
3. Insert a new battery, positive side up, pushing it down until it is held in place.
Use a CR 2032 or equivalent battery.
4. Snap the battery cover back on to the transmitter.
Page 15 of 280
Chevrolet TRAX Owner Manual (GMNA-Localizing-U.S./Canada-14609828) -
2021 - CRC - 8/21/20
14 Keys, Doors, and Windows
Temporary Disable of Passive Locking
Temporarily disable passive locking by
pressing and holding
Kon the interior door
switch with a door open for several seconds,
or until three chimes are heard. Passive
locking will then remain disabled until
Qon
the interior door is pressed, or until the
vehicle is turned on.
To customize the doors to automatically lock
when exiting the vehicle, see Vehicle
Personalization 093.
Keyless Liftgate Opening
To open the liftgate, press the touch pad on
the rear of the liftgate above the license
plate. The doors must be unlocked or the
RKE transmitter must be within 1 m (3 ft)
Key Access
To access a vehicle with a weak transmitter
battery, see Door Locks019.
Programming Transmitters to the Vehicle
Only RKE transmitters programmed to the
vehicle will work. If a transmitter is lost or
stolen, a replacement can be purchased and
programmed through your dealer. The
vehicle can be reprogrammed so that lost or
stolen transmitters no longer work. Any remaining transmitters will need to be
reprogrammed. Each vehicle can have up to
eight transmitters matched to it.
Programming with Recognized Transmitters
A new transmitter can be programmed to
the vehicle when there are two recognized
transmitters. To program, the vehicle must
be off and all of the transmitters, both
currently recognized and new, must be
with you.
1. Remove the key from the RKE transmitter.
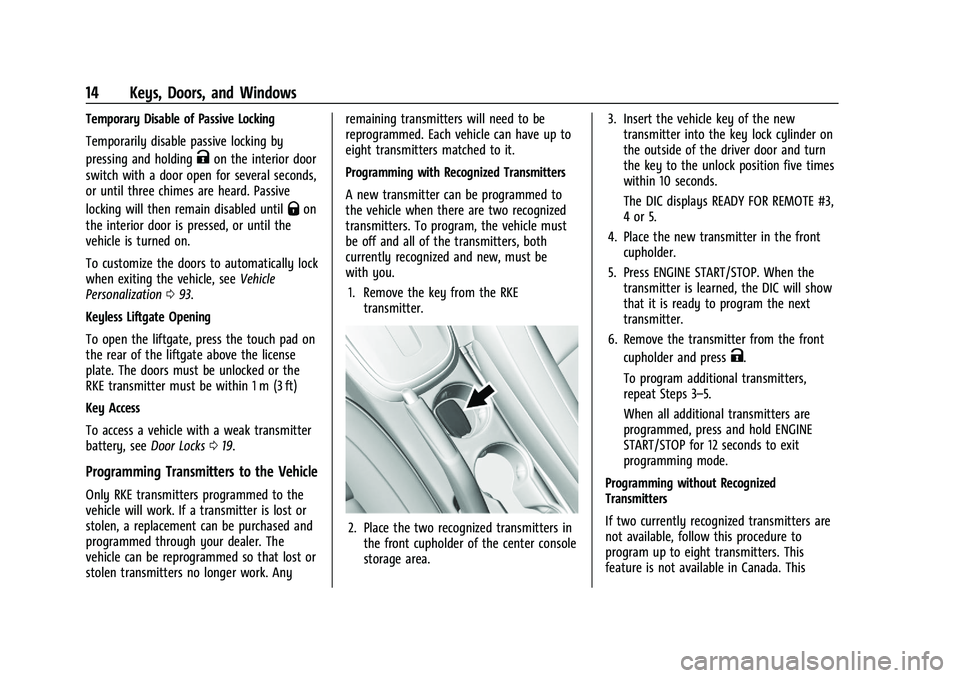
2. Place the two recognized transmitters inthe front cupholder of the center console
storage area. 3. Insert the vehicle key of the new
transmitter into the key lock cylinder on
the outside of the driver door and turn
the key to the unlock position five times
within 10 seconds.
The DIC displays READY FOR REMOTE #3,
4 or 5.
4. Place the new transmitter in the front cupholder.
5. Press ENGINE START/STOP. When the transmitter is learned, the DIC will show
that it is ready to program the next
transmitter.
6. Remove the transmitter from the front cupholder and press
K.
To program additional transmitters,
repeat Steps 3–5.
When all additional transmitters are
programmed, press and hold ENGINE
START/STOP for 12 seconds to exit
programming mode.
Programming without Recognized
Transmitters
If two currently recognized transmitters are
not available, follow this procedure to
program up to eight transmitters. This
feature is not available in Canada. This
Page 17 of 280
Chevrolet TRAX Owner Manual (GMNA-Localizing-U.S./Canada-14609828) -
2021 - CRC - 8/21/20
16 Keys, Doors, and Windows
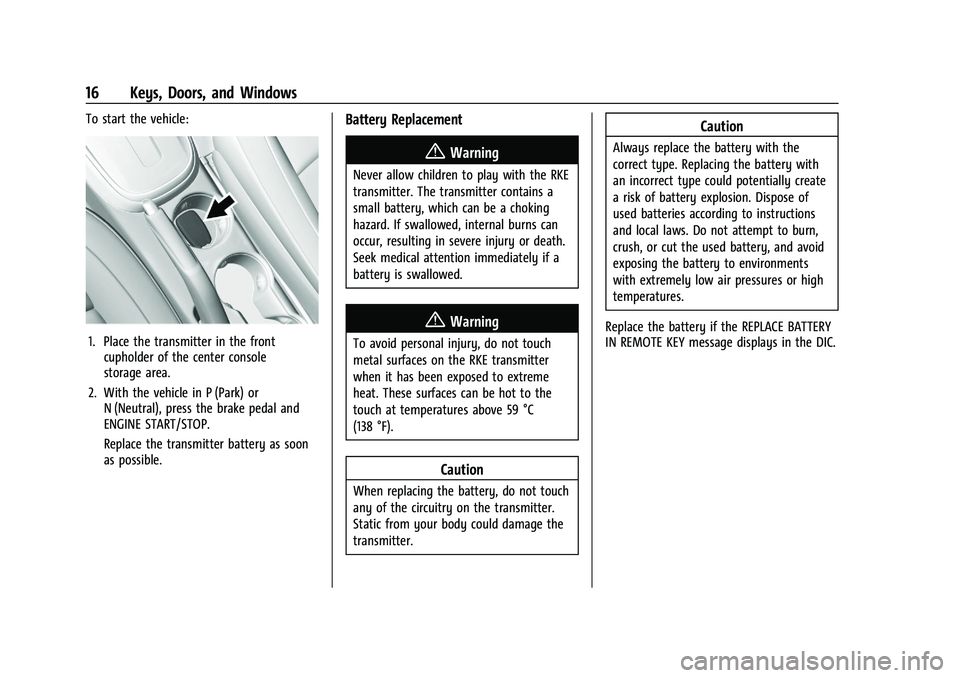
To start the vehicle:
1. Place the transmitter in the frontcupholder of the center console
storage area.
2. With the vehicle in P (Park) or N (Neutral), press the brake pedal and
ENGINE START/STOP.
Replace the transmitter battery as soon
as possible.
Battery Replacement
{Warning
Never allow children to play with the RKE
transmitter. The transmitter contains a
small battery, which can be a choking
hazard. If swallowed, internal burns can
occur, resulting in severe injury or death.
Seek medical attention immediately if a
battery is swallowed.
{Warning
To avoid personal injury, do not touch
metal surfaces on the RKE transmitter
when it has been exposed to extreme
heat. These surfaces can be hot to the
touch at temperatures above 59 °C
(138 °F).
Caution
When replacing the battery, do not touch
any of the circuitry on the transmitter.
Static from your body could damage the
transmitter.
Caution
Always replace the battery with the
correct type. Replacing the battery with
an incorrect type could potentially create
a risk of battery explosion. Dispose of
used batteries according to instructions
and local laws. Do not attempt to burn,
crush, or cut the used battery, and avoid
exposing the battery to environments
with extremely low air pressures or high
temperatures.
Replace the battery if the REPLACE BATTERY
IN REMOTE KEY message displays in the DIC.
Page 19 of 280
Chevrolet TRAX Owner Manual (GMNA-Localizing-U.S./Canada-14609828) -
2021 - CRC - 8/21/20
18 Keys, Doors, and Windows
Laws in some local communities may restrict
the use of remote starters. For example,
some laws require a person using remote
start to have the vehicle in view. Check local
regulations for any requirements.
Do not use the remote start feature if the
vehicle is low on fuel. The vehicle could run
out of fuel.
Other conditions can affect the performance
of the transmitter. SeeRemote Keyless Entry
(RKE) System 09.
Starting the Vehicle
To start the engine using the remote start
feature:
1. Press and release
Q.
2. Immediately after completing Step 1, press and hold
/for at least
four seconds or until the turn signal
lamps flash. The turn signal lamps
flashing confirms the request to remote
start the vehicle has been received.
When the engine starts, the parking lamps
will turn on and remain on as long as the
engine is running. The doors will be locked
and the climate control system may
come on. The engine will continue to run for
15 minutes. After 30 seconds, repeat the
steps if a 15-minute extension is desired.
Remote start can be extended only once.
Turn the ignition on before driving.
Extending Engine Run Time
The engine run time can also be extended
by another 15 minutes, if during the first
15 minutes Steps 1 and 2 are repeated while
the engine is still running. An extension can
be requested 30 seconds after starting. This
provides a total of 30 minutes.
The remote start can only be extended once.
When the remote start is extended, the
second 15-minute period is added on to the
first 15 minutes for a total of 30 minutes.
A maximum of two remote starts, or a
remote start with an extension, are allowed
between ignition cycles.
The ignition must be turned on and then off
before the remote start procedure can be
used again.
Canceling a Remote Start
To cancel a remote start, do one of the
following:
.Press and hold/until the parking lamps
turn off.
.Turn on the hazard warning flashers.
.Turn the vehicle on and then off.
Conditions in Which Remote Start Will
Not Work
The remote vehicle start feature will not
operate if:
.The key is in the ignition (Key Access) or
if a transmitter is in the vehicle (Keyless
Access).
.The hood is not closed.
.The vehicle is on.
.The hazard warning flashers are on.
.The malfunction indicator lamp is on.
.The engine coolant temperature is
too high.
.The oil pressure is low.
.Two remote vehicle starts, or a single
remote start with an extension, have
already been used.
.The vehicle is not in P (Park).
Page 27 of 280
Chevrolet TRAX Owner Manual (GMNA-Localizing-U.S./Canada-14609828) -
2021 - CRC - 8/21/20
26 Keys, Doors, and Windows
Manual Rearview Mirror
If equipped with a manual rearview mirror,
push the tab forward for daytime use and
pull it for nighttime use to avoid glare from
the headlamps from behind.
Automatic Dimming Rearview
Mirror
If equipped, automatic dimming reduces the
glare of headlamps from behind. The
dimming feature comes on when the vehicle
is started.
Windows{
Warning
Never leave a child, a helpless adult, or a
pet alone in a vehicle, especially with the
windows closed in warm or hot weather.
They can be overcome by the extreme
heat and suffer permanent injuries or
even death from heat stroke.
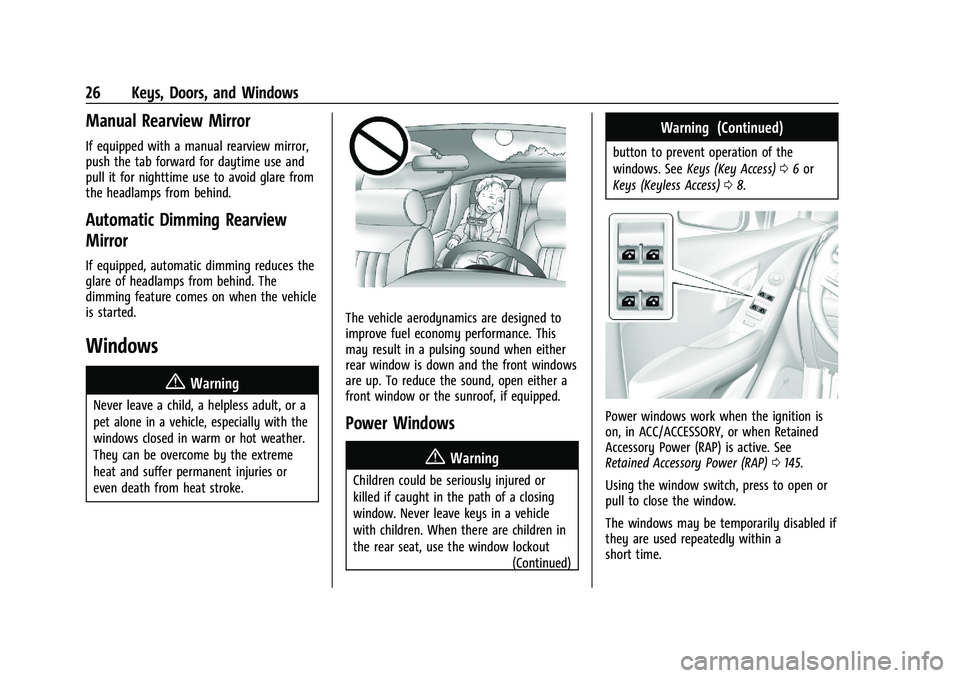
The vehicle aerodynamics are designed to
improve fuel economy performance. This
may result in a pulsing sound when either
rear window is down and the front windows
are up. To reduce the sound, open either a
front window or the sunroof, if equipped.
Power Windows
{Warning
Children could be seriously injured or
killed if caught in the path of a closing
window. Never leave keys in a vehicle
with children. When there are children in
the rear seat, use the window lockout (Continued)
Warning (Continued)
button to prevent operation of the
windows. SeeKeys (Key Access) 06or
Keys (Keyless Access) 08.
Power windows work when the ignition is
on, in ACC/ACCESSORY, or when Retained
Accessory Power (RAP) is active. See
Retained Accessory Power (RAP) 0145.
Using the window switch, press to open or
pull to close the window.
The windows may be temporarily disabled if
they are used repeatedly within a
short time.
Page 34 of 280
Chevrolet TRAX Owner Manual (GMNA-Localizing-U.S./Canada-14609828) -
2021 - CRC - 8/21/20
Seats and Restraints 33
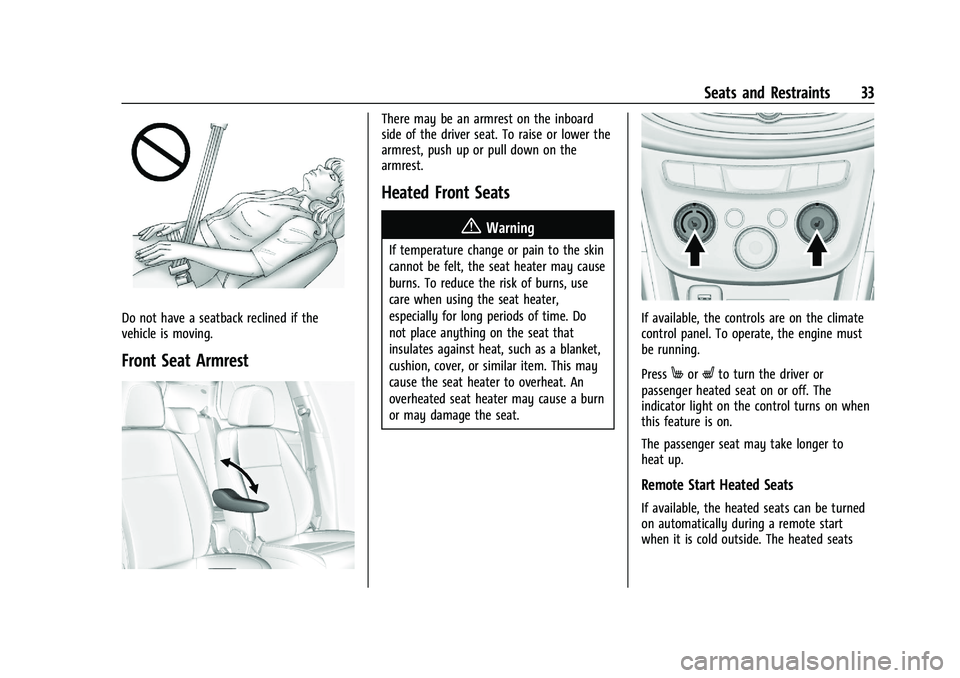
Do not have a seatback reclined if the
vehicle is moving.
Front Seat Armrest
There may be an armrest on the inboard
side of the driver seat. To raise or lower the
armrest, push up or pull down on the
armrest.
Heated Front Seats
{Warning
If temperature change or pain to the skin
cannot be felt, the seat heater may cause
burns. To reduce the risk of burns, use
care when using the seat heater,
especially for long periods of time. Do
not place anything on the seat that
insulates against heat, such as a blanket,
cushion, cover, or similar item. This may
cause the seat heater to overheat. An
overheated seat heater may cause a burn
or may damage the seat.
If available, the controls are on the climate
control panel. To operate, the engine must
be running.
Press
MorLto turn the driver or
passenger heated seat on or off. The
indicator light on the control turns on when
this feature is on.
The passenger seat may take longer to
heat up.
Remote Start Heated Seats
If available, the heated seats can be turned
on automatically during a remote start
when it is cold outside. The heated seats
Page 35 of 280
Chevrolet TRAX Owner Manual (GMNA-Localizing-U.S./Canada-14609828) -
2021 - CRC - 8/21/20
34 Seats and Restraints
will be canceled when the ignition is turned
on. Press the control to use the heated seats
after the vehicle is started.
The heated seat indicator lights do not turn
on during a remote start.
The temperature performance of an
unoccupied seat may be reduced. This is
normal.
The heated seats will not turn on during a
remote start unless the heated seat feature
is enabled in the vehicle personalization
menu. SeeRemote Vehicle Start 017 and
Vehicle Personalization 093.
Folding Seatback
The front passenger seatback may fold flat.
{Warning
If you fold the seatback forward to carry
longer objects, such as skis, be sure any
such cargo is not near an airbag. In a
crash, an inflating airbag might force that
object toward a person. This could cause
severe injury or even death. Secure
objects away from the area in which an
airbag would inflate. For more
(Continued)
Warning (Continued)
information, seeWhere Are the Airbags?
0 46 and
Vehicle Load Limits 0134.
{Warning
Things you put on this seatback can
strike and injure people in a sudden stop
or turn, or in a crash. Remove or secure
all items before driving.
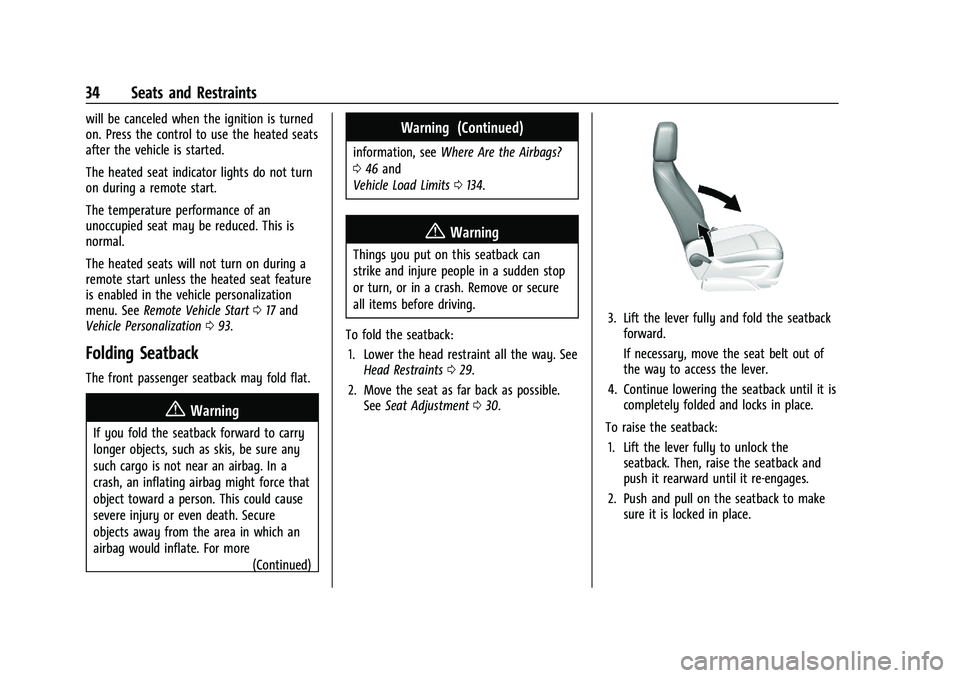
To fold the seatback: 1. Lower the head restraint all the way. See Head Restraints 029.
2. Move the seat as far back as possible. See Seat Adjustment 030.
3. Lift the lever fully and fold the seatback
forward.
If necessary, move the seat belt out of
the way to access the lever.
4. Continue lowering the seatback until it is completely folded and locks in place.
To raise the seatback: 1. Lift the lever fully to unlock the seatback. Then, raise the seatback and
push it rearward until it re-engages.
2. Push and pull on the seatback to make sure it is locked in place.
Page 50 of 280
Chevrolet TRAX Owner Manual (GMNA-Localizing-U.S./Canada-14609828) -
2021 - CRC - 8/21/20
Seats and Restraints 49
Rollover capable roof-rail airbags,
if equipped, are designed to help contain
the head and chest of occupants in the
outboard seating positions in the first and
second rows. The rollover capable roof-rail
airbags are designed to help reduce the risk
of full or partial ejection in rollover events,
although no system can prevent all such
ejections.
But airbags would not help in many types
of collisions, primarily because the
occupant's motion is not toward those
airbags. SeeWhen Should an Airbag Inflate?
0 47.
Airbags should never be regarded as
anything more than a supplement to seat
belts.
What Will You See after an
Airbag Inflates?
After frontal and seat-mounted side impact
airbags inflate, they quickly deflate, so
quickly that some people may not even
realize the airbags inflated. Roof-rail airbags
may still be at least partially inflated for
some time after they inflate. Some
components of the airbag module may be
hot for several minutes. For location of the
airbags, see Where Are the Airbags? 046. The parts of the airbag that come into
contact with you may be warm, but not too
hot to touch. There may be some smoke
and dust coming from the vents in the
deflated airbags. Airbag inflation does not
prevent the driver from seeing out of the
windshield or being able to steer the
vehicle, nor does it prevent people from
leaving the vehicle.
{Warning
When an airbag inflates, there may be
dust in the air. This dust could cause
breathing problems for people with a
history of asthma or other breathing
trouble. To avoid this, everyone in the
vehicle should get out as soon as it is
safe to do so. If you have breathing
problems but cannot get out of the
vehicle after an airbag inflates, then get
fresh air by opening a window or a door.
If you experience breathing problems
following an airbag deployment, you
should seek medical attention.
The vehicle has a feature that may
automatically unlock the doors, turn on the
interior lamps and hazard warning flashers,
and shut off the fuel system after the airbags inflate. The feature may also
activate, without airbag inflation, after an
event that exceeds a predetermined
threshold. After turning the ignition off and
then on again, the fuel system will return to
normal operation; the doors can be locked,
the interior lamps can be turned off, and
the hazard warning flashers can be turned
off using the controls for those features.
If any of these systems are damaged in the
crash they may not operate as normal.{Warning
A crash severe enough to inflate the
airbags may have also damaged
important functions in the vehicle, such
as the fuel system, brake and steering
systems, etc. Even if the vehicle appears
to be drivable after a moderate crash,
there may be concealed damage that
could make it difficult to safely operate
the vehicle.
Use caution if you should attempt to
restart the engine after a crash has
occurred.
Page 67 of 280
Chevrolet TRAX Owner Manual (GMNA-Localizing-U.S./Canada-14609828) -
2021 - CRC - 8/21/20
66 Seats and Restraints
the floor of the cargo area. The
cargo cover should remain off while
the top tether is in use.
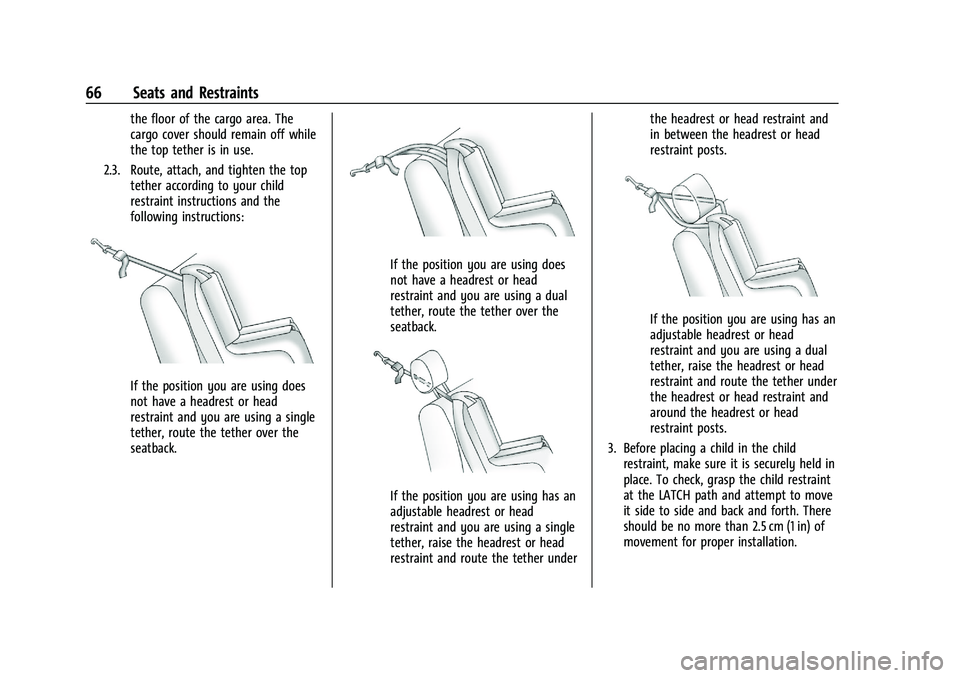
2.3. Route, attach, and tighten the top tether according to your child
restraint instructions and the
following instructions:
If the position you are using does
not have a headrest or head
restraint and you are using a single
tether, route the tether over the
seatback.
If the position you are using does
not have a headrest or head
restraint and you are using a dual
tether, route the tether over the
seatback.
If the position you are using has an
adjustable headrest or head
restraint and you are using a single
tether, raise the headrest or head
restraint and route the tether under the headrest or head restraint and
in between the headrest or head
restraint posts.
If the position you are using has an
adjustable headrest or head
restraint and you are using a dual
tether, raise the headrest or head
restraint and route the tether under
the headrest or head restraint and
around the headrest or head
restraint posts.
3. Before placing a child in the child restraint, make sure it is securely held in
place. To check, grasp the child restraint
at the LATCH path and attempt to move
it side to side and back and forth. There
should be no more than 2.5 cm (1 in) of
movement for proper installation.