keyless CHEVROLET TRAX 2023 Owner's Manual
[x] Cancel search | Manufacturer: CHEVROLET, Model Year: 2023, Model line: TRAX, Model: CHEVROLET TRAX 2023Pages: 280, PDF Size: 12.13 MB
Page 100 of 280
Chevrolet TRAX Owner Manual (GMNA-Localizing-U.S./Canada-15498927) -
2022 - CRC - 5/27/21
Lighting 99
Courtesy Lamps
The courtesy lamps come on when any door
is opened,
Kon the Remote Keyless Entry
(RKE) transmitter is pressed, or when the
ignition is switched off. See Dome Lamps
0 99.
Dome Lamps
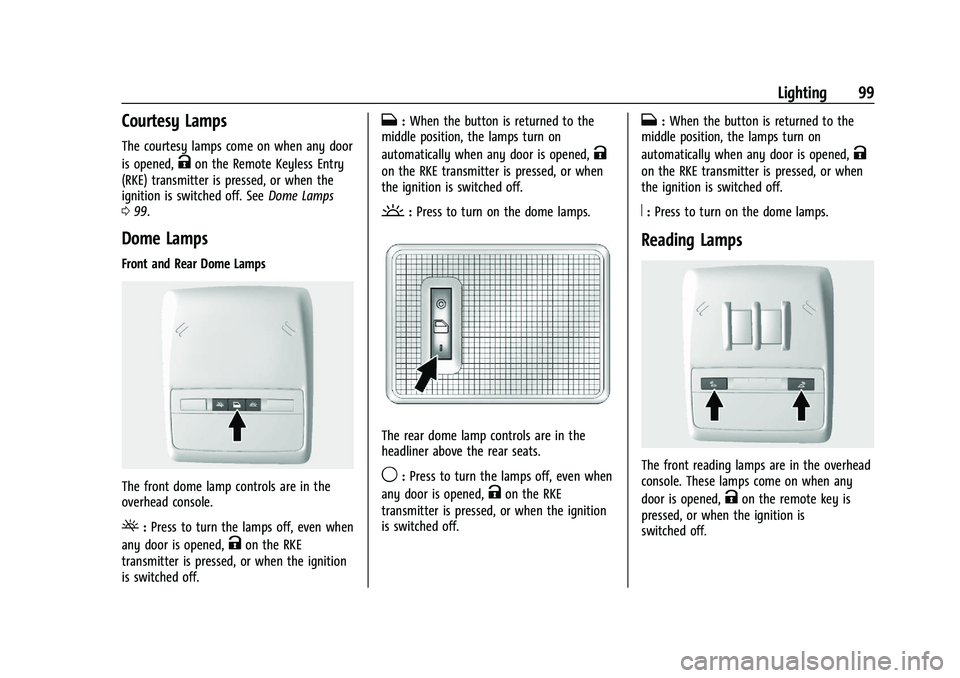
Front and Rear Dome Lamps
The front dome lamp controls are in the
overhead console.
(:Press to turn the lamps off, even when
any door is opened,
Kon the RKE
transmitter is pressed, or when the ignition
is switched off.
H: When the button is returned to the
middle position, the lamps turn on
automatically when any door is opened,
K
on the RKE transmitter is pressed, or when
the ignition is switched off.
': Press to turn on the dome lamps.
The rear dome lamp controls are in the
headliner above the rear seats.
9:Press to turn the lamps off, even when
any door is opened,
Kon the RKE
transmitter is pressed, or when the ignition
is switched off.
H: When the button is returned to the
middle position, the lamps turn on
automatically when any door is opened,
K
on the RKE transmitter is pressed, or when
the ignition is switched off.
R: Press to turn on the dome lamps.
Reading Lamps
The front reading lamps are in the overhead
console. These lamps come on when any
door is opened,
Kon the remote key is
pressed, or when the ignition is
switched off.
Page 101 of 280
Chevrolet TRAX Owner Manual (GMNA-Localizing-U.S./Canada-15498927) -
2022 - CRC - 5/27/21
100 Lighting
To operate, the ignition must be on, in ACC/
ACCESSORY, or using Retained Accessory
Power (RAP).
#or$:Press to turn each lamp on
or off.
Lighting Features
Entry Lighting
The interior lamps turn on when pressingK
on the Remote Keyless Entry (RKE)
transmitter or opening any doors, and the
dome lamp control is in the DOOR position.
Some exterior lamps also turn on when
pressing
Kon the RKE transmitter or
opening any doors. Low-Beam lamps will
only turn on briefly at night, or in areas
with limited lighting.
All lamps will gradually fade out after about
30 seconds.
Entry lighting can be disabled manually by
closing all doors, pressing
Qon the RKE
transmitter, or starting the vehicle.
This feature can be changed. See “Vehicle
Locator Lights” underVehicle Personalization
0 92.
Exit Lighting
Some exterior lamps and interior lamps turn
on when the key is removed from the
ignition.
The exterior and interior lamps remain on
for a set amount of time, then automatically
turn off. If equipped with Keyless Access,
the exterior lamps automatically turn on
when the driver door is opened after the
ignition is turned off.
The interior lights turn on when the ignition
is turned off.
The exterior lamps turn off immediately by
turning the exterior lamp control off.
This feature can be changed. See Vehicle
Personalization 092.
Battery Load Management
The vehicle has Electric Power Management
(EPM) that estimates the battery's
temperature and state of charge. It then
adjusts the voltage for best performance
and extended life of the battery.
When the battery's state of charge is low,
the voltage is raised slightly to quickly bring
the charge back up. When the state of
charge is high, the voltage is lowered slightly to prevent overcharging. If the
vehicle has a voltmeter gauge or a voltage
display on the Driver Information Center
(DIC), you may see the voltage move up or
down. This is normal. If there is a problem,
an alert will be displayed.
The battery can be discharged at idle if the
electrical loads are very high. This is true for
all vehicles. This is because the generator
(alternator) may not be spinning fast
enough at idle to produce all the power
needed for very high electrical loads.
A high electrical load occurs when several of
the following are on, such as: headlamps,
high beams, fog lamps, rear window
defogger, climate control fan at high speed,
heated seats, engine cooling fans, trailer
loads, and loads plugged into accessory
power outlets.
EPM works to prevent excessive discharge of
the battery. It does this by balancing the
generator's output and the vehicle's
electrical needs. It can increase engine idle
speed to generate more power, whenever
needed. It can temporarily reduce the power
demands of some accessories.
Page 122 of 280
Chevrolet TRAX Owner Manual (GMNA-Localizing-U.S./Canada-15498927) -
2022 - CRC - 5/27/21
Infotainment System 121
5. Place the Remote Keyless Entry (RKE)transmitter key you wish to register in
the transmitter pocket. The key does not
need to be the one that started the
vehicle. See Remote Keyless Entry (RKE)
System Operation (Key Access) 09or
Remote Keyless Entry (RKE) System
Operation (Keyless Access) 012 for
transmitter pocket location.
6. From the Teen Driver menu, touch Setup Keys.
.If the transmitter key has not
previously been registered, the option
to add the key displays. Touch Setup
and a confirmation message displays.
Teen Driver restrictions will be
applied whenever this key is used to
operate the vehicle.
.If the transmitter key has already
been registered, the option to
remove the key displays. If Remove is
touched, the transmitter key is no
longer registered. A confirmation
message displays, and Teen Driver
restrictions will not be applied if this
transmitter key is used to operate
the vehicle. In vehicles with a pushbutton start system,
if a Teen Driver and a non-Teen Driver key
are both present at start up, the vehicle will
recognize the non-Teen Driver key to start
the vehicle. The Teen Driver settings will not
be active.
For a keyed ignition system:
1. Start the engine.
2. For automatic transmissions, the vehicle must be in P (Park). For manual
transmissions, the vehicle must be
stopped with the parking brake set.
3. From the Settings menu, touch Vehicle and then Teen Driver.
4. Enter the PIN.
5. Touch Setup Keys. The system displays instructions for registering or
unregistering a key. A confirmation
message displays.
Manage Settings
Audio Volume Limit : Allows the audio
volume limit to be turned on or off. Touch
Set Audio Volume Limit to choose the
maximum allowable audio volume level. Set Audio Volume Limit :
Allows a
maximum radio volume to be set. Use the
arrows to choose the maximum allowable
level for the audio volume.
Teen Driver Speed Limiter : Limits the
maximum speed of the vehicle. When the
speed limiter is turned on and the vehicle is
started with a Teen Driver key, the DIC
displays a message that the top speed is
limited.
On certain vehicles, when the Speed Limiter
is turned ON, the vehicle’s maximum
acceleration will be limited. The DIC will
display a message that the acceleration is
limited.
Teen Driver Speed Warning : Allows the
speed warning to be turned on or off. Touch
Set Teen Driver Speed Warning to set the
warning speed.
Set Teen Driver Speed Warning : Displays a
warning in the DIC when exceeding a
selectable speed. Choose the desired speed
warning level. The speed warning does not
limit the speed of the vehicle.
SiriusXM Explicit Content Filter (if
equipped) : Allows the SiriusXM Explicit
Content Filter to be turned ON or OFF.
When ON, the teen driver will not be able
Page 130 of 280
Chevrolet TRAX Owner Manual (GMNA-Localizing-U.S./Canada-15498927) -
2022 - CRC - 5/27/21
Driving and Operating 129
Driving and Operating
Driving Information
Driver Behavior . . . . . . . . . . . . . . . . . . . . . . . . 130
Driving Environment . . . . . . . . . . . . . . . . . . . 130
Vehicle Design . . . . . . . . . . . . . . . . . . . . . . . . . 130
Driving for Better Fuel Economy . . . . . . . 130
Distracted Driving . . . . . . . . . . . . . . . . . . . . . 130
Defensive Driving . . . . . . . . . . . . . . . . . . . . . . 131
Impaired Driving . . . . . . . . . . . . . . . . . . . . . . . 131
Control of a Vehicle . . . . . . . . . . . . . . . . . . . . 131
Braking . . . . . . . . . . . . . . . . . . . . . . . . . . . . . . . . 132
Steering . . . . . . . . . . . . . . . . . . . . . . . . . . . . . . . 132
Off-Road Recovery . . . . . . . . . . . . . . . . . . . . . 133
Loss of Control . . . . . . . . . . . . . . . . . . . . . . . . . 133
Driving on Wet Roads . . . . . . . . . . . . . . . . . 133
Hill and Mountain Roads . . . . . . . . . . . . . . 134
Winter Driving . . . . . . . . . . . . . . . . . . . . . . . . . 135
If the Vehicle Is Stuck . . . . . . . . . . . . . . . . . 136
Vehicle Load Limits . . . . . . . . . . . . . . . . . . . . 136
Starting and Operating
New Vehicle Break-In . . . . . . . . . . . . . . . . . . 139
Ignition Positions (Key Access) . . . . . . . . 140
Ignition Positions (Keyless Access) . . . . . 142
Starting the Engine . . . . . . . . . . . . . . . . . . . . 143
Winter Cover . . . . . . . . . . . . . . . . . . . . . . . . . . 145
Engine Heater . . . . . . . . . . . . . . . . . . . . . . . . . 146
Retained Accessory Power (RAP) . . . . . . . 147
Shifting Into Park . . . . . . . . . . . . . . . . . . . . . . 147Shifting out of Park . . . . . . . . . . . . . . . . . . . 148
Parking over Things That Burn . . . . . . . . 149
Extended Parking (Keyless Access) . . . . . 149
Engine Exhaust
Engine Exhaust . . . . . . . . . . . . . . . . . . . . . . . . 149
Running the Vehicle While Parked . . . . . 150
Automatic Transmission
Automatic Transmission . . . . . . . . . . . . . . . 150
Manual Mode . . . . . . . . . . . . . . . . . . . . . . . . . . 152
Drive Systems
All-Wheel Drive . . . . . . . . . . . . . . . . . . . . . . . . 152
Brakes
Antilock Brake System (ABS) . . . . . . . . . . . 153
Parking Brake . . . . . . . . . . . . . . . . . . . . . . . . . . 153
Brake Assist . . . . . . . . . . . . . . . . . . . . . . . . . . . 154
Hill Start Assist (HSA) . . . . . . . . . . . . . . . . . . 154
Ride Control Systems
Traction Control/Electronic Stability
Control . . . . . . . . . . . . . . . . . . . . . . . . . . . . . . 154
Cruise Control
Cruise Control . . . . . . . . . . . . . . . . . . . . . . . . . 156
Driver Assistance Systems
Driver Assistance Systems . . . . . . . . . . . . . 158
Rear Vision Camera (RVC) . . . . . . . . . . . . . . 159
Park Assist . . . . . . . . . . . . . . . . . . . . . . . . . . . . 160 Side Blind Zone Alert (SBZA) . . . . . . . . . . . 161
Fuel
Top Tier Fuel . . . . . . . . . . . . . . . . . . . . . . . . . . 162
Recommended Fuel . . . . . . . . . . . . . . . . . . . . 163
Prohibited Fuels . . . . . . . . . . . . . . . . . . . . . . . 163
Fuels in Foreign Countries . . . . . . . . . . . . . 163
Fuel Additives . . . . . . . . . . . . . . . . . . . . . . . . . 163
Filling the Tank . . . . . . . . . . . . . . . . . . . . . . . . 164
Filling a Portable Fuel Container . . . . . . . 165
Trailer Towing
General Towing Information . . . . . . . . . . . 165
Conversions and Add-Ons
Add-On Electrical Equipment . . . . . . . . . . . 165
Page 143 of 280
Chevrolet TRAX Owner Manual (GMNA-Localizing-U.S./Canada-15498927) -
2022 - CRC - 5/27/21
142 Driving and Operating
be used for service and diagnostics, and to
verify the proper operation of the
malfunction indicator lamp as may be
required for emission inspection purposes.
The switch stays in this position when the
engine is running. The transmission is also
unlocked in this position.
If the key is left in ON/RUN with the engine
off, the battery could drain and the vehicle
may not start.
3 (START) :This is the position that starts
the engine. When the engine starts, release
the key. The ignition returns to ON/RUN for
driving.
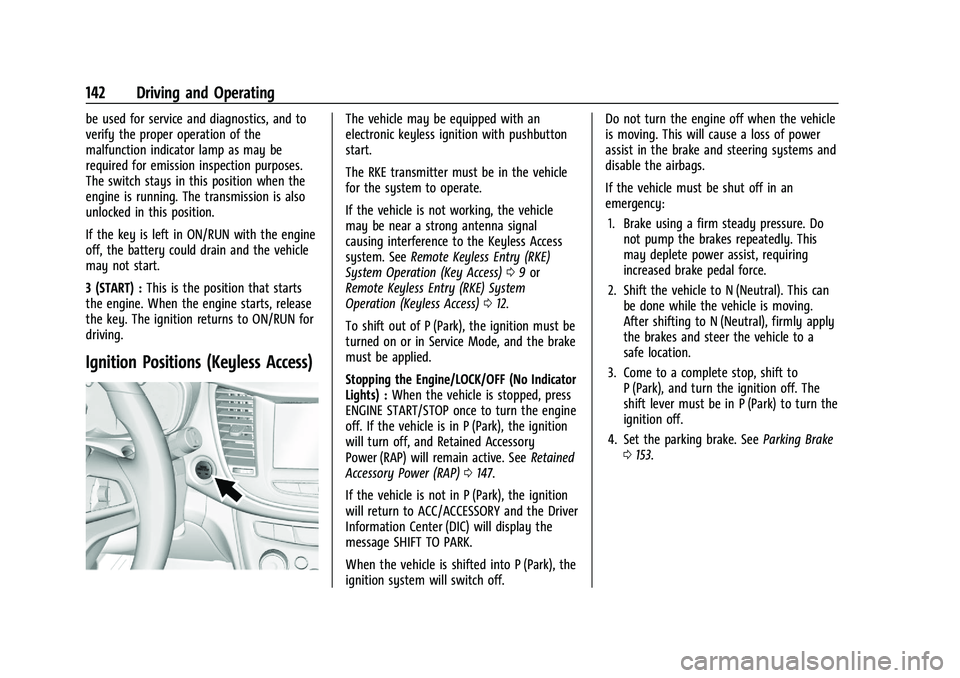
Ignition Positions (Keyless Access)
The vehicle may be equipped with an
electronic keyless ignition with pushbutton
start.
The RKE transmitter must be in the vehicle
for the system to operate.
If the vehicle is not working, the vehicle
may be near a strong antenna signal
causing interference to the Keyless Access
system. See Remote Keyless Entry (RKE)
System Operation (Key Access) 09or
Remote Keyless Entry (RKE) System
Operation (Keyless Access) 012.
To shift out of P (Park), the ignition must be
turned on or in Service Mode, and the brake
must be applied.
Stopping the Engine/LOCK/OFF (No Indicator
Lights) : When the vehicle is stopped, press
ENGINE START/STOP once to turn the engine
off. If the vehicle is in P (Park), the ignition
will turn off, and Retained Accessory
Power (RAP) will remain active. See Retained
Accessory Power (RAP) 0147.
If the vehicle is not in P (Park), the ignition
will return to ACC/ACCESSORY and the Driver
Information Center (DIC) will display the
message SHIFT TO PARK.
When the vehicle is shifted into P (Park), the
ignition system will switch off. Do not turn the engine off when the vehicle
is moving. This will cause a loss of power
assist in the brake and steering systems and
disable the airbags.
If the vehicle must be shut off in an
emergency:
1. Brake using a firm steady pressure. Do not pump the brakes repeatedly. This
may deplete power assist, requiring
increased brake pedal force.
2. Shift the vehicle to N (Neutral). This can be done while the vehicle is moving.
After shifting to N (Neutral), firmly apply
the brakes and steer the vehicle to a
safe location.
3. Come to a complete stop, shift to P (Park), and turn the ignition off. The
shift lever must be in P (Park) to turn the
ignition off.
4. Set the parking brake. See Parking Brake
0 153.
Page 145 of 280
Chevrolet TRAX Owner Manual (GMNA-Localizing-U.S./Canada-15498927) -
2022 - CRC - 5/27/21
144 Driving and Operating
Starting Procedure (Key Access)1. With your foot off the accelerator pedal, turn the ignition key to START. When
the engine starts, let go of the ignition.
The idle speed will go down as the
engine gets warm. Do not race the
engine immediately after starting it.
Operate the engine and transmission
gently to allow the oil to warm up and
lubricate all moving parts.
Caution
Cranking the engine for long periods of
time, by returning the ignition to the
START position immediately after
cranking has ended, can overheat and
damage the cranking motor, and drain
the battery. Wait at least 15 seconds
between each try, to let the cranking
motor cool down.
2. If the engine does not start after five to 10 seconds, especially in very cold
weather (below −18 °C or 0 °F), it could
be flooded with too much gasoline. Try
pushing the accelerator pedal all the way
to the floor and holding it there as you
hold the key in START for up to a
maximum of 15 seconds. Wait at least 15 seconds between each try, to allow
the cranking motor to cool down. When
the engine starts, let go of the key and
the accelerator. If the vehicle starts
briefly but then stops again, do the
same thing. This clears the extra gasoline
from the engine. Do not race the engine
immediately after starting it. Operate
the engine and transmission gently until
the oil warms up and lubricates all
moving parts.
Starting Procedure (Keyless Access) 1. Press the brake pedal, then press ENGINE START/STOP on the instrument panel.
The idle speed will go down as the
engine gets warm. Do not race the
engine immediately after starting it.
If the RKE transmitter is not in the
vehicle, if there is interference, or if the
RKE transmitter battery is low, the Driver
Information Center (DIC) will display a
message. See Driver Information Center
(DIC) 090 and
Remote Keyless Entry (RKE) System
Operation (Key Access) 09or
Remote Keyless Entry (RKE) System
Operation (Keyless Access) 012.
Caution
Cranking the engine for long periods of
time, by trying to start the engine
immediately after cranking has ended,
can overheat and damage the cranking
motor, and drain the battery. Wait at
least 15 seconds between each try, to let
the cranking motor cool down.
2. If the engine does not start after five to 10 seconds, especially in very cold
weather (below −18 °C or 0 °F), it could
be flooded with too much gasoline. Try
pushing the accelerator pedal all the way
to the floor and holding it there as you
hold ENGINE START/STOP, for up to a
maximum of 15 seconds. Wait at least
15 seconds between each try, to allow
the cranking motor to cool down.
When the engine starts, let go of the
button and the accelerator. If the vehicle
starts briefly but then stops again, follow
the same steps. This clears the extra
gasoline from the engine.
Do not race the engine immediately
after starting it. Operate the engine and
transmission gently until the oil warms
up and lubricates all moving parts.
Page 150 of 280
Chevrolet TRAX Owner Manual (GMNA-Localizing-U.S./Canada-15498927) -
2022 - CRC - 5/27/21
Driving and Operating 149
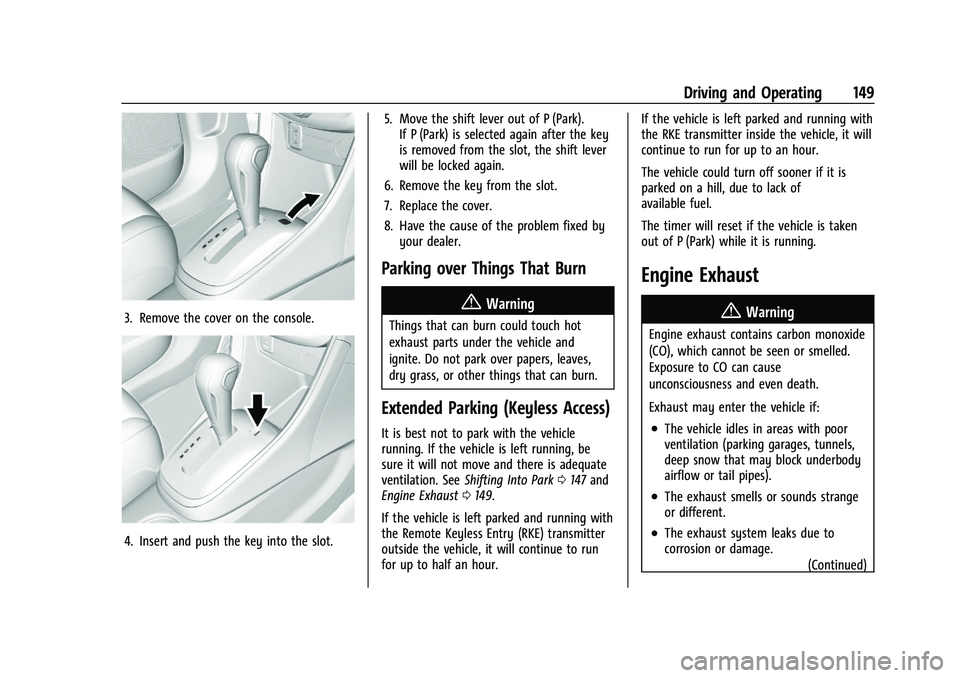
3. Remove the cover on the console.
4. Insert and push the key into the slot.5. Move the shift lever out of P (Park).
If P (Park) is selected again after the key
is removed from the slot, the shift lever
will be locked again.
6. Remove the key from the slot.
7. Replace the cover.
8. Have the cause of the problem fixed by your dealer.
Parking over Things That Burn
{Warning
Things that can burn could touch hot
exhaust parts under the vehicle and
ignite. Do not park over papers, leaves,
dry grass, or other things that can burn.
Extended Parking (Keyless Access)
It is best not to park with the vehicle
running. If the vehicle is left running, be
sure it will not move and there is adequate
ventilation. See Shifting Into Park 0147 and
Engine Exhaust 0149.
If the vehicle is left parked and running with
the Remote Keyless Entry (RKE) transmitter
outside the vehicle, it will continue to run
for up to half an hour. If the vehicle is left parked and running with
the RKE transmitter inside the vehicle, it will
continue to run for up to an hour.
The vehicle could turn off sooner if it is
parked on a hill, due to lack of
available fuel.
The timer will reset if the vehicle is taken
out of P (Park) while it is running.
Engine Exhaust
{
Warning
Engine exhaust contains carbon monoxide
(CO), which cannot be seen or smelled.
Exposure to CO can cause
unconsciousness and even death.
Exhaust may enter the vehicle if:
.The vehicle idles in areas with poor
ventilation (parking garages, tunnels,
deep snow that may block underbody
airflow or tail pipes).
.The exhaust smells or sounds strange
or different.
.The exhaust system leaks due to
corrosion or damage. (Continued)
Page 209 of 280
Chevrolet TRAX Owner Manual (GMNA-Localizing-U.S./Canada-15498927) -
2022 - CRC - 5/27/21
208 Vehicle Care
completing the sensor matching process.
See "TPMS Sensor Matching Process" later
in this section.
.One or more TPMS sensors are missing or
damaged. The malfunction light and the
DIC message, if equipped, should go off
when the TPMS sensors are installed and
the sensor matching process is performed
successfully. See your dealer for service.
.Replacement tires or wheels do not match
the original equipment tires or wheels.
Tires and wheels other than those
recommended could prevent the TPMS
from functioning properly. SeeBuying
New Tires 0211.
.Operating electronic devices or being near
facilities using radio wave frequencies
similar to the TPMS could cause the TPMS
sensors to malfunction.
If the TPMS is not functioning properly, it
cannot detect or signal a low tire pressure
condition. See your dealer for service if the
TPMS malfunction light and DIC message,
if equipped, come on and stay on.
TPMS Sensor Matching Process
Each TPMS sensor has a unique
identification code. The identification code
needs to be matched to a new tire/wheel position after rotating the vehicle’s tires or
replacing one or more of the TPMS sensors.
Also, the TPMS sensor matching process
should be performed after replacing a spare
tire with a road tire containing the TPMS
sensor. The malfunction light and the DIC
message, if equipped, should go off at the
next ignition cycle. The sensors are matched
to the tire/wheel positions, using a TPMS
relearn tool, in the following order: driver
side front tire, passenger side front tire,
passenger side rear tire, and driver side rear.
See your dealer for service or to purchase a
relearn tool. A TPMS relearn tool can also be
purchased. See Tire Pressure Monitor Sensor
Activation Tool at
www.gmtoolsandequipment.com or call
1-800-GM TOOLS (1-800-468-6657).
There are two minutes to match the first
tire/wheel position, and five minutes overall
to match all four tire/wheel positions. If it
takes longer, the matching process stops
and must be restarted.
The TPMS sensor matching process is:
1. Set the parking brake. 2. Turn the ignition on without starting the
vehicle or place the vehicle in Service
Mode. See Ignition Positions (Key Access)
0 140 or
Ignition Positions (Keyless Access) 0142.
3. Use the MENU button to select the Vehicle Information Menu (Menu 2) in
the Driver Information Center (DIC). See
Driver Information Center (DIC) 090.
4. Use the thumbwheel (or up and down arrows) to scroll to the Tire Pressure
Menu Item screen.
5. Press and hold the SET/CLR button to begin the sensor matching process.
A message requesting acceptance of the
process may display.
6. If requested, press the SET/CLR button again to confirm the selection.
The horn sounds twice to signal the
receiver is in relearn mode and the TIRE
LEARN or TIRE LEARNING ACTIVE message
displays on the DIC screen.
7. Start with the driver side front tire.
8. Place the relearn tool against the tire sidewall, near the valve stem. Then press
the button to activate the TPMS sensor.
Page 274 of 280
Chevrolet TRAX Owner Manual (GMNA-Localizing-U.S./Canada-15498927) -
2022 - CRC - 5/27/21
Index 273
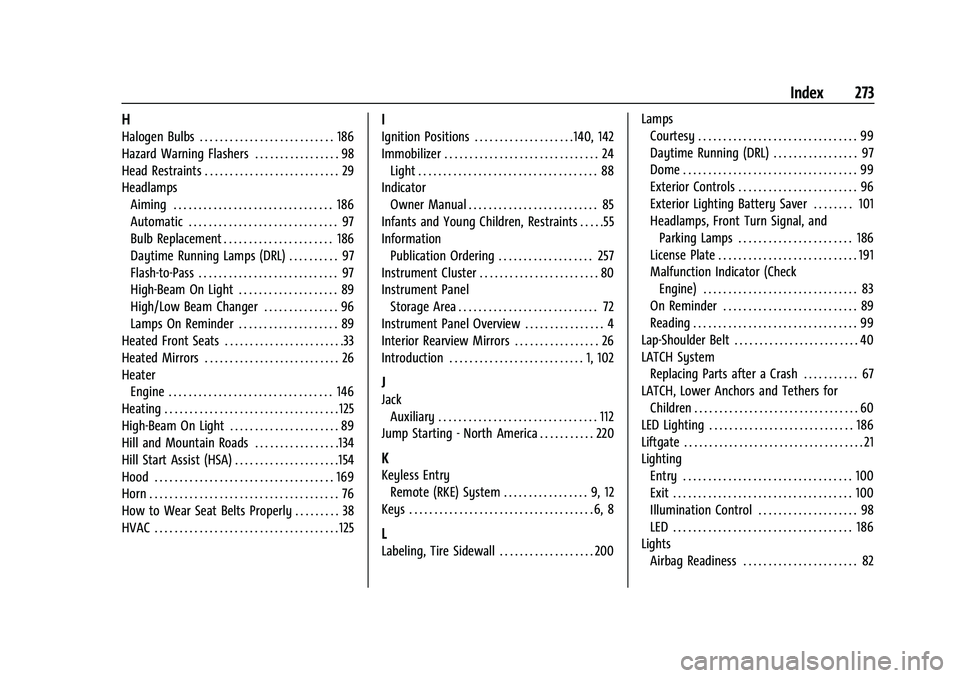
H
Halogen Bulbs . . . . . . . . . . . . . . . . . . . . . . . . . . . 186
Hazard Warning Flashers . . . . . . . . . . . . . . . . . 98
Head Restraints . . . . . . . . . . . . . . . . . . . . . . . . . . . 29
HeadlampsAiming . . . . . . . . . . . . . . . . . . . . . . . . . . . . . . . . 186
Automatic . . . . . . . . . . . . . . . . . . . . . . . . . . . . . . 97
Bulb Replacement . . . . . . . . . . . . . . . . . . . . . . 186
Daytime Running Lamps (DRL) . . . . . . . . . . 97
Flash-to-Pass . . . . . . . . . . . . . . . . . . . . . . . . . . . . 97
High-Beam On Light . . . . . . . . . . . . . . . . . . . . 89
High/Low Beam Changer . . . . . . . . . . . . . . . 96
Lamps On Reminder . . . . . . . . . . . . . . . . . . . . 89
Heated Front Seats . . . . . . . . . . . . . . . . . . . . . . . .33
Heated Mirrors . . . . . . . . . . . . . . . . . . . . . . . . . . . 26
Heater
Engine . . . . . . . . . . . . . . . . . . . . . . . . . . . . . . . . . 146
Heating . . . . . . . . . . . . . . . . . . . . . . . . . . . . . . . . . . . 125
High-Beam On Light . . . . . . . . . . . . . . . . . . . . . . 89
Hill and Mountain Roads . . . . . . . . . . . . . . . . .134
Hill Start Assist (HSA) . . . . . . . . . . . . . . . . . . . . .154
Hood . . . . . . . . . . . . . . . . . . . . . . . . . . . . . . . . . . . . 169
Horn . . . . . . . . . . . . . . . . . . . . . . . . . . . . . . . . . . . . . . 76
How to Wear Seat Belts Properly . . . . . . . . . 38
HVAC . . . . . . . . . . . . . . . . . . . . . . . . . . . . . . . . . . . . . 125
I
Ignition Positions . . . . . . . . . . . . . . . . . . . .140, 142
Immobilizer . . . . . . . . . . . . . . . . . . . . . . . . . . . . . . . 24 Light . . . . . . . . . . . . . . . . . . . . . . . . . . . . . . . . . . . . 88
Indicator
Owner Manual . . . . . . . . . . . . . . . . . . . . . . . . . . 85
Infants and Young Children, Restraints . . . . .55
Information Publication Ordering . . . . . . . . . . . . . . . . . . . 257
Instrument Cluster . . . . . . . . . . . . . . . . . . . . . . . . 80
Instrument Panel
Storage Area . . . . . . . . . . . . . . . . . . . . . . . . . . . . 72
Instrument Panel Overview . . . . . . . . . . . . . . . . 4
Interior Rearview Mirrors . . . . . . . . . . . . . . . . . 26
Introduction . . . . . . . . . . . . . . . . . . . . . . . . . . . 1, 102
J
Jack Auxiliary . . . . . . . . . . . . . . . . . . . . . . . . . . . . . . . . 112
Jump Starting - North America . . . . . . . . . . . 220
K
Keyless Entry
Remote (RKE) System . . . . . . . . . . . . . . . . . 9, 12
Keys . . . . . . . . . . . . . . . . . . . . . . . . . . . . . . . . . . . . . 6, 8
L
Labeling, Tire Sidewall . . . . . . . . . . . . . . . . . . . 200 Lamps
Courtesy . . . . . . . . . . . . . . . . . . . . . . . . . . . . . . . . 99
Daytime Running (DRL) . . . . . . . . . . . . . . . . . 97
Dome . . . . . . . . . . . . . . . . . . . . . . . . . . . . . . . . . . . 99
Exterior Controls . . . . . . . . . . . . . . . . . . . . . . . . 96
Exterior Lighting Battery Saver . . . . . . . . 101
Headlamps, Front Turn Signal, and
Parking Lamps . . . . . . . . . . . . . . . . . . . . . . . 186
License Plate . . . . . . . . . . . . . . . . . . . . . . . . . . . . 191
Malfunction Indicator (Check Engine) . . . . . . . . . . . . . . . . . . . . . . . . . . . . . . . 83
On Reminder . . . . . . . . . . . . . . . . . . . . . . . . . . . 89
Reading . . . . . . . . . . . . . . . . . . . . . . . . . . . . . . . . . 99
Lap-Shoulder Belt . . . . . . . . . . . . . . . . . . . . . . . . . 40
LATCH System Replacing Parts after a Crash . . . . . . . . . . . 67
LATCH, Lower Anchors and Tethers for Children . . . . . . . . . . . . . . . . . . . . . . . . . . . . . . . . . 60
LED Lighting . . . . . . . . . . . . . . . . . . . . . . . . . . . . . 186
Liftgate . . . . . . . . . . . . . . . . . . . . . . . . . . . . . . . . . . . . 21
Lighting Entry . . . . . . . . . . . . . . . . . . . . . . . . . . . . . . . . . . 100
Exit . . . . . . . . . . . . . . . . . . . . . . . . . . . . . . . . . . . . 100
Illumination Control . . . . . . . . . . . . . . . . . . . . 98
LED . . . . . . . . . . . . . . . . . . . . . . . . . . . . . . . . . . . . 186
Lights Airbag Readiness . . . . . . . . . . . . . . . . . . . . . . . 82
Page 277 of 280
Chevrolet TRAX Owner Manual (GMNA-Localizing-U.S./Canada-15498927) -
2022 - CRC - 5/27/21
276 Index
Reduced Engine Power Light . . . . . . . . . . . . . . 89
Reimbursement Program, GMMobility . . . . . . . . . . . . . . . . . . . . . . . . . . . . . . . 252
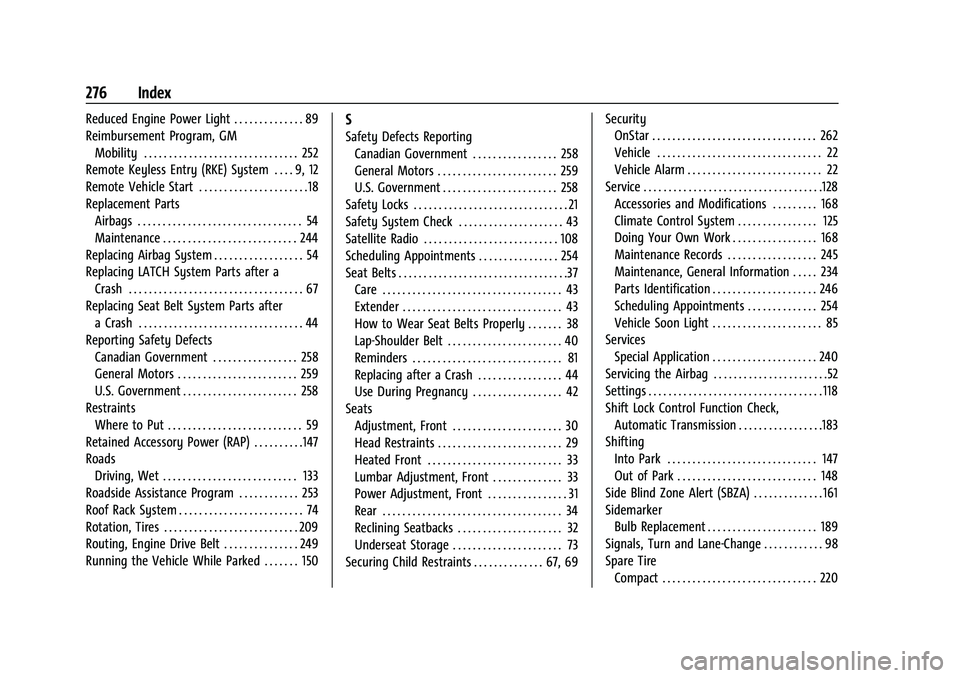
Remote Keyless Entry (RKE) System . . . . 9, 12
Remote Vehicle Start . . . . . . . . . . . . . . . . . . . . . .18
Replacement Parts Airbags . . . . . . . . . . . . . . . . . . . . . . . . . . . . . . . . . 54
Maintenance . . . . . . . . . . . . . . . . . . . . . . . . . . . 244
Replacing Airbag System . . . . . . . . . . . . . . . . . . 54
Replacing LATCH System Parts after a Crash . . . . . . . . . . . . . . . . . . . . . . . . . . . . . . . . . . . 67
Replacing Seat Belt System Parts after a Crash . . . . . . . . . . . . . . . . . . . . . . . . . . . . . . . . . 44
Reporting Safety Defects Canadian Government . . . . . . . . . . . . . . . . . 258
General Motors . . . . . . . . . . . . . . . . . . . . . . . . 259
U.S. Government . . . . . . . . . . . . . . . . . . . . . . . 258
Restraints Where to Put . . . . . . . . . . . . . . . . . . . . . . . . . . . 59
Retained Accessory Power (RAP) . . . . . . . . . .147
Roads Driving, Wet . . . . . . . . . . . . . . . . . . . . . . . . . . . 133
Roadside Assistance Program . . . . . . . . . . . . 253
Roof Rack System . . . . . . . . . . . . . . . . . . . . . . . . . 74
Rotation, Tires . . . . . . . . . . . . . . . . . . . . . . . . . . . 209
Routing, Engine Drive Belt . . . . . . . . . . . . . . . 249
Running the Vehicle While Parked . . . . . . . 150S
Safety Defects Reporting Canadian Government . . . . . . . . . . . . . . . . . 258
General Motors . . . . . . . . . . . . . . . . . . . . . . . . 259
U.S. Government . . . . . . . . . . . . . . . . . . . . . . . 258
Safety Locks . . . . . . . . . . . . . . . . . . . . . . . . . . . . . . . 21
Safety System Check . . . . . . . . . . . . . . . . . . . . . 43
Satellite Radio . . . . . . . . . . . . . . . . . . . . . . . . . . . 108
Scheduling Appointments . . . . . . . . . . . . . . . . 254
Seat Belts . . . . . . . . . . . . . . . . . . . . . . . . . . . . . . . . . .37 Care . . . . . . . . . . . . . . . . . . . . . . . . . . . . . . . . . . . . 43
Extender . . . . . . . . . . . . . . . . . . . . . . . . . . . . . . . . 43
How to Wear Seat Belts Properly . . . . . . . 38
Lap-Shoulder Belt . . . . . . . . . . . . . . . . . . . . . . . 40
Reminders . . . . . . . . . . . . . . . . . . . . . . . . . . . . . . 81
Replacing after a Crash . . . . . . . . . . . . . . . . . 44
Use During Pregnancy . . . . . . . . . . . . . . . . . . 42
Seats Adjustment, Front . . . . . . . . . . . . . . . . . . . . . . 30
Head Restraints . . . . . . . . . . . . . . . . . . . . . . . . . 29
Heated Front . . . . . . . . . . . . . . . . . . . . . . . . . . . 33
Lumbar Adjustment, Front . . . . . . . . . . . . . . 33
Power Adjustment, Front . . . . . . . . . . . . . . . . 31
Rear . . . . . . . . . . . . . . . . . . . . . . . . . . . . . . . . . . . . 34
Reclining Seatbacks . . . . . . . . . . . . . . . . . . . . . 32
Underseat Storage . . . . . . . . . . . . . . . . . . . . . . 73
Securing Child Restraints . . . . . . . . . . . . . . 67, 69 Security
OnStar . . . . . . . . . . . . . . . . . . . . . . . . . . . . . . . . . 262
Vehicle . . . . . . . . . . . . . . . . . . . . . . . . . . . . . . . . . 22
Vehicle Alarm . . . . . . . . . . . . . . . . . . . . . . . . . . . 22
Service . . . . . . . . . . . . . . . . . . . . . . . . . . . . . . . . . . . .128 Accessories and Modifications . . . . . . . . . 168
Climate Control System . . . . . . . . . . . . . . . . 125
Doing Your Own Work . . . . . . . . . . . . . . . . . 168
Maintenance Records . . . . . . . . . . . . . . . . . . 245
Maintenance, General Information . . . . . 234
Parts Identification . . . . . . . . . . . . . . . . . . . . . 246
Scheduling Appointments . . . . . . . . . . . . . . 254
Vehicle Soon Light . . . . . . . . . . . . . . . . . . . . . . 85
Services Special Application . . . . . . . . . . . . . . . . . . . . . 240
Servicing the Airbag . . . . . . . . . . . . . . . . . . . . . . .52
Settings . . . . . . . . . . . . . . . . . . . . . . . . . . . . . . . . . . . 118
Shift Lock Control Function Check,
Automatic Transmission . . . . . . . . . . . . . . . . .183
Shifting Into Park . . . . . . . . . . . . . . . . . . . . . . . . . . . . . . 147
Out of Park . . . . . . . . . . . . . . . . . . . . . . . . . . . . 148
Side Blind Zone Alert (SBZA) . . . . . . . . . . . . . . 161
Sidemarker Bulb Replacement . . . . . . . . . . . . . . . . . . . . . . 189
Signals, Turn and Lane-Change . . . . . . . . . . . . 98
Spare Tire Compact . . . . . . . . . . . . . . . . . . . . . . . . . . . . . . . 220