stop start CHEVROLET TRAX 2023 Owner's Manual
[x] Cancel search | Manufacturer: CHEVROLET, Model Year: 2023, Model line: TRAX, Model: CHEVROLET TRAX 2023Pages: 280, PDF Size: 12.13 MB
Page 143 of 280
Chevrolet TRAX Owner Manual (GMNA-Localizing-U.S./Canada-15498927) -
2022 - CRC - 5/27/21
142 Driving and Operating
be used for service and diagnostics, and to
verify the proper operation of the
malfunction indicator lamp as may be
required for emission inspection purposes.
The switch stays in this position when the
engine is running. The transmission is also
unlocked in this position.
If the key is left in ON/RUN with the engine
off, the battery could drain and the vehicle
may not start.
3 (START) :This is the position that starts
the engine. When the engine starts, release
the key. The ignition returns to ON/RUN for
driving.
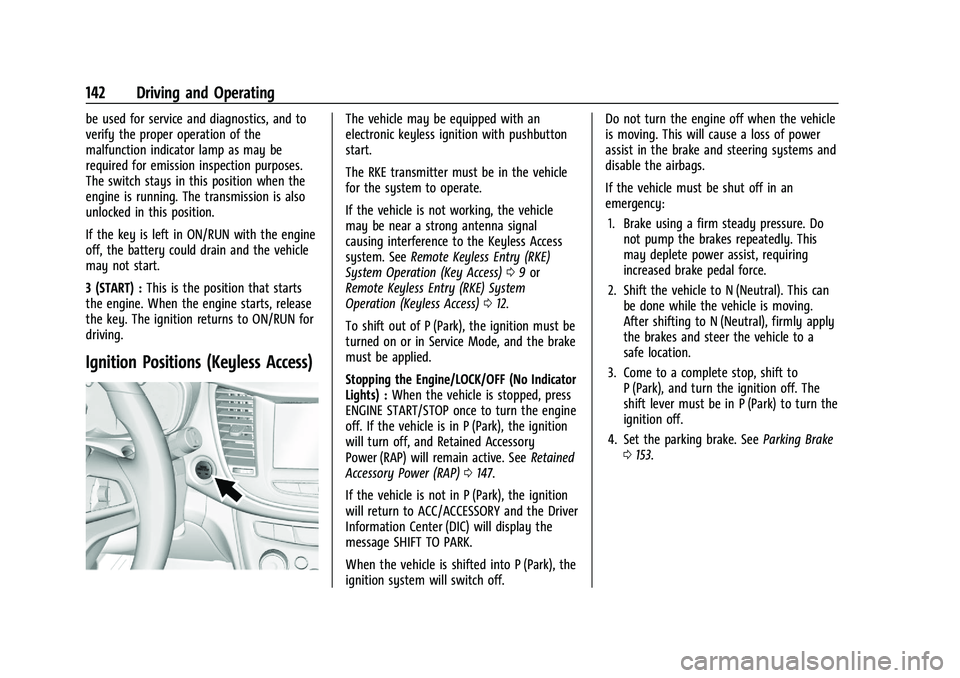
Ignition Positions (Keyless Access)
The vehicle may be equipped with an
electronic keyless ignition with pushbutton
start.
The RKE transmitter must be in the vehicle
for the system to operate.
If the vehicle is not working, the vehicle
may be near a strong antenna signal
causing interference to the Keyless Access
system. See Remote Keyless Entry (RKE)
System Operation (Key Access) 09or
Remote Keyless Entry (RKE) System
Operation (Keyless Access) 012.
To shift out of P (Park), the ignition must be
turned on or in Service Mode, and the brake
must be applied.
Stopping the Engine/LOCK/OFF (No Indicator
Lights) : When the vehicle is stopped, press
ENGINE START/STOP once to turn the engine
off. If the vehicle is in P (Park), the ignition
will turn off, and Retained Accessory
Power (RAP) will remain active. See Retained
Accessory Power (RAP) 0147.
If the vehicle is not in P (Park), the ignition
will return to ACC/ACCESSORY and the Driver
Information Center (DIC) will display the
message SHIFT TO PARK.
When the vehicle is shifted into P (Park), the
ignition system will switch off. Do not turn the engine off when the vehicle
is moving. This will cause a loss of power
assist in the brake and steering systems and
disable the airbags.
If the vehicle must be shut off in an
emergency:
1. Brake using a firm steady pressure. Do not pump the brakes repeatedly. This
may deplete power assist, requiring
increased brake pedal force.
2. Shift the vehicle to N (Neutral). This can be done while the vehicle is moving.
After shifting to N (Neutral), firmly apply
the brakes and steer the vehicle to a
safe location.
3. Come to a complete stop, shift to P (Park), and turn the ignition off. The
shift lever must be in P (Park) to turn the
ignition off.
4. Set the parking brake. See Parking Brake
0 153.
Page 144 of 280
Chevrolet TRAX Owner Manual (GMNA-Localizing-U.S./Canada-15498927) -
2022 - CRC - 5/27/21
Driving and Operating 143
{Warning
Turning off the vehicle while moving may
cause loss of power assist in the brake
and steering systems and disable the
airbags. While driving, only shut the
vehicle off in an emergency.
If the vehicle cannot be pulled over, and
must be shut off while driving, press and
hold ENGINE START/STOP for longer than
two seconds, or press twice in five seconds.
ACC/ACCESSORY (Amber Indicator Light) :
This mode allows you to use some electrical
accessories when the engine is off. With the
ignition off, pressing ENGINE START/STOP
one time without the brake pedal applied
will place the ignition system in ACC/
ACCESSORY.
The ignition will switch from ACC/
ACCESSORY to OFF after five minutes to
prevent battery rundown.
ON/RUN/START (Green Indicator Light) : This
mode is for driving and starting. With the
ignition off, and the brake pedal applied,
pressing ENGINE START/STOP once will place
the ignition system in ON/RUN/Start. Once engine cranking begins, release ENGINE
START/STOP. Engine cranking will continue
until the engine starts. See
Starting the
Engine 0143.
The engine will then remain in ON/RUN.
Service Mode
This power mode is available for service and
diagnostics, and to verify the proper
operation of the malfunction indicator lamp
as may be required for emission inspection
purposes.
With the vehicle off, and the brake pedal
not applied, pressing and holding ENGINE
START/STOP for more than five seconds will
place the vehicle in Service Mode.
The instruments and audio system will
operate as they do in ON/RUN, but the
vehicle will not be able to be driven. The
engine will not start in Service Mode.
Press ENGINE START/STOP again to turn the
vehicle off.
Starting the Engine
Place the transmission in the proper gear.
Caution
If you add electrical parts or accessories,
you could change the way the engine
operates. Any resulting damage would
not be covered by the vehicle warranty.
See Add-On Electrical Equipment 0165.
Caution
If the steering wheel is turned until it
reaches the end of its travel, and is held
in that position while starting the vehicle,
damage may occur to the hydraulic
power steering system and there may be
loss of power steering assist.
Move the shift lever to P (Park) or
N (Neutral). To restart the vehicle when it is
already moving, use N (Neutral) only.
Caution
Do not try to shift to P (Park) if the
vehicle is moving. If you do, you could
damage the transmission. Shift to P (Park)
only when the vehicle is stopped.
Page 145 of 280
Chevrolet TRAX Owner Manual (GMNA-Localizing-U.S./Canada-15498927) -
2022 - CRC - 5/27/21
144 Driving and Operating
Starting Procedure (Key Access)1. With your foot off the accelerator pedal, turn the ignition key to START. When
the engine starts, let go of the ignition.
The idle speed will go down as the
engine gets warm. Do not race the
engine immediately after starting it.
Operate the engine and transmission
gently to allow the oil to warm up and
lubricate all moving parts.
Caution
Cranking the engine for long periods of
time, by returning the ignition to the
START position immediately after
cranking has ended, can overheat and
damage the cranking motor, and drain
the battery. Wait at least 15 seconds
between each try, to let the cranking
motor cool down.
2. If the engine does not start after five to 10 seconds, especially in very cold
weather (below −18 °C or 0 °F), it could
be flooded with too much gasoline. Try
pushing the accelerator pedal all the way
to the floor and holding it there as you
hold the key in START for up to a
maximum of 15 seconds. Wait at least 15 seconds between each try, to allow
the cranking motor to cool down. When
the engine starts, let go of the key and
the accelerator. If the vehicle starts
briefly but then stops again, do the
same thing. This clears the extra gasoline
from the engine. Do not race the engine
immediately after starting it. Operate
the engine and transmission gently until
the oil warms up and lubricates all
moving parts.
Starting Procedure (Keyless Access) 1. Press the brake pedal, then press ENGINE START/STOP on the instrument panel.
The idle speed will go down as the
engine gets warm. Do not race the
engine immediately after starting it.
If the RKE transmitter is not in the
vehicle, if there is interference, or if the
RKE transmitter battery is low, the Driver
Information Center (DIC) will display a
message. See Driver Information Center
(DIC) 090 and
Remote Keyless Entry (RKE) System
Operation (Key Access) 09or
Remote Keyless Entry (RKE) System
Operation (Keyless Access) 012.
Caution
Cranking the engine for long periods of
time, by trying to start the engine
immediately after cranking has ended,
can overheat and damage the cranking
motor, and drain the battery. Wait at
least 15 seconds between each try, to let
the cranking motor cool down.
2. If the engine does not start after five to 10 seconds, especially in very cold
weather (below −18 °C or 0 °F), it could
be flooded with too much gasoline. Try
pushing the accelerator pedal all the way
to the floor and holding it there as you
hold ENGINE START/STOP, for up to a
maximum of 15 seconds. Wait at least
15 seconds between each try, to allow
the cranking motor to cool down.
When the engine starts, let go of the
button and the accelerator. If the vehicle
starts briefly but then stops again, follow
the same steps. This clears the extra
gasoline from the engine.
Do not race the engine immediately
after starting it. Operate the engine and
transmission gently until the oil warms
up and lubricates all moving parts.
Page 152 of 280
Chevrolet TRAX Owner Manual (GMNA-Localizing-U.S./Canada-15498927) -
2022 - CRC - 5/27/21
Driving and Operating 151
R :Use this gear to back up.
Caution
Shifting to R (Reverse) while the vehicle is
moving forward could damage the
transmission. The repairs would not be
covered by the vehicle warranty. Shift to
R (Reverse) only after the vehicle is
stopped.
To rock the vehicle back and forth to get
out of snow, ice, or sand without damaging
the transmission, see If the Vehicle Is Stuck
0 136.
N : In this position, the engine does not
connect with the wheels. To restart the
engine when the vehicle is already moving,
use N (Neutral) only.
{Warning
Shifting into a drive gear while the
engine is running at high speed is
dangerous. Unless your foot is firmly on
the brake pedal, the vehicle could move
very rapidly. You could lose control and
hit people or objects. Do not shift into a
drive gear while the engine is running at
high speed.
Caution
Shifting out of P (Park) or N (Neutral) with
the engine running at high speed may
damage the transmission. The repairs
would not be covered by the vehicle
warranty. Be sure the engine is not
running at high speed when shifting the
vehicle.
Caution
A transmission hot message may display
if the automatic transmission fluid is too
hot. Driving under this condition can
damage the vehicle. Stop and idle the
engine to cool the automatic
transmission fluid. This message clears
when the transmission fluid has cooled
sufficiently.
D : This position is for normal driving.
If more power is needed for passing, press
the accelerator pedal down.
M : This position allows shifting similar to a
manual transmission. See Manual Mode
0 152.
Caution
If the vehicle does not shift gears, the
transmission could be damaged. Have the
vehicle serviced right away.
Operating Modes
The transmission may operate in a lower
gear than normal to improve vehicle
performance. The engine speed may be
higher and there may be an increase in
noise during the following conditions:
.When climbing a grade.
.When driving downhill.
.When driving in hot temperatures or at
high altitude.
Page 155 of 280
Chevrolet TRAX Owner Manual (GMNA-Localizing-U.S./Canada-15498927) -
2022 - CRC - 5/27/21
154 Driving and Operating
4. The brake system warning light will turnoff, if the ignition is on.
Caution
Driving with the parking brake on can
overheat the brake system and cause
premature wear or damage to brake
system parts. Make sure that the parking
brake is fully released and the brake
warning light is off before driving.
Driving with the parking brake applied will
cause a warning chime to sound and a
Driver Information Center (DIC) message
may display. Release the parking brake or
stop the vehicle.
Brake Assist
Brake Assist detects rapid brake pedal
applications due to emergency braking
situations and provides additional braking to
activate the Antilock Brake System (ABS) if
the brake pedal is not pushed hard enough
to activate ABS normally. Minor noise, brake
pedal pulsation, and/or pedal movement
during this time may occur. Continue to
apply the brake pedal as the driving
situation dictates. Brake Assist disengages
when the brake pedal is released.
Hill Start Assist (HSA)
{Warning
Do not rely on the HSA feature. HSA does
not replace the need to pay attention
and drive safely. You may not hear or
feel alerts or warnings provided by this
system. Failure to use proper care when
driving may result in injury, death,
or vehicle damage. See Defensive Driving
0 131.
When the vehicle is stopped on a grade, Hill
Start Assist (HSA) temporarily prevents the
vehicle from rolling in an unintended
direction during the transition from brake
pedal release to accelerator pedal apply. The
brakes release when the accelerator pedal is
applied or automatically release after a few
seconds. The brakes may also release under
other conditions. Do not rely on HSA to hold
the vehicle.
HSA is available when the vehicle is facing
uphill in a forward gear, or when facing
downhill in R (Reverse). The vehicle must
come to a complete stop on a grade for HSA
to activate.
Ride Control Systems
Traction Control/Electronic
Stability Control
System Operation
The vehicle may have a Traction Control
System (TCS) and StabiliTrak/Electronic
Stability Control (ESC), an electronic stability
control system. These systems help limit
wheel slip and assist the driver in
maintaining control, especially on slippery
road conditions.
TCS activates if it senses that any of the
drive wheels are spinning or beginning to
lose traction. When this happens, TCS
applies the brakes to the spinning wheels
and reduces engine power to limit
wheel spin.
StabiliTrak/ESC activates when the vehicle
senses a difference between the intended
path and the direction the vehicle is actually
traveling. StabiliTrak/ESC selectively applies
braking pressure to any one of the vehicle
wheel brakes to assist the driver in keeping
the vehicle on the intended path.
Page 156 of 280
Chevrolet TRAX Owner Manual (GMNA-Localizing-U.S./Canada-15498927) -
2022 - CRC - 5/27/21
Driving and Operating 155
If cruise control is being used and traction
control or StabiliTrak/ESC begins to limit
wheel spin, cruise control will disengage.
Cruise control may be turned back on when
road conditions allow.
Both systems come on automatically when
the vehicle is started and begins to move.
The systems may be heard or felt while
they are operating or while performing
diagnostic checks. This is normal and does
not mean there is a problem with the
vehicle.
It is recommended to leave both systems on
for normal driving conditions, but it may be
necessary to turn TCS off if the vehicle gets
stuck in sand, mud, ice, or snow. SeeIf the
Vehicle Is Stuck 0136 and “Turning the
Systems Off and On” later in this section.
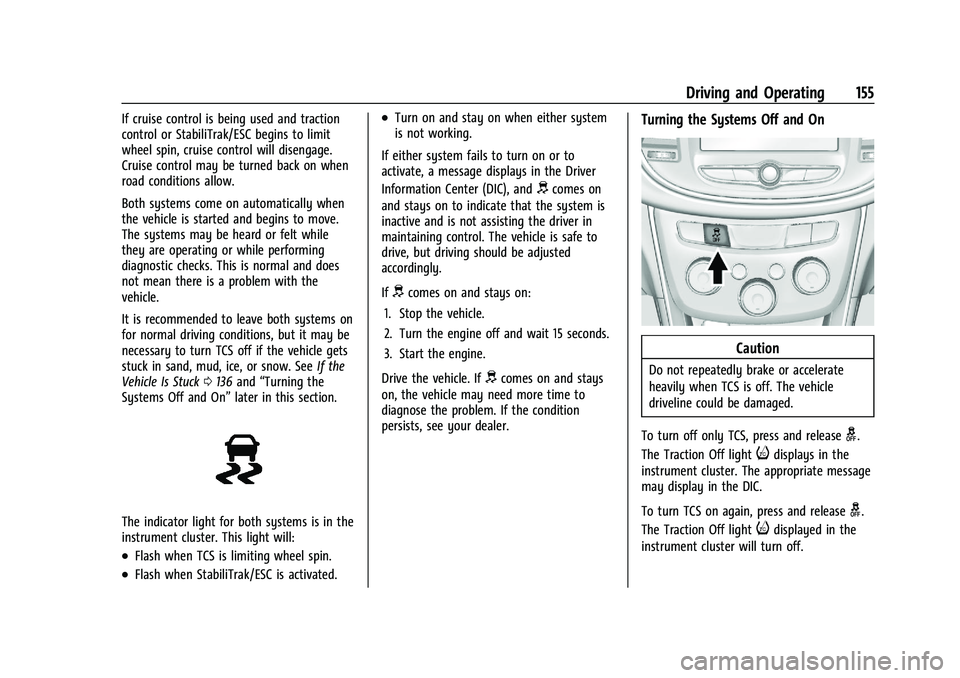
The indicator light for both systems is in the
instrument cluster. This light will:
.Flash when TCS is limiting wheel spin.
.Flash when StabiliTrak/ESC is activated.
.Turn on and stay on when either system
is not working.
If either system fails to turn on or to
activate, a message displays in the Driver
Information Center (DIC), and
dcomes on
and stays on to indicate that the system is
inactive and is not assisting the driver in
maintaining control. The vehicle is safe to
drive, but driving should be adjusted
accordingly.
If
dcomes on and stays on:
1. Stop the vehicle.
2. Turn the engine off and wait 15 seconds.
3. Start the engine.
Drive the vehicle. If
dcomes on and stays
on, the vehicle may need more time to
diagnose the problem. If the condition
persists, see your dealer.
Turning the Systems Off and On
Caution
Do not repeatedly brake or accelerate
heavily when TCS is off. The vehicle
driveline could be damaged.
To turn off only TCS, press and release
g.
The Traction Off light
idisplays in the
instrument cluster. The appropriate message
may display in the DIC.
To turn TCS on again, press and release
g.
The Traction Off light
idisplayed in the
instrument cluster will turn off.
Page 163 of 280
Chevrolet TRAX Owner Manual (GMNA-Localizing-U.S./Canada-15498927) -
2022 - CRC - 5/27/21
162 Driving and Operating
0.5 m (1.5 ft) and 2 m (6 ft) off the ground.
This zone starts at approximately the middle
of the vehicle and goes back 5 m (16 ft).
How the System Works
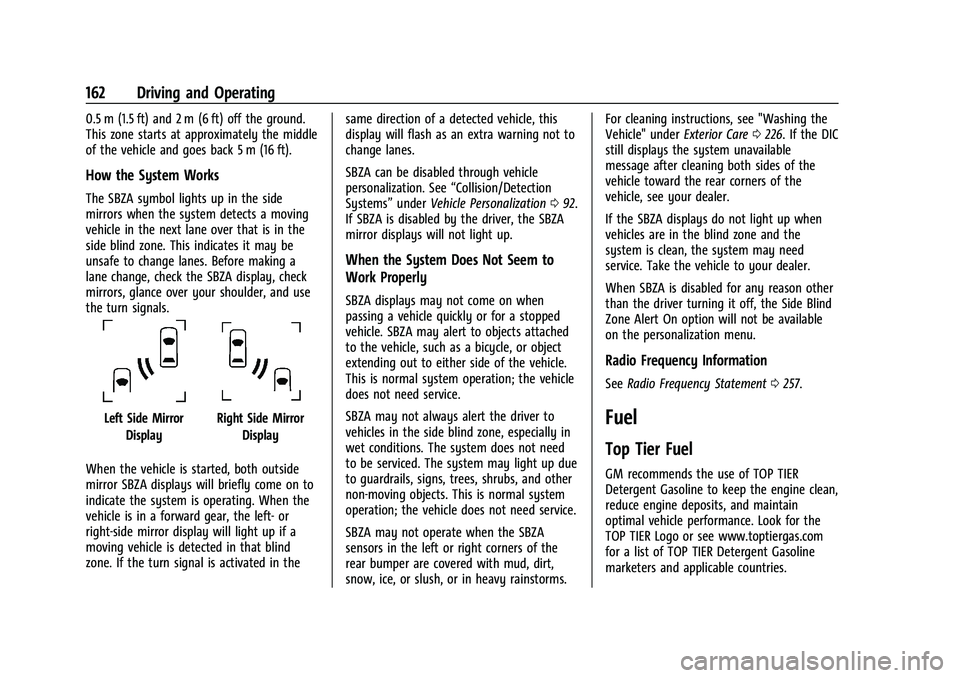
The SBZA symbol lights up in the side
mirrors when the system detects a moving
vehicle in the next lane over that is in the
side blind zone. This indicates it may be
unsafe to change lanes. Before making a
lane change, check the SBZA display, check
mirrors, glance over your shoulder, and use
the turn signals.
Left Side MirrorDisplayRight Side Mirror Display
When the vehicle is started, both outside
mirror SBZA displays will briefly come on to
indicate the system is operating. When the
vehicle is in a forward gear, the left- or
right-side mirror display will light up if a
moving vehicle is detected in that blind
zone. If the turn signal is activated in the same direction of a detected vehicle, this
display will flash as an extra warning not to
change lanes.
SBZA can be disabled through vehicle
personalization. See
“Collision/Detection
Systems” underVehicle Personalization 092.
If SBZA is disabled by the driver, the SBZA
mirror displays will not light up.
When the System Does Not Seem to
Work Properly
SBZA displays may not come on when
passing a vehicle quickly or for a stopped
vehicle. SBZA may alert to objects attached
to the vehicle, such as a bicycle, or object
extending out to either side of the vehicle.
This is normal system operation; the vehicle
does not need service.
SBZA may not always alert the driver to
vehicles in the side blind zone, especially in
wet conditions. The system does not need
to be serviced. The system may light up due
to guardrails, signs, trees, shrubs, and other
non-moving objects. This is normal system
operation; the vehicle does not need service.
SBZA may not operate when the SBZA
sensors in the left or right corners of the
rear bumper are covered with mud, dirt,
snow, ice, or slush, or in heavy rainstorms. For cleaning instructions, see "Washing the
Vehicle" under
Exterior Care0226. If the DIC
still displays the system unavailable
message after cleaning both sides of the
vehicle toward the rear corners of the
vehicle, see your dealer.
If the SBZA displays do not light up when
vehicles are in the blind zone and the
system is clean, the system may need
service. Take the vehicle to your dealer.
When SBZA is disabled for any reason other
than the driver turning it off, the Side Blind
Zone Alert On option will not be available
on the personalization menu.
Radio Frequency Information
See Radio Frequency Statement 0257.
Fuel
Top Tier Fuel
GM recommends the use of TOP TIER
Detergent Gasoline to keep the engine clean,
reduce engine deposits, and maintain
optimal vehicle performance. Look for the
TOP TIER Logo or see www.toptiergas.com
for a list of TOP TIER Detergent Gasoline
marketers and applicable countries.
Page 165 of 280
Chevrolet TRAX Owner Manual (GMNA-Localizing-U.S./Canada-15498927) -
2022 - CRC - 5/27/21
164 Driving and Operating
Filling the Tank
An arrow on the fuel gauge indicates which
side of the vehicle the fuel door is on. See
Fuel Gauge081.
{Warning
Fuel vapors and fuel fires burn violently
and can cause injury or death.
Follow these guidelines to help avoid
injuries to you and others:
.Read and follow all the instructions on
the fuel pump island.
.Turn off the engine when refueling.
.Keep sparks, flames, and smoking
materials away from fuel.
.Do not leave the fuel pump
unattended.
.Avoid using electronic devices while
refueling.
.Do not re-enter the vehicle while
pumping fuel.
.Keep children away from the fuel
pump and never let children
pump fuel.
(Continued)
Warning (Continued)
.Before touching the fill nozzle, touch a
metallic object to discharge static
electricity from your body.
.Fuel can spray out if the fill nozzle is
inserted too quickly. This spray can
happen if the tank is nearly full, and is
more likely in hot weather. Insert the
fill nozzle slowly and wait for any hiss
noise to stop before beginning to
flow fuel.
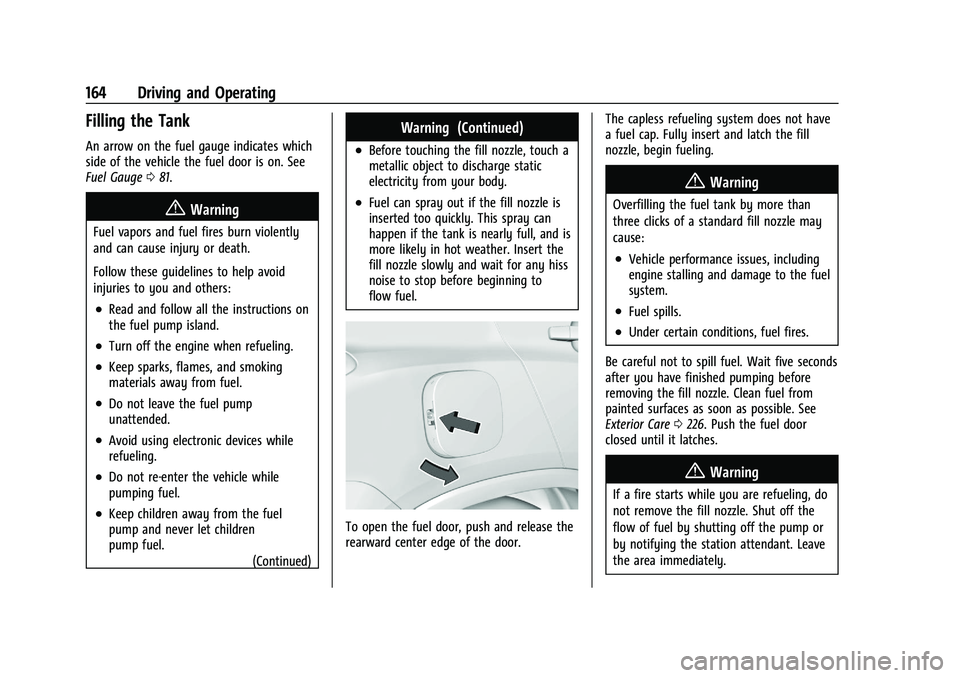
To open the fuel door, push and release the
rearward center edge of the door. The capless refueling system does not have
a fuel cap. Fully insert and latch the fill
nozzle, begin fueling.
{Warning
Overfilling the fuel tank by more than
three clicks of a standard fill nozzle may
cause:
.Vehicle performance issues, including
engine stalling and damage to the fuel
system.
.Fuel spills.
.Under certain conditions, fuel fires.
Be careful not to spill fuel. Wait five seconds
after you have finished pumping before
removing the fill nozzle. Clean fuel from
painted surfaces as soon as possible. See
Exterior Care 0226. Push the fuel door
closed until it latches.
{Warning
If a fire starts while you are refueling, do
not remove the fill nozzle. Shut off the
flow of fuel by shutting off the pump or
by notifying the station attendant. Leave
the area immediately.
Page 168 of 280
Chevrolet TRAX Owner Manual (GMNA-Localizing-U.S./Canada-15498927) -
2022 - CRC - 5/27/21
Vehicle Care 167
Vehicle Care
General Information
General Information . . . . . . . . . . . . . . . . . . . 168
California Perchlorate MaterialsRequirements . . . . . . . . . . . . . . . . . . . . . . . . 168
Accessories and Modifications . . . . . . . . . 168
Vehicle Checks
Doing Your Own Service Work . . . . . . . . 168
Hood . . . . . . . . . . . . . . . . . . . . . . . . . . . . . . . . . . 169
Engine Compartment Overview . . . . . . . . 171
Engine Oil . . . . . . . . . . . . . . . . . . . . . . . . . . . . . 172
Engine Oil Life System . . . . . . . . . . . . . . . . . 174
Automatic Transmission Fluid . . . . . . . . . . 174
Engine Air Cleaner/Filter . . . . . . . . . . . . . . . 175
Cooling System . . . . . . . . . . . . . . . . . . . . . . . . 176
Engine Overheating . . . . . . . . . . . . . . . . . . . . 179
Washer Fluid . . . . . . . . . . . . . . . . . . . . . . . . . . 180
Brakes . . . . . . . . . . . . . . . . . . . . . . . . . . . . . . . . . 180
Brake Fluid . . . . . . . . . . . . . . . . . . . . . . . . . . . . . 181
Battery - North America . . . . . . . . . . . . . . . 182
All-Wheel Drive . . . . . . . . . . . . . . . . . . . . . . . . 182
Starter Switch Check . . . . . . . . . . . . . . . . . . . 183
Automatic Transmission Shift Lock Control Function Check . . . . . . . . . . . . . . 183
Park Brake and P (Park) Mechanism Check . . . . . . . . . . . . . . . . . . . . . . . . . . . . . . . . 183
Wiper Blade Replacement . . . . . . . . . . . . . 184
Windshield Replacement . . . . . . . . . . . . . . . 185 Gas Strut(s) . . . . . . . . . . . . . . . . . . . . . . . . . . . . 185
Headlamp Aiming
Front Headlamp Aiming . . . . . . . . . . . . . . . 186
Bulb Replacement
Bulb Replacement . . . . . . . . . . . . . . . . . . . . . 186
Halogen Bulbs . . . . . . . . . . . . . . . . . . . . . . . . . 186
LED Lighting . . . . . . . . . . . . . . . . . . . . . . . . . . . 186
Headlamps, Front Turn Signal and
Parking Lamps . . . . . . . . . . . . . . . . . . . . . . . 186
Taillamps, Turn Signal, Sidemarker, Stoplamps, and Back-Up Lamps . . . . . . 189
License Plate Lamp . . . . . . . . . . . . . . . . . . . . . 191
Electrical System
Electrical System Overload . . . . . . . . . . . . . 191
Fuses and Circuit Breakers . . . . . . . . . . . . . 193
Engine Compartment Fuse Block . . . . . . . 193
Instrument Panel Fuse Block . . . . . . . . . . 196
Rear Compartment Fuse Block . . . . . . . . . 198
Wheels and Tires
Tires . . . . . . . . . . . . . . . . . . . . . . . . . . . . . . . . . . . 199
All-Season Tires . . . . . . . . . . . . . . . . . . . . . . . 200
Winter Tires . . . . . . . . . . . . . . . . . . . . . . . . . . 200
Tire Sidewall Labeling . . . . . . . . . . . . . . . . . 200
Tire Designations . . . . . . . . . . . . . . . . . . . . . . 202
Tire Terminology and Definitions . . . . . . 203
Tire Pressure . . . . . . . . . . . . . . . . . . . . . . . . . . 205
Tire Pressure Monitor System . . . . . . . . . 206
Tire Pressure Monitor Operation . . . . . . 206 Tire Inspection . . . . . . . . . . . . . . . . . . . . . . . . 209
Tire Rotation . . . . . . . . . . . . . . . . . . . . . . . . . . 209
When It Is Time for New Tires . . . . . . . . 210
Buying New Tires . . . . . . . . . . . . . . . . . . . . . . 211
Different Size Tires and Wheels . . . . . . . . 212
Uniform Tire Quality Grading . . . . . . . . . . 212
Wheel Alignment and Tire Balance . . . . 214
Wheel Replacement . . . . . . . . . . . . . . . . . . . 214
Tire Chains . . . . . . . . . . . . . . . . . . . . . . . . . . . . 214
If a Tire Goes Flat . . . . . . . . . . . . . . . . . . . . . 215
Tire Changing . . . . . . . . . . . . . . . . . . . . . . . . . . 216
Compact Spare Tire . . . . . . . . . . . . . . . . . . . 220
Jump Starting
Jump Starting - North America . . . . . . . . 220
Towing the Vehicle
Towing the Vehicle . . . . . . . . . . . . . . . . . . . . 223
Recreational Vehicle Towing . . . . . . . . . . . 224
Appearance Care
Exterior Care . . . . . . . . . . . . . . . . . . . . . . . . . . 226
Interior Care . . . . . . . . . . . . . . . . . . . . . . . . . . . 230
Floor Mats . . . . . . . . . . . . . . . . . . . . . . . . . . . . . 233
Page 179 of 280
Chevrolet TRAX Owner Manual (GMNA-Localizing-U.S./Canada-15498927) -
2022 - CRC - 5/27/21
178 Vehicle Care
{Warning
Spilling coolant on hot engine parts can
burn you. Coolant contains ethylene
glycol and it will burn if the engine parts
are hot enough.
Caution
Failure to follow the specific coolant fill
procedure could cause the engine to
overheat and could cause system
damage. If coolant is not visible in the
surge tank, contact your dealer.
If no problem is found, check to see if
coolant is visible in the coolant surge tank.
If coolant is visible but the coolant level is
not at the indicated level mark, add a 50/
50 mixture of clean, drinkable water and
DEX-COOL coolant at the coolant surge tank,
but be sure the cooling system, including
the coolant surge tank pressure cap, is cool
before you do it.
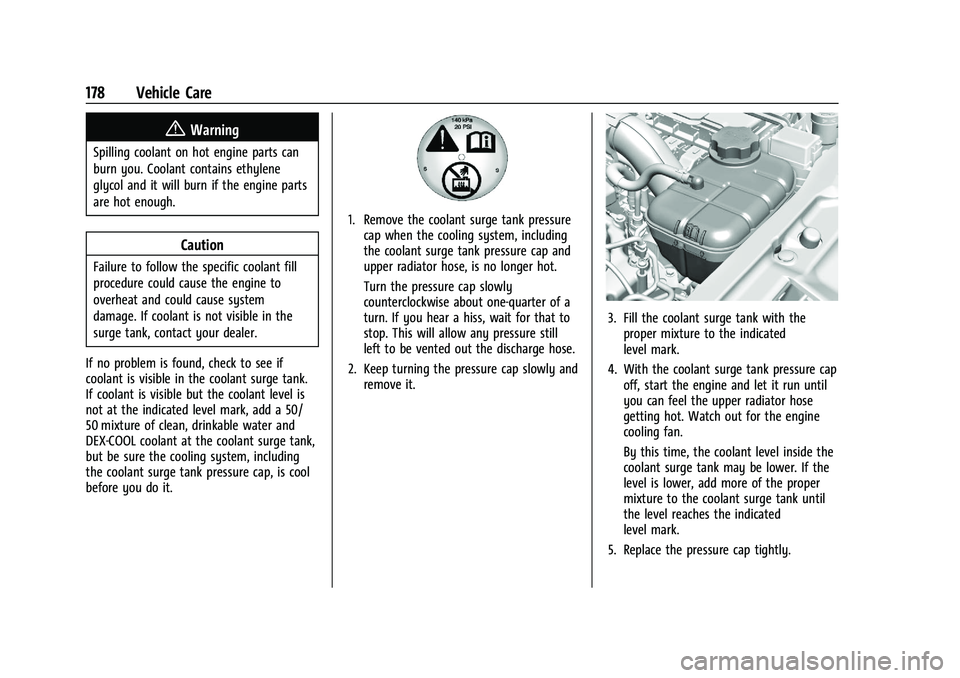
1. Remove the coolant surge tank pressure cap when the cooling system, including
the coolant surge tank pressure cap and
upper radiator hose, is no longer hot.
Turn the pressure cap slowly
counterclockwise about one-quarter of a
turn. If you hear a hiss, wait for that to
stop. This will allow any pressure still
left to be vented out the discharge hose.
2. Keep turning the pressure cap slowly and remove it.
3. Fill the coolant surge tank with theproper mixture to the indicated
level mark.
4. With the coolant surge tank pressure cap off, start the engine and let it run until
you can feel the upper radiator hose
getting hot. Watch out for the engine
cooling fan.
By this time, the coolant level inside the
coolant surge tank may be lower. If the
level is lower, add more of the proper
mixture to the coolant surge tank until
the level reaches the indicated
level mark.
5. Replace the pressure cap tightly.