ECO mode CHEVROLET TRAX 2024 Owners Manual
[x] Cancel search | Manufacturer: CHEVROLET, Model Year: 2024, Model line: TRAX, Model: CHEVROLET TRAX 2024Pages: 328, PDF Size: 7.3 MB
Page 14 of 328
Chevrolet TRAX Owner Manual (GMNA-Localizing-U.S./Canada/Mexico-
17041293) - 2024 - CRC - 12/6/22
Keys, Doors, and Windows 13
Programming with Recognized Transmitters
A new transmitter can be programmed to
the vehicle when there are two recognized
transmitters.
To program, the vehicle must be off and all
of the transmitters, both currently
recognized and new, must be with you.1. Place the two recognized transmitters in transmitter pocket.
2. Insert the vehicle key of the new transmitter into the key lock cylinder on
the outside of the driver door and turn
the key to the unlock position five times
within 10 seconds.
The DIC displays READY FOR REMOTE #2,
3, 4, ETC.
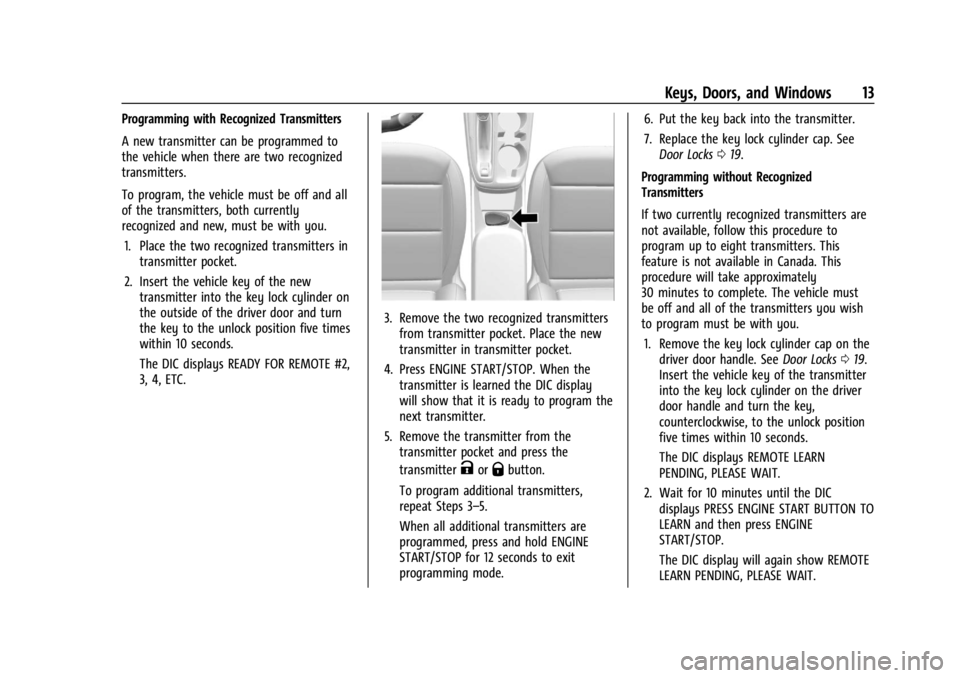
3. Remove the two recognized transmittersfrom transmitter pocket. Place the new
transmitter in transmitter pocket.
4. Press ENGINE START/STOP. When the transmitter is learned the DIC display
will show that it is ready to program the
next transmitter.
5. Remove the transmitter from the transmitter pocket and press the
transmitter
KorQbutton.
To program additional transmitters,
repeat Steps 3–5.
When all additional transmitters are
programmed, press and hold ENGINE
START/STOP for 12 seconds to exit
programming mode. 6. Put the key back into the transmitter.
7. Replace the key lock cylinder cap. See
Door Locks 019.
Programming without Recognized
Transmitters
If two currently recognized transmitters are
not available, follow this procedure to
program up to eight transmitters. This
feature is not available in Canada. This
procedure will take approximately
30 minutes to complete. The vehicle must
be off and all of the transmitters you wish
to program must be with you. 1. Remove the key lock cylinder cap on the driver door handle. See Door Locks019.
Insert the vehicle key of the transmitter
into the key lock cylinder on the driver
door handle and turn the key,
counterclockwise, to the unlock position
five times within 10 seconds.
The DIC displays REMOTE LEARN
PENDING, PLEASE WAIT.
2. Wait for 10 minutes until the DIC displays PRESS ENGINE START BUTTON TO
LEARN and then press ENGINE
START/STOP.
The DIC display will again show REMOTE
LEARN PENDING, PLEASE WAIT.
Page 15 of 328
Chevrolet TRAX Owner Manual (GMNA-Localizing-U.S./Canada/Mexico-
17041293) - 2024 - CRC - 12/6/22
14 Keys, Doors, and Windows
3. Repeat Step 2 two additional times. Afterthe third time all previously known
transmitters will no longer work with the
vehicle. Remaining transmitters can be
relearned during the next steps.
The DIC display should now show READY
FOR REMOTE # 1.
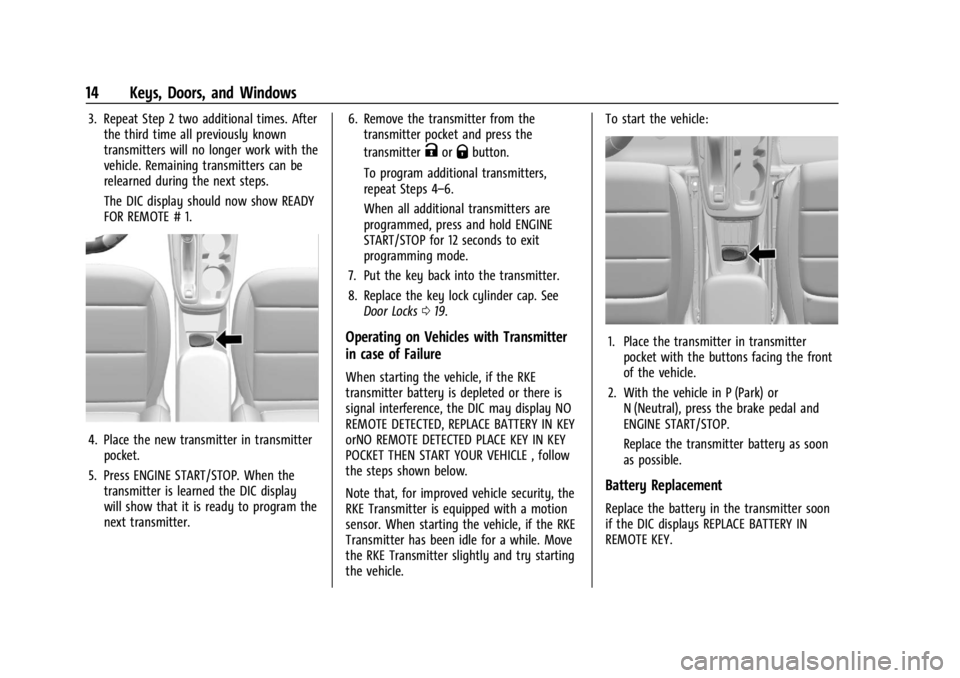
4. Place the new transmitter in transmitterpocket.
5. Press ENGINE START/STOP. When the transmitter is learned the DIC display
will show that it is ready to program the
next transmitter. 6. Remove the transmitter from the
transmitter pocket and press the
transmitter
KorQbutton.
To program additional transmitters,
repeat Steps 4–6.
When all additional transmitters are
programmed, press and hold ENGINE
START/STOP for 12 seconds to exit
programming mode.
7. Put the key back into the transmitter.
8. Replace the key lock cylinder cap. See Door Locks 019.
Operating on Vehicles with Transmitter
in case of Failure
When starting the vehicle, if the RKE
transmitter battery is depleted or there is
signal interference, the DIC may display NO
REMOTE DETECTED, REPLACE BATTERY IN KEY
orNO REMOTE DETECTED PLACE KEY IN KEY
POCKET THEN START YOUR VEHICLE , follow
the steps shown below.
Note that, for improved vehicle security, the
RKE Transmitter is equipped with a motion
sensor. When starting the vehicle, if the RKE
Transmitter has been idle for a while. Move
the RKE Transmitter slightly and try starting
the vehicle. To start the vehicle:
1. Place the transmitter in transmitter
pocket with the buttons facing the front
of the vehicle.
2. With the vehicle in P (Park) or N (Neutral), press the brake pedal and
ENGINE START/STOP.
Replace the transmitter battery as soon
as possible.
Battery Replacement
Replace the battery in the transmitter soon
if the DIC displays REPLACE BATTERY IN
REMOTE KEY.
Page 40 of 328
Chevrolet TRAX Owner Manual (GMNA-Localizing-U.S./Canada/Mexico-
17041293) - 2024 - CRC - 12/7/22
Seats and Restraints 39
If the vehicle is on and the brake pedal is
pressed with the vehicle in P (Park) but the
driver seat belt is not buckled, a message
displays in the Driver Information
Center (DIC) and the vehicle will be delayed
from shifting out of P (Park). Buckle the
driver seat belt to clear the message and
shift out of P (Park). Shifting from P (Park)
will be delayed once for each time the
vehicle is started.
For some fleet vehicles, shifting out of
P (Park) will be delayed each time the driver
attempts to do so while the driver seat belt
is not buckled, whether Teen Driver is ON or
OFF. Turning the vehicle off then on will not
change this condition.
On some models, Buckle to Drive may also
delay shifting out of P (Park) if a front
passenger is unbuckled under similar
conditions. A message displays in the DIC.
Buckle the front passenger seat belt to shift
out of P (Park). This feature may delay the
vehicle from shifting out of P (Park) if an
object, such as a briefcase, handbag, grocery
bag, laptop, or other electronic device, is on
the front passenger seat. If this happens,
remove the object from the seat or buckle
the seat belt to shift out of P (Park).If the driver, or on some vehicles, the
present front passenger seat belt remains
unbuckled, the DIC message will turn off
after several seconds and the vehicle can be
shifted out of P (Park). See
“Seat Belts”and
“Child Restraints” in the Index for
information about the importance of proper
restraint use.
If the driver seat belt or the front passenger
seat belt is unbuckled when driving, the seat
belt reminder chime and light(s) will come
on. See Seat Belt Reminders 091. This
feature may not function properly if the
airbag readiness light is on. See Airbag
Readiness Light 091.
How to Wear Seat Belts Properly
Follow these rules for everyone's protection.
There are additional things to know about
seat belts and children, including smaller
children and infants. If a child will be riding
in the vehicle, see Older Children054 or
Infants and Young Children 056. Review
and follow the rules for children in addition
to the following rules.
It is very important for all occupants to
buckle up. Statistics show that unbelted
people are hurt more often in crashes than
those who are wearing seat belts. There are important things to know about
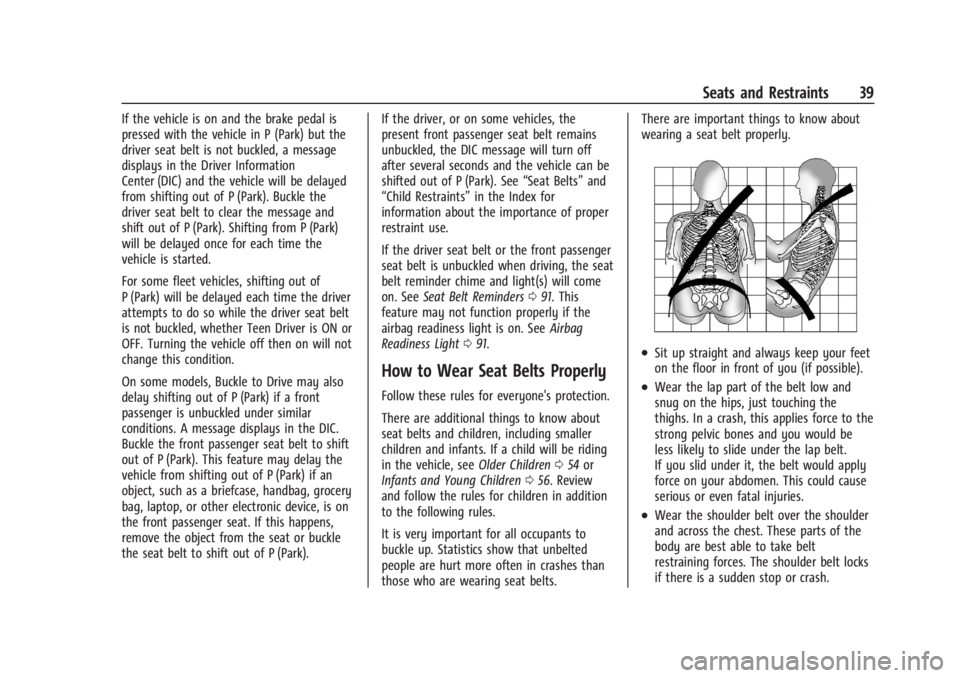
wearing a seat belt properly.
.Sit up straight and always keep your feet
on the floor in front of you (if possible).
.Wear the lap part of the belt low and
snug on the hips, just touching the
thighs. In a crash, this applies force to the
strong pelvic bones and you would be
less likely to slide under the lap belt.
If you slid under it, the belt would apply
force on your abdomen. This could cause
serious or even fatal injuries.
.Wear the shoulder belt over the shoulder
and across the chest. These parts of the
body are best able to take belt
restraining forces. The shoulder belt locks
if there is a sudden stop or crash.
Page 49 of 328
Chevrolet TRAX Owner Manual (GMNA-Localizing-U.S./Canada/Mexico-
17041293) - 2024 - CRC - 12/7/22
48 Seats and Restraints
Roof-rail airbags are designed to inflate in
moderate to severe side crashes depending
on the location of the impact. In addition,
these roof-rail airbags may inflate during a
rollover or in a severe frontal impact.
Roof-rail airbags are not designed to inflate
in rear impacts. Both roof-rail airbags may
inflate when either side of the vehicle is
struck or if the sensing system predicts that
the vehicle is about to roll over on its side,
or in a severe frontal impact.
In any particular crash, no one can say
whether an airbag should have inflated
simply because of the vehicle damage or
repair costs.
What Makes an Airbag Inflate?
In a deployment event, the sensing system
sends an electrical signal triggering a release
of gas from the inflator. Gas from the
inflator fills the airbag causing the bag to
break out of the cover. The inflator, the
airbag, and related hardware are all part of
the airbag module.
For airbag locations, seeWhere Are the
Airbags? 046.
How Does an Airbag Restrain?
In moderate to severe frontal collisions, even
belted occupants can contact the steering
wheel or the instrument panel. In moderate
to severe side collisions, even belted
occupants can contact the inside of the
vehicle.
Airbags supplement the protection provided
by seat belts by distributing the force of the
impact more evenly over the
occupant's body.
Rollover capable roof-rail airbags are
designed to help contain the head and chest
of occupants in the outboard seating
positions in the first and second rows. The
rollover capable roof-rail airbags are
designed to help reduce the risk of full or
partial ejection in rollover events, although
no system can prevent all such ejections.
But airbags would not help in many types
of collisions, primarily because the
occupant's motion is not toward those
airbags. See When Should an Airbag Inflate?
0 47.
Airbags should never be regarded as
anything more than a supplement to seat
belts.
What Will You See after an
Airbag Inflates?
After frontal and seat-mounted side impact
airbags inflate, they quickly deflate, so
quickly that some people may not even
realize the airbags inflated. Roof-rail airbags
may still be at least partially inflated for
some time after they inflate. Some
components of the airbag module may be
hot for several minutes. For location of the
airbags, see Where Are the Airbags? 046.
The parts of the airbag that come into
contact with you may be warm, but not too
hot to touch. There may be some smoke
and dust coming from the vents in the
deflated airbags. Airbag inflation does not
prevent people from leaving the vehicle.
{Warning
When an airbag inflates, there may be
dust in the air. This dust could cause
breathing problems for people with a
history of asthma or other breathing
trouble. To avoid this, everyone in the
vehicle should get out as soon as it is
safe to do so. If you have breathing
problems but cannot get out of the (Continued)
Page 50 of 328

Chevrolet TRAX Owner Manual (GMNA-Localizing-U.S./Canada/Mexico-
17041293) - 2024 - CRC - 12/7/22
Seats and Restraints 49
Warning (Continued)
vehicle after an airbag inflates, then get
fresh air by opening a window or a door.
If you experience breathing problems
following an airbag deployment, you
should seek medical attention.
The vehicle has a feature that may
automatically unlock the doors, turn on the
interior lamps and hazard warning flashers,
and shut off the fuel system after the
airbags inflate. The feature may also
activate, without airbag inflation, after an
event that exceeds a predetermined
threshold. After turning the vehicle off and
then on again, the fuel system will return to
normal operation; the doors can be locked,
the interior lamps can be turned off, and
the hazard warning flashers can be turned
off using the controls for those features.
If any of these systems are damaged in the
crash they may not operate as normal.
{Warning
A crash severe enough to inflate the
airbags may have also damaged
important functions in the vehicle, such (Continued)
Warning (Continued)
as the fuel system, brake and steering
systems, etc. Even if the vehicle appears
to be drivable after a moderate crash,
there may be concealed damage that
could make it difficult to safely operate
the vehicle.
Use caution if you should attempt to
restart the engine after a crash has
occurred.
In many crashes severe enough to inflate
the airbag, windshields are broken by
vehicle deformation. Additional windshield
breakage may also occur from the front
outboard passenger airbag.
.Airbags are designed to inflate only once.
After an airbag inflates, you will need
some new parts for the airbag system.
If you do not get them, the airbag
system will not be there to help protect
you in another crash. A new system will
include airbag modules and possibly other
parts. The service manual for the vehicle
covers the need to replace other parts.
.The vehicle has a crash sensing and
diagnostic module which records
information after a crash. See Vehicle
Data Recording and Privacy 0306 and
Event Data Recorders 0307.
.Let only qualified technicians work on the
airbag system. Improper service can mean
that an airbag system will not work
properly. See your dealer for service.
Passenger Sensing System
The vehicle has a passenger sensing system
for the front outboard passenger position.
The passenger airbag status indicator will
light on the overhead console when the
vehicle is started.
United States
Page 67 of 328
Chevrolet TRAX Owner Manual (GMNA-Localizing-U.S./Canada/Mexico-
17041293) - 2024 - CRC - 12/7/22
66 Seats and Restraints
Warning (Continued)
tighten the belt behind the child restraint
after the child restraint has been
installed.
Caution
Do not let the LATCH attachments rub
against the vehicle’s seat belts. This may
damage these parts. If necessary, move
buckled seat belts to avoid rubbing the
LATCH attachments. Do not fold the rear
seatback when the seat is occupied. Do
not fold the empty rear seat with a seat
belt buckled. This could damage the seat
belt or the seat. Unbuckle and return the
seat belt to its stowed position, before
folding the seat.
If you need to secure more than one child
restraint in the rear seat, see Where to Put
the Restraint 059. Van Models Without Rear Seats
1. For van models without rear seats, forward-facing child restraints should
only be installed in the right front
seating position with the seat belt and a
top tether. See Securing Child Restraints
(With the Seat Belt in the Rear Seat)
0 68 or
Securing Child Restraints (With the Seat
Belt in the Front Seat) 070.
If the child restraint manufacturer
recommends that the top tether be
attached, attach and tighten the top
tether to the top tether anchor, if your
vehicle has one. Refer to the child
restraint instructions and the following
steps:
1.1. Find the top tether anchor.
1.2. Route, attach, and tighten the top tether according to your child
restraint instructions and the
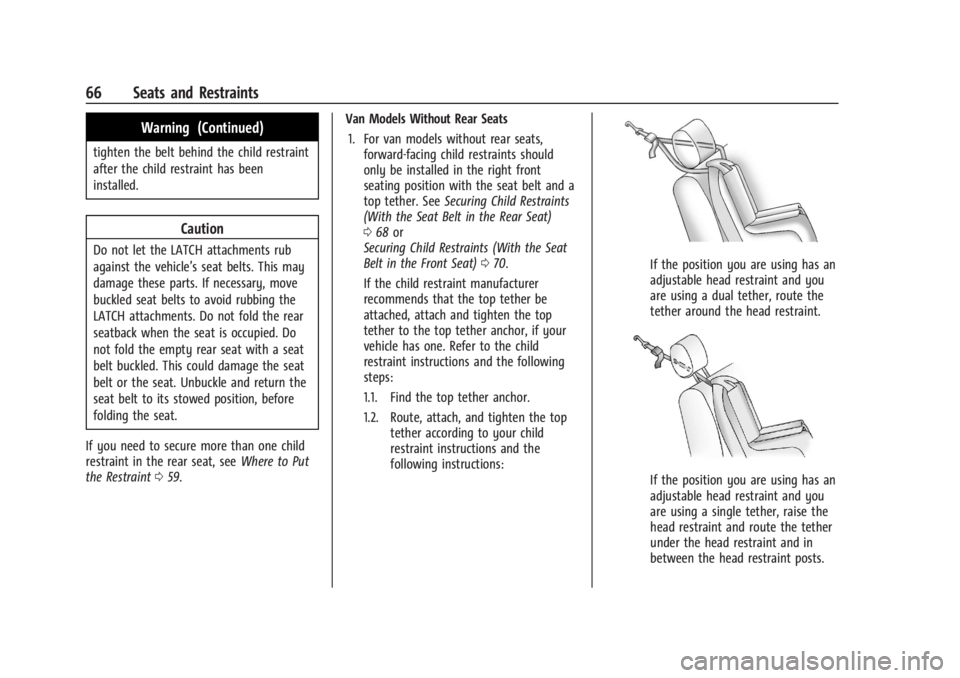
following instructions:If the position you are using has an
adjustable head restraint and you
are using a dual tether, route the
tether around the head restraint.
If the position you are using has an
adjustable head restraint and you
are using a single tether, raise the
head restraint and route the tether
under the head restraint and in
between the head restraint posts.
Page 68 of 328

Chevrolet TRAX Owner Manual (GMNA-Localizing-U.S./Canada/Mexico-
17041293) - 2024 - CRC - 12/7/22
Seats and Restraints 67
2. Secure the child restraint in the rightfront seating position with the seat belt.
See Securing Child Restraints (With the
Seat Belt in the Rear Seat) 068 or
Securing Child Restraints (With the Seat
Belt in the Front Seat) 070.
3. Before placing a child in the child restraint, make sure it is securely held in
place. To check, grasp the child restraint
at the belt path and attempt to move it
side to side and back and forth. There
should be no more than 2.5 cm (1 in) of
movement for proper installation.
Sedan Models 1. Attach and tighten the lower attachments to the lower anchors. If the
child restraint does not have lower
attachments or the desired seating
position does not have lower anchors,
secure the child restraint with the top
tether and the seat belt. Refer to the
child restraint manufacturer instructions
and the instructions in this manual.
1.1. Find the lower anchors for the desired seating position.
1.2. Put the child restraint on the seat. 1.3. Attach and tighten the lower
attachments on the child restraint
to the lower anchors.
2. If the child restraint manufacturer recommends that the top tether be
attached, attach and tighten the top
tether to the top tether anchor,
if equipped. Refer to the child restraint
instructions and the following steps:
2.1. Find the top tether anchor.
2.2. Route, attach and tighten the top
tether according to your child
restraint instructions and the
following instructions:
If the position you are using does
not have a head restraint and you
are using a single tether, route the
tether over the seatback.
If the position you are using does
not have a head restraint and you
are using a dual tether, route the
tether over the seatback.
If the position you are using has an
adjustable headrest or head
restraint and you are using a single
tether, raise the headrest or head
restraint and route the tether under
Page 107 of 328
Chevrolet TRAX Owner Manual (GMNA-Localizing-U.S./Canada/Mexico-
17041293) - 2024 - CRC - 12/2/22
106 Instruments and Controls
When selected, Show in Cluster may be
chosen in the dialog.
Oil Temperature :Displays the current oil
temperature in either degrees Celsius (°C) or
degrees Fahrenheit (°F).
When selected, Show in Cluster may be
chosen in the dialog.
Engine Hours : Displays the total number of
hours the engine has run.
When selected, Show in Cluster may be
chosen in the dialog.
Trip
Trip Information : Trip 1 or 2 displays the
current distance traveled, in either
kilometers (km) or miles (mi), since the trip
odometer was last reset.
Average Fuel Economy displays the
approximate average liters per
100 kilometers (L/100 km) or miles per
gallon (mpg). This number is calculated
based on the number of L/100 km (mpg)
recorded since the last time this menu item
was reset. This number reflects only the
current, approximate average fuel economy
and changes as driving conditions change. To reset these values, touch reset on the
touchscreen display when the Trip
Information dialog is selected.
When selected, the following options may
be chosen in the dialog: Reset Trip 1, Reset
Trip 2, and Show in Cluster.
Fuel Economy :
Displays average fuel
economy, the best fuel economy over the
selected distance, and a bar graph showing
instantaneous fuel economy. Values are
displayed in liters per 100 kilometers
(L/100 km) or miles per gallon (mpg). This
number reflects only the approximate fuel
economy and changes frequently as driving
conditions change. Only the best score can
be reset.
If the vehicle is equipped with an Active Fuel
Management indicator, the engine operating
mode may be shown in the bottom corner
of this display.
When selected, the following options may
be chosen in the dialog: Change Distance,
Reset Best Score, and Show in Cluster. The
distance for average fuel economy and the
best fuel economy can be changed to:
25 miles, 50 miles, and 300 miles.Vehicle Messages
Messages displayed on the DIC indicate the
status of the vehicle or some action that
may be needed to correct a condition.
Multiple messages may appear one after
another.
The messages that do not require
immediate action can be acknowledged and
cleared by pressing
V. The messages that
require immediate action cannot be cleared
until that action is performed.
All messages should be taken seriously;
clearing the message does not correct the
problem.
If a SERVICE message appears, see your
dealer.
Follow the instructions given in the
messages. The system displays messages
regarding the following topics:
.Service Messages
.Fluid Levels
.Vehicle Security
.Brakes
.Steering
.Ride Control Systems
.Advanced Driver Assistance Systems
Page 118 of 328

Chevrolet TRAX Owner Manual (GMNA-Localizing-U.S./Canada/Mexico-
17041293) - 2024 - CRC - 12/2/22
Infotainment System 117
app icon in the Application Tray cannot be
moved. If a second Home Page is desired,
one or more of the Application Icons from
the Application Tray must be moved to
create more than 8 app icons so that the
9th and beyond create a second Home Page.
Applications and icons cannot be added to
this system.
Swipe left or right across the display to
access the pages of icons.
Managing Home Page Icons1. Touch and hold any of the Home Page icons to enter edit mode.
2. Continue holding the icon and drag it to the desired position.
3. Release your finger to drop the icon in the desired position.
Move an Icon to Another Page 1. Drag the icon to the edge of the display toward the desired page.
2. Continue dragging and dropping application icons as desired.
Move an Icon to the Application Tray
To move an icon to the application tray on
the left side of the screen, drag the icon to
the applications tray.Steering Wheel Controls (11 inch
screen radio)
If equipped, some audio controls can be
adjusted at the steering wheel.
g: Press to answer an incoming call during
phone projection or start voice recognition.
See Bluetooth (Pairing and Using a Phone
11 inch screen radio) 0123 or
Bluetooth (Overview 11 inch screen radio)
0 122.
e:Press to open the audio source list.
c: Press to decline an incoming call, end
a current call or to mute or unmute the
infotainment system when not on a call.
6: Press to answer an incoming call.
The favorites and volume switches are on
the back of the steering wheel.
1. Favorite: When on a radio source, press to select the next or previous audio
broadcast favorite. When listening to a
media device, press to select the next or
previous track.
2. Volume: Press to increase or decrease the volume.
Page 124 of 328
Chevrolet TRAX Owner Manual (GMNA-Localizing-U.S./Canada/Mexico-
17041293) - 2024 - CRC - 12/2/22
Infotainment System 123
.Stream audio (music, podcasts).
.Notify receipt of text messages for Apple
CarPlay and Android Auto connected
devices.
To minimize driver distraction, before
driving, and with the vehicle parked:
.Become familiar with the features of the
mobile device. Organize the phone book
and contact lists clearly and delete
duplicate or rarely used entries.
.Review the controls and operation of the
infotainment system.
.Pair mobile device(s) to the vehicle. The
system may not work with all mobile
devices. See “Pairing”later in this section.
Vehicles with a Bluetooth system can use a
Bluetooth-capable mobile device with a
Hands-Free Profile to make and receive
phone calls. The infotainment system and
voice recognition are used to control the
system. The system can be used while the
vehicle is on or in accessory mode. The
range of the Bluetooth system can be up to
9.1 m (30 ft). Not all mobile devices support
all functions and not all mobile devices work
with the Bluetooth system. See Online
Account 0299 for more information about
compatible mobile devices.
Controls
Use the controls on the infotainment display
and the steering wheel to operate the
Bluetooth system.
Steering Wheel Controls
g: Press and release to answer incoming
calls on your connected Bluetooth mobile
device. If there is no incoming call, press
and release for mobile device assistant.
c: Press to end a call, decline a call,
or cancel an operation. Press to mute or
unmute the infotainment system when not
on a call.
Infotainment System Controls
For information about how to navigate the
menu system using the infotainment
controls, see Using the System (11 inch
screen radio) 0118.
Audio System
When using the Bluetooth mobile device
system, sound comes through the vehicle's
front audio system speakers and overrides
the audio system. The volume level while on
a mobile device call can be adjusted by
pressing the steering wheel controls or the
volume controls for the infotainment system. The adjusted volume level remains
in memory for later calls. The volume
cannot be lowered beyond a certain level.
Bluetooth (Pairing and Using a
Phone 11 inch screen radio)
Pairing
A Bluetooth-enabled mobile device must be
paired to the Bluetooth system and then
connected to the vehicle before it can be
used. See the mobile device manufacturer's
user guide for Bluetooth functions before
pairing the device.
Pairing Information
.Touch the Phone icon on the home page
of the infotainment display.
.If no mobile device has been paired, a
message on the infotainment display will
show the Manage Phones option. Touch
this option and the Phones screen will
display. See
“Pairing a Phone” later in this
section.
.A Bluetooth smartphone with music
capability can be paired to the vehicle as
a smartphone and a music player at the
same time.
.Up to 10 devices can be paired to the
system.