AUX CHEVROLET UPLANDER 2006 Owners Manual
[x] Cancel search | Manufacturer: CHEVROLET, Model Year: 2006, Model line: UPLANDER, Model: CHEVROLET UPLANDER 2006Pages: 458, PDF Size: 3.19 MB
Page 173 of 458
Notice:Leaving electrical equipment on for
extended periods will drain the battery. Always turn
off electrical equipment when not in use and do
not plug in equipment that exceeds the maximum
amperage rating.
Certain electrical accessories may not be compatible
with the accessory power outlet and could result
in blown vehicle or adapter fuses. If you experience a
problem see your dealer for additional information
on accessory power outlets.
Notice:Adding any electrical equipment to your
vehicle may damage it or keep other components
from working as they should. The repairs would not
be covered by your warranty. Do not use equipment
exceeding maximum amperage rating. Check
with your dealer before adding electrical equipment.
When adding electrical equipment, be sure to follow
the proper installation instructions included with
the equipment.
Notice:Improper use of the power outlet can cause
damage not covered by your warranty. Do not
hang any type of accessory or accessory bracket
from the plug because the power outlets are
designed for accessory power plugs only.Power Outlet 115 Volt Alternating
Current
Your vehicle may have a power outlet that can be used
to plug in auxiliary electrical equipment with a
maximum limit of 150 watts. If you try to use equipment
that requires more than the limit, a protection circuit
will cut the power supply. To reset the outlet, unplug the
item and plug it back in or turn the ignition to OFF or
ACCESSORY and then back on. The power will
automatically restart when equipment that operates
within the limit is plugged in.
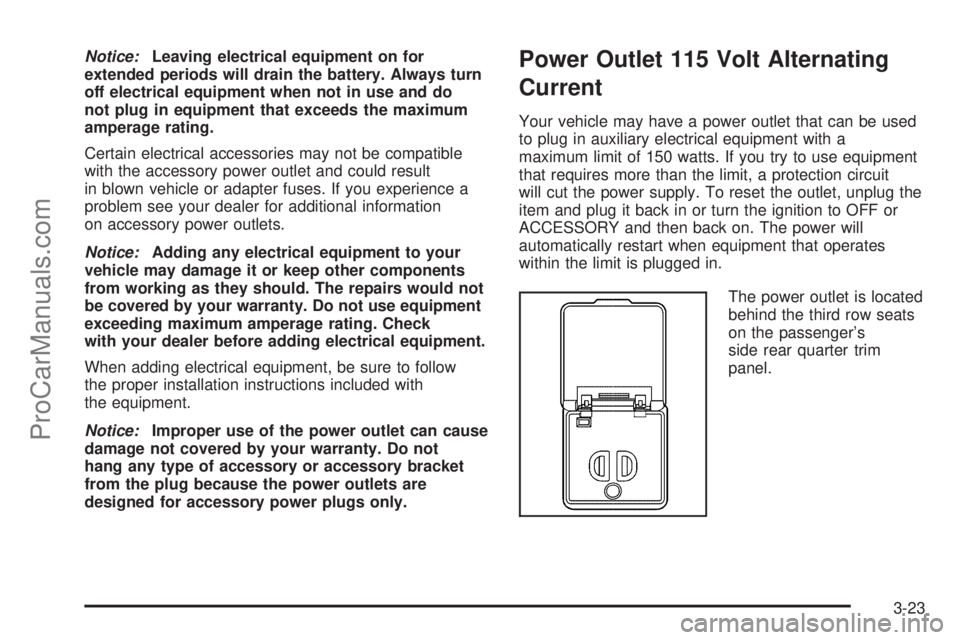
The power outlet is located
behind the third row seats
on the passenger’s
side rear quarter trim
panel.
3-23
ProCarManuals.com
Page 177 of 458
Outlet Adjustment
k(Open):Turn the thumbwheel to this position to
open the air outlets.
l(Closed):Turn the thumbwheel to this position to
close the air outlets.
Use the louvers located on the air outlets to change the
direction of the air�ow.
Operation Tips
Clear away any ice, snow, or leaves from the air
inlets at the base of the vehicle that may block
the �ow of air into your vehicle.
Use of non-GM approved hood de�ectors may
adversely affect the performance of the system.
Keep the path under the front seats clear of objects
to help circulate the air inside of your vehicle more
effectively.
Rear Climate Control System
Your vehicle may have a rear climate control system
that allows the driver to adjust the fan speed for the rear
seating area. This system works with the main climate
control system in your vehicle.
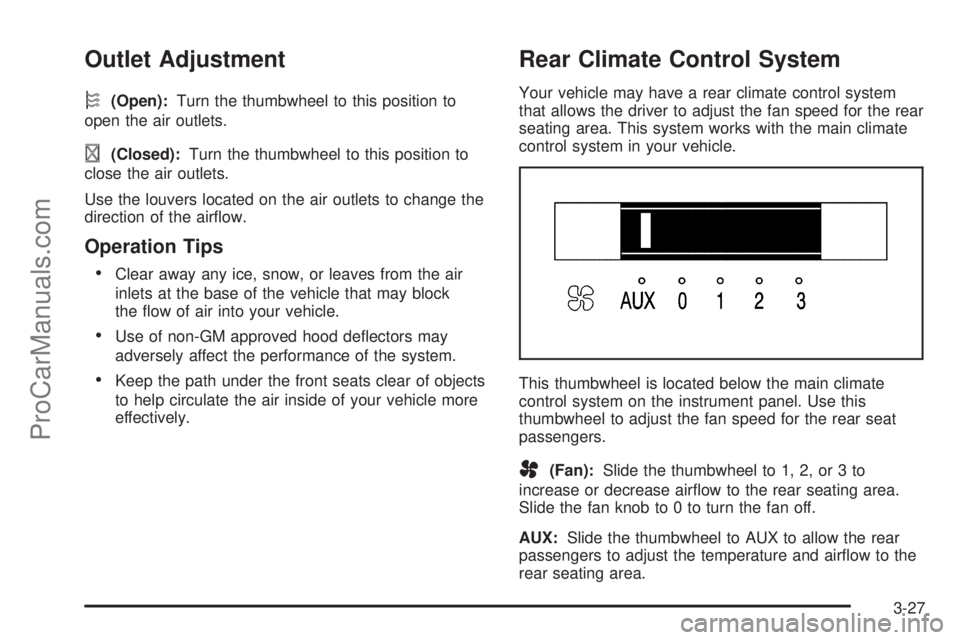
This thumbwheel is located below the main climate
control system on the instrument panel. Use this
thumbwheel to adjust the fan speed for the rear seat
passengers.
A(Fan):Slide the thumbwheel to 1, 2, or 3 to
increase or decrease air�ow to the rear seating area.
Slide the fan knob to 0 to turn the fan off.
AUX:Slide the thumbwheel to AUX to allow the rear
passengers to adjust the temperature and air�ow to the
rear seating area.
3-27
ProCarManuals.com
Page 178 of 458
Your vehicle may also have a rear climate control
system that allows the rear passengers to adjust the
temperature and fan speed for the rear seating area.
When the front climate control is in AUX and the
rear climate control fan or temperature button is
pressed, the display will show the same air�ow modes
as the front climate control system. SeeClimate
Control System on page 3-24
The front control must be in AUX position to enable
adjustment of the temperature and fan speed on the rear
control system. If it is not in AUX, pressing the fan or
temperature button on the rear climate control will show
a DISABLED message on the rear seat entertainment
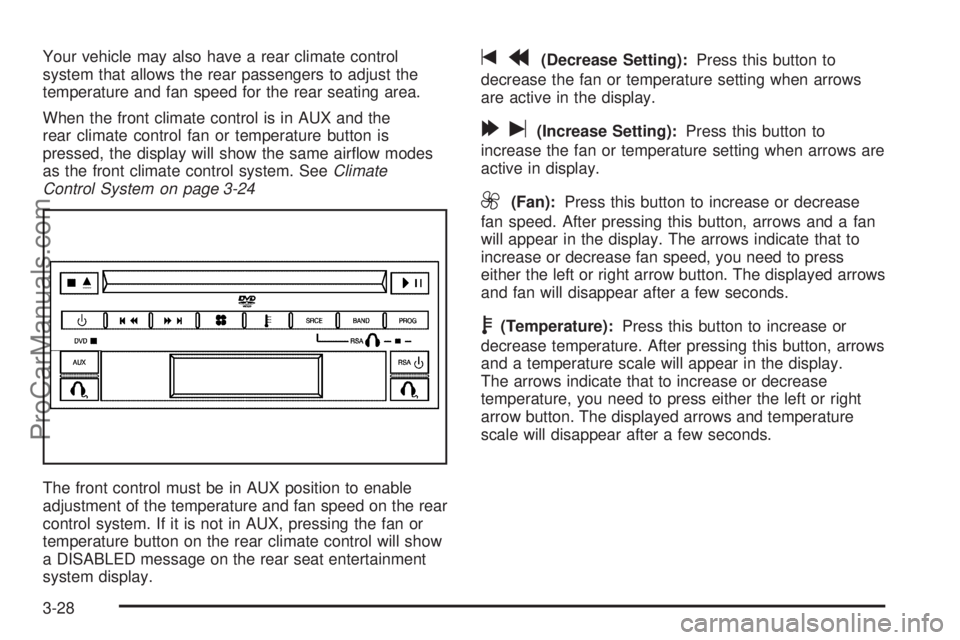
system display.tr(Decrease Setting):Press this button to
decrease the fan or temperature setting when arrows
are active in the display.
[u(Increase Setting):Press this button to
increase the fan or temperature setting when arrows are
active in display.
9(Fan):Press this button to increase or decrease
fan speed. After pressing this button, arrows and a fan
will appear in the display. The arrows indicate that to
increase or decrease fan speed, you need to press
either the left or right arrow button. The displayed arrows
and fan will disappear after a few seconds.
b(Temperature):Press this button to increase or
decrease temperature. After pressing this button, arrows
and a temperature scale will appear in the display.
The arrows indicate that to increase or decrease
temperature, you need to press either the left or right
arrow button. The displayed arrows and temperature
scale will disappear after a few seconds.
3-28
ProCarManuals.com
Page 238 of 458
Do not add any label to a CD, it could get caught in the
CD player. If a CD is recorded on a personal computer
and a description label is needed, try labeling the top of
the recorded CD with a marking pen instead.
Notice:If you add any label to a CD, insert more
than one CD into the slot at a time, or attempt
to play scratched or damaged CDs, you could
damage the CD player. When using the CD player,
use only CDs in good condition without any
label, load one CD at a time, and keep the CD player
and the loading slot free of foreign materials,
liquids, and debris.
If an error appears on the display, see “CD Messages”
later in this section.
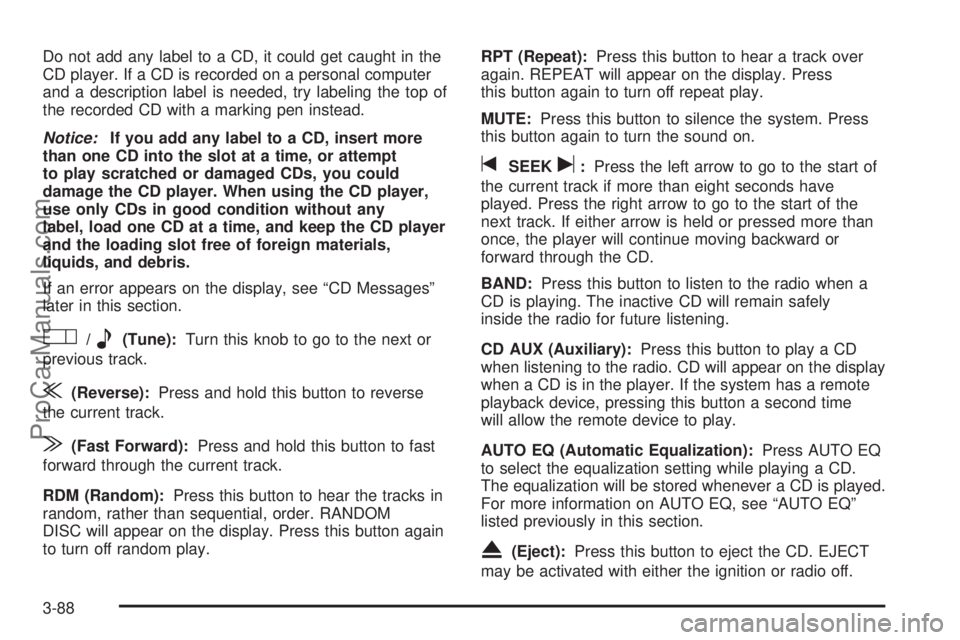
O/e(Tune):Turn this knob to go to the next or
previous track.
{(Reverse):Press and hold this button to reverse
the current track.
|(Fast Forward):Press and hold this button to fast
forward through the current track.
RDM (Random):Press this button to hear the tracks in
random, rather than sequential, order. RANDOM
DISC will appear on the display. Press this button again
to turn off random play.RPT (Repeat):Press this button to hear a track over
again. REPEAT will appear on the display. Press
this button again to turn off repeat play.
MUTE:Press this button to silence the system. Press
this button again to turn the sound on.
tSEEKu:Press the left arrow to go to the start of
the current track if more than eight seconds have
played. Press the right arrow to go to the start of the
next track. If either arrow is held or pressed more than
once, the player will continue moving backward or
forward through the CD.
BAND:Press this button to listen to the radio when a
CD is playing. The inactive CD will remain safely
inside the radio for future listening.
CD AUX (Auxiliary):Press this button to play a CD
when listening to the radio. CD will appear on the display
when a CD is in the player. If the system has a remote
playback device, pressing this button a second time
will allow the remote device to play.
AUTO EQ (Automatic Equalization):Press AUTO EQ
to select the equalization setting while playing a CD.
The equalization will be stored whenever a CD is played.
For more information on AUTO EQ, see “AUTO EQ”
listed previously in this section.
X(Eject):Press this button to eject the CD. EJECT
may be activated with either the ignition or radio off.
3-88
ProCarManuals.com
Page 242 of 458
CD AUX (Auxiliary):Press this button to play a CD
when listening to the radio. CD will appear on the display
when a CD is in the player. If your system is equipped
with a remote playback device, pressing this button
a second time will allow the remote device to play.
AUTO EQ (Automatic Equalization):Press AUTO EQ
to select the equalization setting while playing a CD.
The equalization will be stored whenever a CD is played.
For more information on AUTO EQ, see “AUTO EQ”
listed previously in this section.
Using an MP3 CD
MP3 Format
If you burn your own MP3 disc on a personal computer:
Make sure the MP3 �les are recorded on
a CD-R disc.
Make sure to �nalize the disc when burning an MP3
disc, using multiple sessions. It is usually better to
burn the disc all at once.
Files can be recorded with a variety of �xed or
variable bit rates. Song title, artist name, and album
will be available for display by the radio when
recorded using ID3 tags version 1 and 2.
Do not mix standard audio and MP3 �les
on one disc.
Make sure playlists have a .pls, or .m3u, or .rmp
extension, other �le extensions may not work.
The player will be able to read and play a maximum of
50 folders, 50 playlists, 10 sessions, and 255 �les.
Long �le names, folder names, or playlist names may
use more disc memory space than necessary. To
conserve space on the disc, minimize the length of the
�le, folder or playlist names. You can also play an
MP3 CD that was recorded using no �le folders. The
system can support up to 11 folders in depth, though,
keep the depth of the folders to a minimum in order
to keep down the complexity and confusion in trying to
locate a particular folder during playback. If a CD
contains more than the maximum of 50 folders,
50 playlists, 10 sessions, and 255 �les the player will let
you access and navigate up to the maximum, but all
items over the maximum will be ignored.
Root Directory
The root directory will be treated as a folder. If the root
directory has compressed audio �les, the directory
will be displayed as F1 ROOT. All �les contained directly
under the root directory will be accessed prior to any
root directory folders. However, playlists (Px) will always
be accessed before root folders or �les.
3-92
ProCarManuals.com
Page 246 of 458
BAND:Press this button to listen to the radio when a
CD is playing. The inactive CD will remain safely
inside the radio for future listening.
CD AUX (Auxiliary):Press this button to play a CD
when listening to the radio. The CD symbol will appear
on the display when a CD is loaded.
Y(Eject):Press this button to eject a CD. Eject may
be activated with either the ignition or radio off.
UsingR(Song List) Mode (Single CD,
MP3, and Six-Disc CD)
This feature is capable of saving 20 track selections.
To save tracks into the song list feature, perform
the following steps:
1. Turn the CD player on and load it with at least
one CD.
2. Check to see that the CD player is not in song list
mode. S-LIST should not appear on the display. If
S-LIST is present, press the song list button to
turn it off.
3. Select the desired CD by pressing the numbered
pushbutton and then use the SEEK right arrow or
turn the tune knob to locate the track to be
saved. The track will begin to play.4. Press and hold the song list button to save the
track into memory. When song list is pressed,
one beep will be heard immediately. ADDED SONG
will appear on the display.
5. Repeat Steps 3 and 4 for saving other selections.
SONGLIST FULL will appear on the display if you try to
save more than 20 selections.
To play the song list, press the song list button. The
recorded tracks will begin to play in the order they were
saved.
Seek through the song list by using the SEEK arrows.
Seeking past the last saved track will return to the
�rst saved track.
To delete tracks from the song list, perform the
following steps:
1. Turn the CD player on.
2. Press the song list button to turn song list on.
S-LIST will appear on the display.
3. Press either SEEK arrow or turn the tune knob to
select the desired track to be deleted.
4. Press and hold the song list button for two seconds.
Release the button when SONG REMOVED
appears on the display.
After a track has been deleted, the remaining tracks are
moved up the list. When another track is added to the
song list, the track will be added to the end of the list.
3-96
ProCarManuals.com
Page 248 of 458
Rear Seat Entertainment System
Your vehicle may have a DVD Rear Seat Entertainment
(RSE) system. The RSE system includes a DVD player, a
video display screen, auxiliary inputs, two sets of wireless
headphones (if included), and a remote control.
Parental Control
rj
(Parental Control):This button is located behind
the video screen, below the auxiliary jacks. Press this
button while using RSA, or when a DVD or CD is playing
to blank the video screen and to mute the audio. The
power indicator lights on the DVD player will �ash.
Turning on the parental control will also disable all other
button operations from the remote control and the
DVD player, except for the eject button. Press this
button again to restore operation of the RSA, DVD
player, and remote control.
This button may also be used to turn the DVD player
power on and automatically resume play if the vehicle is
on and a disc is in the player. If no disc is in the
player, the system will power up in auxiliary mode.
Before You Drive
The RSE is designed for rear seat passengers only.
The driver cannot safely view the video screen
while driving and should not try to do so. The RSE
system will play DVD, CD, and MP3 discs. You can also
connect an auxiliary device to the RSE system to play
games, watch videos, look at pictures, etc.
Normal operation may be limited under extremely low or
high temperatures, in order to protect the system
from damage. Operate the RSE system under normal or
comfortable cabin temperature ranges.
Headphones
Wireless Headphones
The RSE system may include two sets of wireless
headphones (batteries are included).
The wireless headphones have an ON/OFF switch, a
channel select switch, and a volume control. To use the
headphones, turn the switch to ON. An indicator light on
the headphones will illuminate. If the light does not
illuminate, the batteries may need to be replaced. See
“Battery Replacement” later in this section for more
information. Switch the headphones to OFF when not
in use.
3-98
ProCarManuals.com
Page 249 of 458
The headphones will shut off automatically to save the
battery power if the RSE system is shut off or if the
headphones are out of range of the transmitters for more
than three minutes. The transmitters are located next
to the DVD faceplate. If you move too far forward or step
out of the vehicle, the headphones will lose the audio
signal.
DVD and auxiliary audio will always be found on
channel (CHA or CH1) of the wireless headphones.
RSA audio is dedicated to CHB or CH2 of the wireless
headphones.
To adjust the volume on the wireless headphones, use
the volume control.
Notice:Do not store the headphones in heat or
direct sunlight. This could damage the headphones
and repairs will not be covered by your warranty.
Keep the headphones stored in a cool, dry place.
If there is a decreased audio signal during CD, MP3, or
DVD play, there may be a low hissing noise through
the speakers and/or headphones. If the hissing sound in
the wireless headphones seems excessive, make
sure that the headphone batteries are fully charged.
Some amount of hissing is normal.
Both sets of rear seat headphones may include foam
ear pads that can be replaced.Foam ear pads on these headphones may become
worn or damaged. The headphone foam ear pads can
become damaged if they are not handled or stored
properly. If the foam ear pads do become damaged or
worn out, the pads can be replaced separately from
the headphone set. It is not necessary to replace
the complete headphone set.
The headphone replacement foam ear pads can be
ordered in pairs. See your dealer for more information.
Battery Replacement
To change the batteries, do the following:
1. Loosen the screw on the battery compartment door
located on the left side of the headphone earpiece.
2. Replace the two AAA batteries in the compartment.
Make sure that they are installed correctly using the
diagram on the inside of the battery compartment.
3. Tighten the screw on the battery compartment door.
If the headphones are to be stored for a long period
of time, remove the batteries, and keep them in a cool,
dry place.
3-99
ProCarManuals.com
Page 250 of 458
Wired Headphones
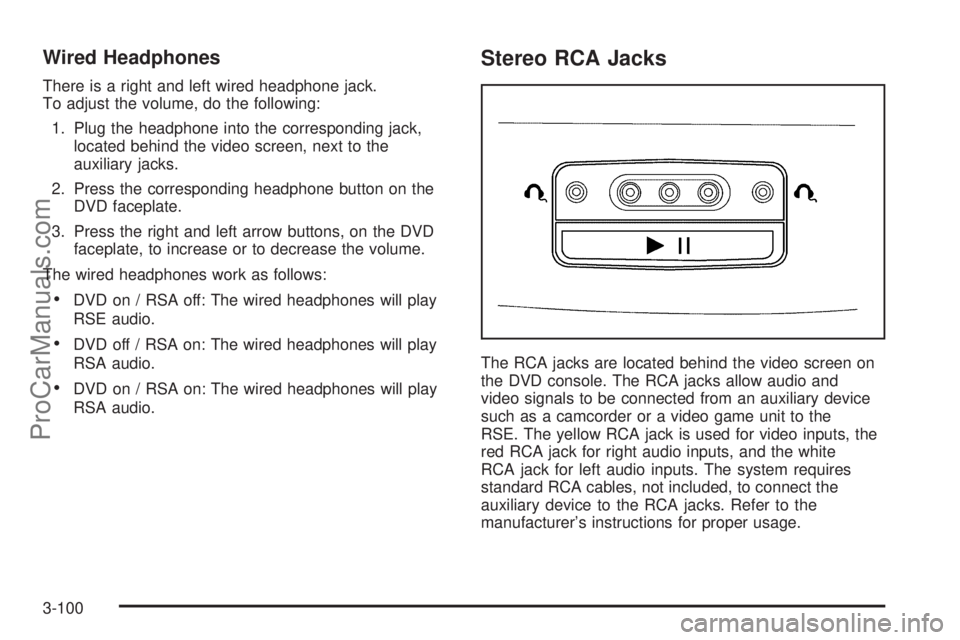
There is a right and left wired headphone jack.
To adjust the volume, do the following:
1. Plug the headphone into the corresponding jack,
located behind the video screen, next to the
auxiliary jacks.
2. Press the corresponding headphone button on the
DVD faceplate.
3. Press the right and left arrow buttons, on the DVD
faceplate, to increase or to decrease the volume.
The wired headphones work as follows:
DVD on / RSA off: The wired headphones will play
RSE audio.
DVD off / RSA on: The wired headphones will play
RSA audio.
DVD on / RSA on: The wired headphones will play
RSA audio.
Stereo RCA Jacks
The RCA jacks are located behind the video screen on
the DVD console. The RCA jacks allow audio and
video signals to be connected from an auxiliary device
such as a camcorder or a video game unit to the
RSE. The yellow RCA jack is used for video inputs, the
red RCA jack for right audio inputs, and the white
RCA jack for left audio inputs. The system requires
standard RCA cables, not included, to connect the
auxiliary device to the RCA jacks. Refer to the
manufacturer’s instructions for proper usage.
3-100
ProCarManuals.com
Page 251 of 458
To use the auxiliary audio and video inputs, connect an
external auxiliary device such as a camcorder to the
RCA jacks and turn on both the auxiliary device power
and the power on the front of the RSE player.
If a disc is present when the RSE power is turned on,
the player will automatically begin playing the disc
and the user will need to press the AUX button on the
remote control or on the DVD player faceplate to switch
the system between the DVD player and the auxiliary
device. See “DVD Player” and “Remote Control” later in
this section for more information.
Audio Output
Audio from the DVD player or auxiliary devices can be
heard through the following possible sources:
Vehicle Speakers
Wireless Headphones
Wired Headphones (not included)
Vehicle Speakers
Only one audio source can be heard through the
vehicle’s speakers at a time.
The RSE system or an auxiliary device can be heard
through all of the vehicle’s speakers when the following
occurs:
A DVD or auxiliary device is playing
The front audio system is on and the CD AUX
button is pressed to enable the RSE system
DVD will appear on the radio display when the RSE
system is on.
To turn the vehicles speakers on and off, press the CD
AUX button on the radio. The audio from the RSE
system can be heard through the wireless headphones
and the vehicles speakers at the same time. The
volume on the radio may vary when switching between
the radio, CD, DVD, MP3, or an auxiliary device.
3-101
ProCarManuals.com