ESP CHEVROLET UPLANDER 2006 Owners Manual
[x] Cancel search | Manufacturer: CHEVROLET, Model Year: 2006, Model line: UPLANDER, Model: CHEVROLET UPLANDER 2006Pages: 458, PDF Size: 3.19 MB
Page 31 of 458
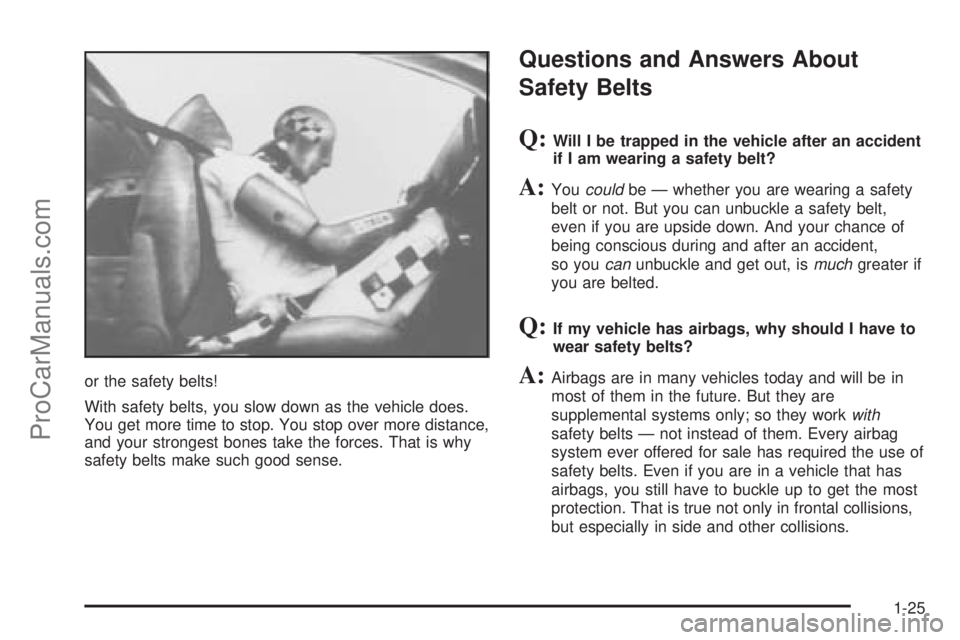
or the safety belts!
With safety belts, you slow down as the vehicle does.
You get more time to stop. You stop over more distance,
and your strongest bones take the forces. That is why
safety belts make such good sense.
Questions and Answers About
Safety Belts
Q:Will I be trapped in the vehicle after an accident
if I am wearing a safety belt?
A:Youcouldbe — whether you are wearing a safety
belt or not. But you can unbuckle a safety belt,
even if you are upside down. And your chance of
being conscious during and after an accident,
so youcanunbuckle and get out, ismuchgreater if
you are belted.
Q:If my vehicle has airbags, why should I have to
wear safety belts?
A:Airbags are in many vehicles today and will be in
most of them in the future. But they are
supplemental systems only; so they workwith
safety belts — not instead of them. Every airbag
system ever offered for sale has required the use of
safety belts. Even if you are in a vehicle that has
airbags, you still have to buckle up to get the most
protection. That is true not only in frontal collisions,
but especially in side and other collisions.
1-25
ProCarManuals.com
Page 106 of 458
Doors and Locks
Door Locks
{CAUTION:
Unlocked doors can be dangerous.
Passengers — especially children — can
easily open the doors and fall out of a
moving vehicle. When a door is locked, the
handle will not open it. You increase the
chance of being thrown out of the vehicle
in a crash if the doors are not locked. So,
wear safety belts properly and lock the
doors whenever you drive.
Young children who get into unlocked
vehicles may be unable to get out. A child
can be overcome by extreme heat and can
suffer permanent injuries or even death
from heat stroke. Always lock your vehicle
whenever you leave it.
Outsiders can easily enter through an
unlocked door when you slow down or
stop your vehicle. Locking your doors can
help prevent this from happening.There are several ways to lock and unlock your vehicle.
From the outside, use your key or the remote keyless
entry transmitter.
To unlock the driver’s door from the outside with the
key, insert the key and turn it toward the front of
the vehicle. To lock the driver’s door from the outside
with your key, insert the key and turn it toward the rear
of the vehicle.
If your vehicle has power door locks, you may be able
to unlock all of the doors and the liftgate when you insert
the key, turn it toward the front of the vehicle, and
hold it there for one second. You may be able to lock all
of the doors when you insert the key and turn it toward
the rear of the vehicle.
2-10
ProCarManuals.com
Page 120 of 458
Windows
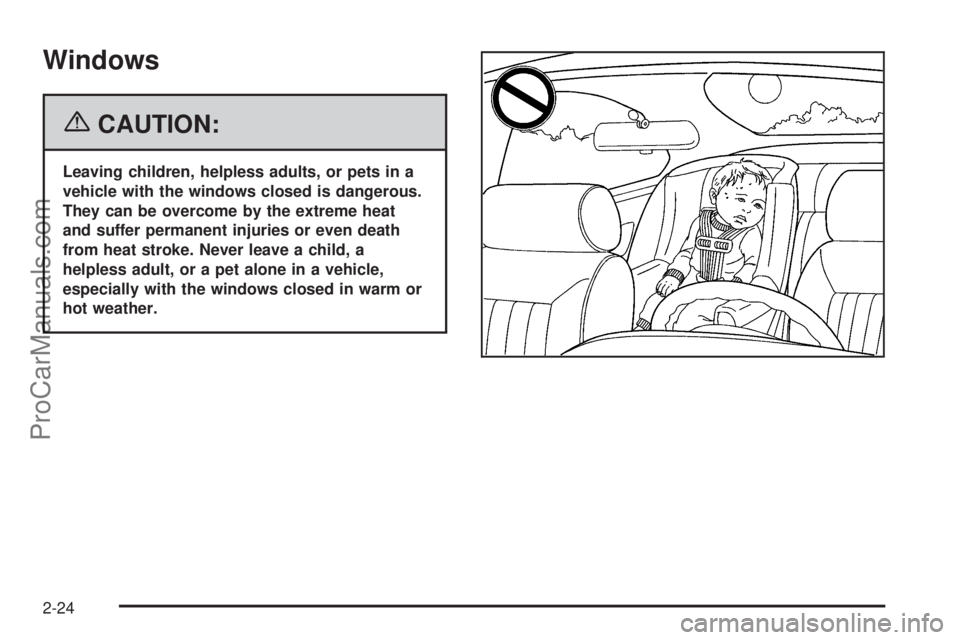
{CAUTION:
Leaving children, helpless adults, or pets in a
vehicle with the windows closed is dangerous.
They can be overcome by the extreme heat
and suffer permanent injuries or even death
from heat stroke. Never leave a child, a
helpless adult, or a pet alone in a vehicle,
especially with the windows closed in warm or
hot weather.
2-24
ProCarManuals.com
Page 122 of 458
Power Rear Quarter Windows
Your vehicle may have power rear quarter windows.
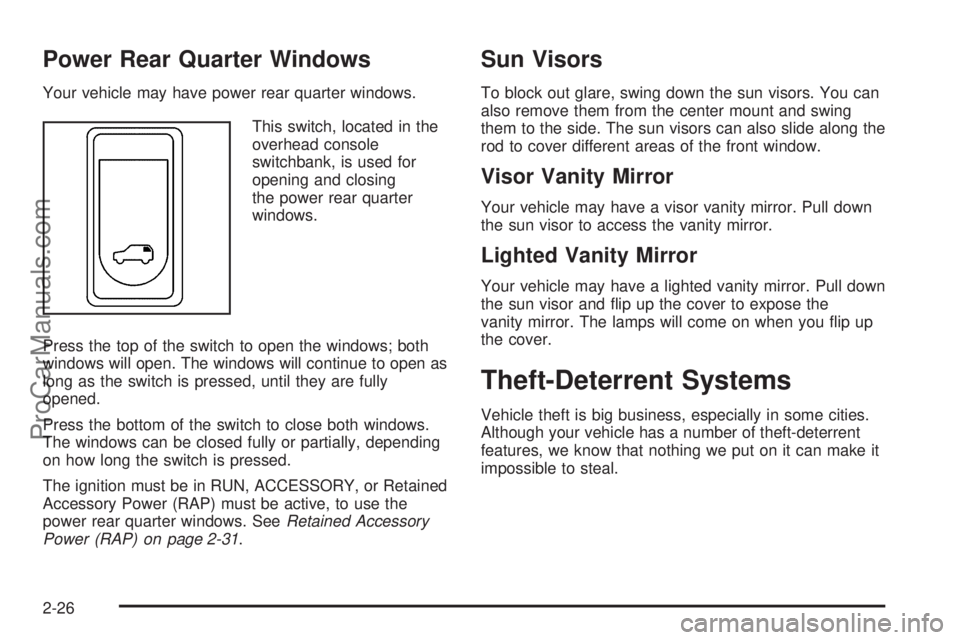
This switch, located in the
overhead console
switchbank, is used for
opening and closing
the power rear quarter
windows.
Press the top of the switch to open the windows; both
windows will open. The windows will continue to open as
long as the switch is pressed, until they are fully
opened.
Press the bottom of the switch to close both windows.
The windows can be closed fully or partially, depending
on how long the switch is pressed.
The ignition must be in RUN, ACCESSORY, or Retained
Accessory Power (RAP) must be active, to use the
power rear quarter windows. SeeRetained Accessory
Power (RAP) on page 2-31.
Sun Visors
To block out glare, swing down the sun visors. You can
also remove them from the center mount and swing
them to the side. The sun visors can also slide along the
rod to cover different areas of the front window.
Visor Vanity Mirror
Your vehicle may have a visor vanity mirror. Pull down
the sun visor to access the vanity mirror.
Lighted Vanity Mirror
Your vehicle may have a lighted vanity mirror. Pull down
the sun visor and �ip up the cover to expose the
vanity mirror. The lamps will come on when you �ip up
the cover.
Theft-Deterrent Systems
Vehicle theft is big business, especially in some cities.
Although your vehicle has a number of theft-deterrent
features, we know that nothing we put on it can make it
impossible to steal.
2-26
ProCarManuals.com
Page 165 of 458
Due to the momentary switch design, your automatic
lights may be disabled even if the control is in the AUTO
position.
;(Parking Lamps):Turn the control to this position
to turn on the parking lamps together with the
following:
Taillamps
Instrument Panel Lights
5(Headlamps):Turn the control to this position to
turn on the headlamps, together with the previously
listed lamps and lights.
Wiper Activated Headlamps
This feature, if equipped, will automatically activate the
headlamps and parking lamps after the windshield
wipers have been in use for about 30 seconds and when
all of the following conditions are met.
The exterior lamp control is in AUTO.
The headlamps have not already been activated by
automatic lighting.
The automatic lighting feature has not been
disabled using the exterior lamp control.
SeeExterior Lamps on page 3-14for additional
information.If the wipers are activated for over 30 seconds and the
exterior lamp control is in the parking lamps position,
or the automatic lighting feature has been disabled using
the exterior lamp control, a HEADLAMPS SUGGESTED
message will appear on the Driver Information Center,
if equipped.
Headlamps on Reminder
If you turn the ignition to LOCK while leaving the lamps
on, you will hear a warning chime once the driver’s
door is opened.
Daytime Running Lamps
(DRL)/Automatic Headlamp System
Daytime Running Lamps (DRL) can make it easier
for others to see the front of your vehicle during the day.
DRL can be helpful in many different driving conditions,
but they can be especially helpful in the short periods
after dawn and before sunset. Fully functional Daytime
Running Lamps are required on all vehicles �rst sold
in Canada.
3-15
ProCarManuals.com
Page 201 of 458
Menu Button Items
q
(Menu):Press this button to scroll through the
following items:
Units
Press the menu button until UNITS displays. This mode
allows you to select between English or Metric units
of measurement. Once in this mode, press the set/reset
button to select between ENGLISH or METRIC.
Language
Press the menu button until the language screen
displays. This mode allows you to select the language
in which the DIC messages will appear. Once in
this mode, press the set/reset button to select among
the following choices:
English
Francais (French)
Espanol (Spanish)
Personalization (Uplevel Only)
Press the menu button until PERSONAL PROGRAM
displays. Your vehicle may have personalization
capabilities that allow you to program certain features to
a preferred setting for up to two drivers.
Your vehicle may also have customization capabilities
that allow you to program certain features to
one preferred setting. Customization features can
only be programmed to one setting on the vehicle and
cannot be programmed to a preferred setting for up
to two drivers. SeeDIC Vehicle Personalization (Uplevel
Only) on page 3-69for additional information on
personal programming.
Compass Zone (Uplevel Only)
Press the menu button until COMPASS ZONE displays.
Press the set/reset button to change the compass
zone. Zones 1 through 15 are available. The direction
the vehicle is moving will be displayed in the top
right corner of the DIC display.
3-51
ProCarManuals.com
Page 219 of 458
DIC Vehicle Personalization
(Uplevel Only)
Your vehicle may have customization capabilities that
allow you to program certain features to one preferred
setting. Customization features can only be programmed
to one setting on the vehicle and cannot be programmed
to a preferred setting for two different drivers. The
customization features include the following:
Exterior lighting delay
Interior lighting delay
Delayed locking
Content theft
Remote keyless entry feedback
Remote start
Rear park chimeYour vehicle may also have personalization capabilities
that allow you to program certain features to a
preferred setting for up to two drivers. The �rst
personalized key corresponds to driver 1 and the second
personalized key corresponds to driver 2. The
personalization features include the following:
Radio station presets
Auto door unlock preferences
Remote keyless entry unlock preferences
All of the customization and personalization options may
not be available on your vehicle. Only the options
available will be displayed on your DIC.
The default settings for the customization and
personalization features were set when your vehicle left
the factory, but may have been changed from their
default setting since then.
The customization preferences are automatically
recalled.
The driver’s personalization preferences are recalled by
using the key programmed for driver 1 or 2.
To change customization and personalization
preferences, use the following procedure.
3-69
ProCarManuals.com
Page 224 of 458
REMOTE START
If your vehicle has remote start, this feature allows the
remote start to be turned OFF or ON. The remote
start feature allows you to start the engine from outside
of the vehicle using the remote keyless entry
transmitter. See “Remote Vehicle Start” underRemote
Keyless Entry System Operation on page 2-5for
more information.
Press the menu button until REMOTE START appears
on the DIC display. Press the set/reset button to
scroll through the following choices:
OFF:The remote start feature will be disabled.
ON (default):The remote start feature will be enabled.
Choose one of the available settings and press the
menu button while it is displayed on the DIC to select it
and move on to the next feature.
REAR PARK CHIME
If your vehicle has the Ultrasonic Rear Parking Assist
(URPA) system, this feature allows the URPA system’s
chime to be turned OFF or ON. SeeUltrasonic Rear
Parking Assist (URPA) on page 3-20for more
information.Press the option button until REAR PARK CHIME
appears on the DIC display. Press the set/reset button
to scroll through the following choices:
OFF:The URPA system’s chime will be disabled.
ON (default):The URPA system’s chime will be
enabled.
Choose one of the available settings and press the
menu button while it is displayed on the DIC to select it
and move on to the next feature.
Personalization Menu Items
The following are personalization features that allow you
to program setting for up to two drivers:
PERSONALIZE KEY
If you are using a key that has already been
personalized to be recognized as key 1 or 2, this screen
will not display. This feature allows you to personalize
a key to be recognized as key 1 or 2. A personalized key
allows you to program personalization features to a
preferred setting to correspond to key 1 or 2.
3-74
ProCarManuals.com
Page 240 of 458
To insert multiple CDs, do the following:
1. Turn the ignition on.
2. Press and hold the load button for two seconds.
You will hear a beep and LOAD ALL DISC will
appear on the display.
3. When INSERT CD # appears on the display, load a
CD. Insert the CD partway into the slot, label side
up. The player will pull the CD in.
Once the CD is loaded, wait for INSERT CD # to
appear on the display, then load the next CD.
The CD player takes up to six CDs. Do not try to
load more than six.
To load more than one CD but less than six, complete
Steps 1 through 3. When �nished loading CDs,
press the load button to cancel the loading function.
The radio will begin to play the last CD loaded.
If more than one CD has been loaded, a number for
each CD will appear on the display.
Playing a Speci�c Loaded CD
For every CD loaded, a number will appear on the
display. To play a speci�c CD press the numbered
pushbutton that corresponds to the CD.
If an error appears on the display, see “CD Messages”
later in this section.
X(Eject):Press this button to eject CD(s).
To eject the CD that is currently playing, press and
release this button.
To eject multiple CDs, do the following:
1. Press and hold the eject button for two seconds.
You will hear a beep and EJECT ALL DISCS will
appear on the display.
2. When REMOVE DISC appears on the display, the
CD will eject and can be removed.
To stop ejecting the CDs, press the load or the
eject button.
If the CD is not removed, after 25 seconds, the CD will
be automatically pulled back into the player. If CD is
pushed back into the player, before the 25 second time
period is complete, the player will sense an error
and will try to eject the CD several times before
stopping.
Do not repeatedly press the eject button to eject a CD
after you have tried to push it in manually. The
player’s 25-second eject timer will reset at each press of
eject, causing the player to not eject the CD until the
25-second time period has elapsed.
O/e(Tune):Turn this knob to go to the next or
previous track.
3-90
ProCarManuals.com
Page 250 of 458
Wired Headphones
There is a right and left wired headphone jack.
To adjust the volume, do the following:
1. Plug the headphone into the corresponding jack,
located behind the video screen, next to the
auxiliary jacks.
2. Press the corresponding headphone button on the
DVD faceplate.
3. Press the right and left arrow buttons, on the DVD
faceplate, to increase or to decrease the volume.
The wired headphones work as follows:
DVD on / RSA off: The wired headphones will play
RSE audio.
DVD off / RSA on: The wired headphones will play
RSA audio.
DVD on / RSA on: The wired headphones will play
RSA audio.
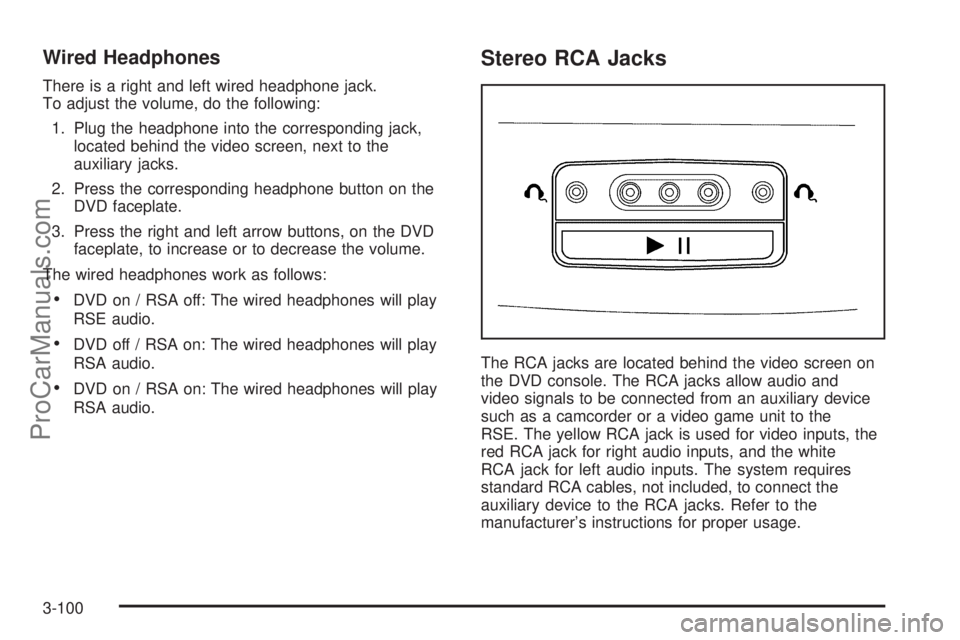
Stereo RCA Jacks
The RCA jacks are located behind the video screen on
the DVD console. The RCA jacks allow audio and
video signals to be connected from an auxiliary device
such as a camcorder or a video game unit to the
RSE. The yellow RCA jack is used for video inputs, the
red RCA jack for right audio inputs, and the white
RCA jack for left audio inputs. The system requires
standard RCA cables, not included, to connect the
auxiliary device to the RCA jacks. Refer to the
manufacturer’s instructions for proper usage.
3-100
ProCarManuals.com