change wheel CHEVROLET UPLANDER 2007 1.G Owners Manual
[x] Cancel search | Manufacturer: CHEVROLET, Model Year: 2007, Model line: UPLANDER, Model: CHEVROLET UPLANDER 2007 1.GPages: 592, PDF Size: 3.04 MB
Page 169 of 592
OnStar®Steering Wheel Controls
$
:Your vehicle may be equipped with a
Talk/Mute button that can be used to interact with
OnStar
®.
SeeAudio Steering Wheel Controls on page 367
for more information.
When calling into voice mail systems or to dial
directory numbers, press this button once, wait for
the response, say the number(s) to be dialed,
wait for the number(s) to be repeated and then say
“dial.” See the OnStar
®Owner’s Guide for more
information.
Universal Home Remote
System
Universal Home Remote System
(With Three Round LED)
The Universal Home Remote System provides a
way to replace up to three hand-held
Radio-Frequency (RF) transmitters used to
activate devices such as garage door openers,
security systems, and home lighting.This device complies with Part 15 of the FCC
Rules. Operation is subject to the following
two conditions:
1. This device may not cause harmful
interference.
2. This device must accept any interference
received, including interference that may
cause undesired operation.
The FCC Grant of Equipment Authorization
Certi�cate number is KOBGTE05A.
This device complies with RSS-210 of Industry
Canada. Operation is subject to the following two
conditions:
1. This device may not cause interference.
2. This device must accept any interference
received, including interference that may
cause undesired operation of the device.
The Canadian Registration ID number is
3521A-GTE05A.
Changes or modi�cations to this system by other
than an authorized service facility could void
authorization to use this equipment.
169
Page 189 of 592
Instrument Panel Overview........................ 192
Hazard Warning Flashers.......................... 194
Other Warning Devices............................. 194
Horn.......................................................... 194
Tilt Wheel.................................................. 195
Turn Signal/Multifunction Lever.................. 195
Turn and Lane-Change Signals................. 196
Headlamp High/Low-Beam Changer.......... 197
Flash-to-Pass............................................ 197
Windshield Wipers..................................... 197
Windshield Washer.................................... 198
Rear Window Wiper/Washer...................... 199
Cruise Control........................................... 200
Exterior Lamps.......................................... 204
Wiper Activated Headlamps....................... 205
Headlamps on Reminder........................... 205
Daytime Running Lamps (DRL)/Automatic
Headlamp System.................................. 205
Instrument Panel Brightness...................... 206
Interior Lamps Control............................... 207
Dome Lamp.............................................. 207
Entry Lighting............................................ 208
Delayed Lighting........................................ 208
Exit Lighting.............................................. 209
Front Reading Lamps................................ 209Rear Reading Lamps................................ 209
Cargo Lamp.............................................. 210
Electric Power Management...................... 210
Battery Run-Down Protection..................... 211
Overhead Console Switchbank.................. 211
Ultrasonic Rear Parking Assist (URPA)...... 212
Accessory Power Outlet(s)........................ 214
Power Outlet 115 Volt Alternating
Current.................................................. 215
Cigarette Lighter........................................ 216
Climate Controls......................................... 217
Climate Control System............................. 217
Dual Climate Control System..................... 220
Outlet Adjustment...................................... 223
Rear Climate Control System
(Option A, Uplevel)................................ 224
Rear Climate Control System
(Option B, Uplevel)................................ 226
Passenger Compartment Air Filter............. 228
Warning Lights, Gages, and Indicators..... 230
Instrument Panel Cluster........................... 231
Speedometer and Odometer...................... 232
Trip Odometer........................................... 232
Tachometer............................................... 232
Section 3 Instrument Panel
189
Page 195 of 592
Tilt Wheel
A tilt wheel allows you to adjust the steering wheel
before you drive. You can raise the steering
wheel to the highest level to give your legs more
room when you enter and exit the vehicle.
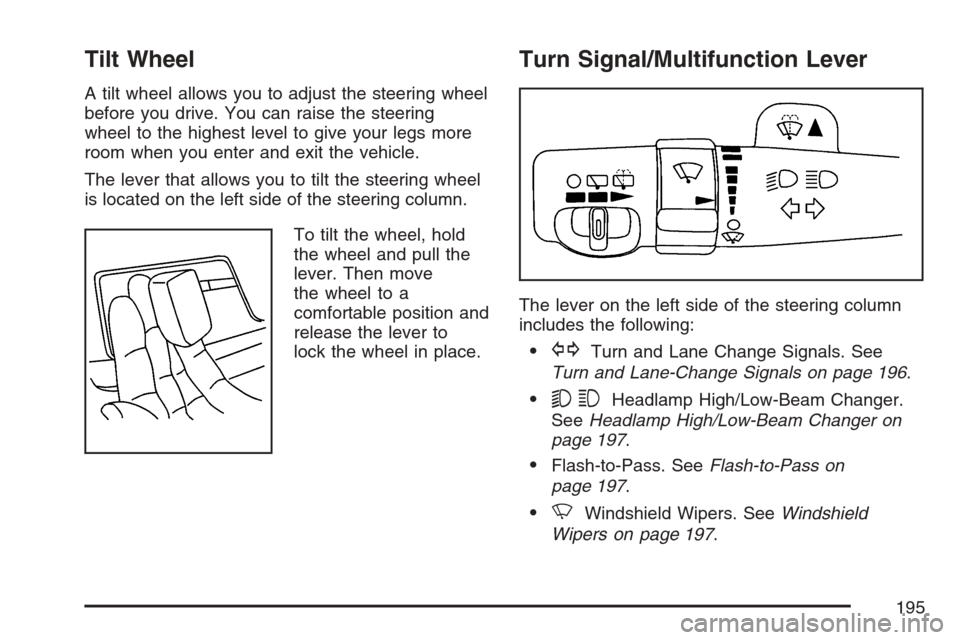
The lever that allows you to tilt the steering wheel
is located on the left side of the steering column.
To tilt the wheel, hold
the wheel and pull the
lever. Then move
the wheel to a
comfortable position and
release the lever to
lock the wheel in place.
Turn Signal/Multifunction Lever
The lever on the left side of the steering column
includes the following:
GTurn and Lane Change Signals. See
Turn and Lane-Change Signals on page 196.
53Headlamp High/Low-Beam Changer.
SeeHeadlamp High/Low-Beam Changer on
page 197.
Flash-to-Pass. SeeFlash-to-Pass on
page 197.
NWindshield Wipers. SeeWindshield
Wipers on page 197.
195
Page 200 of 592
Cruise Control
{CAUTION:
Cruise control can be dangerous where
you cannot drive safely at a steady speed.
So, do not use your cruise control on
winding roads or in heavy traffic.
Cruise control can be dangerous on
slippery roads. On such roads, fast
changes in tire traction can cause
excessive wheel slip, and you could lose
control. Do not use cruise control on
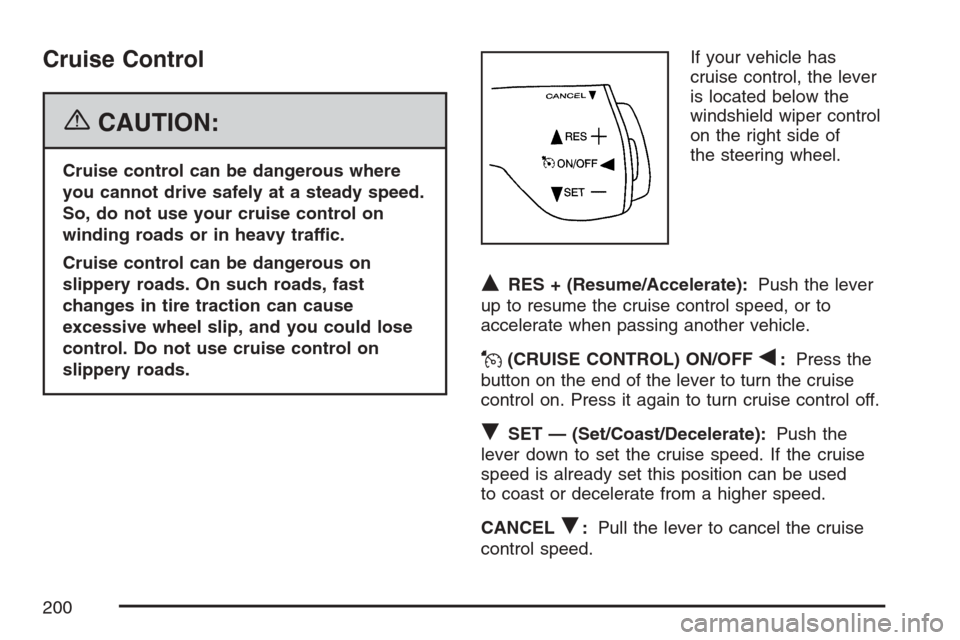
slippery roads.If your vehicle has
cruise control, the lever
is located below the
windshield wiper control
on the right side of
the steering wheel.
QRES + (Resume/Accelerate):Push the lever
up to resume the cruise control speed, or to
accelerate when passing another vehicle.
J(CRUISE CONTROL) ON/OFFq:Press the
button on the end of the lever to turn the cruise
control on. Press it again to turn cruise control off.
RSET — (Set/Coast/Decelerate):Push the
lever down to set the cruise speed. If the cruise
speed is already set this position can be used
to coast or decelerate from a higher speed.
CANCEL
R:Pull the lever to cancel the cruise
control speed.
200
Page 223 of 592
Rear Window Defogger
The rear window defogger uses a warming grid to
remove fog from the rear window.
<(Rear Window Defogger):Press this button
to turn the rear window defogger on or off. An
indicator light in the button will come on to let you
know that the rear window defogger is activated.
The rear window defogger will turn off about
10 minutes after the button is pressed. If turned on
again, the defogger will only run for about
�ve minutes before turning off. The defogger can
also be turned off by pressing the button again
or by turning off the engine.
Notice:Do not use anything sharp on the
inside of the rear window. If you do, you could
cut or damage the warming grid, and the
repairs would not be covered by your warranty.
Do not attach a temporary vehicle license,
tape, a decal or anything similar to the
defogger grid.
Outlet Adjustment
k(Open):Turn the thumbwheel to this position
to open the air outlets.
l(Closed):Turn the thumbwheel to this position
to close the air outlets.
Use the louvers located on the air outlets to
change the direction of the air�ow.
Operation Tips
Clear away any ice, snow, or leaves from the
air inlets at the base of the vehicle that may
block the �ow of air into your vehicle.
Use of non-GM approved hood de�ectors may
adversely affect the performance of the
system.
Keep the path under the front seats clear of
objects to help circulate the air inside of
your vehicle more effectively.
223
Page 350 of 592
The GM Mobile Digital Media is controlled through
the radio and steering wheel controls on your
vehicle’s audio system. This system functions
differently than a typical CD changer. The Digital
Media system allows you to switch between
different playback modes. These modes determine
the next song that will play. Using modes, you
can browse through playlists, artists, albums, and
genres while the system reads Voice Index™
names to you while you drive. By selecting Playlist
Mode, you can access the music collection in
the order placed onto the DMS cartridge, or you
can have the system sort the music by Album,
Artist, or Genre by selecting the corresponding
Modes.
Starting the System for Front Seat
Entertainment
The GM Mobile Digital Media system is available
through the DMS mode of your radio. This
system will power on and off automatically and
resume where the system last stopped.To begin playback, follow the instructions listed
below:
1. Insert the DMS cartridge into the GM Mobile
Digital Media player.
2. Turn on your radio and switch to the DMS
mode by pressing the CD/AUX button on
your radio.
3. Press any of the �rst four pushbuttons (A-D)
to select different browse modes.
4. Press the left or right SEEK/SCAN arrow (E)
to navigate through the mode items.
5. Turn the tune knob (F) to navigate through
songs in a song list.
350
Page 378 of 592
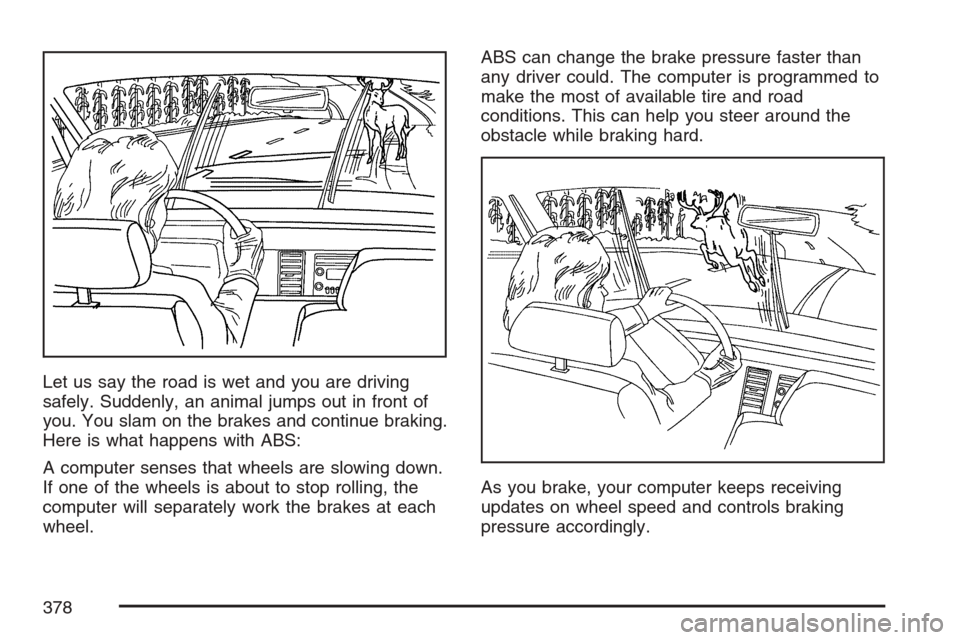
Let us say the road is wet and you are driving
safely. Suddenly, an animal jumps out in front of
you. You slam on the brakes and continue braking.
Here is what happens with ABS:
A computer senses that wheels are slowing down.
If one of the wheels is about to stop rolling, the
computer will separately work the brakes at each
wheel.ABS can change the brake pressure faster than
any driver could. The computer is programmed to
make the most of available tire and road
conditions. This can help you steer around the
obstacle while braking hard.
As you brake, your computer keeps receiving
updates on wheel speed and controls braking
pressure accordingly.
378
Page 379 of 592
Remember: ABS does not change the time you
need to get your foot up to the brake pedal
or always decrease stopping distance. If you get
too close to the vehicle in front of you, you will not
have time to apply your brakes if that vehicle
suddenly slows or stops. Always leave enough
room up ahead to stop, even though you
have ABS.
Using ABS
Do not pump the brakes. Just hold the brake
pedal down �rmly and let anti-lock work for you.
You may feel a slight brake pedal pulsation
or notice some noise, but this is normal.
Braking in Emergencies
With ABS, you can steer and brake at the same
time. In many emergencies, steering can help you
more than even the very best braking.
Traction Control System (TCS)
Your vehicle may have a traction control system
that limits wheel spin. This is especially useful
in slippery road conditions. The system operates if
it senses that one or both of the front wheels
are spinning or beginning to lose traction. When
this happens, the system brakes the spinning
wheel(s) and/or reduces engine power to
limit wheel spin.
The TRACTION CONTROL ACTIVE message will
come on in the Driver Information Center (DIC)
when the traction control system is limiting wheel
spin. You may feel or hear the system working,
but this is normal.
If your vehicle is in cruise control when the
traction control system begins to limit wheel spin,
the cruise control will automatically disengage.
When road conditions allow you to safely
use it again, you may re-engage the cruise control.
379
Page 383 of 592
Steering
Power Steering
If you lose power steering assist because the
engine stops or the system is not functioning, you
can steer but it will take much more effort.
Steering Tips
It is important to take curves at a reasonable speed.
A lot of the “driver lost control” accidents
mentioned on the news happen on curves.
Here is why:
Experienced driver or beginner, each of us is
subject to the same laws of physics when driving on
curves. The traction of the tires against the road
surface makes it possible for the vehicle to change
its path when you turn the front wheels. If there is
no traction, inertia will keep the vehicle going in the
same direction. If you have ever tried to steer a
vehicle on wet ice, you will understand this.
The traction you can get in a curve depends on
the condition of your tires and the road surface, the
angle at which the curve is banked, and your
speed. While you are in a curve, speed is the one
factor you can control.Suppose you are steering through a sharp curve.
Then you suddenly apply the brakes. Both
control systems — steering and braking — have
to do their work where the tires meet the road.
Unless you have four-wheel anti-lock brakes,
adding the hard braking can demand too much of
those places. You can lose control.
The same thing can happen if you are steering
through a sharp curve and you suddenly
accelerate. Those two control systems — steering
and acceleration — can overwhelm those places
where the tires meet the road and make you lose
control. SeeTraction Control System (TCS) on
page 379andStabiliTrak
®System on page 381.
What should you do if this ever happens? Ease up
on the brake or accelerator pedal, steer the
vehicle the way you want it to go, and slow down.
Speed limit signs near curves warn that you
should adjust your speed. Of course, the posted
speeds are based on good weather and road
conditions. Under less favorable conditions you will
want to go slower.
If you need to reduce your speed as you approach
a curve, do it before you enter the curve, while
your front wheels are straight ahead.
383
Page 404 of 592
Rocking Your Vehicle to Get It Out
First, turn the steering wheel left and right.
That will clear the area around the front wheels. If
your vehicle has traction control, you should
turn the traction control system off. SeeTraction
Control System (TCS) on page 379and
StabiliTrak
®System on page 381. Then shift back
and forth between REVERSE (R) and a forward
gear, spinning the wheels as little as possible.
Release the accelerator pedal while you shift, and
press lightly on the accelerator pedal when the
transaxle is in gear. By slowly spinning the wheels
in the forward and reverse directions, you will
cause a rocking motion that may free your vehicle.
If that does not get your vehicle out after a few
tries, it may need to be towed out. If your vehicle
does need to be towed out, seeTowing Your
Vehicle on page 410.
Loading Your Vehicle
It is very important to know how much weight your
vehicle can carry. This weight is called the vehicle
capacity weight and includes the weight of all
occupants, cargo, and all nonfactory-installed
options. Two labels on your vehicle show how much
weight it may properly carry, the Tire and Loading
Information label and the Certi�cation/Tire label.
{CAUTION:
Do not load your vehicle any heavier than
the Gross Vehicle Weight Rating (GVWR),
or either the maximum front or rear Gross
Axle Weight Rating (GAWR). If you do,
parts on your vehicle can break, and it
can change the way your vehicle handles.
These could cause you to lose control
and crash. Also, overloading can shorten
the life of your vehicle.
404