CHEVROLET VENTURE 2003 1.G Owners Manual
VENTURE 2003 1.G
CHEVROLET
CHEVROLET
https://www.carmanualsonline.info/img/24/8380/w960_8380-0.png
CHEVROLET VENTURE 2003 1.G Owners Manual
Trending: window, flat tire, four wheel drive, roof, spare wheel, radio controls, open gas tank
Page 381 of 486
Carrier Assembly-Differential
(Rear Drive Module)
When to Check and Change Lubricant
Refer to the Maintenance Schedule to determine how
often to check the lubricant and when to change it. See
Part A: Scheduled Maintenance Services on page 6-4.
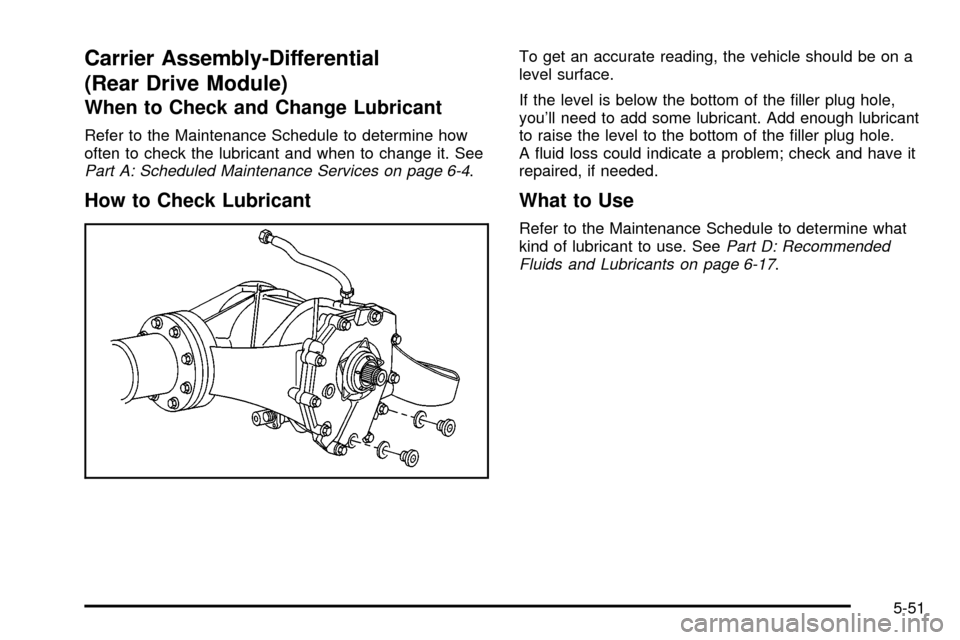
How to Check Lubricant
To get an accurate reading, the vehicle should be on a
level surface.
If the level is below the bottom of the ®ller plug hole,
you'll need to add some lubricant. Add enough lubricant
to raise the level to the bottom of the ®ller plug hole.
A ¯uid loss could indicate a problem; check and have it
repaired, if needed.
What to Use
Refer to the Maintenance Schedule to determine what
kind of lubricant to use. SeePart D: Recommended
Fluids and Lubricants on page 6-17.
5-51
Page 382 of 486
Bulb Replacement
For the type of bulbs, seeReplacement Bulbs on
page 5-57.
For any bulb changing procedure not listed in this
section, contact your dealer.
Halogen Bulbs
{CAUTION:
Halogen bulbs have pressurized gas inside
and can burst if you drop or scratch the bulb.
You or others could be injured. Be sure to read
and follow the instructions on the bulb
package.
Headlamps
1. Open the hood.
2. Remove the front turn signal/parking lamp
assembly. See
Front Turn Signal, Sidemarker and
Parking Lamps on page 5-54.
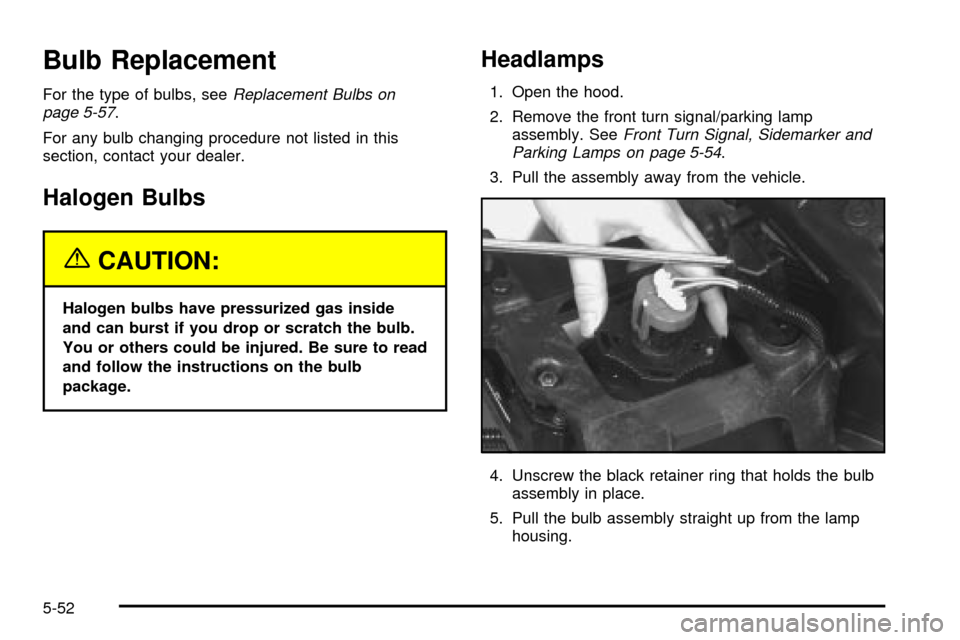
3. Pull the assembly away from the vehicle.
4. Unscrew the black retainer ring that holds the bulb
assembly in place.
5. Pull the bulb assembly straight up from the lamp
housing.
5-52
Page 383 of 486
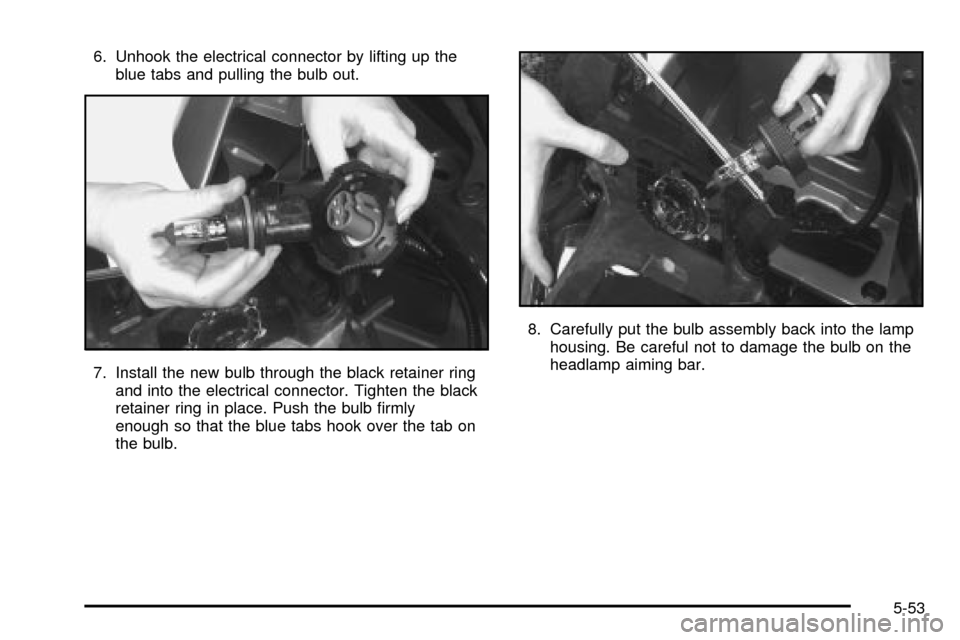
6. Unhook the electrical connector by lifting up the
blue tabs and pulling the bulb out.
7. Install the new bulb through the black retainer ring
and into the electrical connector. Tighten the black
retainer ring in place. Push the bulb ®rmly
enough so that the blue tabs hook over the tab on
the bulb.8. Carefully put the bulb assembly back into the lamp
housing. Be careful not to damage the bulb on the
headlamp aiming bar.
5-53
Page 384 of 486
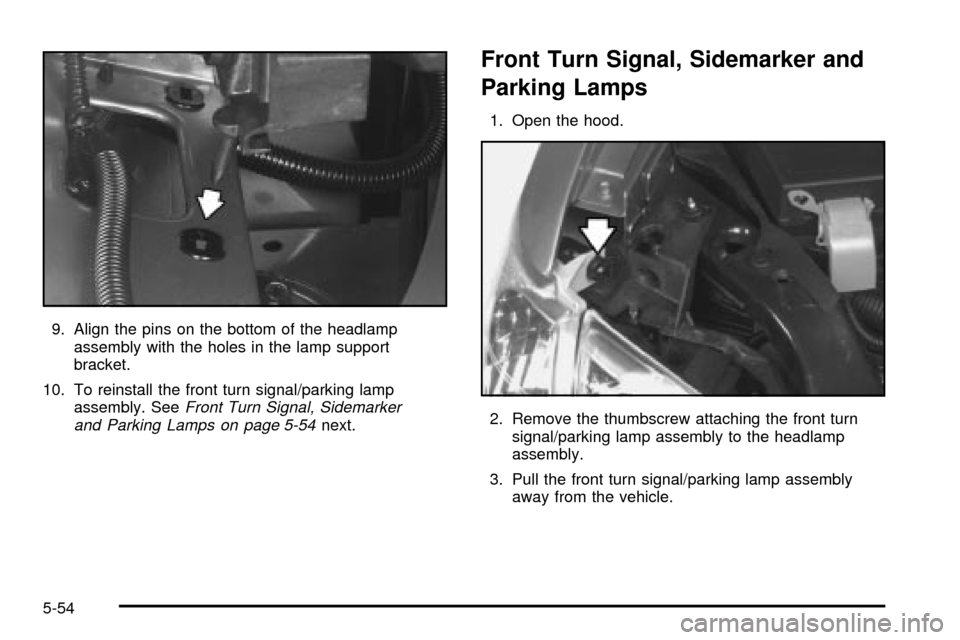
9. Align the pins on the bottom of the headlamp
assembly with the holes in the lamp support
bracket.
10. To reinstall the front turn signal/parking lamp
assembly. See
Front Turn Signal, Sidemarker
and Parking Lamps on page 5-54next.
Front Turn Signal, Sidemarker and
Parking Lamps
1. Open the hood.
2. Remove the thumbscrew attaching the front turn
signal/parking lamp assembly to the headlamp
assembly.
3. Pull the front turn signal/parking lamp assembly
away from the vehicle.
5-54
Page 385 of 486
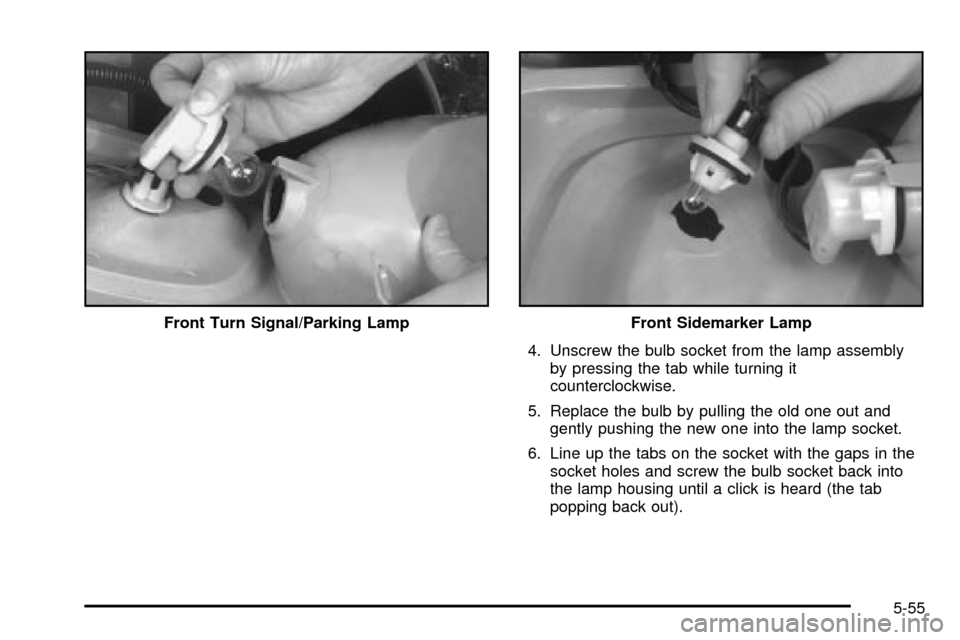
4. Unscrew the bulb socket from the lamp assembly
by pressing the tab while turning it
counterclockwise.
5. Replace the bulb by pulling the old one out and
gently pushing the new one into the lamp socket.
6. Line up the tabs on the socket with the gaps in the
socket holes and screw the bulb socket back into
the lamp housing until a click is heard (the tab
popping back out). Front Turn Signal/Parking Lamp
Front Sidemarker Lamp
5-55
Page 386 of 486
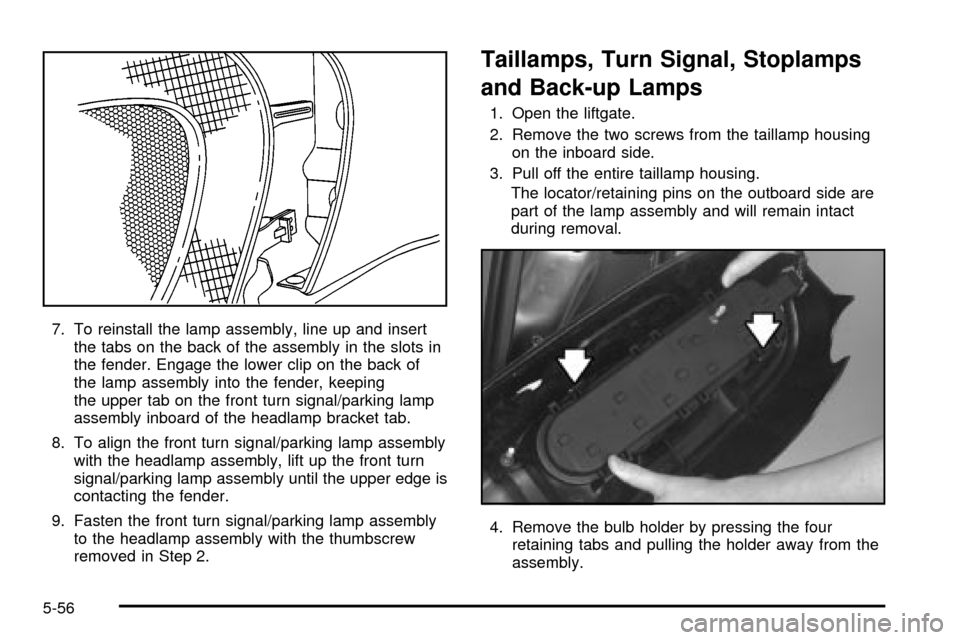
7. To reinstall the lamp assembly, line up and insert
the tabs on the back of the assembly in the slots in
the fender. Engage the lower clip on the back of
the lamp assembly into the fender, keeping
the upper tab on the front turn signal/parking lamp
assembly inboard of the headlamp bracket tab.
8. To align the front turn signal/parking lamp assembly
with the headlamp assembly, lift up the front turn
signal/parking lamp assembly until the upper edge is
contacting the fender.
9. Fasten the front turn signal/parking lamp assembly
to the headlamp assembly with the thumbscrew
removed in Step 2.
Taillamps, Turn Signal, Stoplamps
and Back-up Lamps
1. Open the liftgate.
2. Remove the two screws from the taillamp housing
on the inboard side.
3. Pull off the entire taillamp housing.
The locator/retaining pins on the outboard side are
part of the lamp assembly and will remain intact
during removal.
4. Remove the bulb holder by pressing the four
retaining tabs and pulling the holder away from the
assembly.
5-56
Page 387 of 486
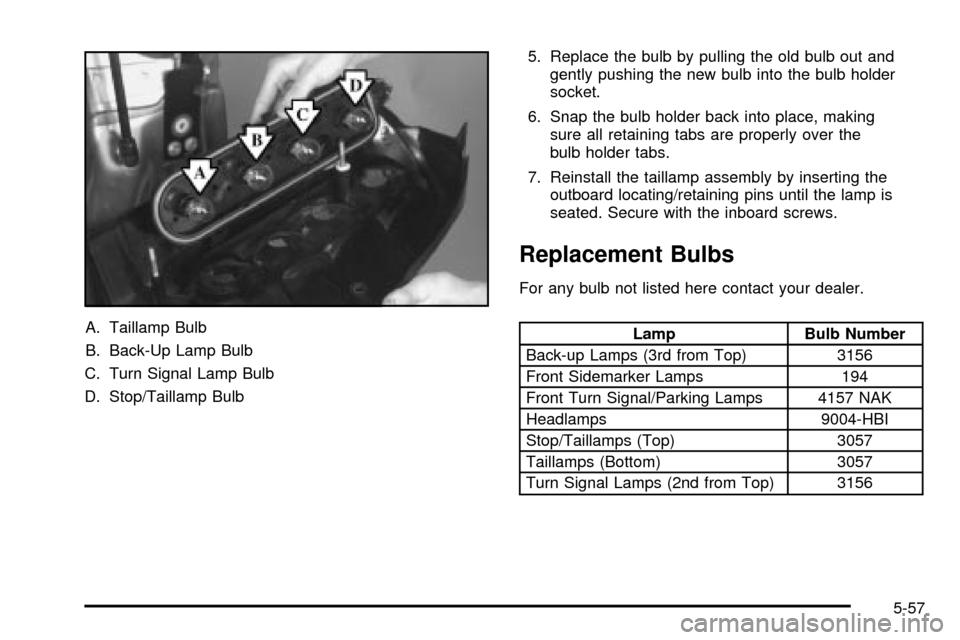
A. Taillamp Bulb
B. Back-Up Lamp Bulb
C. Turn Signal Lamp Bulb
D. Stop/Taillamp Bulb5. Replace the bulb by pulling the old bulb out and
gently pushing the new bulb into the bulb holder
socket.
6. Snap the bulb holder back into place, making
sure all retaining tabs are properly over the
bulb holder tabs.
7. Reinstall the taillamp assembly by inserting the
outboard locating/retaining pins until the lamp is
seated. Secure with the inboard screws.
Replacement Bulbs
For any bulb not listed here contact your dealer.
Lamp Bulb Number
Back-up Lamps (3rd from Top) 3156
Front Sidemarker Lamps 194
Front Turn Signal/Parking Lamps 4157 NAK
Headlamps 9004-HBI
Stop/Taillamps (Top) 3057
Taillamps (Bottom) 3057
Turn Signal Lamps (2nd from Top) 3156
5-57
Page 388 of 486
Windshield Wiper Blade
Replacement
Windshield wiper blades should be inspected at least
twice a year for wear or cracking. See ªWiper Blade
Checkº in
At Least Twice a Year on page 6-11for more
information.
Replacement blades come in different types and are
removed in different ways. For proper type and length,
see
Normal Maintenance Replacement Parts on
page 5-104.To remove the windshield wiper blade(s):
1. Turn the wipers on to the lowest intermittent setting.
2. Turn the ignition to OFF while the wipers are at
the outer position of the wipe pattern.
3. Pull the windshield wiper arm away from the
windshield or backglass.
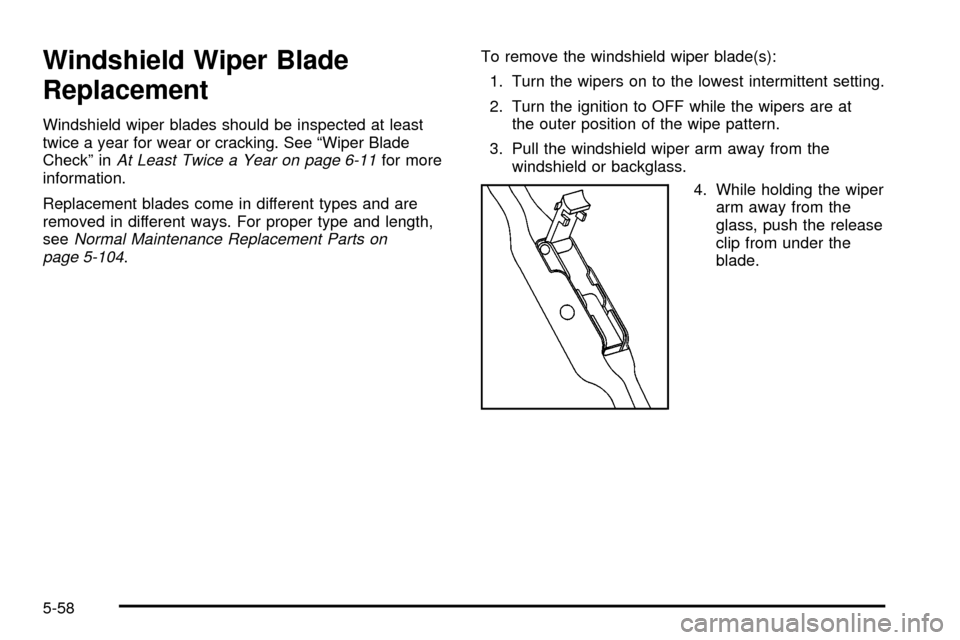
4. While holding the wiper
arm away from the
glass, push the release
clip from under the
blade.
5-58
Page 389 of 486
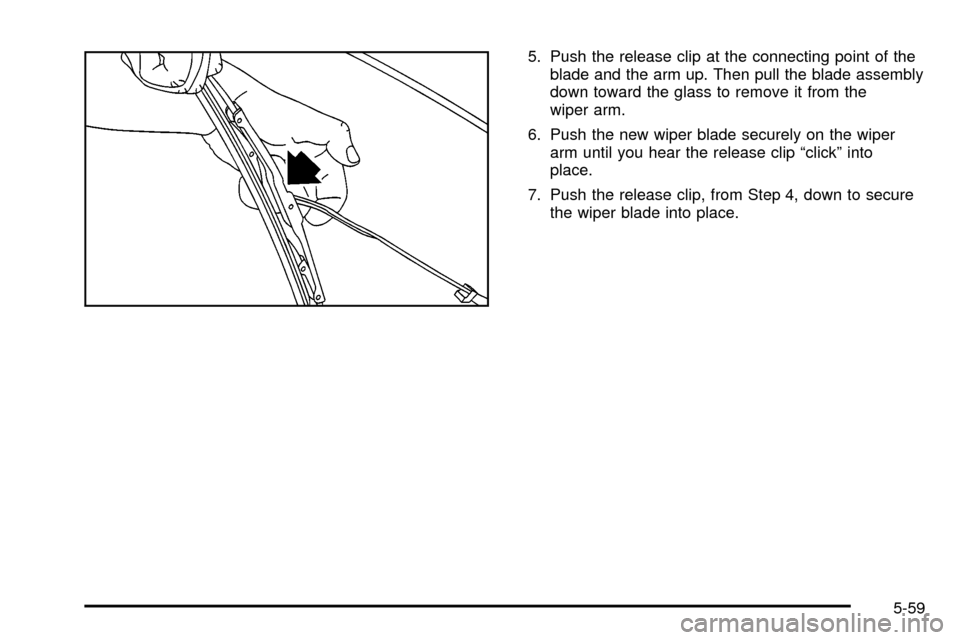
5. Push the release clip at the connecting point of the
blade and the arm up. Then pull the blade assembly
down toward the glass to remove it from the
wiper arm.
6. Push the new wiper blade securely on the wiper
arm until you hear the release clip ªclickº into
place.
7. Push the release clip, from Step 4, down to secure
the wiper blade into place.
5-59
Page 390 of 486
Tires
Your new vehicle comes with high-quality tires made by
a leading tire manufacturer. If you ever have questions
about your tire warranty and where to obtain service,
see your Chevrolet Warranty booklet for details.
{CAUTION:
Poorly maintained and improperly used tires
are dangerous.
·Overloading your tires can cause
overheating as a result of too much
friction. You could have an air-out and a
serious accident. See ªLoading Your
Vehicleº in the Index.
CAUTION: (Continued)
CAUTION: (Continued)
·
Underin¯ated tires pose the same danger
as overloaded tires. The resulting accident
could cause serious injury. Check all tires
frequently to maintain the recommended
pressure. Tire pressure should be checked
when your tires are cold.
·Overin¯ated tires are more likely to be
cut, punctured or broken by a sudden
impact Ð such as when you hit a pothole.
Keep tires at the recommended pressure.
·Worn, old tires can cause accidents. If
your tread is badly worn, or if your tires
have been damaged, replace them.
5-60
Trending: check engine light, dead battery, warning, check transmission fluid, emergency towing, auxiliary battery, height
