seat adjustment CHEVROLET VENTURE 2003 1.G Owners Manual
[x] Cancel search | Manufacturer: CHEVROLET, Model Year: 2003, Model line: VENTURE, Model: CHEVROLET VENTURE 2003 1.GPages: 486, PDF Size: 3.3 MB
Page 15 of 486

Adjusting the Split Bench Seats
(Second Row)
The second row bench seats are adjustable. There are
two adjustment levers on each section of the split
bench seats to adjust the seat forward or rearward.
One is located below the center, in the front of each
section of the split bench.The other lever is located
on the rear of the seat.
Lift up either lever and slide the seat forward or
rearward. Release the lever. Push and pull on the seat
to make sure it is locked into place.
1-9
Page 17 of 486
To return the seatback to an upright position, pull on the
nylon strap or lift the recliner lever without putting any
pressure on the seatback. Push and pull on the
seatback to be sure it is locked into place.
Removing the Split Bench Seat
Make sure the seatback is in the upright position.
1. For the second row split bench, with the seatback
in the upright position, unhook the side attachment
for the safety belt. This mini-buckle is located
on the right side of the seat.
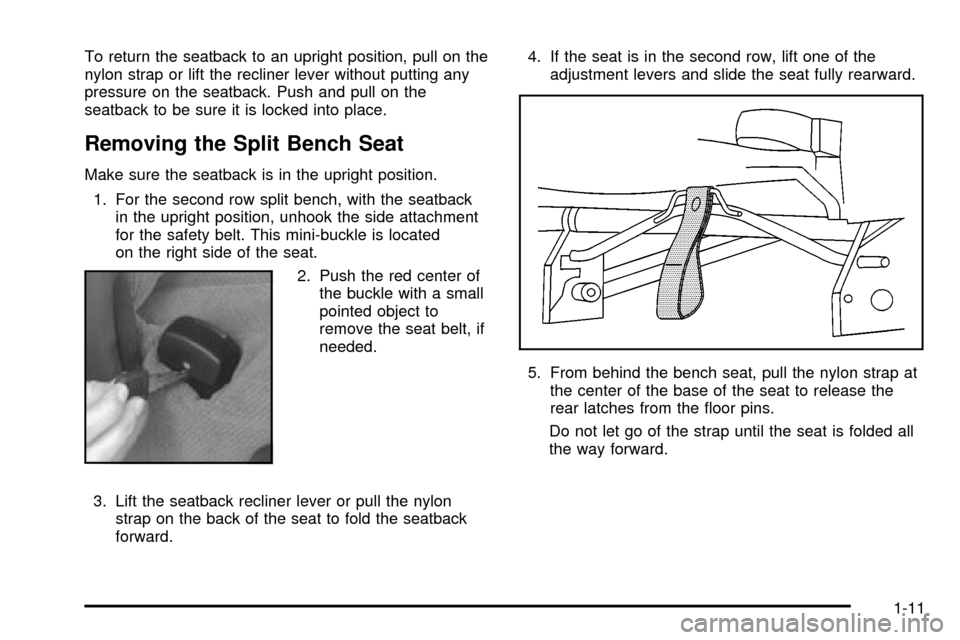
2. Push the red center of
the buckle with a small
pointed object to
remove the seat belt, if
needed.
3. Lift the seatback recliner lever or pull the nylon
strap on the back of the seat to fold the seatback
forward.4. If the seat is in the second row, lift one of the
adjustment levers and slide the seat fully rearward.
5. From behind the bench seat, pull the nylon strap at
the center of the base of the seat to release the
rear latches from the ¯oor pins.
Do not let go of the strap until the seat is folded all
the way forward.
1-11
Page 22 of 486
Adjusting the Bucket Seats
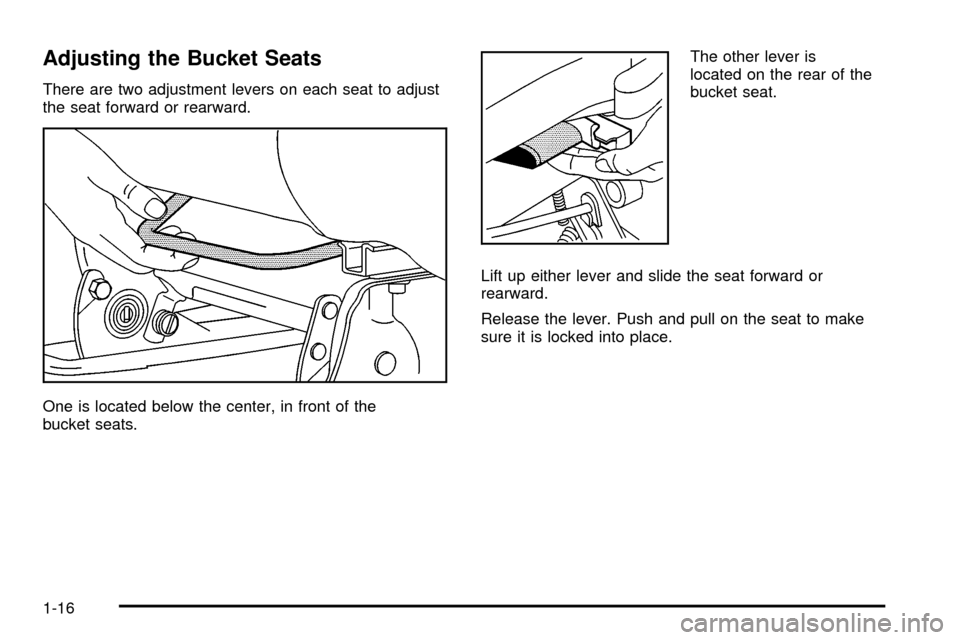
There are two adjustment levers on each seat to adjust
the seat forward or rearward.
One is located below the center, in front of the
bucket seats.The other lever is
located on the rear of the
bucket seat.
Lift up either lever and slide the seat forward or
rearward.
Release the lever. Push and pull on the seat to make
sure it is locked into place.
1-16
Page 28 of 486
Captain Chairs
If your vehicle has captain's chairs, the chairs and
seatbacks can be adjusted forward or rearward.
Adjusting the Captain's Chairs
(Second Row)
The second row captain's chairs can be adjusted
forward or rearward.
There are two adjustment levers on each seat. One is
located below the center, in front of the seat. The
other is located across the rear of the seat.
Lift up either lever to slide the seat forward or rearward.
Release the lever. Push and pull on the seat to make
sure it is locked into place.
Folding or Reclining the Seatbacks
{CAUTION:
If the seatback isn't locked, it could move
forward in a sudden stop or crash. That could
cause injury to the person sitting there. Always
press rearward on the seatback to be sure it is
locked.
1-22
Page 95 of 486
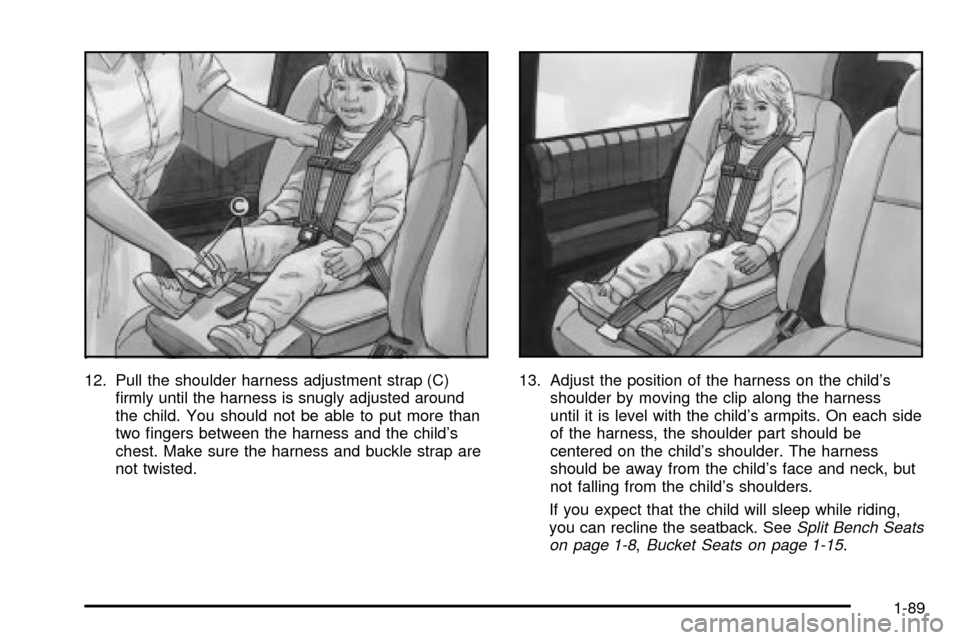
12. Pull the shoulder harness adjustment strap (C)
®rmly until the harness is snugly adjusted around
the child. You should not be able to put more than
two ®ngers between the harness and the child's
chest. Make sure the harness and buckle strap are
not twisted.13. Adjust the position of the harness on the child's
shoulder by moving the clip along the harness
until it is level with the child's armpits. On each side
of the harness, the shoulder part should be
centered on the child's shoulder. The harness
should be away from the child's face and neck, but
not falling from the child's shoulders.
If you expect that the child will sleep while riding,
you can recline the seatback. See
Split Bench Seats
on page 1-8,Bucket Seats on page 1-15.
1-89
Page 206 of 486

)(Bi-Level):This mode directs half of the air to the
instrument panel outlets, then directs the remaining
air to the ¯oor outlets. Cooler air is directed to the upper
outlets and warmer air to the ¯oor outlets.
6(Floor):This mode directs most of the air to the
¯oor outlets. Use this mode to send air to the rear of the
vehicle. Keep the area under the front seats free of
objects that could obstruct air¯ow to the rear of
the vehicle.
The right knob can also be used to select defog or
defrost mode. For more information, see ªDefogging and
Defrostingº later in this section.
9(Fan):Turn the left knob clockwise or
counterclockwise to increase or decrease the fan speed.
Turn the knob to OFF to turn off the fan. The fan
must be turned on for the air conditioning compressor to
operate.
:(Outside Air):Press this button to turn the
outside air mode on or off. When this mode is on,
outside air will circulate throughout your vehicle. When
this mode is on, an indicator light in the button will
come on to let you know that it is activated. The outside
air mode can be used with all modes, but it cannot
be used with the recirculation mode.
?(Recirculation):This mode keeps outside air
from coming in the vehicle. It can be used to prevent
outside air and odors from entering your vehicle or help
heat or cool the air inside your vehicle more quickly.
Press this button to turn the recirculation mode on or off.
When the button is pressed, an indicator light will
come on. The air-conditioning compressor also comes
on. The recirculation mode can be used with vent
and bi-level modes, but it cannot be used with ¯oor,
defog, defrost or outside air modes.
Temperature Control:Turn the center knob clockwise
or counterclockwise to increase or decrease the air
temperature inside your vehicle.
#A/C (Air Conditioning):Press this button to turn
the air-conditioning system on or off. When A/C is
pressed, an indicator light in the button will come on to
let you know that air conditioning is activated.
You may notice a slight change in engine performance
when the air-conditioning compressor shuts off and
turns on again. This is normal. The system is designed
to make adjustments to help with fuel economy while
still maintaining the selected temperature.
On hot days, open the windows to let hot inside air
escape; then close them. This helps to reduce the time
it takes for your vehicle to cool down. It also helps
the system to operate more efficiently.
3-26
Page 208 of 486
Rear Window Defogger
The rear window defogger uses a warming grid to
remove fog from the rear window.
will come on to let you know that the rear window
defogger is activated.
The rear window defogger will turn off about 10 minutes
after the button is pressed. If turned on again, the
defogger will only run for about ®ve minutes before
turning off. The defogger can also be turned off
by pressing the button again or by turning off the engine.
Notice:Don't use anything sharp on the inside of
the rear window. If you do, you could cut or damage
the warming grid, and the repairs wouldn't be
covered by your warranty. Do not attach a temporary
vehicle license, tape, a decal or anything similar
to the defogger grid.
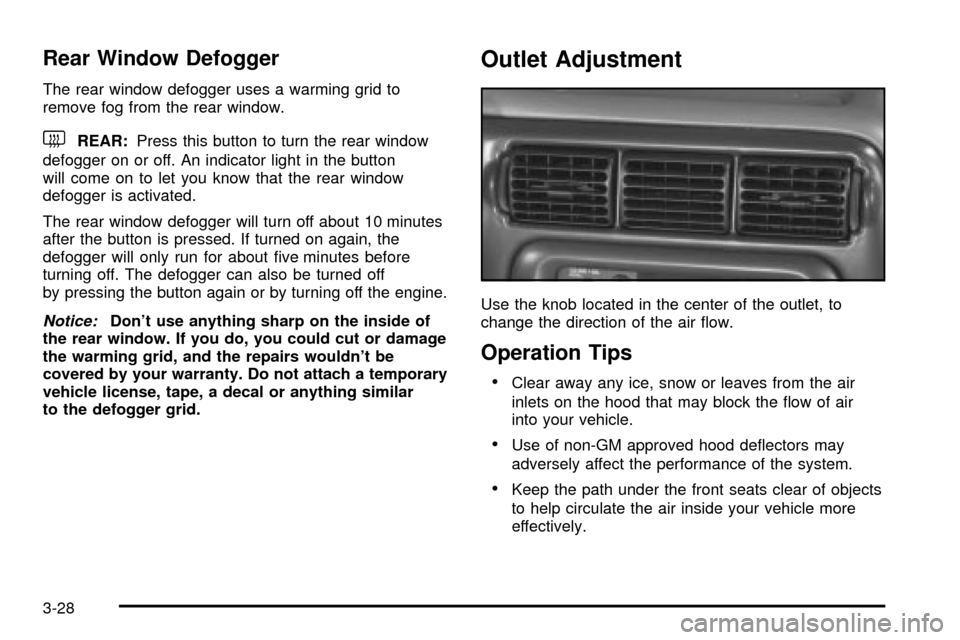
Outlet Adjustment
Use the knob located in the center of the outlet, to
change the direction of the air ¯ow.
Operation Tips
·Clear away any ice, snow or leaves from the air
inlets on the hood that may block the ¯ow of air
into your vehicle.
·Use of non-GM approved hood de¯ectors may
adversely affect the performance of the system.
·Keep the path under the front seats clear of objects
to help circulate the air inside your vehicle more
effectively.
3-28
Page 210 of 486

Directing the Air¯ow
To direct the air¯ow to the rear-seating area, use the
right knob located on the main climate-control panel.
·Select vent or bi-level mode to direct air to the
rear of the vehicle through the overhead outlets.
·Select ¯oor, defog or defrost mode to direct air to
the rear of the vehicle through the ¯oor outlets.
Generally the upper outlets are used for air conditioning
and the ¯oor outlets are used for heating.
Selecting the Fan Speed
9
(Fan):Turn the fan knob on either rear fan control
to numeral 1, 2, or 3 to increase or decrease air¯ow
to the rear-seating area. Turn the fan knob on either rear
fan control to 0 or OFF to turn off the fan.
Setting the Temperature
If the driver is adjusting the temperature, do the
following:
To increase or decrease the temperature for the entire
vehicle, use the temperature controls located on the
main climate-control panel.If using the main climate-control panel, then the
air-conditioning system must be on to direct cooled air
to the rear of the vehicle. If it is not on, then the
temperature in the rear of the vehicle will remain at
cabin temperature.
If a rear-seat passenger is adjusting the temperature, do
the following:
Turn the right knob, located on the overhead rear-control
panel, behind the driver's seat, clockwise or
counterclockwise to raise or lower the temperature in
the rear-seating area only.
Rear Air Outlets
To increase air¯ow through the rear ¯oor outlets, place
the left bucket seat in the second row in the forward
position. For more information, see
Rear Seat Operation
on page 1-7.
The outlet behind the left rear seat is the cold air return
outlet. Be sure to keep it free from obstructions.
Also, keep the area around the base of the center
instrument panel console, between and under the front
seats, free of objects that could also obstruct air¯ow
to the rear-seating area.
For more information on how to use the main climate
control system, see ªClimate Control Systemº listed
previously in this section. For information on ventilation,
see ªOutlet Adjustmentº under ªClimate Control
Systemº listed previously in this section.
3-30
Page 213 of 486
Rear Air Outlets
To increase air¯ow through the rear ¯oor outlets, place
the left bucket seat in the second row in the forward
position. For more information, see
Rear Seat Operation
on page 1-7.
The outlet behind the left rear seat is the cold air return
outlet. Be sure to keep it free from obstructions.
Also, keep the area around the base of the center
instrument panel console, between and under the front
seats, free of objects that could also obstruct air¯ow
to the rear-seating area.
For more information on how to use the main climate
control system, see ªClimate Control Systemº listed
previously in this section. For information on ventilation,
see ªOutlet Adjustmentº under ªClimate Control
Systemº listed previously in this section.
Passenger Compartment Air Filter
Passenger compartment air, both outside and
recirculated air, is routed through a passenger
compartment ®lter. The ®lter removes certain
contaminants from the air, including pollen and dust
particles. Reductions in air¯ow, which may occur more
quickly in dusty areas, indicate that the ®lter needs
to be replaced early. For how often to change the air
®lter, see
Part A: Scheduled Maintenance Services
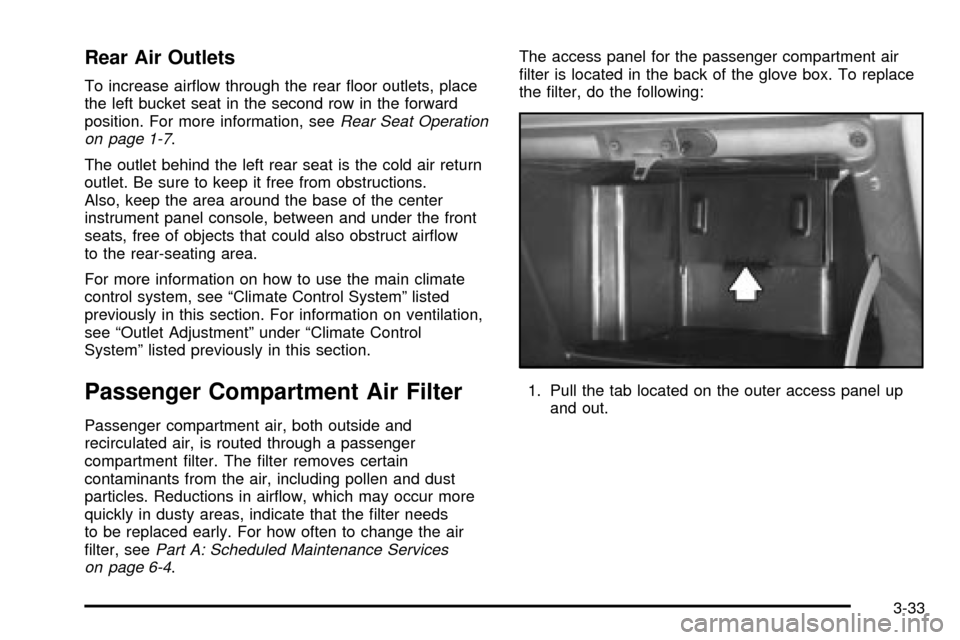
on page 6-4.The access panel for the passenger compartment air
®lter is located in the back of the glove box. To replace
the ®lter, do the following:
1. Pull the tab located on the outer access panel up
and out.
3-33