towing CHEVROLET VENTURE 2003 1.G Owners Manual
[x] Cancel search | Manufacturer: CHEVROLET, Model Year: 2003, Model line: VENTURE, Model: CHEVROLET VENTURE 2003 1.GPages: 486, PDF Size: 3.3 MB
Page 1 of 486

Seats and Restraint Systems........................... 1-1
Front Seats
............................................... 1-3
Rear Seats
............................................... 1-7
Safety Belts
.............................................1-30
Child Restraints
.......................................1-55
Air Bag Systems
......................................1-93
Restraint System Check
..........................1-103
Features and Controls..................................... 2-1
Keys
........................................................ 2-3
Doors and Locks
....................................... 2-9
Windows
.................................................2-24
Theft-Deterrent Systems
............................2-27
Starting and Operating Your Vehicle
...........2-31
Mirrors
....................................................2-44
OnStar
žSystem
......................................2-45
HomeLinkžTransmitter
.............................2-47
Storage Areas
.........................................2-51
Vehicle Personalization
.............................2-61
Instrument Panel............................................. 3-1
Instrument Panel Overview
.......................... 3-4
Climate Controls
......................................3-25
Warning Lights, Gages and Indicators
.........3-35
Message Center
.......................................3-50
Driver Information Center (DIC)
..................3-58
Audio System(s)
.......................................3-61Driving Your Vehicle....................................... 4-1
Your Driving, the Road, and Your Vehicle
..... 4-2
Towing
...................................................4-32
Service and Appearance Care.......................... 5-1
Service
..................................................... 5-3
Fuel
......................................................... 5-4
Checking Things Under the Hood
...............5-10
All-Wheel Drive
........................................5-50
Bulb Replacement
....................................5-52
Windshield Wiper Blade Replacement
.........5-58
Tires
......................................................5-60
Appearance Care
.....................................5-87
Vehicle Identi®cation
.................................5-95
Electrical System
......................................5-96
Capacities and Speci®cations
...................5-103
Normal Maintenance Replacement Parts
....5-104
Maintenance Schedule..................................... 6-1
Maintenance Schedule
................................ 6-2
Customer Assistance Information.................... 7-1
Customer Assistance Information
.................. 7-2
Reporting Safety Defects
............................ 7-9
Index.................................................................1
2003 Chevrolet Venture Owner ManualM
Page 141 of 486

Starting and Operating Your
Vehicle
New Vehicle Break-In
Notice:Your vehicle does not need an elaborate
ªbreak-in.º But it will perform better in the long run
if you follow these guidelines:
·Do not drive at any one speed Ð fast or
slow Ð for the ®rst 500 miles (805 km). Do not
make full-throttle starts.
·Avoid making hard stops for the ®rst 200 miles
(322 km) or so. During this time your new
brake linings are not yet broken in. Hard stops
with new linings can mean premature wear
and earlier replacement. Follow this breaking-in
guideline every time you get new brake
linings.
·Do not tow a trailer during break-in. SeeTowing
a Trailer on page 4-36
for more information.
Ignition Positions
With the key in the ignition, you can turn it to ®ve
different positions.
A (ACCESSORY):This is the position in which you can
operate your electrical accessories. Press in the
ignition switch as you turn the top of the key
toward you.
2-31
Page 145 of 486
PARK (P):This gear position locks your front wheels.
It's the best position to use when you start your
engine because your vehicle can't move easily.
Ensure the shift lever is fully in PARK (P) before starting
the engine. Your vehicle has an automatic transaxle
shift lock control system. You have to fully
applyyour regular brakesbeforeyou can shift from PARK (P)
when the ignition key is in RUN. As you step on the
brake pedal, while in PARK (P), you may hear a
click from the solenoid of the system. This ensures that
the system is operating properly.
If you cannot shift out of PARK (P), ease pressure on
the shift lever ± push the shift lever all the way into
PARK (P) as you maintain brake application. Then move
the shift lever into the gear you wish. See
Shifting Out
of Park (P) on page 2-41.
{CAUTION:
It is dangerous to get out of your vehicle if the
shift lever is not fully in PARK (P) with the
parking brake ®rmly set. Your vehicle can roll.
Do not leave your vehicle when the engine is
running unless you have to. If you have left the
engine running, the vehicle can move
suddenly. You or others could be injured. To
be sure your vehicle will not move, even when
you are on fairly level ground, always set your
parking brake and move the shift lever to
PARK (P). See ªShifting Into Park (P)º in the
Index. If you are pulling a trailer, see ªTowing
a Trailerº in the Index.
2-35
Page 147 of 486

Warm-Up Shift
Your vehicle has a computer controlled transaxle
designed to warm up the engine faster when the outside
temperature is 35ÉF (2ÉC) or colder. You may notice
that the transaxle will shift at a higher vehicle speed until
the engine is warmed up. This is a normal condition
designed to provide heat to the passenger compartment
and defrost the windows more quickly. See
Climate
Control System on page 3-25for more information.
THIRD (3):This position is also used for normal driving,
but it offers more power and lower fuel economy than
AUTOMATIC OVERDRIVE (D).
Here are some times you might choose THIRD (3)
instead of AUTOMATIC OVERDRIVE (D):
·When driving on hilly, winding roads.
·When towing a trailer (so there is less shifting
between gears).
·When going down a steep hill.
SECOND (2):This position gives you more power but
lower fuel economy than THIRD (3). You can use
SECOND (2) on hills. It can help control your speed as
you go down steep mountain roads, but then you
would also want to use your brakes off and on.
Notice:Driving in SECOND (2) for more than
25 miles (40 km) or at speeds over 55 mph (90 km/h)
may damage the transaxle. Also, shifting into
SECOND (2) at speeds above 65 mph (105 km/h) can
cause damage. Drive in THIRD (3) or AUTOMATIC
OVERDRIVE (D) instead of SECOND (2).
Notice:If your vehicle seems to start up rather
slowly, or if it seems not to shift gears as you go
faster, something may be wrong with a transaxle
system sensor. If you drive very far that way, your
vehicle can be damaged. So, if this happens,
have your vehicle serviced right away. Until then,
you can use SECOND (2) when you are driving less
than 35 mph (55 km/h) and THIRD (3) for higher
speeds.
FIRST (1):This position gives you even more power
but lower fuel economy than SECOND (2). You can use
it on very steep hills, or in deep snow or mud. If the
shift lever is put in FIRST (1), the transaxle won't
downshift into ®rst gear until the vehicle is going slow
enough.
Notice:Spinning the tires or holding the vehicle in
one place on a hill using only the accelerator
pedal may damage the transaxle. If you are stuck,
do not spin the tires. When stopping on a hill,
use the brakes to hold the vehicle in place.
2-37
Page 148 of 486
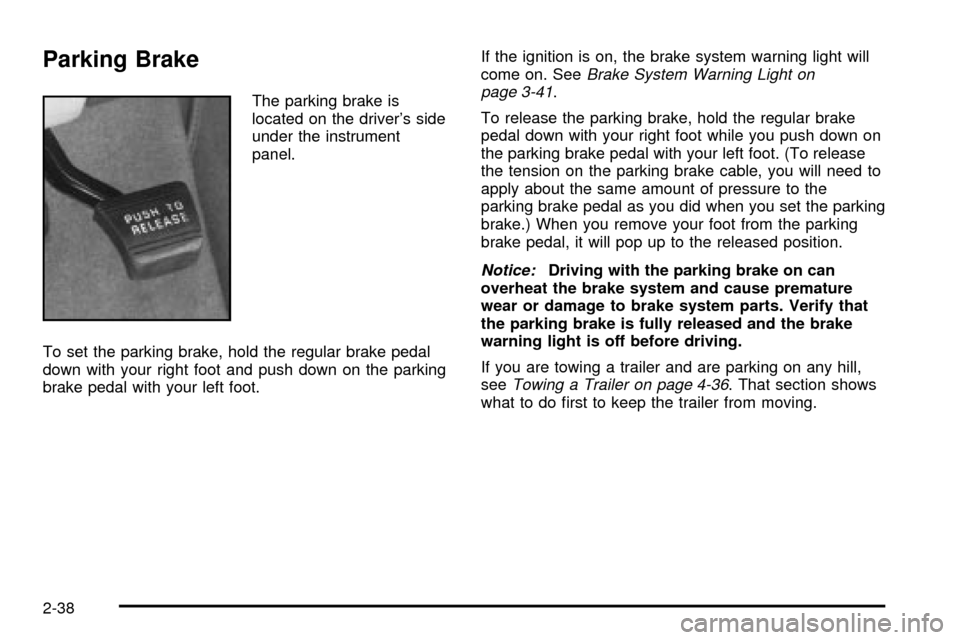
Parking Brake
The parking brake is
located on the driver's side
under the instrument
panel.
To set the parking brake, hold the regular brake pedal
down with your right foot and push down on the parking
brake pedal with your left foot.If the ignition is on, the brake system warning light will
come on. See
Brake System Warning Light on
page 3-41.
To release the parking brake, hold the regular brake
pedal down with your right foot while you push down on
the parking brake pedal with your left foot. (To release
the tension on the parking brake cable, you will need to
apply about the same amount of pressure to the
parking brake pedal as you did when you set the parking
brake.) When you remove your foot from the parking
brake pedal, it will pop up to the released position.
Notice:Driving with the parking brake on can
overheat the brake system and cause premature
wear or damage to brake system parts. Verify that
the parking brake is fully released and the brake
warning light is off before driving.
If you are towing a trailer and are parking on any hill,
see
Towing a Trailer on page 4-36. That section shows
what to do ®rst to keep the trailer from moving.
2-38
Page 149 of 486
Shifting Into Park (P)
{CAUTION:
It can be dangerous to get out of your vehicle
if the shift lever is not fully in PARK (P) with
the parking brake ®rmly set. Your vehicle can
roll. If you have left the engine running, the
vehicle can move suddenly. You or others
could be injured. To be sure your vehicle will
not move, even when you are on fairly level
ground, use the steps that follow. If you are
pulling a trailer, see ªTowing a Trailerº in the
Index.
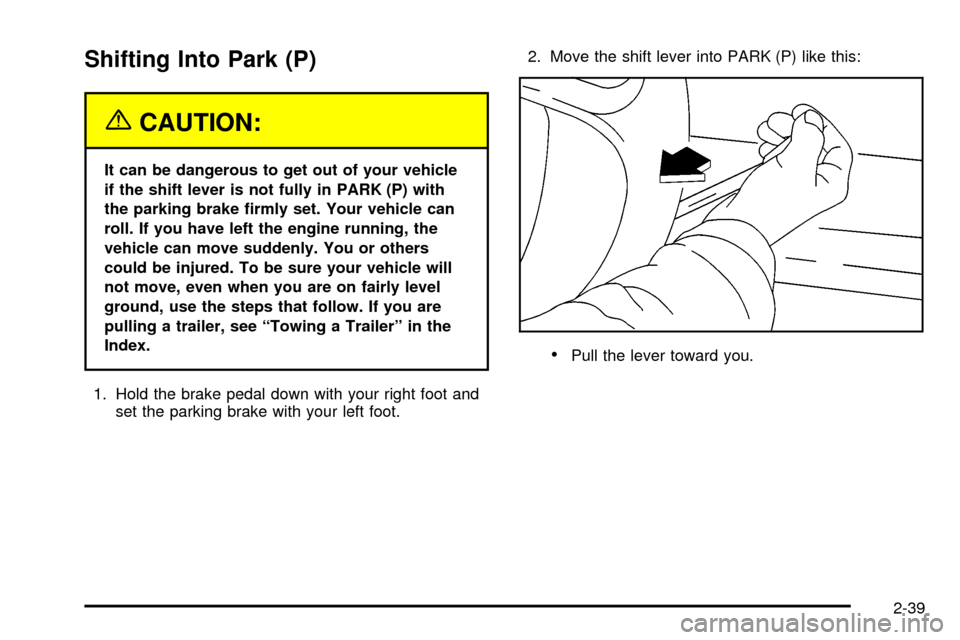
1. Hold the brake pedal down with your right foot and
set the parking brake with your left foot.2. Move the shift lever into PARK (P) like this:
·Pull the lever toward you.
2-39
Page 153 of 486
Running Your Engine While You
Are Parked
It is better not to park with the engine running. But if
you ever have to, here are some things to know.
{CAUTION:
Idling the engine with the climate control
system off could allow dangerous exhaust into
your vehicle. See the earlier Caution under
Engine Exhaust on page 2-42.
Also, idling in a closed-in place can let deadly
carbon monoxide (CO) into your vehicle even if
the climate control fan is at the highest setting.
One place this can happen is a garage.
Exhaust Ð with CO Ð can come in easily.
NEVER park in a garage with the engine
running.
Another closed-in place can be a blizzard. See
Winter Driving on page 4-26.
{CAUTION:
It can be dangerous to get out of your vehicle
if the shift lever is not fully in PARK (P) with
the parking brake ®rmly set. Your vehicle can
roll. Do not leave your vehicle when the engine
is running unless you have to. If you have left
the engine running, the vehicle can move
suddenly. You or others could be injured. To
be sure your vehicle will not move, even when
you are on fairly level ground, always set your
parking brake and move the shift lever to
PARK (P).
Follow the proper steps to be sure your vehicle will not
move. See
Shifting Into Park (P) on page 2-39.
If you are pulling a trailer, see
Towing a Trailer on
page 4-36.
2-43
Page 188 of 486

Turn and Lane-Change Signals
The turn signal has two upward (for right) and two
downward (for left) positions. These positions allow you
to signal a turn or a lane change.
To signal a turn, move the lever all the way up or down.
When the turn is ®nished, the lever will return
automatically.
An arrow on the instrument
panel cluster will ¯ash in
the direction of the
turn or lane change.
To signal a lane change, just raise or lower the lever
until the arrow starts to ¯ash. Hold it there until you
complete your lane change. The lever will return by itself
when you release it.
As you signal a turn or a lane change, if the arrow
¯ashes faster than normal, a signal bulb may be burned
out and other drivers won't see your turn signal.
If a bulb is burned out, replace it to help avoid an
accident. If the arrows don't go on at all when you signal
a turn, check for burned-out bulbs and check the
fuse. See
Bulb Replacement on page 5-52andFuses
and Circuit Breakers on page 5-96.If you have a trailer towing option with added wiring for
the trailer lamps, the signal indicator will ¯ash at a
normal rate even if a turn signal bulb is burned
out. Check the front and rear turn signal lamps regularly
to make sure they are working.
Turn Signal On Chime
If either turn signal is left on for more than 3/4 mile
(1.2 km), a chime will sound to let the driver know to turn
it off.
If you need to leave the signal on for more than 3/4 mile
(1.2 km), turn off the signal and then turn it back on.
Headlamp High/Low-Beam Changer
To change the headlamps from high to low beam, or
low to high, simply pull the turn signal lever all the way
toward you. Then release it.
When the high beams are
on, this light on the
instrument panel cluster
will also be on.
Your fog lamps will turn off when you switch to high
beams. Using your high beams in fog is not
recommended.
3-8
Page 222 of 486
If the light comes on while you are driving, pull off the
road and stop carefully. You may notice that the pedal is
harder to push. Or, the pedal may go closer to the
¯oor. It may take longer to stop. If the light is still on,
have the vehicle towed for service. See
Anti-Lock Brake
System Warning Light on page 3-42andTowing Your
Vehicle on page 4-32.
{CAUTION:
Your brake system may not be working
properly if the brake system warning light is
on. Driving with the brake system warning light
on can lead to an accident. If the light is still
on after you have pulled off the road and
stopped carefully, have the vehicle towed
for service.
Anti-Lock Brake System
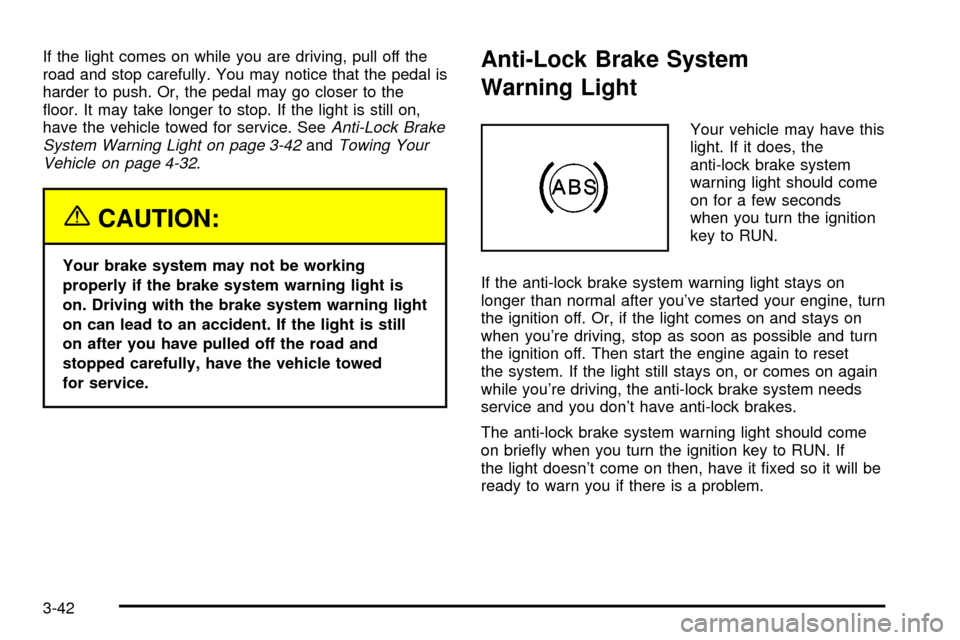
Warning Light
Your vehicle may have this
light. If it does, the
anti-lock brake system
warning light should come
on for a few seconds
when you turn the ignition
key to RUN.
If the anti-lock brake system warning light stays on
longer than normal after you've started your engine, turn
the ignition off. Or, if the light comes on and stays on
when you're driving, stop as soon as possible and turn
the ignition off. Then start the engine again to reset
the system. If the light still stays on, or comes on again
while you're driving, the anti-lock brake system needs
service and you don't have anti-lock brakes.
The anti-lock brake system warning light should come
on brie¯y when you turn the ignition key to RUN. If
the light doesn't come on then, have it ®xed so it will be
ready to warn you if there is a problem.
3-42
Page 226 of 486

This light should come on, as a check to show you it is
working, when the ignition is on and the engine is
not running. If the light does not come on, have it
repaired. This light will also come on during a
malfunction in one of two ways:
·Light FlashingÐ A mis®re condition has been
detected. A mis®re increases vehicle emissions
and may damage the emission control system on
your vehicle. Diagnosis and service may be
required.
·Light On SteadyÐ An emission control system
malfunction has been detected on your vehicle.
Diagnosis and service may be required.
If the Light Is Flashing
The following may prevent more serious damage to
your vehicle:
·Reducing vehicle speed.
·Avoiding hard accelerations.
·Avoiding steep uphill grades.
·If you are towing a trailer, reduce the amount of
cargo being hauled as soon as it is possible.
If the light stops ¯ashing and remains on steady, see ªIf
the Light Is On Steadyº following.
If the light continues to ¯ash, when it is safe to do so,
stop the vehicle.Find a safe place to park your vehicle.
Turn the key off, wait at least 10 seconds and restart
the engine. If the light remains on steady, see ªIf
the Light Is On Steadyº following. If the light is still
¯ashing, follow the previous steps, and see your dealer
for service as soon as possible.
3-46