engine compartment overview CHEVROLET VOLT 2014 1.G Owners Manual
[x] Cancel search | Manufacturer: CHEVROLET, Model Year: 2014, Model line: VOLT, Model: CHEVROLET VOLT 2014 1.GPages: 394, PDF Size: 5.86 MB
Page 1 of 394
(1,1)Chevrolet VOLT Owner Manual (GMNA-Localizing-U.S./Canada-6014139) -
2014 - CRC - 9/16/13
2014 Chevrolet VOLT Owner ManualM
In Brief. . . . . . . . . . . . . . . . . . . . . . . . 1-1
Instrument Panel . . . . . . . . . . . . . . 1-2
Initial Drive Information . . . . . . . . 1-4
Vehicle Features . . . . . . . . . . . . . 1-16
Battery and Efficiency . . . . . . . . 1-19
Performance and
Maintenance . . . . . . . . . . . . . . . . 1-24
Keys, Doors, and Windows . . . . . . . . . . . . . . . . . . . . 2-1
Keys and Locks . . . . . . . . . . . . . . . 2-1
Doors . . . . . . . . . . . . . . . . . . . . . . . . 2-13
Vehicle Security . . . . . . . . . . . . . . 2-14
Exterior Mirrors . . . . . . . . . . . . . . . 2-16
Interior Mirrors . . . . . . . . . . . . . . . . 2-17
Windows . . . . . . . . . . . . . . . . . . . . . 2-18
Seats and Restraints . . . . . . . . . 3-1
Head Restraints . . . . . . . . . . . . . . . 3-2
Front Seats . . . . . . . . . . . . . . . . . . . . 3-3
Rear Seats . . . . . . . . . . . . . . . . . . . . 3-7
Safety Belts . . . . . . . . . . . . . . . . . . . . 3-9
Airbag System . . . . . . . . . . . . . . . . 3-16
Child Restraints . . . . . . . . . . . . . . 3-30 Storage
. . . . . . . . . . . . . . . . . . . . . . . 4-1
Storage Compartments . . . . . . . . 4-1
Additional Storage Features . . . 4-4
Instruments and Controls . . . . 5-1
Instrument Panel Overview . . . . 5-3
Controls . . . . . . . . . . . . . . . . . . . . . . . 5-5
Warning Lights, Gauges, and
Indicators . . . . . . . . . . . . . . . . . . . . 5-8
Information Displays . . . . . . . . . . 5-29
Vehicle Messages . . . . . . . . . . . . 5-45
Vehicle Personalization . . . . . . . 5-54
Universal Remote System . . . . 5-60
Lighting . . . . . . . . . . . . . . . . . . . . . . . 6-1
Exterior Lighting . . . . . . . . . . . . . . . 6-1
Interior Lighting . . . . . . . . . . . . . . . . 6-4
Lighting Features . . . . . . . . . . . . . . 6-5
Infotainment System . . . . . . . . . 7-1
Introduction . . . . . . . . . . . . . . . . . . . . 7-1 Climate Controls
. . . . . . . . . . . . . 8-1
Climate Control Systems . . . . . . 8-1
Air Vents . . . . . . . . . . . . . . . . . . . . . . . 8-8
Driving and Operating . . . . . . . . 9-1
Driving Information . . . . . . . . . . . . . 9-2
Starting and Operating . . . . . . . 9-16
Electric Vehicle Operating
Modes . . . . . . . . . . . . . . . . . . . . . . 9-21
Engine Exhaust . . . . . . . . . . . . . . 9-27
Electric Drive Unit . . . . . . . . . . . . 9-28
Brakes . . . . . . . . . . . . . . . . . . . . . . . 9-30
Ride Control Systems . . . . . . . . 9-33
Cruise Control . . . . . . . . . . . . . . . . 9-35
Driver Assistance Systems . . . 9-38
Charging . . . . . . . . . . . . . . . . . . . . . 9-47
Fuel . . . . . . . . . . . . . . . . . . . . . . . . . . 9-55
Trailer Towing . . . . . . . . . . . . . . . . 9-59
Conversions and Add-Ons . . . 9-60
Page 249 of 394
(1,1)Chevrolet VOLT Owner Manual (GMNA-Localizing-U.S./Canada-6014139) -
2014 - CRC - 9/16/13
Vehicle Care 10-1
Vehicle Care
General Information
General Information . . . . . . . . . . 10-2
California Proposition65 Warning . . . . . . . . . . . . . . . . . 10-2
California Perchlorate Materials Requirements . . . . 10-2
Accessories and Modifications . . . . . . . . . . . . . . . 10-2
Lifting the Vehicle . . . . . . . . . . . . 10-3
Vehicle Checks
Doing Your Own Service Work . . . . . . . . . . . . . . . 10-5
Hood . . . . . . . . . . . . . . . . . . . . . . . . 10-7
Engine Compartment Overview . . . . . . . . . . . . . . . . . . . 10-8
Engine Oil . . . . . . . . . . . . . . . . . . . 10-9
Engine Oil Life System . . . . . 10-12
Engine Air Cleaner/Filter . . . . 10-13
Cooling System (Engine) . . . 10-14
Cooling System (High Voltage Battery) . . . . . . . . . . . 10-15
Cooling System (Power Electronics and Charger
Modules) . . . . . . . . . . . . . . . . . . 10-16
Engine Coolant . . . . . . . . . . . . . 10-17 Engine Overheating . . . . . . . . 10-19
Washer Fluid . . . . . . . . . . . . . . . 10-20
Brakes . . . . . . . . . . . . . . . . . . . . . 10-20
Brake Fluid . . . . . . . . . . . . . . . . . 10-21
Battery . . . . . . . . . . . . . . . . . . . . . 10-23
Electric Drive Unit Shift Lock
Control Function Check . . . 10-25
Park Brake and P (Park) Mechanism Check . . . . . . . . 10-25
Wiper Blade Replacement . . . . . . . . . . . . . . 10-26
Headlamp Aiming
Headlamp Aiming . . . . . . . . . . 10-27
Bulb Replacement
Bulb Replacement . . . . . . . . . . 10-27
Halogen Bulbs . . . . . . . . . . . . . . 10-27
LED Lighting . . . . . . . . . . . . . . . 10-27
Headlamps . . . . . . . . . . . . . . . . . 10-27
Back-Up Lamps . . . . . . . . . . . . 10-28
License Plate Lamp . . . . . . . . 10-29
Replacement Bulbs . . . . . . . . . 10-30
Electrical System
High Voltage Devices andWiring . . . . . . . . . . . . . . . . . . . . . 10-30
Electrical System Overload . . . . . . . . . . . . . . . . . . 10-30 Engine Compartment Fuse
Block . . . . . . . . . . . . . . . . . . . . . 10-31
Instrument Panel Fuse Block (Left Side) . . . . . . . . . . . . . . . . 10-35
Instrument Panel Fuse Block
(Right Side) . . . . . . . . . . . . . . . 10-36
Rear Compartment Fuse Block . . . . . . . . . . . . . . . . . . . . . 10-38
Wheels and Tires
Tires . . . . . . . . . . . . . . . . . . . . . . . . 10-40
All-Season Tires . . . . . . . . . . . . 10-41
Winter Tires . . . . . . . . . . . . . . . . 10-41
Summer Tires . . . . . . . . . . . . . . 10-42
Tire Sidewall Labeling . . . . . . 10-42
Tire Designations . . . . . . . . . . . 10-43
Tire Terminology andDefinitions . . . . . . . . . . . . . . . . 10-44
Tire Pressure . . . . . . . . . . . . . . . 10-47
Tire Pressure Monitor System . . . . . . . . . . . . . . . . . . . 10-48
Tire Pressure Monitor Operation . . . . . . . . . . . . . . . . . 10-49
Tire Inspection . . . . . . . . . . . . . . 10-52
Tire Rotation . . . . . . . . . . . . . . . 10-53
When It Is Time for New Tires . . . . . . . . . . . . . . . . . . . . . . 10-54
Buying New Tires . . . . . . . . . . . 10-55
Page 256 of 394

(8,1)Chevrolet VOLT Owner Manual (GMNA-Localizing-U.S./Canada-6014139) -
2014 - CRC - 9/16/13
10-8 Vehicle Care
Engine Compartment Overview
Page 258 of 394
(10,1)Chevrolet VOLT Owner Manual (GMNA-Localizing-U.S./Canada-6014139) -
2014 - CRC - 9/16/13
10-10 Vehicle Care
Checking Engine Oil
It is a good idea to check the engine
oil level at each fuel fill. In order to
get an accurate reading, the vehicle
must be on level ground. The
engine oil dipstick handle is a loop.
SeeEngine Compartment Overview
on page 10-8 for the location of the
engine oil dipstick.
Obtaining an accurate oil level
reading is essential:
1. If the engine has been running recently, turn off the engine and
allow several minutes for the oil
to drain back into the oil pan.
Checking the oil level too soon
after engine shutoff will not
provide an accurate oil level
reading.
{Warning
The engine oil dipstick handle
may be hot; it could burn you.
Use a towel or glove to touch the
dipstick handle. 2. Pull out the dipstick and clean it
with a paper towel or cloth, then
push it back in all the way.
Remove it again, keeping the tip
down, and check the level.
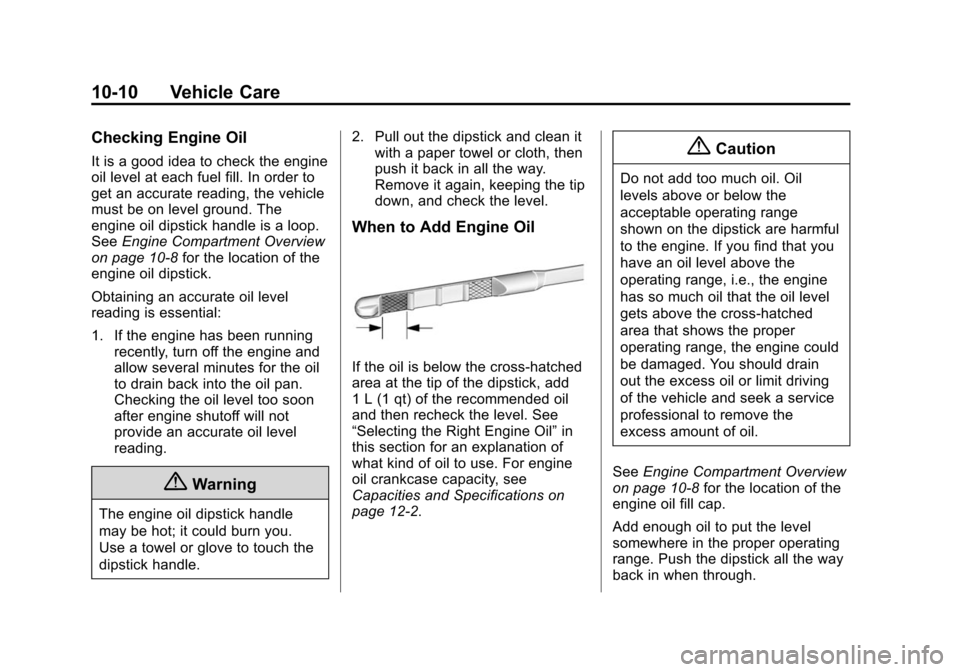
When to Add Engine Oil
If the oil is below the cross-hatched
area at the tip of the dipstick, add
1 L (1 qt) of the recommended oil
and then recheck the level. See
“Selecting the Right Engine Oil” in
this section for an explanation of
what kind of oil to use. For engine
oil crankcase capacity, see
Capacities and Specifications on
page 12-2.
{Caution
Do not add too much oil. Oil
levels above or below the
acceptable operating range
shown on the dipstick are harmful
to the engine. If you find that you
have an oil level above the
operating range, i.e., the engine
has so much oil that the oil level
gets above the cross-hatched
area that shows the proper
operating range, the engine could
be damaged. You should drain
out the excess oil or limit driving
of the vehicle and seek a service
professional to remove the
excess amount of oil.
See Engine Compartment Overview
on page 10-8 for the location of the
engine oil fill cap.
Add enough oil to put the level
somewhere in the proper operating
range. Push the dipstick all the way
back in when through.
Page 261 of 394
(13,1)Chevrolet VOLT Owner Manual (GMNA-Localizing-U.S./Canada-6014139) -
2014 - CRC - 9/16/13
Vehicle Care 10-13
If the CHANGE ENGINE OIL SOON
message comes back on when the
vehicle is started, the engine oil life
system has not reset. Repeat the
procedure.
Engine Air Cleaner/Filter
SeeEngine Compartment Overview
on page 10-8 for the location of the
engine air cleaner/filter.
When to Inspect the Engine Air
Filter
Inspect the air filter at the scheduled
maintenance intervals and replace it
at the first oil change after each
80 000 km (50,000 mi) interval. See
Maintenance Schedule on
page 11-2 for more information.
If driving in dusty/dirty conditions,
inspect the air filter at each engine
oil change.
How to Inspect the Engine Air
Filter
To inspect the air filter, remove it
from the engine air cleaner/filter
assembly and lightly shake to release loose dust and dirt. If the air
filter remains covered with dirt, a
new air filter is required.
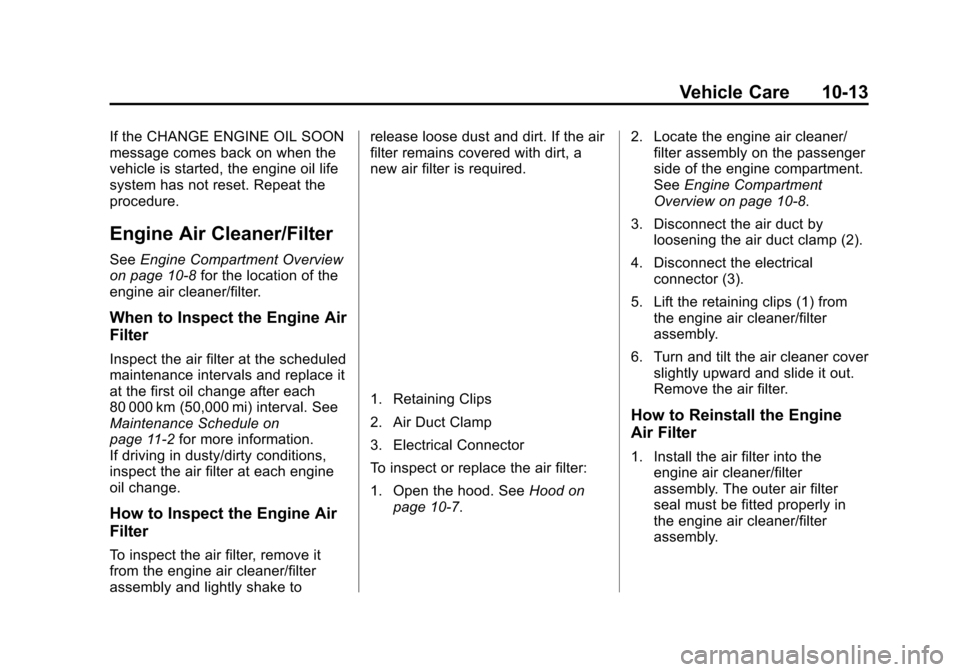
1. Retaining Clips
2. Air Duct Clamp
3. Electrical Connector
To inspect or replace the air filter:
1. Open the hood. See
Hood on
page 10-7. 2. Locate the engine air cleaner/
filter assembly on the passenger
side of the engine compartment.
See Engine Compartment
Overview on page 10-8.
3. Disconnect the air duct by loosening the air duct clamp (2).
4. Disconnect the electrical connector (3).
5. Lift the retaining clips (1) from the engine air cleaner/filter
assembly.
6. Turn and tilt the air cleaner cover slightly upward and slide it out.
Remove the air filter.
How to Reinstall the Engine
Air Filter
1. Install the air filter into theengine air cleaner/filter
assembly. The outer air filter
seal must be fitted properly in
the engine air cleaner/filter
assembly.
Page 263 of 394
(15,1)Chevrolet VOLT Owner Manual (GMNA-Localizing-U.S./Canada-6014139) -
2014 - CRC - 9/16/13
Vehicle Care 10-15
{Warning
Heater and radiator hoses, and
other engine parts, can be very
hot. Do not touch them. If you do,
you can be burned.
Do not run the vehicle if there is a
leak. If you run the engine, it
could lose all coolant. That could
cause an engine fire, and you
could be burned. Get any leak
fixed before you drive the vehicle.
If there seems to be no leak, with
the engine on, check to see if the
cooling fans are running. If the
engine is overheating, the fans
should be running. If it is not, the
vehicle needs service. Turn off the
vehicle.
Cooling System (High
Voltage Battery)
During vehicle operation and also
during charging, the high voltage
battery cells in the vehicle are kept within a normal operating
temperature range. If the
temperature rises above this
temperature, the battery cooling
system turns on the air conditioning
compressor and cools the coolant
until the correct temperature is
reached. If the temperature falls
below this temperature, a high
voltage heater, located in the
battery, heats the coolant until the
correct temperature is reached.
What to Use
The high voltage battery coolant
reservoir in the vehicle is filled with
a 50/50 mixture of DEX-COOL
®
engine coolant and deionized water.
If using this mixture, nothing else
needs to be added.
The coolant needs to be replaced at
the appropriate interval. See
Maintenance Schedule on
page 11-2.
Checking Coolant
The vehicle must be on a level
surface when checking the coolant
level.
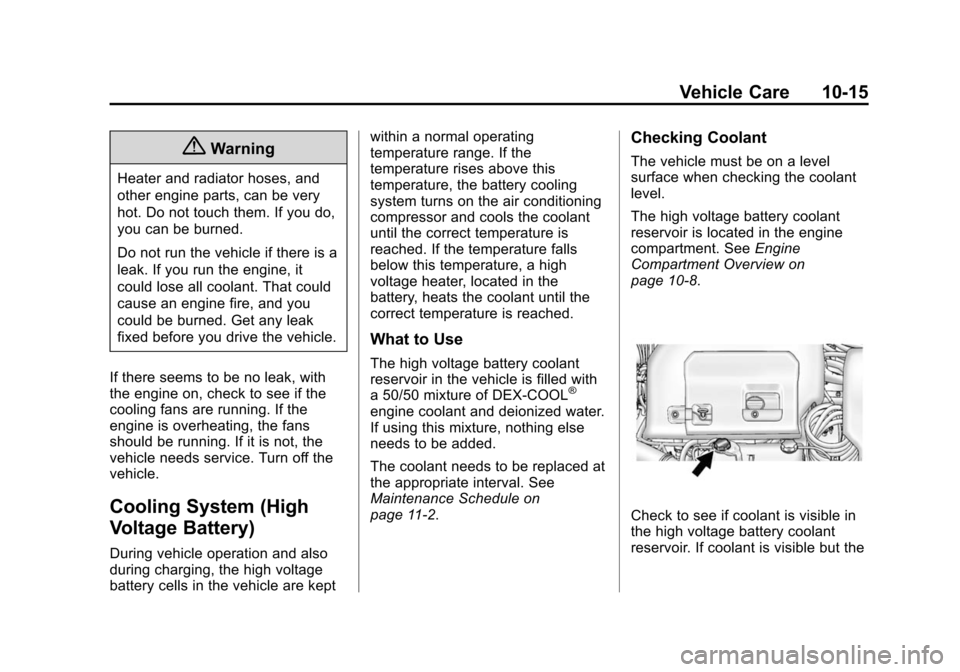
The high voltage battery coolant
reservoir is located in the engine
compartment. See
Engine
Compartment Overview on
page 10-8.
Check to see if coolant is visible in
the high voltage battery coolant
reservoir. If coolant is visible but the
Page 264 of 394
(16,1)Chevrolet VOLT Owner Manual (GMNA-Localizing-U.S./Canada-6014139) -
2014 - CRC - 9/16/13
10-16 Vehicle Care
coolant level is below the cold fill
line, there could be a leak in the
cooling system.
The high voltage battery coolant
should only be serviced by a
qualified technician.
Cooling System (Power
Electronics and Charger
Modules)
The power electronics and charger
modules are cooled using the same
coolant loop.
The power electronics and charger
modules in the vehicle are kept
below a maximum temperature.
If the temperature rises above this
temperature, the electric cooling
fans will turn on and cool the
coolant until the correct temperature
is reached.
What to Use
The power electronics and charger
modules coolant reservoir in the
vehicle is filled with a 50/50 mixture
of DEX-COOL engine coolant and
deionized water. If using this
mixture, nothing else needs to be
added.
The coolant needs to be replaced at
the appropriate interval. See
Maintenance Schedule on
page 11-2.
Checking Coolant
The vehicle must be on a level
surface when checking the coolant
level.
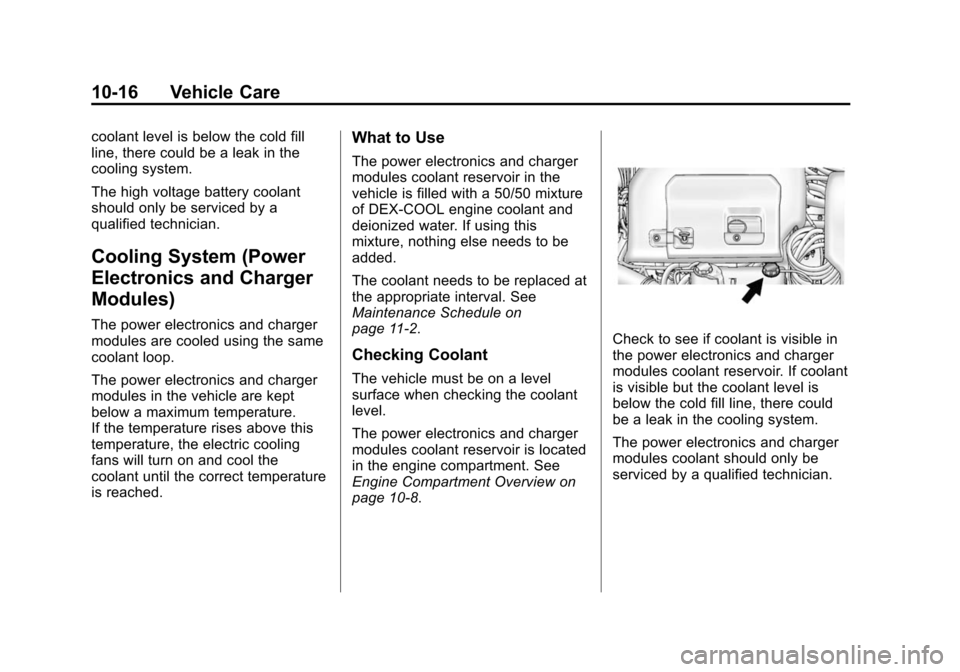
The power electronics and charger
modules coolant reservoir is located
in the engine compartment. See
Engine Compartment Overview on
page 10-8.
Check to see if coolant is visible in
the power electronics and charger
modules coolant reservoir. If coolant
is visible but the coolant level is
below the cold fill line, there could
be a leak in the cooling system.
The power electronics and charger
modules coolant should only be
serviced by a qualified technician.
Page 266 of 394
(18,1)Chevrolet VOLT Owner Manual (GMNA-Localizing-U.S./Canada-6014139) -
2014 - CRC - 9/16/13
10-18 Vehicle Care
used coolant disposal. This will help
protect the environment and your
health.
Checking Coolant
The vehicle must be on a level
surface when checking the coolant
level.
Check to see if coolant is visible in
the coolant surge tank. If the coolant
inside the coolant surge tank is
boiling, do not do anything else until
it cools down. If coolant is visible
but the coolant level is not at or
above the cold fill mark, add a
50/50 mixture of deionized water
and DEX-COOL coolant at the
coolant surge tank, but be sure the
cooling system is cool before this is
done. SeeEngine Overheating on
page 10-19 for more information.
The coolant reservoir is located on
the passenger side of the engine
compartment. See Engine
Compartment Overview on
page 10-8 for more information on
location. The coolant level should be at or
above the cold fill line on the
coolant surge tank. If it is not, there
could be a leak in the cooling
system.How to Add Coolant to the
Coolant Surge Tank
{Warning
You can be burned if you spill
coolant on hot engine parts.
Coolant contains ethylene glycol
and it will burn if the engine parts
are hot enough. Do not spill
coolant on a hot engine.
{Caution
This vehicle has a specific
coolant fill procedure. Failure to
follow this procedure could cause
the engine to overheat and be
severely damaged.
{Warning
The electric fans under the hood
can start up even when the
engine is not running and can
cause injury. Keep hands,
clothing, and tools away from any
underhood electric fan.
{Warning
Steam and scalding liquids from a
hot cooling system can blow out
and burn you badly. They are
under pressure, and if you turn
the surge tank pressure
cap
—even a little —they can
come out at high speed. Never
turn the cap when the cooling
system, including the surge tank
pressure cap, is hot. Wait for the
cooling system and surge tank
pressure cap to cool if you ever
have to turn the pressure cap.
Page 268 of 394
(20,1)Chevrolet VOLT Owner Manual (GMNA-Localizing-U.S./Canada-6014139) -
2014 - CRC - 9/16/13
10-20 Vehicle Care
Washer Fluid
What to Use
When adding windshield washer
fluid to the vehicle, be sure to read
the manufacturer's instructions
before use. If operating the vehicle
in an area where the temperature
may fall below freezing, use a fluid
that has sufficient protection against
freezing.
Adding Washer Fluid
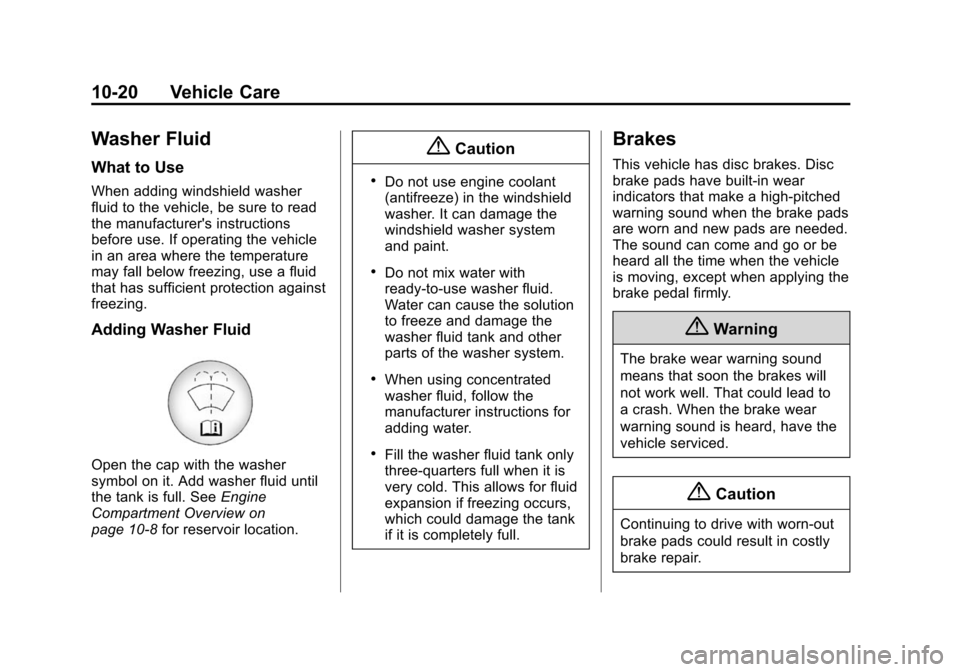
Open the cap with the washer
symbol on it. Add washer fluid until
the tank is full. SeeEngine
Compartment Overview on
page 10-8 for reservoir location.
{Caution
.Do not use engine coolant
(antifreeze) in the windshield
washer. It can damage the
windshield washer system
and paint.
.Do not mix water with
ready-to-use washer fluid.
Water can cause the solution
to freeze and damage the
washer fluid tank and other
parts of the washer system.
.When using concentrated
washer fluid, follow the
manufacturer instructions for
adding water.
.Fill the washer fluid tank only
three-quarters full when it is
very cold. This allows for fluid
expansion if freezing occurs,
which could damage the tank
if it is completely full.
Brakes
This vehicle has disc brakes. Disc
brake pads have built-in wear
indicators that make a high-pitched
warning sound when the brake pads
are worn and new pads are needed.
The sound can come and go or be
heard all the time when the vehicle
is moving, except when applying the
brake pedal firmly.
{Warning
The brake wear warning sound
means that soon the brakes will
not work well. That could lead to
a crash. When the brake wear
warning sound is heard, have the
vehicle serviced.
{Caution
Continuing to drive with worn-out
brake pads could result in costly
brake repair.
Page 269 of 394
(21,1)Chevrolet VOLT Owner Manual (GMNA-Localizing-U.S./Canada-6014139) -
2014 - CRC - 9/16/13
Vehicle Care 10-21
Some driving conditions or climates
can cause a brake squeal when the
brakes are first applied or lightly
applied. This does not mean
something is wrong with the brakes.
Properly torqued wheel nuts are
necessary to help prevent brake
pulsation. When tires are rotated,
inspect brake pads for wear and
evenly tighten wheel nuts in the
proper sequence to torque
specifications. SeeCapacities and
Specifications on page 12-2.
Brake pads should be replaced as
complete sets.
Brake Pedal Travel
See your dealer if the brake pedal
does not return to normal height,
or if there is a rapid increase in
pedal travel. This could be a sign
that brake service might be
required.
Brake Adjustment
Every time the brakes are applied,
with or without the vehicle moving,
the brakes adjust for wear.
Replacing Brake System Parts
The braking system on a vehicle is
complex. Its many parts have to be
of top quality and work well together
if the vehicle is to have really good
braking. The vehicle was designed
and tested with top-quality brake
parts. When parts of the braking
system are replaced, be sure to get
new, approved replacement parts.
If this is not done, the brakes might
not work properly. For example,
installing disc brake pads that are
wrong for the vehicle, can change
the balance between the front and
rear brakes —for the worse. The
braking performance expected can
change in many other ways if the
wrong replacement brake parts are
installed.
Brake Fluid
The brake master cylinder reservoir
is filled with DOT 3 brake fluid as
indicated on the reservoir cap. See
Engine Compartment Overview on
page 10-8 for the location of the
reservoir.
There are only two reasons why the
brake fluid level in the reservoir
might go down:
.The brake fluid level goes down
because of normal brake lining
wear. When new linings are
installed, the fluid level goes
back up.