Filter CHEVROLET VOLT 2017 2.G Owners Manual
[x] Cancel search | Manufacturer: CHEVROLET, Model Year: 2017, Model line: VOLT, Model: CHEVROLET VOLT 2017 2.GPages: 376, PDF Size: 6.75 MB
Page 26 of 376
Chevrolet VOLT Owner Manual (GMNA-Localizing-U.S./Canada/Mexico-
9807421) - 2017 - CRC - 11/18/15
In Brief 25
Vehicle Load Limits0171. The
warning light will remain on until the
tire pressure is corrected.
The low tire pressure warning light
may come on in cool weather when
the vehicle is first started, and then
turn off as the vehicle is driven. This
may be an early indicator that the
tire pressures are getting low and
the tires need to be inflated to the
proper pressure.
The TPMS does not replace normal
monthly tire maintenance. Maintain
the correct tire pressures.
See Tire Pressure Monitor
System 0280.
Fuel
Regular Fuel
Use only unleaded gasoline rated
87 octane or higher in your vehicle.
Do not use gasoline with an octane
rating lower as it may result in
vehicle damage and lower fuel
economy. See Fuel0230.
E85 or FlexFuel
No E85 or FlexFuel
Gasoline-ethanol fuel blends greater
than E15 (15% ethanol by volume),
such as E85, cannot be used in this
vehicle.
Engine Oil Life System
The engine oil life system calculates
engine oil life based on vehicle use
and displays the CHANGE ENGINE
OIL SOON message when it is time
to change the engine oil and filter. The oil life system should be reset
to 100% only following an oil
change.
Resetting the Oil Life System
1. Select REMAINING OIL LIFE on the DIC menu.
2. Press and hold
Vfor several
seconds while the Oil Life
display is active to reset the Oil
Life system.
3. 100% OIL LIFE will be displayed when the oil life
system is successfully reset.
The oil life system can also be reset
as follows: 1. Turn the ignition to ON/RUN with the engine off.
2. Fully press and release the accelerator pedal three times
within five seconds.
See Engine Oil Life System 0245.
Page 158 of 376
Chevrolet VOLT Owner Manual (GMNA-Localizing-U.S./Canada/Mexico-
9807421) - 2017 - CRC - 11/18/15
Climate Controls 157
Climate Controls
Climate Control Systems
Automatic Climate ControlSystem . . . . . . . . . . . . . . . . . . . . . . 157
Air Vents
Air Vents . . . . . . . . . . . . . . . . . . . . . 162
Maintenance
Passenger Compartment AirFilter . . . . . . . . . . . . . . . . . . . . . . . . 162
Climate Control
Systems
Automatic Climate
Control System
The heating, cooling, and ventilation
for the vehicle can be controlled
with this system.
The vehicle may require the use of
an auxiliary heat source under
certain cold conditions. This
provides additional heating and defrost capability obtained by
running the engine, even if the high
voltage battery is adequately
charged. Under these conditions,
the engine will start and use fuel.
Make sure there is fuel in the tank.
Do not allow the vehicle to remain in
extreme temperatures for long
periods without being driven or
plugged in.
Page 163 of 376
Chevrolet VOLT Owner Manual (GMNA-Localizing-U.S./Canada/Mexico-
9807421) - 2017 - CRC - 11/18/15
162 Climate Controls
Air Vents
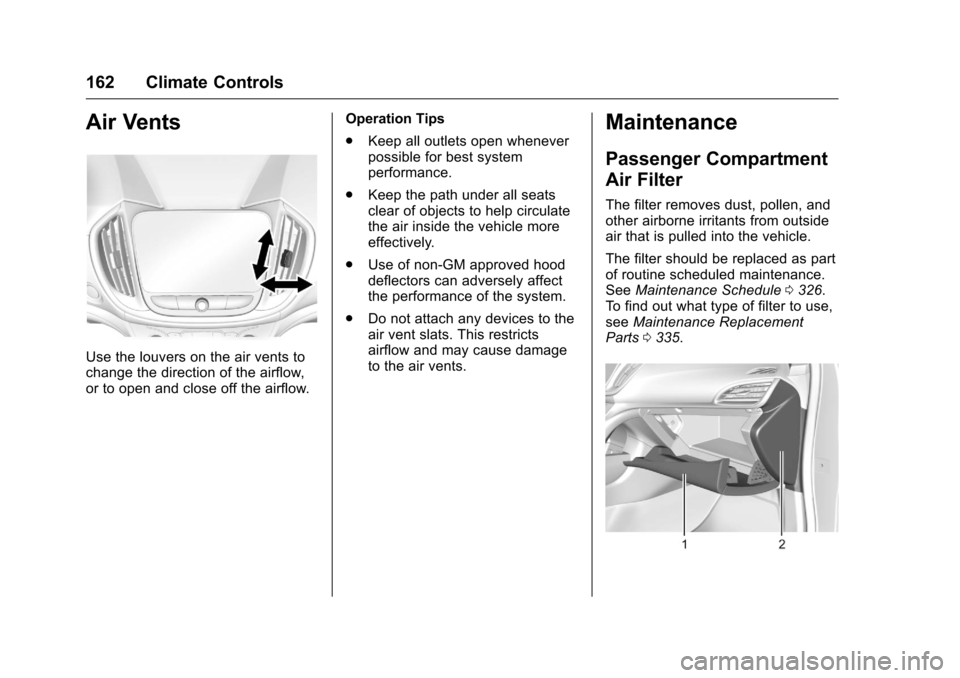
Use the louvers on the air vents to
change the direction of the airflow,
or to open and close off the airflow.Operation Tips
.
Keep all outlets open whenever
possible for best system
performance.
. Keep the path under all seats
clear of objects to help circulate
the air inside the vehicle more
effectively.
. Use of non-GM approved hood
deflectors can adversely affect
the performance of the system.
. Do not attach any devices to the
air vent slats. This restricts
airflow and may cause damage
to the air vents.
Maintenance
Passenger Compartment
Air Filter
The filter removes dust, pollen, and
other airborne irritants from outside
air that is pulled into the vehicle.
The filter should be replaced as part
of routine scheduled maintenance.
See Maintenance Schedule 0326.
To find out what type of filter to use,
see Maintenance Replacement
Parts 0335.
Page 164 of 376
Chevrolet VOLT Owner Manual (GMNA-Localizing-U.S./Canada/Mexico-
9807421) - 2017 - CRC - 11/18/15
Climate Controls 163
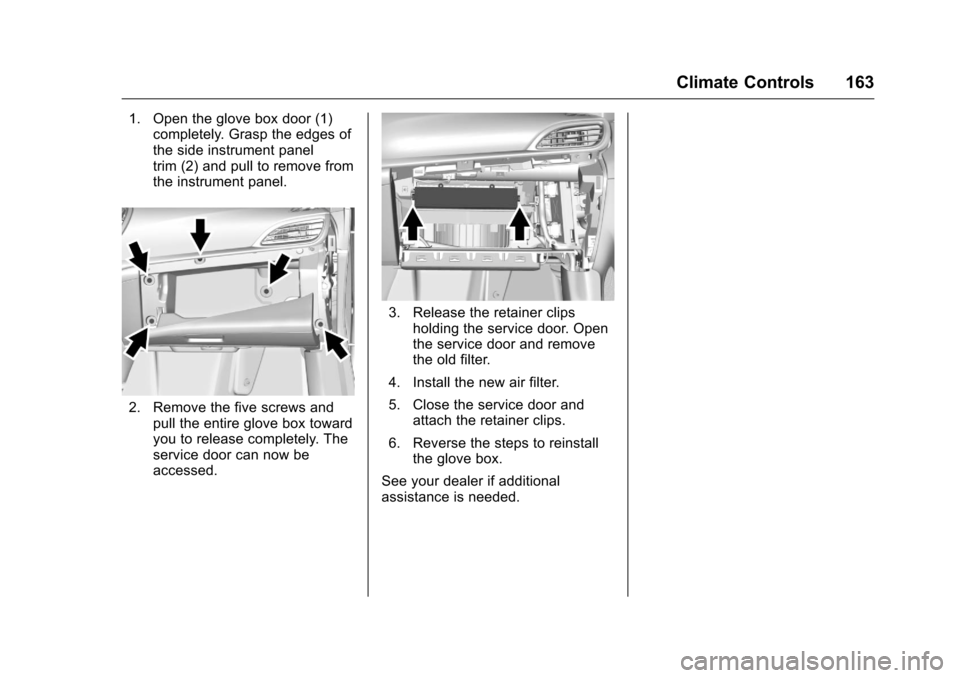
1. Open the glove box door (1)completely. Grasp the edges of
the side instrument panel
trim (2) and pull to remove from
the instrument panel.
2. Remove the five screws and
pull the entire glove box toward
you to release completely. The
service door can now be
accessed.
3. Release the retainer clipsholding the service door. Open
the service door and remove
the old filter.
4. Install the new air filter.
5. Close the service door and attach the retainer clips.
6. Reverse the steps to reinstall the glove box.
See your dealer if additional
assistance is needed.
Page 236 of 376
Chevrolet VOLT Owner Manual (GMNA-Localizing-U.S./Canada/Mexico-
9807421) - 2017 - CRC - 11/18/15
Vehicle Care 235
Vehicle Care
General Information
General Information . . . . . . . . . . 236
California Proposition65 Warning . . . . . . . . . . . . . . . . . 236
California Perchlorate Materials Requirements . . . . . 236
Accessories and Modifications . . . . . . . . . . . . . . . . 237
Lifting the Vehicle . . . . . . . . . . . . 237
Vehicle Checks
Doing Your Own Service Work . . . . . . . . . . . . . . . 239
Hood . . . . . . . . . . . . . . . . . . . . . . . . . 240
Engine Compartment Overview . . . . . . . . . . . . . . . . . . . . 242
Engine Oil . . . . . . . . . . . . . . . . . . . . 243
Engine Oil Life System . . . . . . . 245
Engine Air Cleaner/Filter . . . . . . 246
Cooling System (Engine) . . . . . 248
Cooling System (High Voltage Battery) . . . . . . . . . . . . . . . . . . . . . 248
Cooling System (Power Electronics and Charger
Modules) . . . . . . . . . . . . . . . . . . . . 249
Engine Coolant . . . . . . . . . . . . . . . 250
Engine Overheating . . . . . . . . . . 253
Washer Fluid . . . . . . . . . . . . . . . . . 253 Brakes . . . . . . . . . . . . . . . . . . . . . . . 254
Brake Fluid . . . . . . . . . . . . . . . . . . . 254
Battery - North America . . . . . . 256
Electric Drive Unit Shift Lock
Control Function Check . . . . . 258
Park Brake and P (Park) Mechanism Check . . . . . . . . . . 258
Wiper Blade Replacement . . . . 258
Headlamp Aiming
Headlamp Aiming . . . . . . . . . . . . 259
Bulb Replacement
Bulb Replacement . . . . . . . . . . . . 260
Halogen Bulbs . . . . . . . . . . . . . . . . 260
LED Lighting . . . . . . . . . . . . . . . . . 260
Headlamps . . . . . . . . . . . . . . . . . . . 260
Taillamps . . . . . . . . . . . . . . . . . . . . . 261
License Plate Lamp . . . . . . . . . . 261
Replacement Bulbs . . . . . . . . . . . 262
Electrical System
High Voltage Devices and Wiring . . . . . . . . . . . . . . . . . . . . . . . 262
Electrical System Overload . . . 262
Engine Compartment Fuse Block . . . . . . . . . . . . . . . . . . . . . . . . 263
Instrument Panel Fuse Block . . . . . . . . . . . . . . . . . . . . . . . . 266
Rear Compartment Fuse Block . . . . . . . . . . . . . . . . . . . . . . . . 269
Wheels and Tires
Tires . . . . . . . . . . . . . . . . . . . . . . . . . . 271
All-Season Tires . . . . . . . . . . . . . . 272
Winter Tires . . . . . . . . . . . . . . . . . . 272
Low-Profile Tires . . . . . . . . . . . . . 273
Tire Sidewall Labeling . . . . . . . . 273
Tire Designations . . . . . . . . . . . . . 275
Tire Terminology andDefinitions . . . . . . . . . . . . . . . . . . 276
Tire Pressure . . . . . . . . . . . . . . . . . 278
Tire Pressure Monitor System . . . . . . . . . . . . . . . . . . . . . . 280
Tire Pressure Monitor Operation . . . . . . . . . . . . . . . . . . . 281
Tire Inspection . . . . . . . . . . . . . . . . 284
Tire Rotation . . . . . . . . . . . . . . . . . 284
When It Is Time for New Tires . . . . . . . . . . . . . . . . . . . . . . . . 285
Buying New Tires . . . . . . . . . . . . . 286
Different Size Tires and Wheels . . . . . . . . . . . . . . . . . . . . . . 287
Uniform Tire Quality Grading . . . . . . . . . . . . . . . . . . . . . 288
Wheel Alignment and Tire Balance . . . . . . . . . . . . . . . . . . . . . 289
Wheel Replacement . . . . . . . . . . 289
Tire Chains . . . . . . . . . . . . . . . . . . . 291
If a Tire Goes Flat . . . . . . . . . . . . 291
Tire Sealant and Compressor Kit . . . . . . . . . . . . . 293
Page 244 of 376
Chevrolet VOLT Owner Manual (GMNA-Localizing-U.S./Canada/Mexico-
9807421) - 2017 - CRC - 11/18/15
Vehicle Care 243
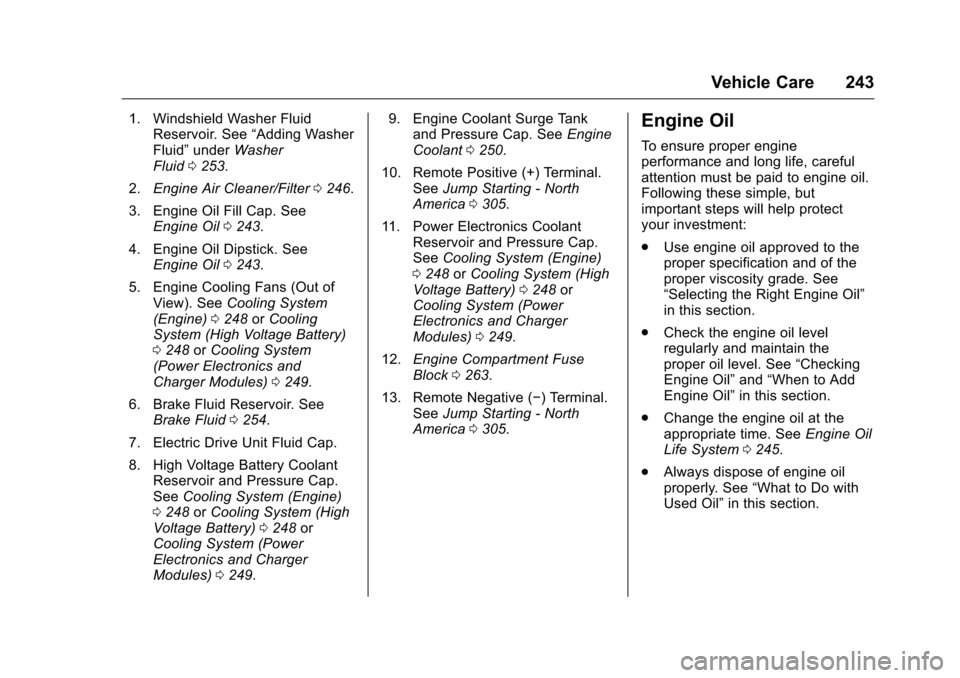
1. Windshield Washer FluidReservoir. See “Adding Washer
Fluid” under Washer
Fluid 0253.
2. Engine Air Cleaner/Filter 0246.
3. Engine Oil Fill Cap. See Engine Oil 0243.
4. Engine Oil Dipstick. See Engine Oil 0243.
5. Engine Cooling Fans (Out of View). See Cooling System
(Engine) 0248 orCooling
System (High Voltage Battery)
0 248 orCooling System
(Power Electronics and
Charger Modules) 0249.
6. Brake Fluid Reservoir. See Brake Fluid 0254.
7. Electric Drive Unit Fluid Cap.
8. High Voltage Battery Coolant Reservoir and Pressure Cap.
See Cooling System (Engine)
0 248 orCooling System (High
Voltage Battery) 0248 or
Cooling System (Power
Electronics and Charger
Modules) 0249. 9. Engine Coolant Surge Tank
and Pressure Cap. See Engine
Coolant 0250.
10. Remote Positive (+) Terminal. SeeJump Starting - North
America 0305.
11. Power Electronics Coolant Reservoir and Pressure Cap.
SeeCooling System (Engine)
0 248 orCooling System (High
Voltage Battery) 0248 or
Cooling System (Power
Electronics and Charger
Modules) 0249.
12. Engine Compartment Fuse
Block 0263.
13. Remote Negative (−) Terminal. SeeJump Starting - North
America 0305.Engine Oil
To ensure proper engine
performance and long life, careful
attention must be paid to engine oil.
Following these simple, but
important steps will help protect
your investment:
.
Use engine oil approved to the
proper specification and of the
proper viscosity grade. See
“Selecting the Right Engine Oil”
in this section.
. Check the engine oil level
regularly and maintain the
proper oil level. See “Checking
Engine Oil” and“When to Add
Engine Oil” in this section.
. Change the engine oil at the
appropriate time. See Engine Oil
Life System 0245.
. Always dispose of engine oil
properly. See “What to Do with
Used Oil” in this section.
Page 246 of 376
Chevrolet VOLT Owner Manual (GMNA-Localizing-U.S./Canada/Mexico-
9807421) - 2017 - CRC - 11/18/15
Vehicle Care 245
Selecting the Right Engine Oil
Selecting the right engine oil
depends on both the proper oil
specification and viscosity grade.
SeeRecommended Fluids and
Lubricants 0334.
Specification
Ask for and use engine oils that
meet the dexos1™ specification.
Engine oils that have been
approved by GM as meeting the
dexos1 specification are marked
with the dexos1 approved logo. See
www.gmdexos.com.
Caution
Failure to use the recommended
engine oil or equivalent can result
in engine damage not covered by
the vehicle warranty. Viscosity Grade
Use SAE 5W-20 viscosity grade
engine oil. SAE 0W-20 may be used
as an alternative.
When selecting an oil of the
appropriate viscosity grade, it is
recommended to select an oil of the
correct specification. See
“Specification”
earlier in this section.
Engine Oil Additives/Engine
Oil Flushes
Do not add anything to the oil. The
recommended oils meeting the
dexos1 specification are all that is
needed for good performance and
engine protection.
Engine oil system flushes are not
recommended and could cause
engine damage not covered by the
vehicle warranty.
What to Do with Used Oil
Used engine oil contains certain
elements that can be unhealthy for
your skin and could even cause
cancer. Do not let used oil stay on
your skin for very long. Clean your
skin and nails with soap and water, or a good hand cleaner. Wash or
properly dispose of clothing or rags
containing used engine oil. See the
manufacturer's warnings about the
use and disposal of oil products.
Used oil can be a threat to the
environment. If you change your
own oil, be sure to drain all the oil
from the filter before disposal. Never
dispose of oil by putting it in the
trash or pouring it on the ground,
into sewers, or into streams or
bodies of water. Recycle it by taking
it to a place that collects used oil.
Engine Oil Life System
When to Change Engine Oil
This vehicle has a computer system
that indicates when to change the
engine oil and filter. This is based
on a combination of factors which
include engine revolutions, engine
temperature, and miles driven.
Based on driving conditions, the
mileage at which an oil change is
indicated can vary considerably. For
the oil life system to work properly,
the system must be reset every time
the oil is changed.
Page 247 of 376
Chevrolet VOLT Owner Manual (GMNA-Localizing-U.S./Canada/Mexico-
9807421) - 2017 - CRC - 11/18/15
246 Vehicle Care
When the system has calculated
that oil life has been diminished, it
indicates that an oil change is
necessary. A CHANGE ENGINE
OIL SOON message comes on.
Change the oil as soon as possible
within the next 1 000 km (600 mi).
It is possible that, if driving under
the best conditions, the oil life
system might indicate that an oil
change is not necessary for up to
two years. The engine oil and filter
must be changed at least once
every two years and, at this time,
the system must be reset. Your
dealer has trained service people
who will perform this work and reset
the system. It is also important to
check the oil regularly over the
course of an oil drain interval and
keep it at the proper level.
If the system is ever reset
accidentally, the oil must be
changed at 5 000 km (3,000 mi)
since the last oil change.
Remember to reset the oil life
system whenever the oil is changed.How to Reset the Engine Oil
Life System
Reset the system whenever the
engine oil is changed so that the
system can calculate the next
engine oil change. To reset the
system:1. Select REMAINING OIL LIFE on the DIC menu.
2. Press and hold
Vfor several
seconds while the Oil Life
display is active to reset the Oil
Life system.
3. 100% OIL LIFE will be displayed when the oil life
system is successfully reset.
The oil life system can also be reset
as follows: 1. Turn the ignition to ON/RUN with the engine off.
2. Fully press and release the accelerator pedal three times
within five seconds. If the CHANGE ENGINE OIL SOON
message comes back on when the
vehicle is started, the engine oil life
system has not reset. Repeat the
procedure.
Engine Air Cleaner/Filter
The engine air cleaner/filter is in the
engine compartment on the
passenger side of the vehicle, see
Engine Compartment
Overview
0242.
When to Inspect the Engine Air
Filter
For intervals on changing and
inspecting the engine air cleaner/
filter, see Maintenance
Schedule 0326.
How to Inspect the Engine Air
Filter
Do not start the engine or have the
engine running with the engine air
cleaner/filter housing open. Before
removing the engine air cleaner/
filter, make sure that the engine air
cleaner/filter housing and nearby
components are free of dirt and
debris. Remove the engine air
Page 248 of 376
Chevrolet VOLT Owner Manual (GMNA-Localizing-U.S./Canada/Mexico-
9807421) - 2017 - CRC - 11/18/15
Vehicle Care 247
cleaner/filter. Lightly tap and shake
the engine air cleaner/filter (away
from the vehicle), to release loose
dust and dirt. Inspect the engine air
cleaner/filter for damage, and
replace if damaged. Do not clean
the engine air cleaner/filter or
components with water or
compressed air.
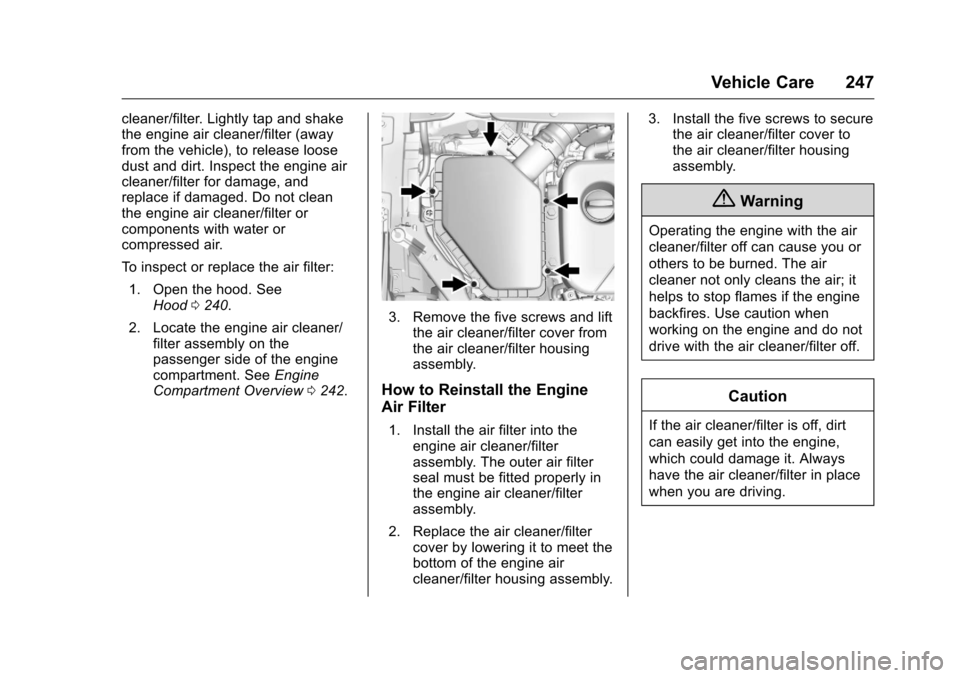
To inspect or replace the air filter:1. Open the hood. See Hood 0240.
2. Locate the engine air cleaner/ filter assembly on the
passenger side of the engine
compartment. See Engine
Compartment Overview 0242.
3. Remove the five screws and lift
the air cleaner/filter cover from
the air cleaner/filter housing
assembly.
How to Reinstall the Engine
Air Filter
1. Install the air filter into theengine air cleaner/filter
assembly. The outer air filter
seal must be fitted properly in
the engine air cleaner/filter
assembly.
2. Replace the air cleaner/filter cover by lowering it to meet the
bottom of the engine air
cleaner/filter housing assembly. 3. Install the five screws to secure
the air cleaner/filter cover to
the air cleaner/filter housing
assembly.
{Warning
Operating the engine with the air
cleaner/filter off can cause you or
others to be burned. The air
cleaner not only cleans the air; it
helps to stop flames if the engine
backfires. Use caution when
working on the engine and do not
drive with the air cleaner/filter off.
Caution
If the air cleaner/filter is off, dirt
can easily get into the engine,
which could damage it. Always
have the air cleaner/filter in place
when you are driving.
Page 327 of 376
Chevrolet VOLT Owner Manual (GMNA-Localizing-U.S./Canada/Mexico-
9807421) - 2017 - CRC - 11/18/15
326 Service and Maintenance
Maintenance
Schedule
Owner Checks and Services
At Each Fuel Stop
.Check the engine oil level. See
Engine Oil 0243.
Once a Month
. Check the tire inflation
pressures. See Tire
Pressure 0278.
. Inspect the tires for wear. See
Tire Inspection 0284.
. Check the windshield washer
fluid level. See Washer
Fluid 0253.
. Engine, power electronics, and
high voltage battery pack
coolant level checks. See
Cooling System (Engine) 0248
or Cooling System (High Voltage
Battery) 0248 orCooling
System (Power Electronics and
Charger Modules) 0249.
Engine Oil Change
Every 24 months or when the
CHANGE ENGINE OIL SOON
message displays, change the
engine oil and filter as soon as
possible, within the next 1 000 km/
600 mi. The engine oil and filter
must be changed at least once
every 24 months. After each oil and
filter change, the oil life system must
be reset. See Engine Oil Life
System 0245. More frequent
changes may be required when the
vehicle is exposed to a corrosive
environment, such as areas of high
humidity, along an ocean coast,
and/or areas that apply road salt
during winter.
Your trained dealer technician can
perform this work. If the engine oil
life system is reset accidentally,
service the vehicle within 5 000 km/
3,000 mi since the last service.
Reset the oil life system when the
oil is changed.
Tire Rotation and Required
Services Every 12 000 km/
7,500 mi
Rotate the tires, if recommended for
the vehicle, and perform the
following services. See Tire
Rotation 0284.
. Check engine oil level and oil
life percentage. If needed,
change engine oil and filter, and
reset oil life system. See Engine
Oil 0243 andEngine Oil Life
System 0245.
. Check engine coolant level. See
Engine Coolant 0250.
. Check windshield washer fluid
level. See Washer Fluid 0253.
. Visually inspect windshield wiper
blades for wear, cracking,
or contamination. See Exterior
Care 0314. Replace worn or
damaged wiper blades. See
Wiper Blade
Replacement 0258.
. Check tire inflation pressures.
See Tire Pressure 0278.