instrument panel CHRYSLER 200 2011 1.G User Guide
[x] Cancel search | Manufacturer: CHRYSLER, Model Year: 2011, Model line: 200, Model: CHRYSLER 200 2011 1.GPages: 76, PDF Size: 1.96 MB
Page 12 of 76
SUPPLEMENTAL RESTRAINT SYSTEM (SRS) — AIRBAGS• This vehicle has Advanced Front Airbags for both the driver and right front passenger as asupplement to the seat belt restraint system. The Advanced Front Airbags will not deploy in
every type of collision.
• Advanced Front Airbags are designed to provide additional protection by supplementing the seat belts in certain frontal collisions depending on the severity and type of collision. Advanced
Front Airbags are not expected to reduce the risk of injury in rear, side, or rollover collisions.
• This vehicle is equipped with Supplemental Side Airbag Inflatable Curtains to protect the driver, front and rear passengers sitting next to a window.
• This vehicle is equipped with Supplemental Seat-Mounted Side Airbags to provide enhanced protection to help protect an occupant during a side impact.
• If the Airbag Warning Light
is not on during starting, stays on, or turns on while driving,
have the vehicle serviced by an authorized service center immediately.
• Refer to the Owner's Manual on the DVD for further details regarding the Supplemental Restraint System (SRS).
WARNING!
• Relying on the airbags alone could lead to more severe injuries in a collision. The airbagswork with your seat belt to restrain you properly. In some collisions, the airbags won't
deploy at all. Always wear your seat belts even though you have airbags.
• Being too close to the steering wheel or instrument panel during Advanced Front Airbag deployment could cause serious injury, including death. Airbags need room to inflate. Sit
back, comfortably extending your arms to reach the steering wheel or instrument panel.
• Supplemental Side Airbag Inflatable Curtains and Supplemental Seat-Mounted Side Airbags need room to inflate. Do not lean against the door or window. Sit upright in the
center of the seat.
• Being too close to the Supplemental Side Airbag Inflatable Curtain and/or Seat-Mounted Side Airbag during deployment could cause you to be severely injured or
killed.
• Do not drive your vehicle after the airbags hav e deployed. If you are involved in another
collision, the airbags will not be in place to protect you.
• After any collision, the vehicle should be taken to an authorized dealer immediately.
CHILD RESTRAINTS
• Children 12 years and under should ride properly buckled up in a rear seat, if available.According to crash statistics, children are safer when properly restrained in the rear seats rather
than in the front.
• Every state in the United States and all Canadian provinces require that small children ride in proper restraint systems. This is the law, and you can be prosecuted for ignoring it.
Installing The LATCH-Compatible Child Restraint System
• Your vehicle's second row passenger seats are equipped with the child restraint anchoragesystem called LATCH, which stands for Lower Anchors and Tether for CHildren. GETTING STARTED
10
Page 19 of 76
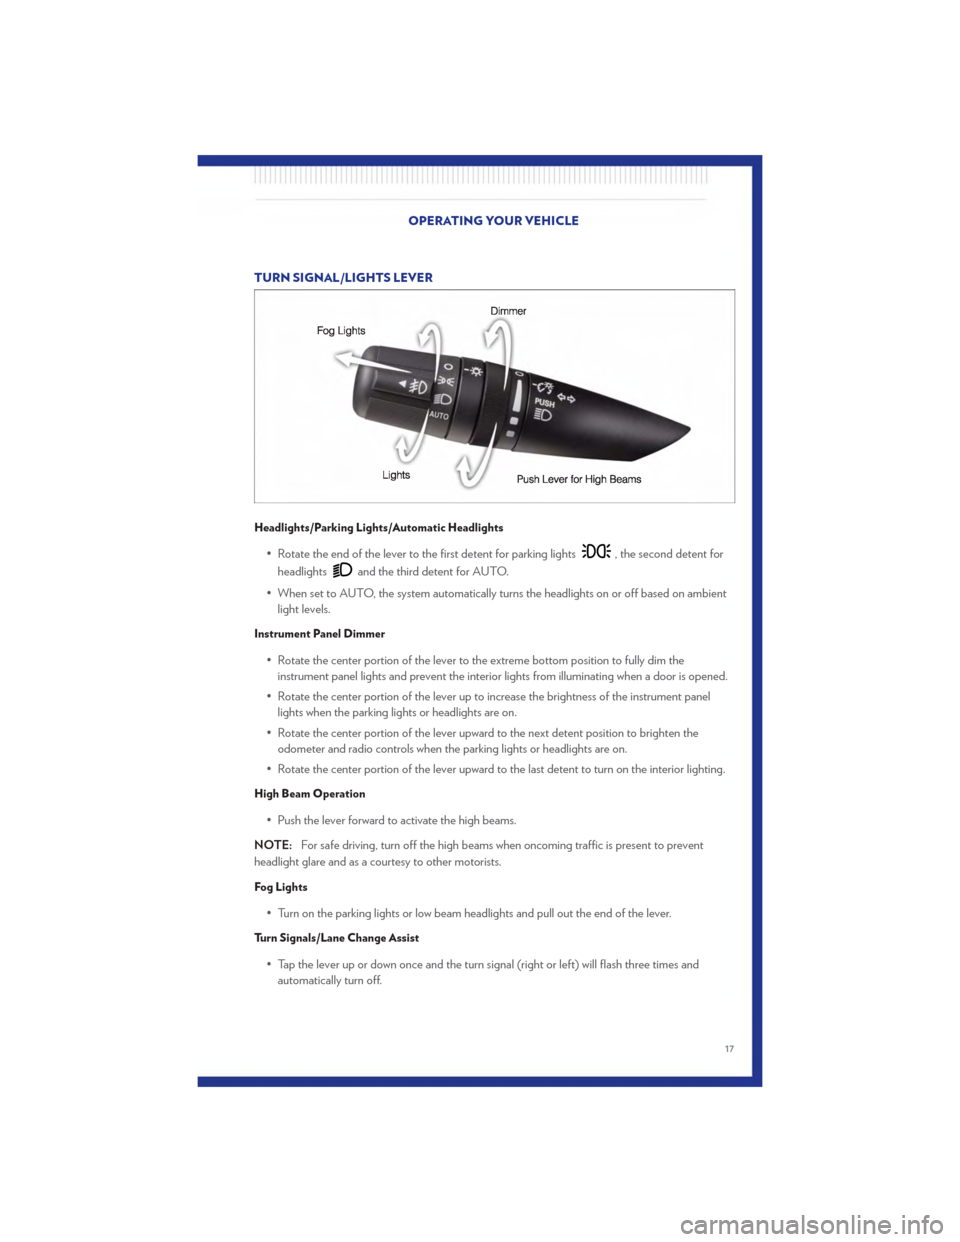
TURN SIGNAL/LIGHTS LEVER
Headlights/Parking Lights/Automatic Headlights
• Rotate the end of the lever to the first detent for parking lights, the second detent for
headlights
and the third detent for AUTO.
• When set to AUTO, the system automatically turns the headlights on or off based on ambient light levels.
Instrument Panel Dimmer
• Rotate the center portion of the lever to the extreme bottom position to fully dim theinstrument panel lights and prevent the interior lights from illuminating when a door is opened.
• Rotate the center portion of the lever up to increase the brightness of the instrument panel lights when the parking lights or headlights are on.
• Rotate the center portion of the lever upward to the next detent position to brighten the odometer and radio controls when the parking lights or headlights are on.
• Rotate the center portion of the lever upward to the last detent to turn on the interior lighting.
High Beam Operation
• Push the lever forward to activate the high beams.
NOTE: For safe driving, turn off the high beams when oncoming traffic is present to prevent
headlight glare and as a courtesy to other motorists.
Fog Lights
• Turn on the parking lights or low beam headlights and pull out the end of the lever.
Turn Signals/Lane Change Assist
• Tap the lever up or down once and the turn signal (right or left) will flash three times and automatically turn off.
OPERATING YOUR VEHICLE
17
Page 33 of 76
• Confirm your selection by touching the YES soft-key. The imported picture is now available inthe MANAGE MY PICTURES screen.
• In order to display the imported picture in the radio screen, touch the desired picture soft-key.
• Select this picture by pressing the PICTURE VIEW soft-key. A check mark indicates the currently used picture.
Cleaning Your Touch-Screen Radio
• Do not spray any liquid or caustic chemicals directly on the screen. Use a clean and dry microfiber lens cleaning cloth in order to clean the touch-screen.
• If necessary, use a lint-free cloth dampened with a cleaning solution such as isopropyl alcohol or an isopropyl alcohol and water solution ratio of 50:50. Be sure to follow the solvent
manufacturer's precautions and directions.
USB Port
• The USB port on the radio allows you to copy songs from a connected USB drive or supportedmedia device onto your Media Center hard drive.
• The USB port located in the instrument panel storage bin also offers the ability to play songs from connected USB drives, or supported media devices. Supported devices may be controlled
through the vehicles steering wheel or radio controls, or even with voice commands, and may
be charged through the USB port.
Navigation – Media Center 430N (Sales Code RHB) Only
• For software updates, visit http://www.garmin.com/chrysler website, or contact your authorizeddealer for the latest available software.
• The Navigation system receives GPS signals from satellites to display the position of your vehicle. You may experience interruptions or delays in receiving navigation information in
garages, tunnels, large cities, or other situations where the vehicle does not have a direct line of
sight to the sky.
• Voice Command is not available for navigation commands on this radio (although Voice Command functions for all other radio functions).
Map • Touch the NAV soft-key in the upper-right corner of your radio screen to access the Navigation system.
• Touch the View Mapsoft-key to display a map of your current position.
Finding a Point of Interest • Touch the NAV soft-key in the upper-right corner of your radio screen to access the Navigation system.
• Touch the Where To?soft-key to program a destination.
• Next touch one of the subcategories to search for your destination. Address, Points of Interest, Recently Found, Favorites and Intersection are a few of the options.
• After touching one of the subcategories, follow the on-screen steps to complete the process and be routed to your destination. ELECTRONICS
31
Page 38 of 76
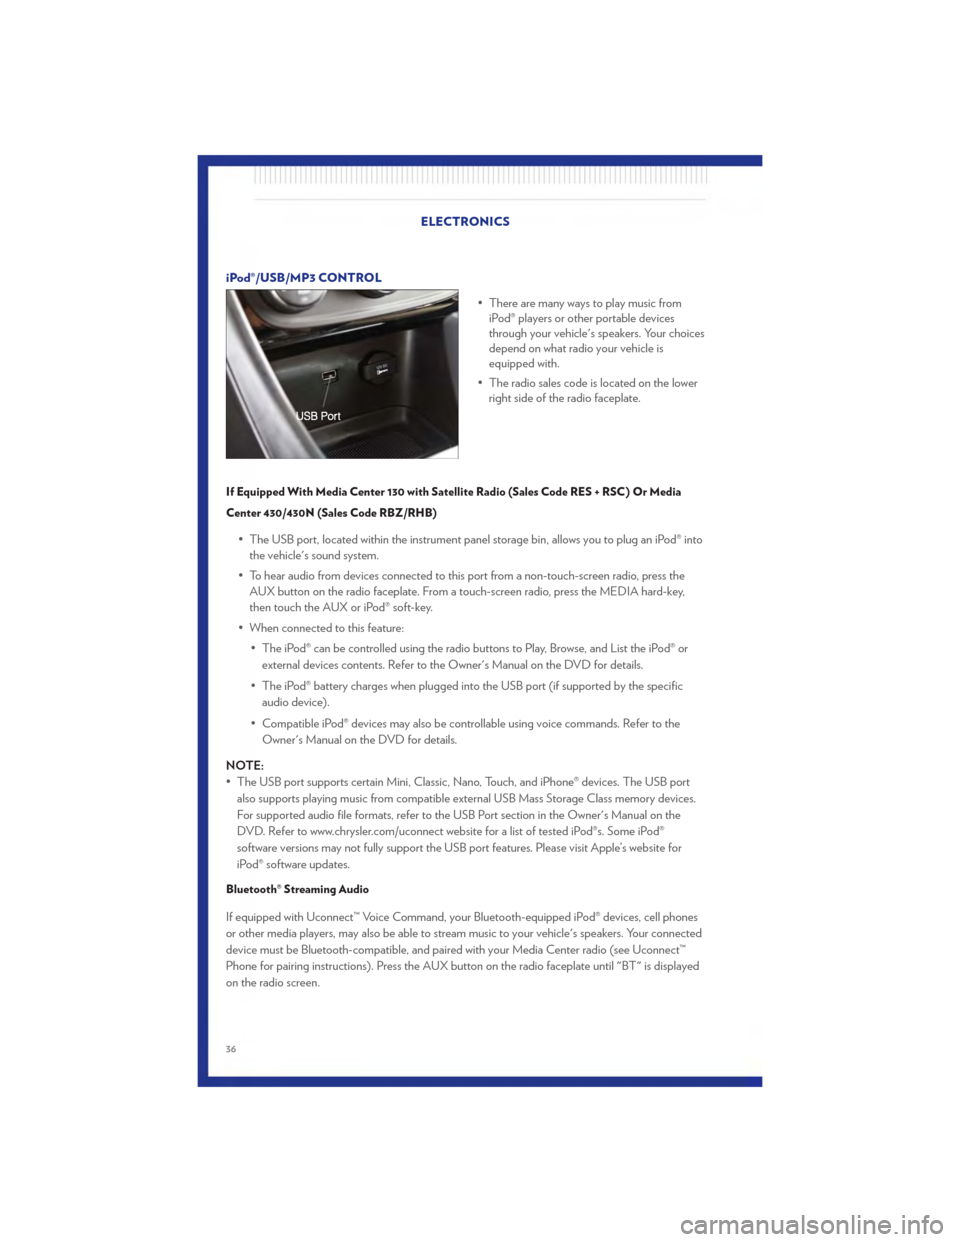
iPod®/USB/MP3 CONTROL• There are many ways to play music fromiPod® players or other portable devices
through your vehicle's speakers. Your choices
depend on what radio your vehicle is
equipped with.
• The radio sales code is located on the lower right side of the radio faceplate.
If Equipped With Media Center 130 with Satellite Radio (Sales Code RES + RSC) Or Media
Center 430/430N (Sales Code RBZ/RHB)
• The USB port, located within the instrument panel storage bin, allows you to plug an iPod® into
the vehicle's sound system.
• To hear audio from devices connected to this port from a non-touch-screen radio, press the AUX button on the radio faceplate. From a touch-screen radio, press the MEDIA hard-key,
then touch the AUX or iPod® soft-key.
• When connected to this feature: • The iPod® can be controlled using the radio buttons to Play, Browse, and List the iPod® orexternal devices contents. Refer to the Owner's Manual on the DVD for details.
• The iPod® battery charges when plugged into the USB port (if supported by the specific audio device).
• Compatible iPod® devices may also be controllable using voice commands. Refer to the Owner's Manual on the DVD for details.
NOTE:
• The USB port supports certain Mini, Classic, Nano, Touch, and iPhone® devices. The USB port also supports playing music from compatible external USB Mass Storage Class memory devices.
For supported audio file formats, refer to the USB Port section in the Owner's Manual on the
DVD. Refer to www.chrysler.com/uconnect website for a list of tested iPod®s. Some iPod®
software versions may not fully support the USB port features. Please visit Apple’s website for
iPod® software updates.
Bluetooth® Streaming Audio
If equipped with Uconnect™ Voice Command, your Bluetooth-equipped iPod® devices, cell phones
or other media players, may also be able to stream music to your vehicle's speakers. Your connected
device must be Bluetooth-compatible, and paired with your Media Center radio (see Uconnect™
Phone for pairing instructions). Press the AUX button on the radio faceplate until "BT" is displayed
on the radio screen.
ELECTRONICS
36
Page 43 of 76
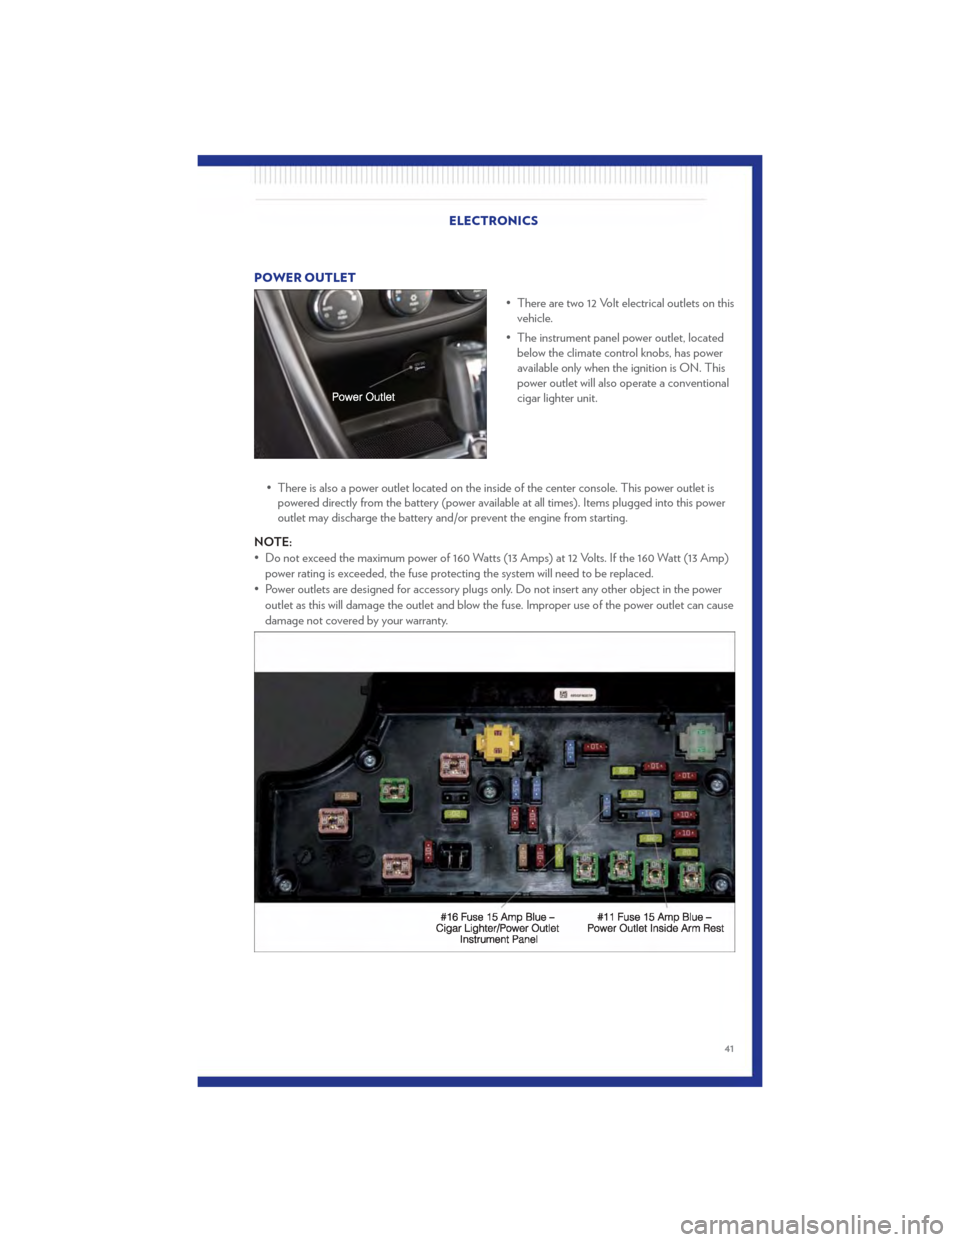
POWER OUTLET• There are two 12 Volt electrical outlets on thisvehicle.
• The instrument panel power outlet, located below the climate control knobs, has power
available only when the ignition is ON. This
power outlet will also operate a conventional
cigar lighter unit.
• There is also a power outlet located on the inside of the center console. This power outlet is powered directly from the battery (power available at all times). Items plugged into this power
outlet may discharge the battery and/or prevent the engine from starting.
NOTE:
• Do not exceed the maximum power of 160 Watts (13 Amps) at 12 Volts. If the 160 Watt (13 Amp) power rating is exceeded, the fuse protecting the system will need to be replaced.
• Power outlets are designed for accessory plugs only. Do not insert any other object in the power outlet as this will damage the outlet and blow the fuse. Improper use of the power outlet can cause
damage not covered by your warranty.
ELECTRONICS
41
Page 60 of 76
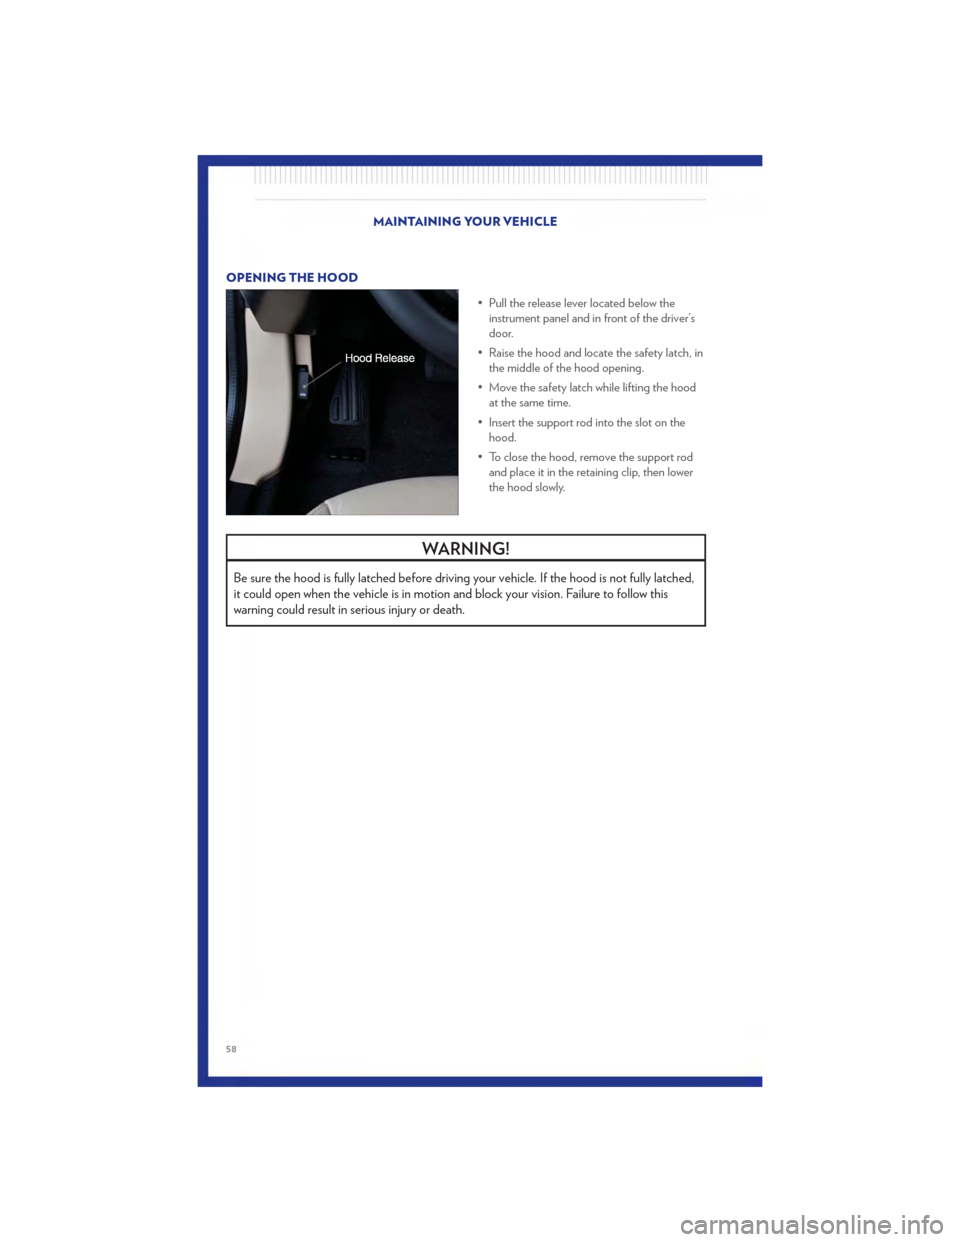
OPENING THE HOOD• Pull the release lever located below theinstrument panel and in front of the driver’s
door.
• Raise the hood and locate the safety latch, in the middle of the hood opening.
• Move the safety latch while lifting the hood at the same time.
• Insert the support rod into the slot on the hood.
• To close the hood, remove the support rod and place it in the retaining clip, then lower
the hood slowly.
WARNING!
Be sure the hood is fully latched before driving your vehicle. If the hood is not fully latched,
it could open when the vehicle is in motion and block your vision. Failure to follow this
warning could result in serious injury or death.
MAINTAINING YOUR VEHICLE
58