lock CHRYSLER 200 2014 1.G Owner's Manual
[x] Cancel search | Manufacturer: CHRYSLER, Model Year: 2014, Model line: 200, Model: CHRYSLER 200 2014 1.GPages: 116, PDF Size: 3.15 MB
Page 32 of 116
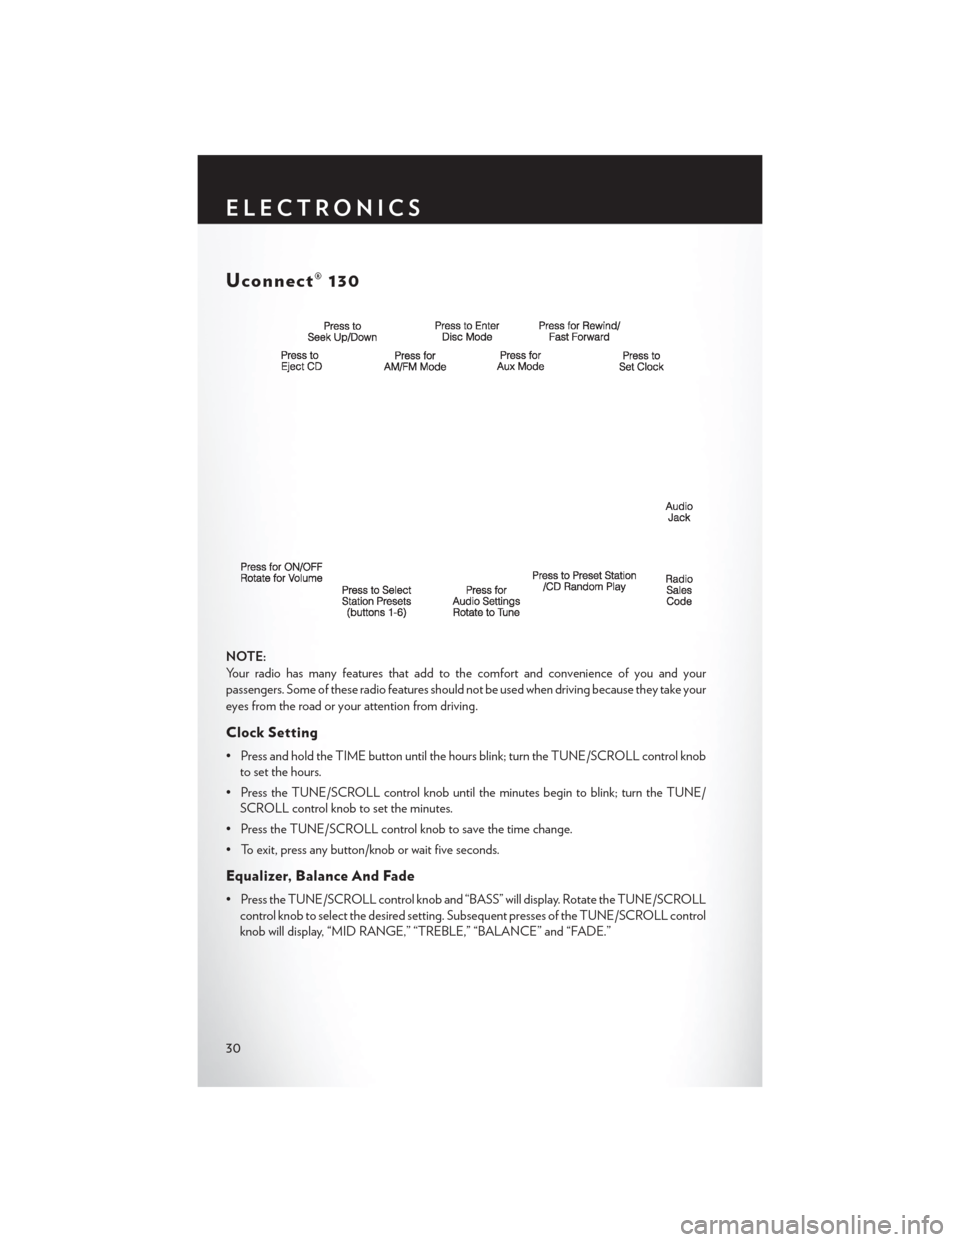
Uconnect® 130
NOTE:
Your radio has many features that add to the comfort and convenience of you and your
passengers. Some of these radio features should not be used when driving because they take your
eyes from the road or your attention from driving.
Clock Setting
• Press and hold the TIME button until the hours blink; turn the TUNE/SCROLL control knobto set the hours.
• Press the TUNE/SCROLL control knob until the minutes begin to blink; turn the TUNE/ SCROLL control knob to set the minutes.
• Press the TUNE/SCROLL control knob to save the time change.
• To exit, press any button/knob or wait five seconds.
Equalizer, Balance And Fade
• Press the TUNE/SCROLL control knob and “BASS” will display. Rotate the TUNE/SCROLL control knob to select the desired setting. Subsequent presses of the TUNE/SCROLL control
knob will display, “MID RANGE,” “TREBLE,” “BALANCE” and “FADE.”
ELECTRONICS
30
Page 34 of 116
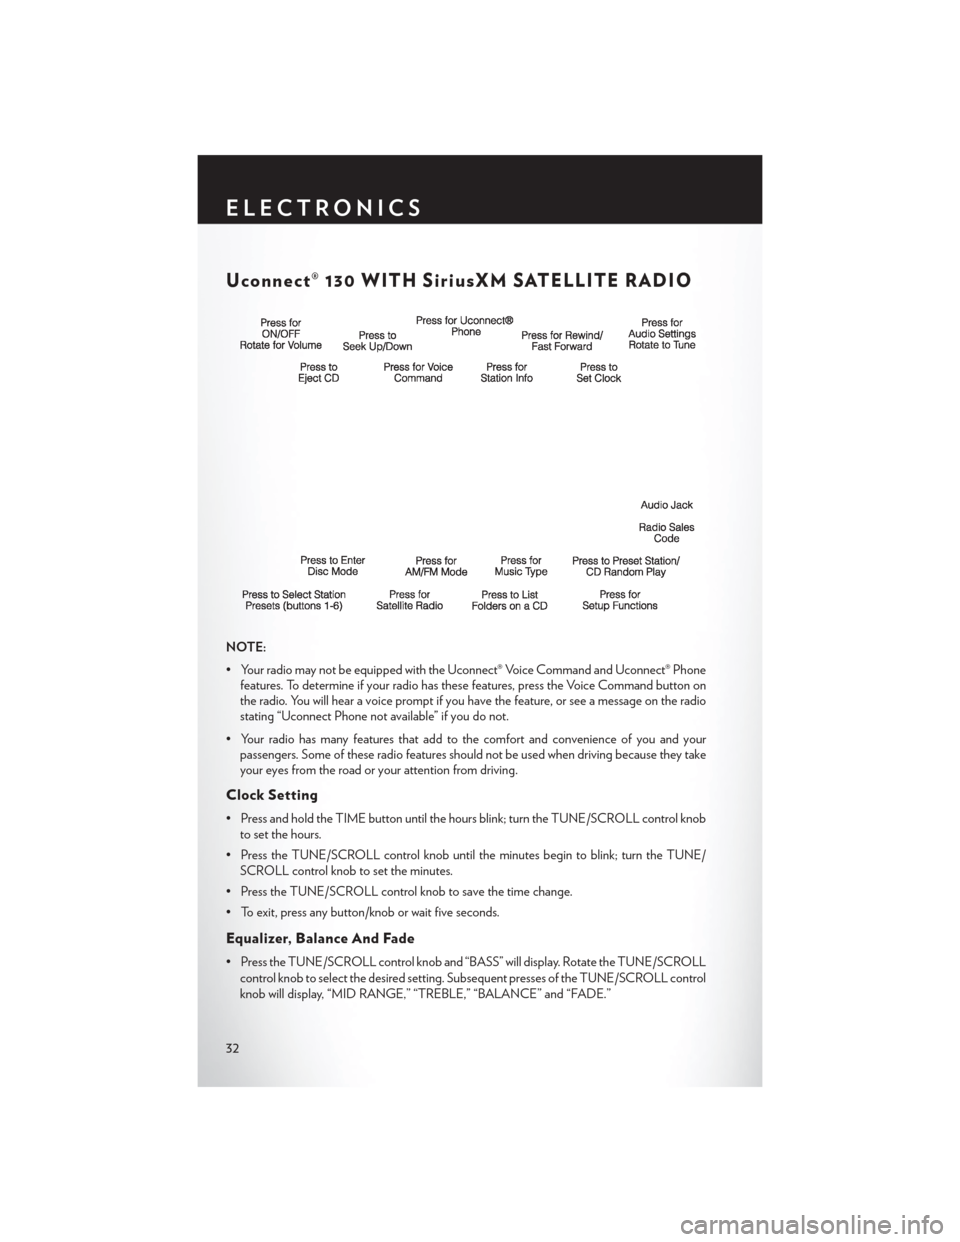
Uconnect® 130 WITH SiriusXM SATELLITE RADIO
NOTE:
• Your radio may not be equipped with the Uconnect® Voice Command and Uconnect® Phonefeatures. To determine if your radio has these features, press the Voice Command button on
the radio. You will hear a voice prompt if you have the feature, or see a message on the radio
stating “Uconnect Phone not available” if you do not.
• Your radio has many features that add to the comfort and convenience of you and your passengers. Some of these radio features should not be used when driving because they take
your eyes from the road or your attention from driving.
Clock Setting
• Press and hold the TIME button until the hours blink; turn the TUNE/SCROLL control knob
to set the hours.
• Press the TUNE/SCROLL control knob until the minutes begin to blink; turn the TUNE/ SCROLL control knob to set the minutes.
• Press the TUNE/SCROLL control knob to save the time change.
• To exit, press any button/knob or wait five seconds.
Equalizer, Balance And Fade
• Press the TUNE/SCROLL control knob and “BASS” will display. Rotate the TUNE/SCROLL control knob to select the desired setting. Subsequent presses of the TUNE/SCROLL control
knob will display, “MID RANGE,” “TREBLE,” “BALANCE” and “FADE.”
ELECTRONICS
32
Page 37 of 116
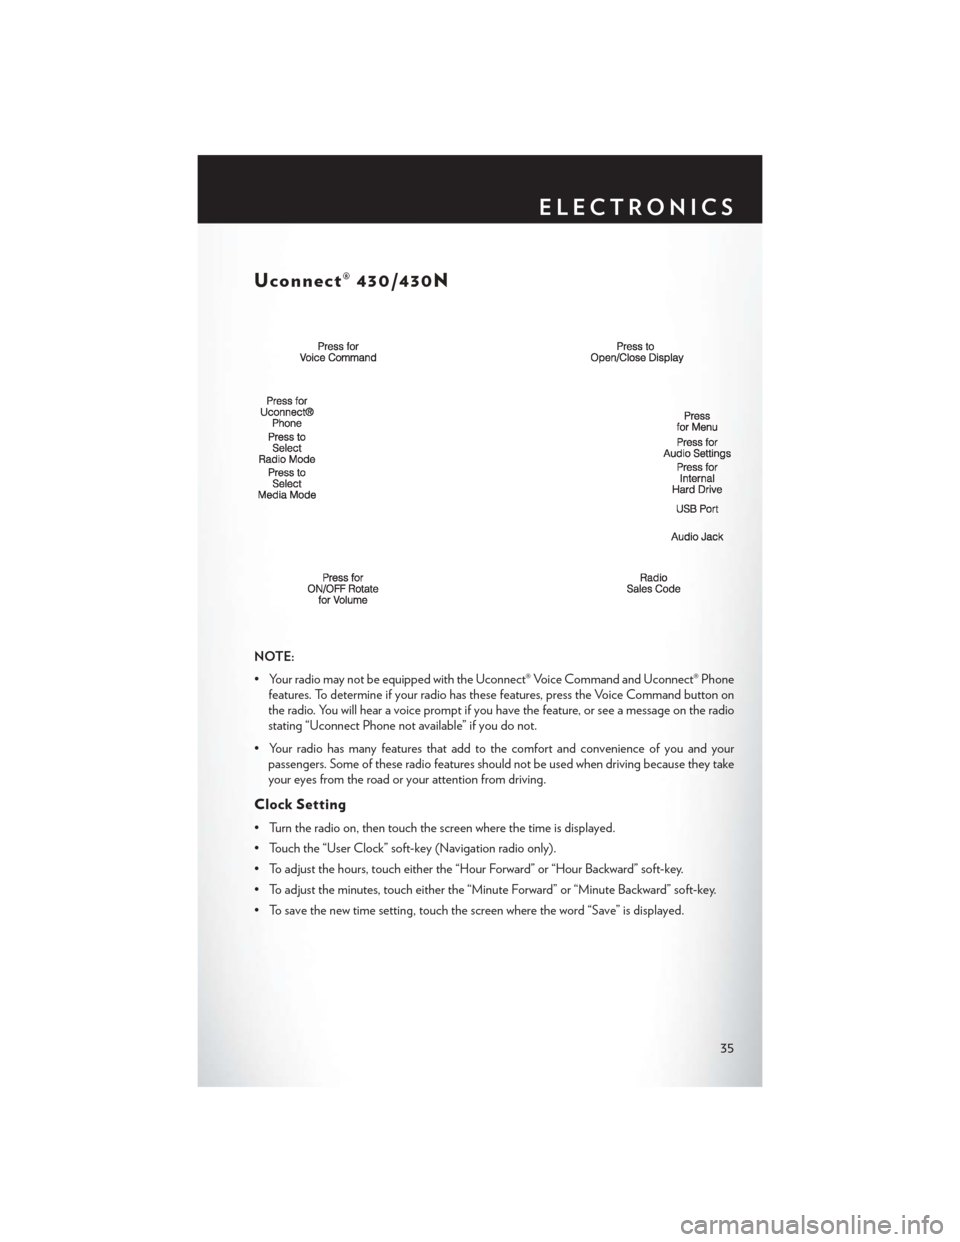
Uconnect® 430/430N
NOTE:
• Your radio may not be equipped with the Uconnect® Voice Command and Uconnect® Phonefeatures. To determine if your radio has these features, press the Voice Command button on
the radio. You will hear a voice prompt if you have the feature, or see a message on the radio
stating “Uconnect Phone not available” if you do not.
• Your radio has many features that add to the comfort and convenience of you and your passengers. Some of these radio features should not be used when driving because they take
your eyes from the road or your attention from driving.
Clock Setting
• Turn the radio on, then touch the screen where the time is displayed.
• Touch the “User Clock” soft-key (Navigation radio only).
• To adjust the hours, touch either the “Hour Forward” or “Hour Backward” soft-key.
• To adjust the minutes, touch either the “Minute Forward” or “Minute Backward” soft-key.
• To save the new time setting, touch the screen where the word “Save” is displayed.
ELECTRONICS
35
Page 46 of 116
Acquiring Satellites
• The GPS Satellite strength bars indicate the strength of your satellite reception.
• Acquiring satellite signals can take a few minutes. When at least one of the bars is green, yourdevice has acquired satellite signals.
• You may experience delays receiving satellite signals when in areas with an obstructed view to the sky, such as garages, tunnels, or large cities with tall buildings.
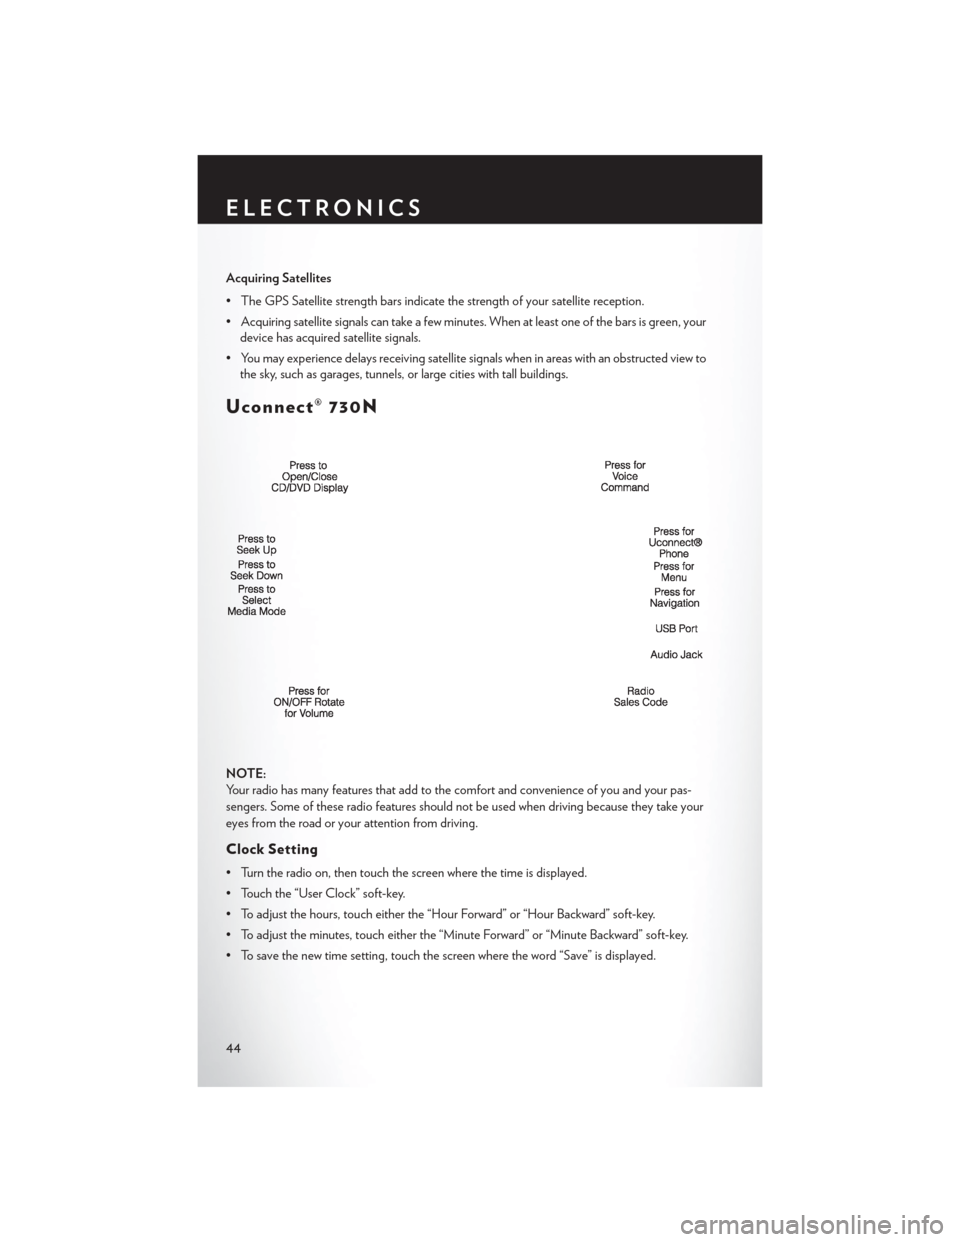
Uconnect® 730N
NOTE:
Your radio has many features that add to the comfort and convenience of you and your pas-
sengers. Some of these radio features should not be used when driving because they take your
eyes from the road or your attention from driving.
Clock Setting
• Turn the radio on, then touch the screen where the time is displayed.
• Touch the “User Clock” soft-key.
• To adjust the hours, touch either the “Hour Forward” or “Hour Backward” soft-key.
• To adjust the minutes, touch either the “Minute Forward” or “Minute Backward” soft-key.
• To save the new time setting, touch the screen where the word “Save” is displayed.
ELECTRONICS
44
Page 57 of 116
SiriusXM SATELLITE RADIO/TRAVEL LINK
• SiriusXM Travel Link requires a subscription, sold separately after the 1 year trial subscriptionincluded with your vehicle purchase.
• SiriusXM Travel Link is only available in the United States.
• The following describes features that are available when in SiriusXM Satellite Radio mode.
• To access SiriusXM Satellite Radio, press the RADIO/MEDIA or RADIO hard-key, then touch the “SAT” soft-key tab.
Info
• Touch the “i” soft-key to view detailed information about the current Sirius XM Satellite channel.
SiriusXM Parental Controls
• SiriusXM offers the option to permanently block selected channels. Call 1-888-539-7474 and request the Family Package.
• Uconnect® 430/430N and 730N: Press the “MENU” hard-key while in SiriusXM Satellite
Radio Mode, then touch the “Channel Lock” to enable and/or disable desired channels. The
SEEK and SCAN function will then only display channels without Channel lock.
Search/Browse
• Touch the “magnifying glass” soft-key to search/browse the SiriusXM channel listing by Favorites and Categories such as Song, Artist and Channel Name. The Search/Browse also
allows you to manage your Favorites.
ELECTRONICS
55
Page 61 of 116
STEERING WHEEL AUDIO CONTROLS
•The steering wheel audio controls are located
on the rear surface of the steering wheel.
Right Switch
• Press the switch up or down to increase or decrease the volume.
• Press the button in the center to change modes AM/FM/CD/SAT.
Left Switch
• Press the switch up or down to search for thenext listenable station or select the next or
previous CD track.
• Press the button in the center to select the next preset station (radio) or to change CDs if equipped with a CD Changer.
SETTING THE ANALOG CLOCK
To set the analog clock at the top center of the instrument panel, press and hold the button until
the setting is correct.
ELECTRONICS
59
Page 69 of 116
ELECTRONIC VEHICLE INFORMATION
CENTER (EVIC)
• The EVIC features a driver interactive dis-play that is located in the instrument cluster.
Pressing the controls on the left side of the
steering wheel allows the driver to select
vehicle information and Personal Settings.
For additional information, refer to “Pro-
grammable Features” located in this guide.
• Press and release the MENU button to advance the display to Trip Functions or
Personal settings or to return to the default
System status display.
• Press and release the DOWN
button
to advance the display through the various Trip Functions or Personal Settings.
• Press and release the COMPASS
button to display the compass heading and the outside
temperature.
• Press and release the SELECT
button to accept a selection. The SELECT Button also
resets various Trip Functions.
Compass Calibration
• This compass is self-calibrating, which eliminates the need to set the compass manually. When the vehicle is new, the compass may appear erratic and the EVIC will display “CAL” until
the compass is calibrated.
• You may also calibrate the compass by completing one or more 360 degree turns (in an area free from large metal or metallic objects) until the “CAL” message displayed in the EVIC
turns off. The compass will now function normally.
PROGRAMMABLE FEATURES
Electronic Vehicle Information Center (EVIC)
• The EVIC can be used to program the following Personal Settings. Press and release the
MENU button until Personal Settings displays, then press the DOWN button
to scroll
through the settings. Press the SELECT button
to change the setting.
• Language • Key Off Power Delay
• Auto Unlock On Exit • Illuminated Approach
• RKE Unlock • Hill Start Assist (HSA)
• Sound Horn With Lock • Display Units In
• Flash Lamps With Lock • Calibrate Compass
• Headlamp Off Delay • Compass Variance
• Headlights With Wipers (Available with Auto Headlights Only)
ELECTRONICS
67
Page 70 of 116
Key Fob Programmable Features
• The following features may also be programmed by using the Key Fob transmitter or theignition switch and driver's door lock switch.
NOTE:
Pressing the LOCK button while you are inside the vehicle will activate the Vehicle Security
Alarm. Opening a door with the Vehicle Security Alarm activated will cause the alarm to sound.
Press the UNLOCK button to deactivate the Vehicle Security Alarm.
Unlock On First Press
• To unlock either the driver's side, or all doors, on the first press of the UNLOCK button: • Press and hold the LOCK button for at least four seconds, but no longer than 10 seconds.
Then, press and hold the UNLOCK button while still holding the LOCK button.
• Release both buttons at the same time.
Auto Unlock Doors On Exit
• To have all of the vehicle doors unlock when any door is opened: • Enter your vehicle and close all the doors, and fasten your seat belt.
• Cycle the ignition switch between the LOCK and ON position four times, ending in the
LOCK position (do not start the engine).
• Press the power door UNLOCK switch to unlock the doors. A single chime will indicate that programming is complete.
Sound Horn With Lock
• To turn the horn chirp on or off when the doors are locked: • Press the LOCK button for at least four seconds, but no longer than 10 seconds. Then, press
the PANIC button while still holding the LOCK button.
• Release both buttons at the same time.
Flashing Lights With Lock
• The turn signal lights flashing, when the doors are locked or unlocked, feature can be turned on or off. To turn this feature on or off:• Press and hold the UNLOCK button for at least four seconds, but no longer than 10 sec-
onds. Then, press and hold the LOCK button while still holding the UNLOCK button.
• Release both buttons at the same time.
ELECTRONICS
68
Page 73 of 116
Programming A Non-Rolling Code
NOTE:
For programming Garage Door Openers manufactured before 1995.
1. Turn the ignition switch to the ON/RUN position.
2. Place the hand-held transmitter 1 to 3 inches (3 to 8 cm) away from the HomeLink® button youwish to program while keeping the HomeLink® indicator light in view.
3. Simultaneously press and hold both the HomeLink® button you want to program and the hand-held transmitter button.
4.
Continue to hold both buttons and observe the indicator light. The HomeLink® indicator will
flash slowly and then rapidly after HomeLink® has received the frequency signal from the
hand-held transmitter. Release both buttons after the indicator light changes from slow to rapid.
5. Press and hold the programmed HomeLink® button and observe the indicator light. If the indicator light stays on constantly, programming is complete and the garage door (or device)
should activate when the HomeLink® button is pressed.
6. To program the two remaining HomeLink® buttons, repeat each step for each remaining button. DO NOT erase the channels.
Using HomeLink®
• To operate, press and release the programmed HomeLink® button. Activation will now occurfor the programmed device (e.g., garage door opener, gate operator, security system, entry
door lock, home/office lighting, etc.,). The hand-held transmitter of the device may also be
used at any time.
WARNING!
• Your motorized door or gate will open and close while you are programming the universal
transceiver. Do not program the transceiver if people or pets are in the path of the door or
gate.
• Do not run your vehicle in a closed garage or confined area while programming the
transceiver. Exhaust gas from your vehicle contains Carbon Monoxide (CO) which is
odorless and colorless. Carbon Monoxide is poisonous when inhaled and can cause you
and others to be severely injured or killed.
ELECTRONICS
71
Page 79 of 116
- Engine Temperature Warning Light
• This light warns of an overheated engine condition.
• If the light turns on or flashes continuously while driving, safely pull over and stop the vehicle.If the A/C system is on, turn it off. Also, shift the transmission into NEUTRAL and idle the
vehicle. If the temperature reading does not return to normal, turn the engine off immediately.
• We recommend that you do not operate the vehicle or engine damage will occur. Have the vehicle serviced immediately.
WARNING!
A hot engine cooling system is dangerous. You or others could be badly burned by steam or
boiling coolant.
BRAKE- Brake Warning Light
• The Brake Warning light illuminates when there is either a system malfunction or the parkingbrake is applied. If the light is on and the parking brake is not applied, it indicates a possible
brake hydraulic malfunction, brake booster problem or an Anti-Lock Brake System problem.
• Please have your vehicle serviced immediately.
WARNING!
Driving a vehicle with the red brake light on is dangerous. Part of the brake system may have
failed. It will take longer to stop the vehicle. You could have a collision. Have the vehicle
checked immediately.
- Malfunction Indicator Light (MIL)
• Certain conditions, such as a loose or missing gas cap, poor fuel quality, etc., may illuminate the MIL after engine start. The vehicle should be serviced if the light stays on through several
typical driving cycles. In most situations, the vehicle will drive normally and not require towing.
• If the MIL flashes when the engine is running, serious conditions may exist that could lead to immediate loss of power or severe catalytic converter damage. We recommend you do not
operate the vehicle. Have the vehicle serviced immediately.
- Charging System Light
• This light shows the status of the electrical charging system. If the charging system lightremains on, it means that the vehicle is experiencing a problem with the charging system.
• We recommend you do not continue driving if the charging system light is on. Have the vehicle serviced immediately.
WHAT TO DO IN EMERGENCIES
77