steering CHRYSLER 200 2014 1.G Owner's Manual
[x] Cancel search | Manufacturer: CHRYSLER, Model Year: 2014, Model line: 200, Model: CHRYSLER 200 2014 1.GPages: 116, PDF Size: 3.15 MB
Page 92 of 116
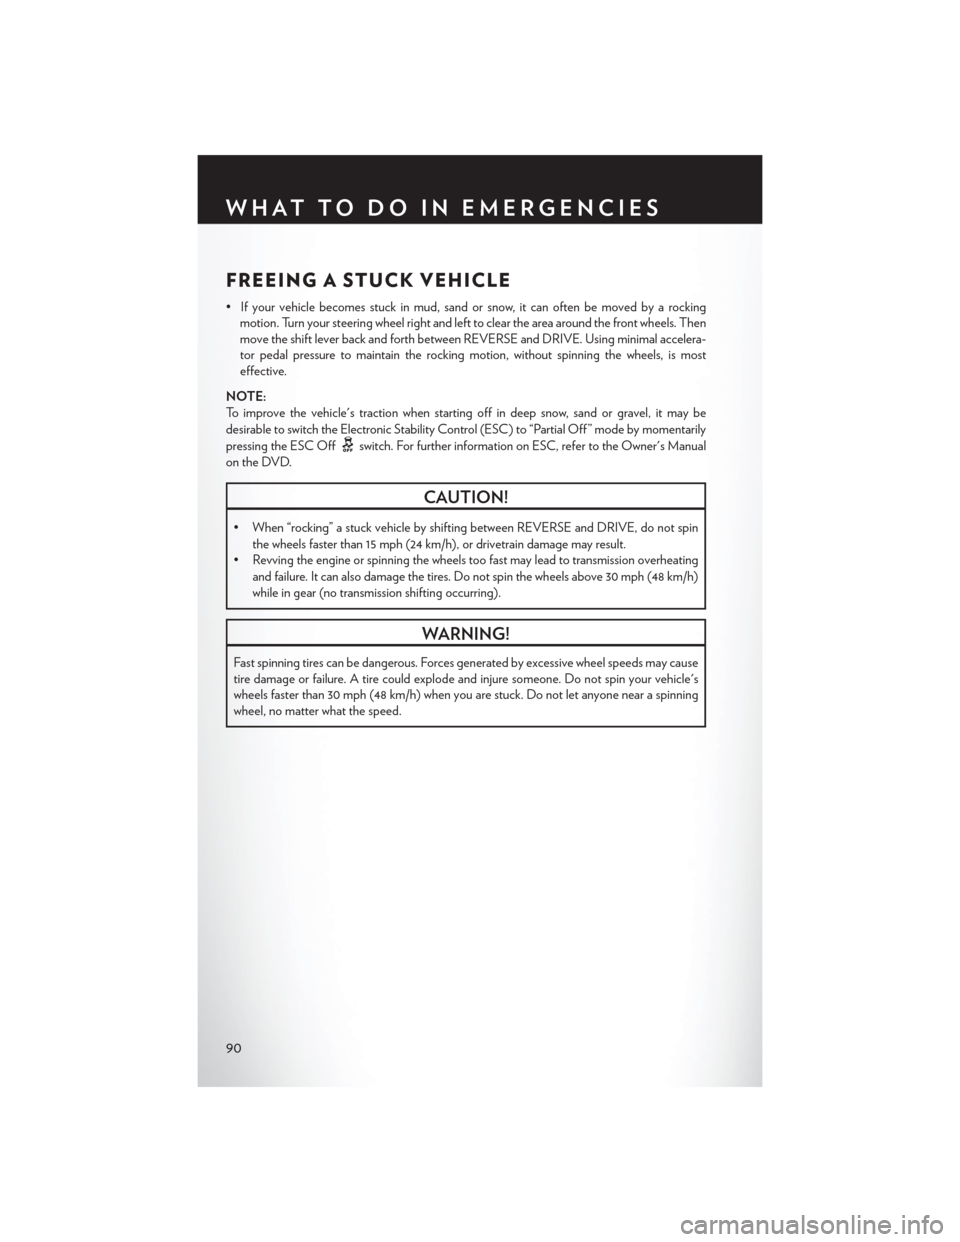
FREEING A STUCK VEHICLE
• If your vehicle becomes stuck in mud, sand or snow, it can often be moved by a rockingmotion. Turn your steering wheel right and left to clear the area around the front wheels. Then
move the shift lever back and forth between REVERSE and DRIVE. Using minimal accelera-
tor pedal pressure to maintain the rocking motion, without spinning the wheels, is most
effective.
NOTE:
To improve the vehicle's traction when starting off in deep snow, sand or gravel, it may be
desirable to switch the Electronic Stability Control (ESC) to “Partial Off ” mode by momentarily
pressing the ESC Off
switch. For further information on ESC, refer to the Owner's Manual
on the DVD.
CAUTION!
• When “rocking” a stuck vehicle by shifting between REVERSE and DRIVE, do not spin the wheels faster than 15 mph (24 km/h), or drivetrain damage may result.
• Revving the engine or spinning the wheels too fast may lead to transmission overheating
and failure. It can also damage the tires. Do not spin the wheels above 30 mph (48 km/h)
while in gear (no transmission shifting occurring).
WARNING!
Fast spinning tires can be dangerous. Forces generated by excessive wheel speeds may cause
tire damage or failure. A tire could explode and injure someone. Do not spin your vehicle's
wheels faster than 30 mph (48 km/h) when you are stuck. Do not let anyone near a spinning
wheel, no matter what the speed.
WHAT TO DO IN EMERGENCIES
90
Page 98 of 116
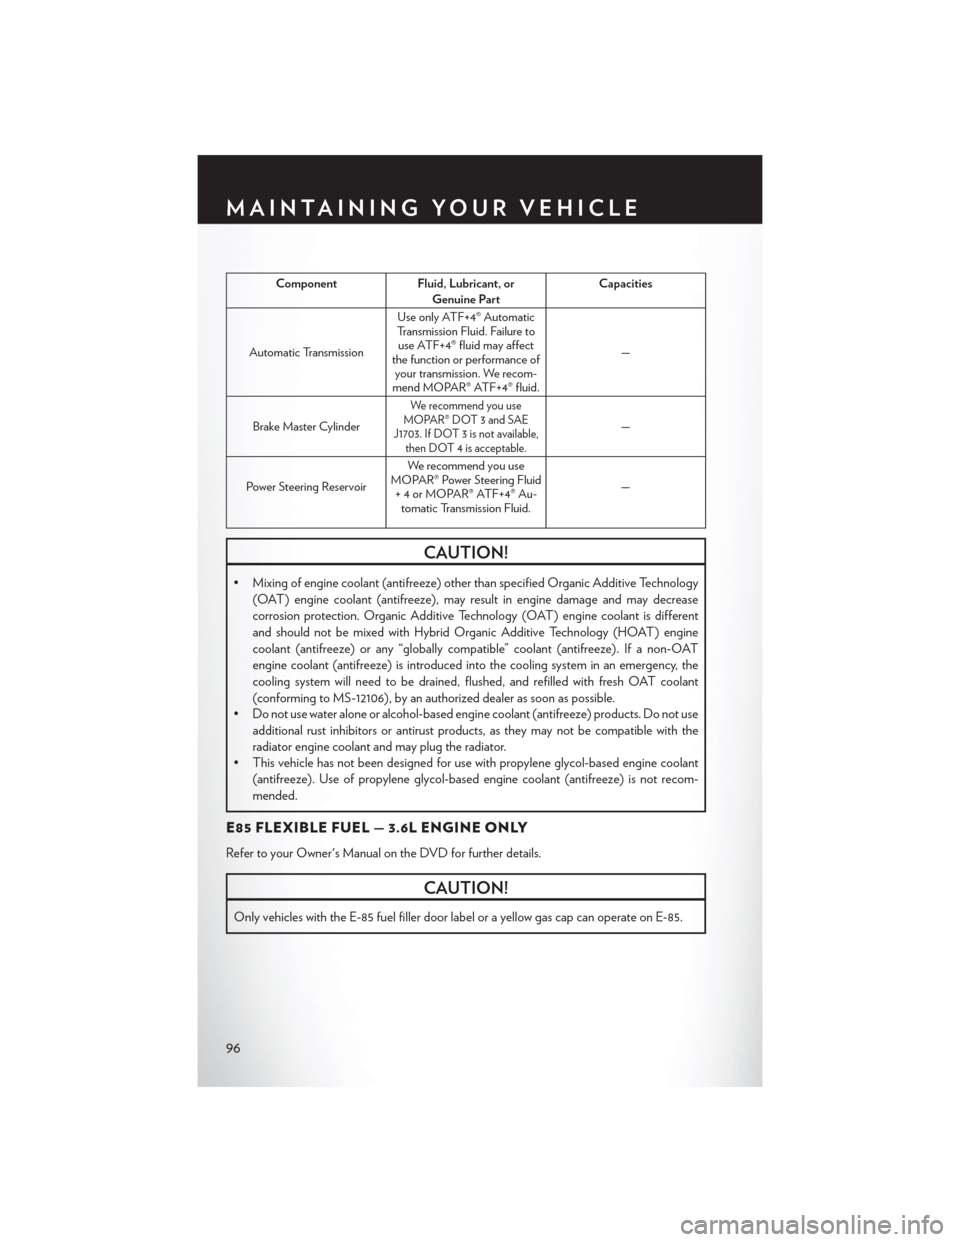
ComponentFluid, Lubricant, or
Genuine Part Capacities
Automatic Transmission Use only ATF+4® Automatic
Transmission Fluid. Failure to use ATF+4® fluid may affect
the function or performance of your transmission. We recom-
mend MOPAR® ATF+4® fluid. —
Brake Master Cylinder
We recommend you use
MOPAR® DOT 3 and SAE
J1703. If DOT 3 is not available, then DOT 4 is acceptable.
—
Power Steering Reservoir We recommend you use
MOPAR® Power Steering Fluid + 4 or MOPAR® ATF+4® Au- tomatic Transmission Fluid. —
CAUTION!
• Mixing of engine coolant (antifreeze) other than specified Organic Additive Technology
(OAT) engine coolant (antifreeze), may result in engine damage and may decrease
corrosion protection. Organic Additive Technology (OAT) engine coolant is different
and should not be mixed with Hybrid Organic Additive Technology (HOAT) engine
coolant (antifreeze) or any “globally compatible” coolant (antifreeze). If a non-OAT
engine coolant (antifreeze) is introduced into the cooling system in an emergency, the
cooling system will need to be drained, flushed, and refilled with fresh OAT coolant
(conforming to MS-12106), by an authorized dealer as soon as possible.
• Do not use water alone or alcohol-based engine coolant (antifreeze) products. Do not use
additional rust inhibitors or antirust products, as they may not be compatible with the
radiator engine coolant and may plug the radiator.
• This vehicle has not been designed for use with propylene glycol-based engine coolant
(antifreeze). Use of propylene glycol-based engine coolant (antifreeze) is not recom-
mended.
E85 FLEXIBLE FUEL — 3.6L ENGINE ONLY
Refer to your Owner's Manual on the DVD for further details.
CAUTION!
Only vehicles with the E-85 fuel filler door label or a yellow gas cap can operate on E-85.
MAINTAINING YOUR VEHICLE
96
Page 99 of 116
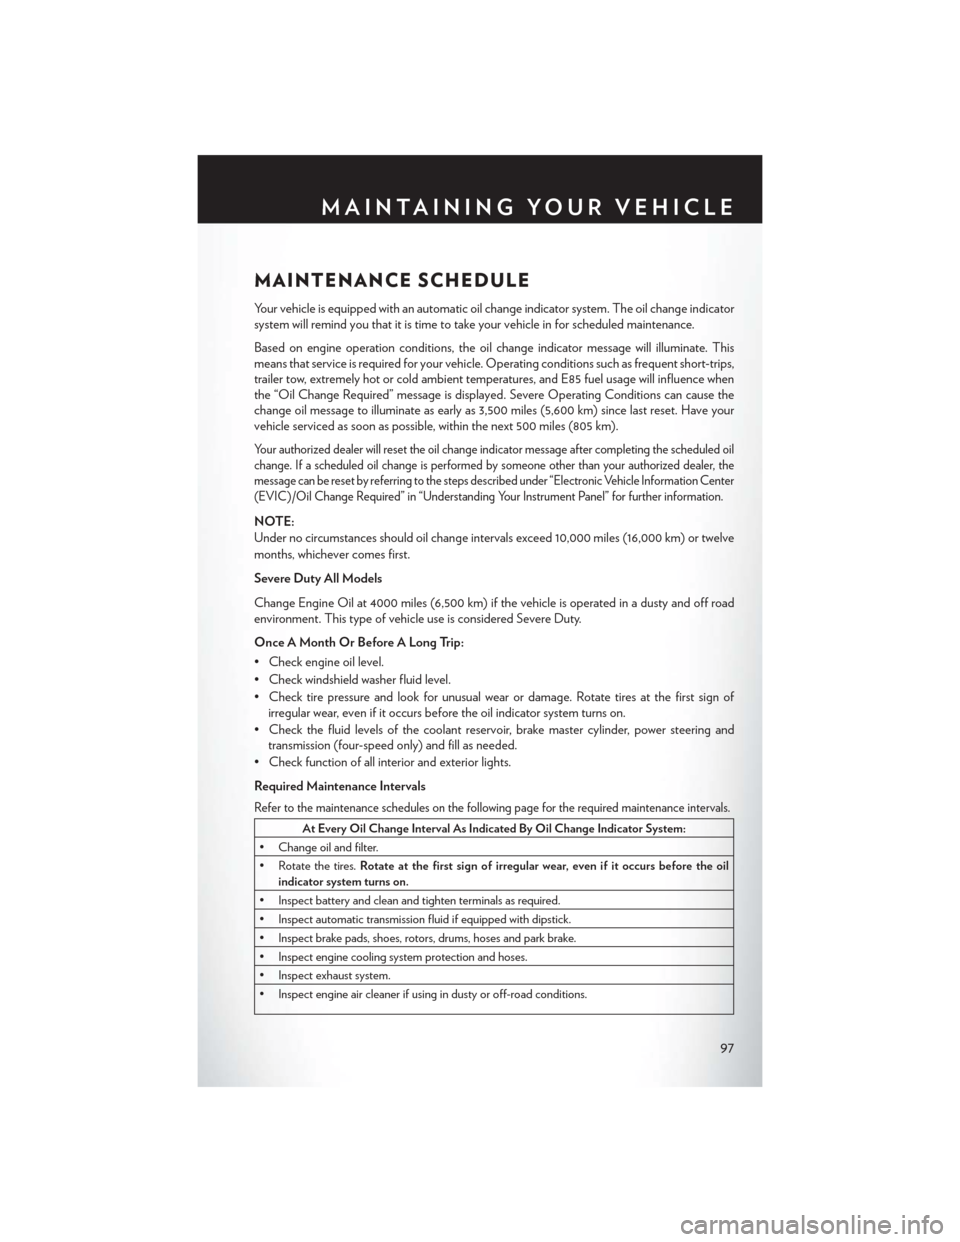
MAINTENANCE SCHEDULE
Your vehicle is equipped with an automatic oil change indicator system. The oil change indicator
system will remind you that it is time to take your vehicle in for scheduled maintenance.
Based on engine operation conditions, the oil change indicator message will illuminate. This
means that service is required for your vehicle. Operating conditions such as frequent short-trips,
trailer tow, extremely hot or cold ambient temperatures, and E85 fuel usage will influence when
the “Oil Change Required” message is displayed. Severe Operating Conditions can cause the
change oil message to illuminate as early as 3,500 miles (5,600 km) since last reset. Have your
vehicle serviced as soon as possible, within the next 500 miles (805 km).
Your authorized dealer will reset the oil change indicator message after completing the scheduled oil
change. If a scheduled oil change is performed by someone other than your authorized dealer, the
message can be reset by referring to the steps described under “Electronic Vehicle Information Center
(EVIC)/Oil Change Required” in “Understanding Your Instrument Panel” for further information.
NOTE:
Under no circumstances should oil change intervals exceed 10,000 miles (16,000 km) or twelve
months, whichever comes first.
Severe Duty All Models
Change Engine Oil at 4000 miles (6,500 km) if the vehicle is operated in a dusty and off road
environment. This type of vehicle use is considered Severe Duty.
Once A Month Or Before A Long Trip:
• Check engine oil level.
• Check windshield washer fluid level.
• Check tire pressure and look for unusual wear or damage. Rotate tires at the first sign ofirregular wear, even if it occurs before the oil indicator system turns on.
• Check the fluid levels of the coolant reservoir, brake master cylinder, power steering and transmission (four-speed only) and fill as needed.
• Check function of all interior and exterior lights.
Required Maintenance Intervals
Refer to the maintenance schedules on the following page for the required maintenance intervals.
At Every Oil Change Interval As Indicated By Oil Change Indicator System:
• Change oil and filter.
• Rotate the tires. Rotate at the first sign of irregular wear, even if it occurs before the oil
indicator system turns on.
• Inspect battery and clean and tighten terminals as required.
• Inspect automatic transmission fluid if equipped with dipstick.
• Inspect brake pads, shoes, rotors, drums, hoses and park brake.
• Inspect engine cooling system protection and hoses.
• Inspect exhaust system.
• Inspect engine air cleaner if using in dusty or off-road conditions.
MAINTAINING YOUR VEHICLE
97
Page 104 of 116
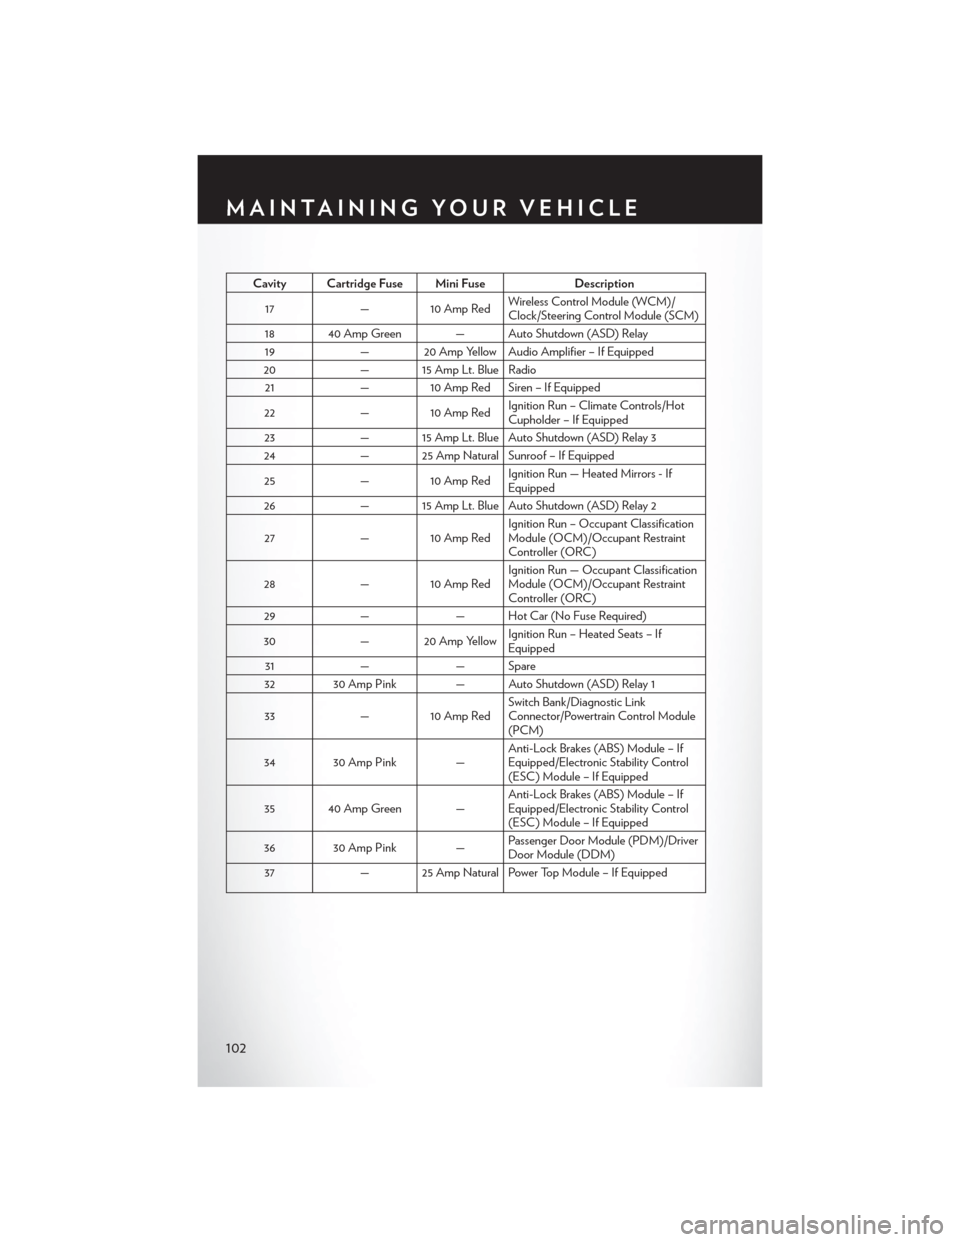
Cavity Cartridge Fuse Mini FuseDescription
17 — 10 Amp Red Wireless Control Module (WCM)/
Clock/Steering Control Module (SCM)
18 40 Amp Green — Auto Shutdown (ASD) Relay 19 — 20 Amp Yellow Audio Amplifier – If Equipped
20 — 15 Amp Lt. Blue Radio
21 — 10 Amp Red Siren – If Equipped
22 — 10 Amp Red Ignition Run – Climate Controls/Hot
Cupholder – If Equipped
23 — 15 Amp Lt. Blue Auto Shutdown (ASD) Relay 3
24 — 25 Amp Natural Sunroof – If Equipped
25 — 10 Amp Red Ignition Run — Heated Mirrors - If
Equipped
26 — 15 Amp Lt. Blue Auto Shutdown (ASD) Relay 2
27 — 10 Amp Red Ignition Run – Occupant Classification
Module (OCM)/Occupant Restraint
Controller (ORC)
28 — 10 Amp Red Ignition Run — Occupant Classification
Module (OCM)/Occupant Restraint
Controller (ORC)
29 —— Hot Car (No Fuse Required)
30 — 20 Amp Yellow Ignition Run – Heated Seats – If
Equipped
31 — — Spare
32 30 Amp Pink — Auto Shutdown (ASD) Relay 1
33 — 10 Amp Red Switch Bank/Diagnostic Link
Connector/Powertrain Control Module
(PCM)
34 30 Amp Pink — Anti-Lock Brakes (ABS) Module – If
Equipped/Electronic Stability Control
(ESC) Module – If Equipped
35 40 Amp Green — Anti-Lock Brakes (ABS) Module – If
Equipped/Electronic Stability Control
(ESC) Module – If Equipped
36 30 Amp Pink — Passenger Door Module (PDM)/Driver
Door Module (DDM)
37 — 25 Amp Natural Power Top Module – If Equipped
MAINTAINING YOUR VEHICLE
102
Page 105 of 116
CAUTION!
• When installing the integrated power module cover, it is important to ensure the cover isproperly positioned and fully latched. Failure to do so may allow water to get into the
integrated power module, and possibly result in a electrical system failure.
• When replacing a blown fuse, it is important to use only a fuse having the correct
amperage rating. The use of a fuse with a rating other than indicated may result in a
dangerous electrical system overload. If a properly rated fuse continues to blow, it
indicates a problem in the circuit that must be corrected.
TIRE PRESSURES
• Check the inflation pressure of each tire, including the spare tire, at least monthly and inflateto the recommended pressure for your vehicle.
• The tire pressures recommended for your vehicle are found on the “Tire and Loading Information” label located on the driver’s side door opening.
NOTE:
Refer to the Owner's Manual on the DVD for
more information regarding tire warnings and
instructions.
WARNING!
• Overloading of your tires is dangerous. Overloading can cause tire failure, affect vehicle handling, and increase your stopping distance. Use tires of the recommended load
capacity for your vehicle . Never overload them.
• Improperly inflated tires are dangerous and can cause collisions. Under-inflation is the
leading cause of tire failure and may result in severe cracking, component separation, or
“blow out”. Over-inflation reduces a tire’s ability to cushion shock. Objects on the road
and chuck holes can cause damage that results in tire failure. Unequal tire pressures can
cause steering problems. You could lose control of your vehicle. Over-inflated or under-
inflated tires can affect vehicle handling and can fail suddenly, resulting in loss of vehicle
control.
MAINTAINING YOUR VEHICLE
103
Page 111 of 116
Fuses.................. .101
Garage Door Opener (HomeLink®) ....69
GPS Navigation (Uconnect® gps) .....43
Headlights Automatic ...............20
Dimmer Switch ............20
HighBeam ..............20
Heated Mirrors .............24, 25
Heated Seats ................17
High Beam/Low Beam Select (Dimmer) Switch .................20
HomeLink® (Garage Door Opener) ....69
Hood Release ...............92
Instrument Cluster .............6
Indicators ................7
Instrument Cluster Warning Lights .....75
Integrated Power Module (Fuses) .....101
Interior and Instrument Lights .......4,5
Intermittent Wipers (Delay Wipers) ....21
Introduction .................2
iPod®/USB/MP3 Control .........60
Bluetooth® Streaming Audio ......66
Jacking Instructions ............81
Jack Location ...............80
Jack Operation ............ .80, 81
Jump Starting ...............86
KeyFob...................8
Key Fob Programmable Features .....68
Lane Change and Turn Signals .......21
Lane Change Assist ............21
Lap/Shoulder Belts .............10
LATCH (Lower Anchors and Tether for CHildren) ............12, 13, 14
LightBulbs................104
Lights Tire Pressure Monitoring (TPMS) . . .75
Turn Signal ...............21
Locks Door ..................8
Lower Anchors and Tether for CHildren (LATCH)................13 Maintenance Record
...........100
Maintenance Schedule ...........97
Malfunction Indicator Light (Check Engine) .................77
Media Center Radio ............35
Mirrors Heated .............. .24, 25
MOPAR® Accessories ..........107
Navigation ...............41,51
Navigation System (Uconnect® gps) ....42
Navigation Voice Prompt Volume . . . .41, 51
New Vehicle Break-In Period ........19
Oil Change Indicator ...........79
Oil, Engine Capacity ................95
Oil
Pressure Light .............78
Outlet Power .................72
Overheating, Engine ............79
Panic Alarm .................8
Placard, Tire and Loading Information . .103
Power Deck Lid Release ............9
Glass Sunroof .............26
Outlet (Auxiliary Electrical Outlet) . .72
Seats ..................15
Steering ..............95,96
Preparation for Jacking ...........81
Programmable Electronic Features .....67
Radio Operation ............31, 33
Rain Sensitive Wiper System ........21
Rear Seat, Folding .............17
Recreational Towing ............74
Remote Starting System ..........9
Remote Trunk Release ...........9
Replacement Bulbs ............104
Reporting Safety Defects .........106
Satellite Radio (Uconnect® studios) . . .32, 33
Schedule, Maintenance ..........97
Seat Belts .................10
Seats ................. .15, 16
Adjustment ..............16
Heated .................17
INDEX
109
Page 112 of 116
Manual.................16
Power .................15
RearFolding ..............17
Setting the Clock .............59
Shift Lever Override ............89
Signals, Turn ................21
Sirius Satellite Radio (Uconnect® studios) ..........55
SIRIUSTravelLink.............55
SpareTire.................80
Spark Plugs ................95
Speed Control Accel/Decel ..............22
Cancel .................23
Resume ................23
Set...................22
Starting Remote.................9
Steering Tilt Column ..............18
Steering Wheel Audio Controls ......59
SunRoof..................26
Tether Anchor, Child Restraint .......14
Tilt Steering Column ............18
Ti re s Air Pressure .............103
Changing ...............80
Jacking ................80
SpareTire...............80 Touchscreen Radio
Cleaning Your Touchscreen
Radio ............... .41, 51
Towing...................73 Disabled Vehicle ............89
Recreational ..............74
Towing Vehicle Behind a Motorhome . . .74
Trailer Towing Trailer and Tongue Weight .......73
Trailer Weight ...............73
Transmission Fluid ..................95
Transmission Temperature Warning Light .78
TrunkLid(DeckLid)............9
Trunk Release, Emergency .........9
Trunk Release Remote Control ......8,9
Turn Signals ................21
Uconnect® Voice Command ........64
Vehicle Security Alarm Arming .......10
Vehicle Security Alarm Disarming .....10
VoiceCommand..............64
Voice Prompt Volume Navigation .............41, 51
Volume Navigation Voice Prompt ......41, 51
Warning Lights ...............6
Washers, Windshield ............21
Wheel and Wheel Trim Care .......104
Wind Buffeting ...............27
Windshield Washers ............21
Windshield Wipers .............21
INDEX
110