tow CHRYSLER 200 2014 1.G Owner's Manual
[x] Cancel search | Manufacturer: CHRYSLER, Model Year: 2014, Model line: 200, Model: CHRYSLER 200 2014 1.GPages: 116, PDF Size: 3.15 MB
Page 87 of 116
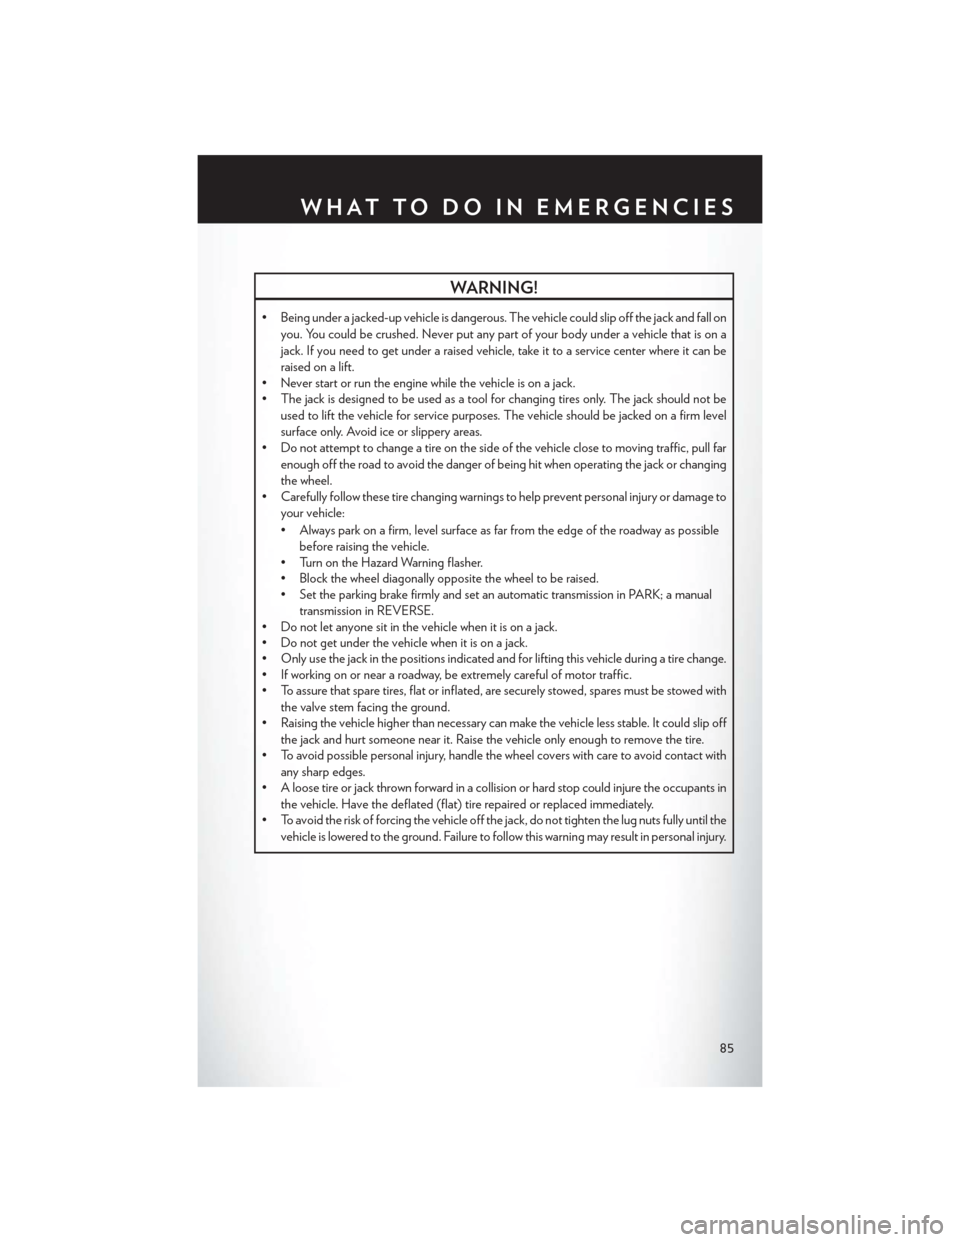
WARNING!
• Being under a jacked-up vehicle is dangerous. The vehicle could slip off the jack and fall onyou. You could be crushed. Never put any part of your body under a vehicle that is on a
jack. If you need to get under a raised vehicle, take it to a service center where it can be
raised on a lift.
• Never start or run the engine while the vehicle is on a jack.
• The jack is designed to be used as a tool for changing tires only. The jack should not be
used to lift the vehicle for service purposes. The vehicle should be jacked on a firm level
surface only. Avoid ice or slippery areas.
• Do not attempt to change a tire on the side of the vehicle close to moving traffic, pull far
enough off the road to avoid the danger of being hit when operating the jack or changing
the wheel.
• Carefully follow these tire changing warnings to help prevent personal injury or damage to
your vehicle:
• Always park on a firm, level surface as far from the edge of the roadway as possiblebefore raising the vehicle.
• Turn on the Hazard Warning flasher.
• Block the wheel diagonally opposite the wheel to be raised.
• Set the parking brake firmly and set an automatic transmission in PARK; a manual
transmission in REVERSE.
• Do not let anyone sit in the vehicle when it is on a jack.
• Do not get under the vehicle when it is on a jack.
• Only use the jack in the positions indicated and for lifting this vehicle during a tire change.
• If working on or near a roadway, be extremely careful of motor traffic.
• To assure that spare tires, flat or inflated, are securely stowed, spares must be stowed with
the valve stem facing the ground.
• Raising the vehicle higher than necessary can make the vehicle less stable. It could slip off
the jack and hurt someone near it. Raise the vehicle only enough to remove the tire.
• To avoid possible personal injury, handle the wheel covers with care to avoid contact with
any sharp edges.
• A loose tire or jack thrown forward in a collision or hard stop could injure the occupants in
the vehicle. Have the deflated (flat) tire repaired or replaced immediately.
• To avoid the risk of forcing the vehicle off the jack, do not tighten the lug nuts fully until the
vehicle is lowered to the ground. Failure to follow this warning may result in personal injury.
WHAT TO DO IN EMERGENCIES
85
Page 91 of 116
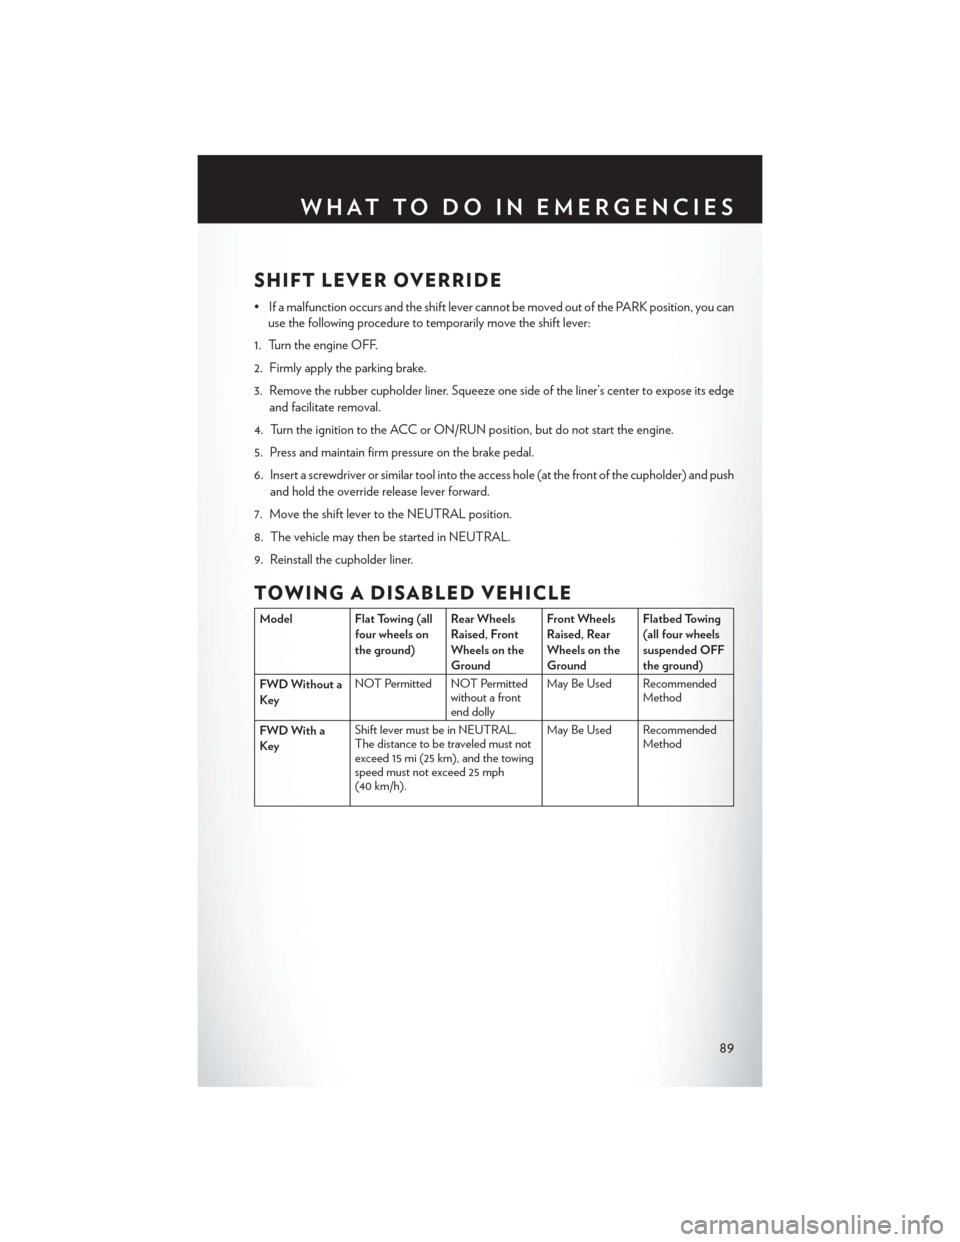
SHIFT LEVER OVERRIDE
• If a malfunction occurs and the shift lever cannot be moved out of the PARK position, you canuse the following procedure to temporarily move the shift lever:
1. Turn the engine OFF.
2. Firmly apply the parking brake.
3. Remove the rubber cupholder liner. Squeeze one side of the liner’s center to expose its edge and facilitate removal.
4. Turn the ignition to the ACC or ON/RUN position, but do not start the engine.
5. Press and maintain firm pressure on the brake pedal.
6. Insert a screwdriver or similar tool into the access hole (at the front of the cupholder) and push and hold the override release lever forward.
7. Move the shift lever to the NEUTRAL position.
8. The vehicle may then be started in NEUTRAL.
9. Reinstall the cupholder liner.
TOWING A DISABLED VEHICLE
Model Flat Towing (all four wheels on
the ground) Rear Wheels
Raised, Front
Wheels on the
GroundFront Wheels
Raised, Rear
Wheels on the
GroundFlatbed Towing
(all four wheels
suspended OFF
the ground)
FWD Without a
Key NOT Permitted NOT Permitted
without a front
end dollyMay Be Used Recommended
Method
FWD With a
Key Shift lever must be in NEUTRAL.
The distance to be traveled must not
exceed 15 mi (25 km), and the towing
speed must not exceed 25 mph
(40 km/h). May Be Used Recommended
Method
WHAT TO DO IN EMERGENCIES
89
Page 99 of 116
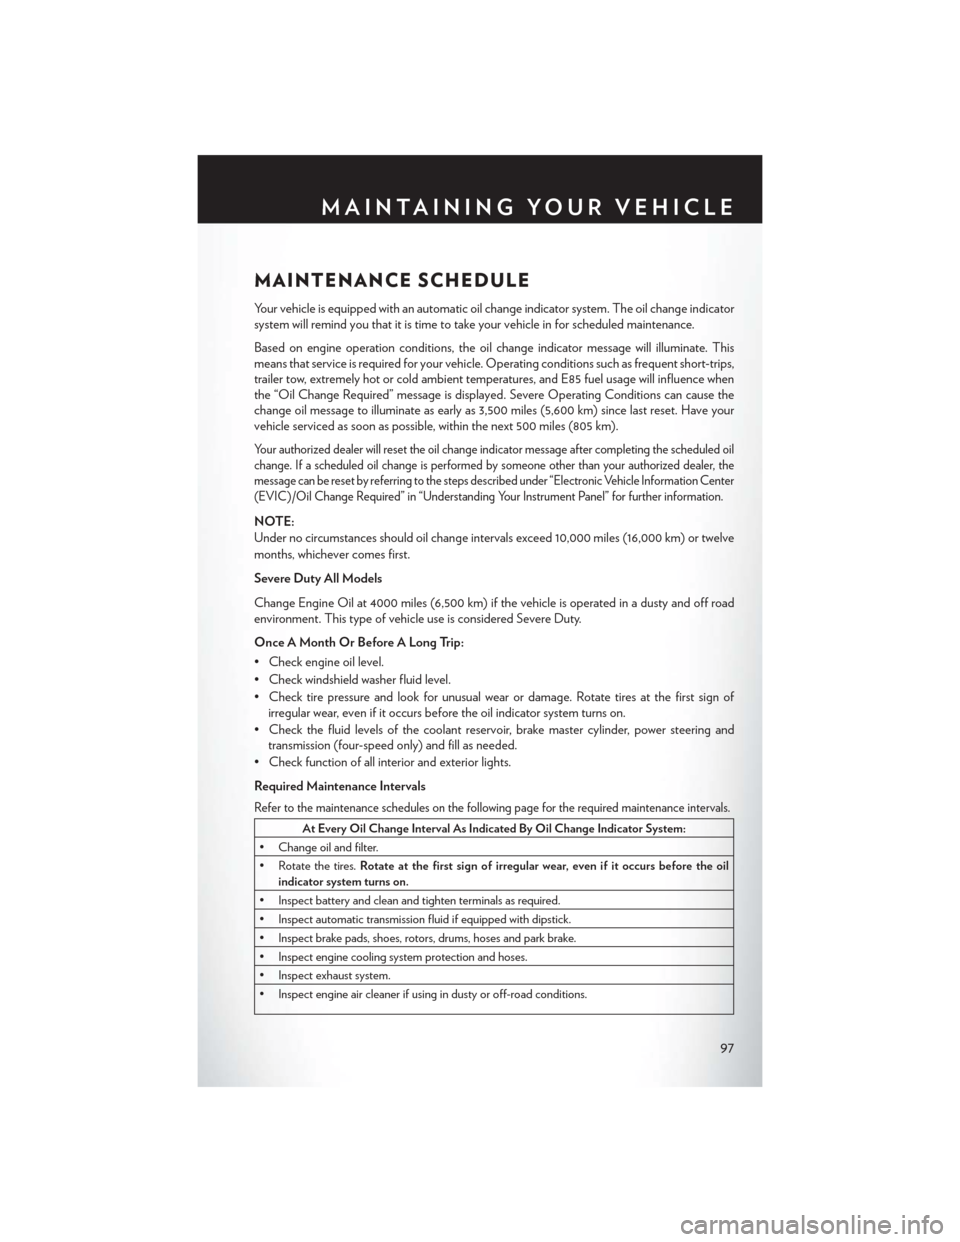
MAINTENANCE SCHEDULE
Your vehicle is equipped with an automatic oil change indicator system. The oil change indicator
system will remind you that it is time to take your vehicle in for scheduled maintenance.
Based on engine operation conditions, the oil change indicator message will illuminate. This
means that service is required for your vehicle. Operating conditions such as frequent short-trips,
trailer tow, extremely hot or cold ambient temperatures, and E85 fuel usage will influence when
the “Oil Change Required” message is displayed. Severe Operating Conditions can cause the
change oil message to illuminate as early as 3,500 miles (5,600 km) since last reset. Have your
vehicle serviced as soon as possible, within the next 500 miles (805 km).
Your authorized dealer will reset the oil change indicator message after completing the scheduled oil
change. If a scheduled oil change is performed by someone other than your authorized dealer, the
message can be reset by referring to the steps described under “Electronic Vehicle Information Center
(EVIC)/Oil Change Required” in “Understanding Your Instrument Panel” for further information.
NOTE:
Under no circumstances should oil change intervals exceed 10,000 miles (16,000 km) or twelve
months, whichever comes first.
Severe Duty All Models
Change Engine Oil at 4000 miles (6,500 km) if the vehicle is operated in a dusty and off road
environment. This type of vehicle use is considered Severe Duty.
Once A Month Or Before A Long Trip:
• Check engine oil level.
• Check windshield washer fluid level.
• Check tire pressure and look for unusual wear or damage. Rotate tires at the first sign ofirregular wear, even if it occurs before the oil indicator system turns on.
• Check the fluid levels of the coolant reservoir, brake master cylinder, power steering and transmission (four-speed only) and fill as needed.
• Check function of all interior and exterior lights.
Required Maintenance Intervals
Refer to the maintenance schedules on the following page for the required maintenance intervals.
At Every Oil Change Interval As Indicated By Oil Change Indicator System:
• Change oil and filter.
• Rotate the tires. Rotate at the first sign of irregular wear, even if it occurs before the oil
indicator system turns on.
• Inspect battery and clean and tighten terminals as required.
• Inspect automatic transmission fluid if equipped with dipstick.
• Inspect brake pads, shoes, rotors, drums, hoses and park brake.
• Inspect engine cooling system protection and hoses.
• Inspect exhaust system.
• Inspect engine air cleaner if using in dusty or off-road conditions.
MAINTAINING YOUR VEHICLE
97
Page 101 of 116
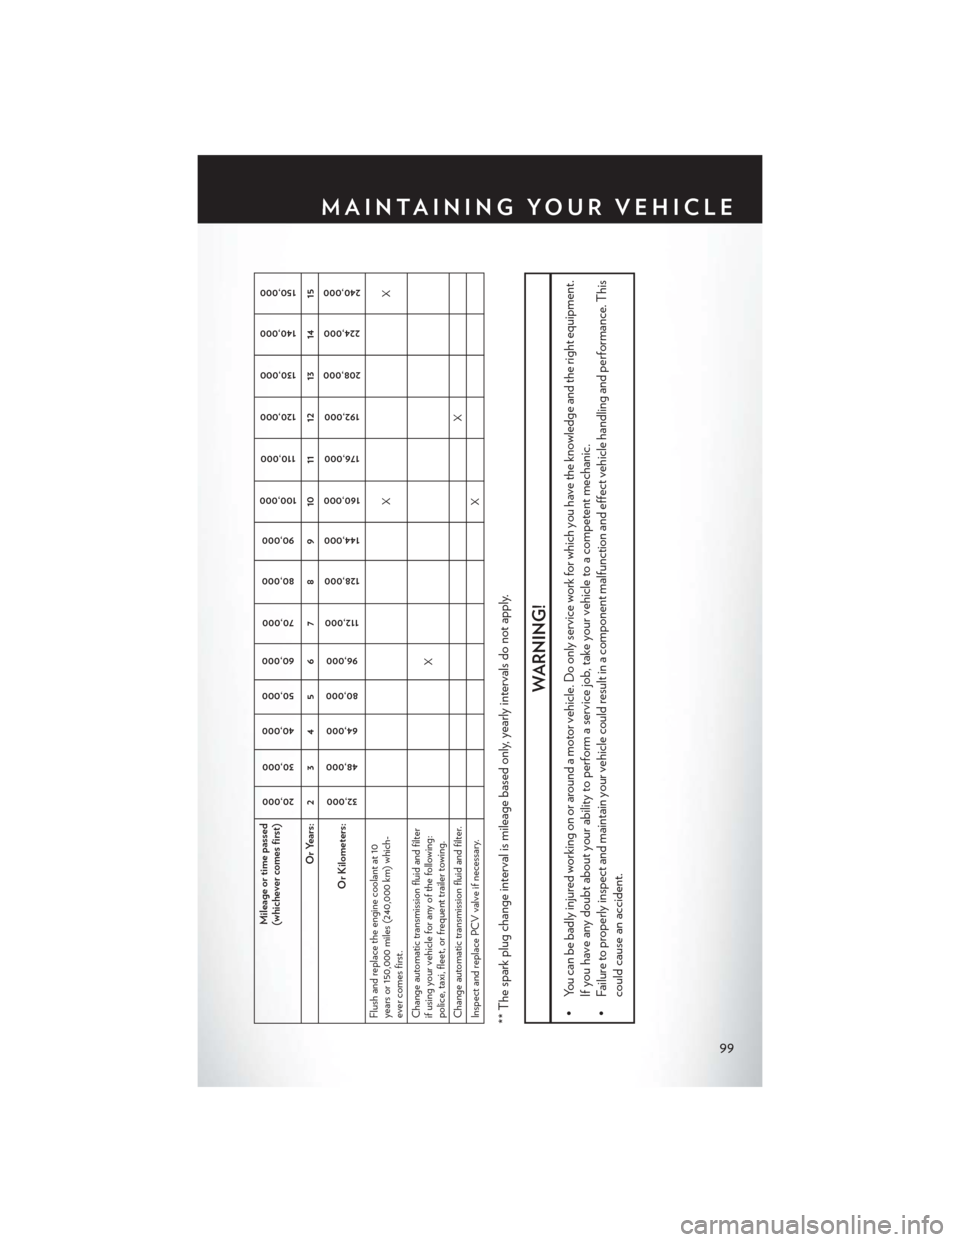
Mileage or time passed
(whichever comes first)
20,000
30,000
40,000 50,000
60,000
70,000
80,000 90,000
100,000
110,000
120,000 130,000
140,000 150,000
Or Years: 2 3 4 5 6 7 8 9 10 11 12 13 14 15
Or Kilometers:
32,000
48,000
64,000
80,000
96,000
112,000
128,000
144,000
160,000
176,000
192,000
208,000 224,000
240,000
Flush and replace the engine coolant at 10
years or 150,000 miles (240,000 km) which-
ever comes first. XX
Change automatic transmission fluid and filter
if using your vehicle for any of the following:
police, taxi, fleet, or frequent trailer towing. X
Change automatic transmission fluid and filter. X
Inspect and replace PCV valve if necessary. X** The spark plug change interval is mileage based only, yearly intervals do not apply.
WARNING!
• You can be badly injured working on or around a motor vehicle. Do only service work for which you have the knowledge and the right equipment. If you have any doubt about your ability to perform a service job, take your vehicle to a competent mechanic.
• Failure to properly inspect and maintain your vehicle could result in a component malfunction and effect vehicle handling and performance. This
could cause an accident.
MAINTAINING YOUR VEHICLE
99
Page 103 of 116
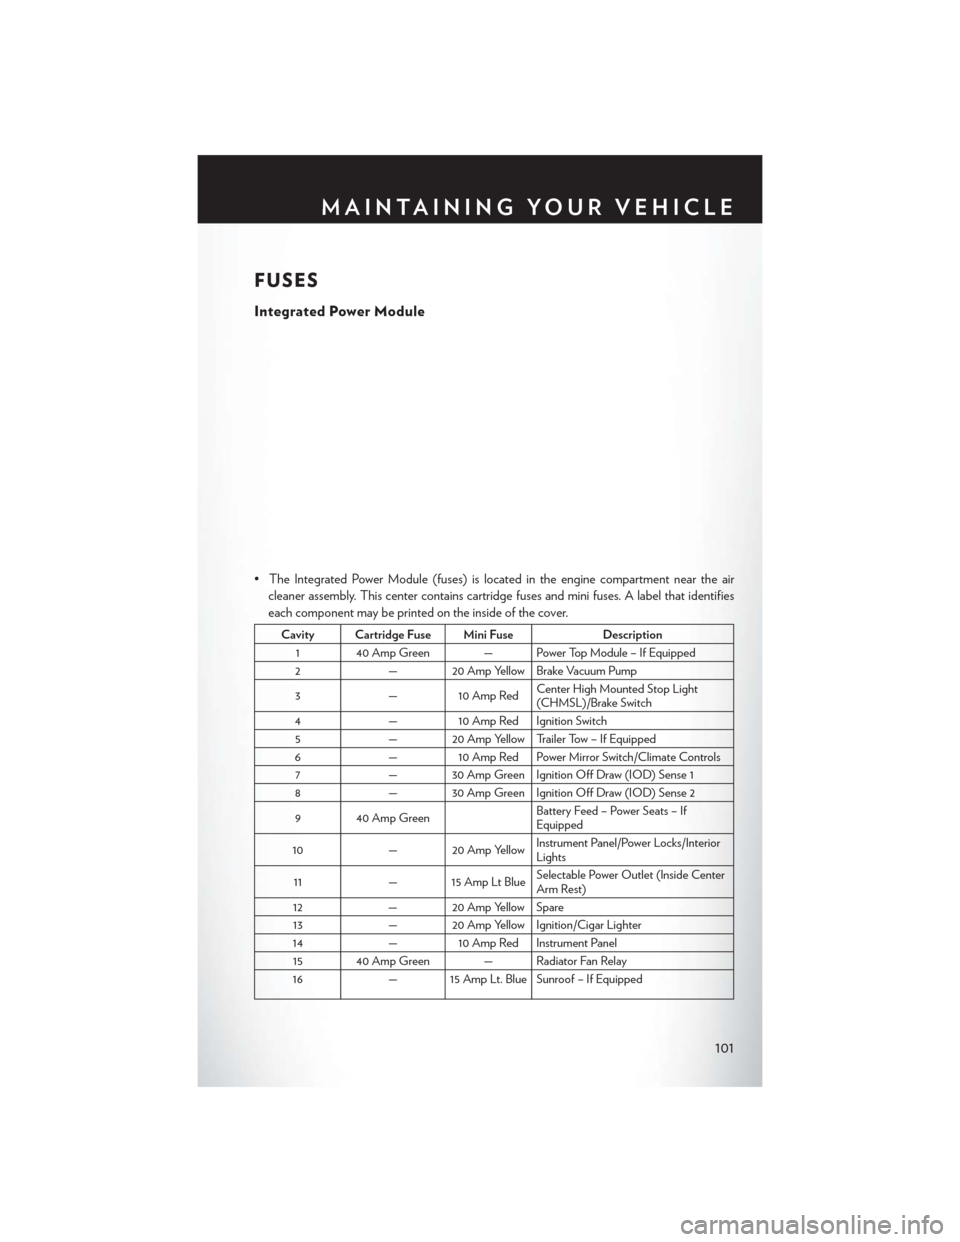
FUSES
Integrated Power Module
• The Integrated Power Module (fuses) is located in the engine compartment near the aircleaner assembly. This center contains cartridge fuses and mini fuses. A label that identifies
each component may be printed on the inside of the cover.
Cavity Cartridge Fuse Mini Fuse Description
1 40 Amp Green — Power Top Module – If Equipped
2 — 20 Amp Yellow Brake Vacuum Pump
3 — 10 Amp Red Center High Mounted Stop Light
(CHMSL)/Brake Switch
4 — 10 Amp Red Ignition Switch
5 — 20 Amp Yellow Trailer Tow – If Equipped
6 — 10 Amp Red Power Mirror Switch/Climate Controls
7 — 30 Amp Green Ignition Off Draw (IOD) Sense 1
8 — 30 Amp Green Ignition Off Draw (IOD) Sense 2
9 40 Amp Green Battery Feed – Power Seats – If
Equipped
10 — 20 Amp Yellow Instrument Panel/Power Locks/Interior
Lights
11 — 15 Amp Lt Blue Selectable Power Outlet (Inside Center
Arm Rest)
12 — 20 Amp Yellow Spare
13 — 20 Amp Yellow Ignition/Cigar Lighter
14 — 10 Amp Red Instrument Panel
15 40 Amp Green — Radiator Fan Relay
16 — 15 Amp Lt. Blue Sunroof – If Equipped
MAINTAINING YOUR VEHICLE
101
Page 111 of 116
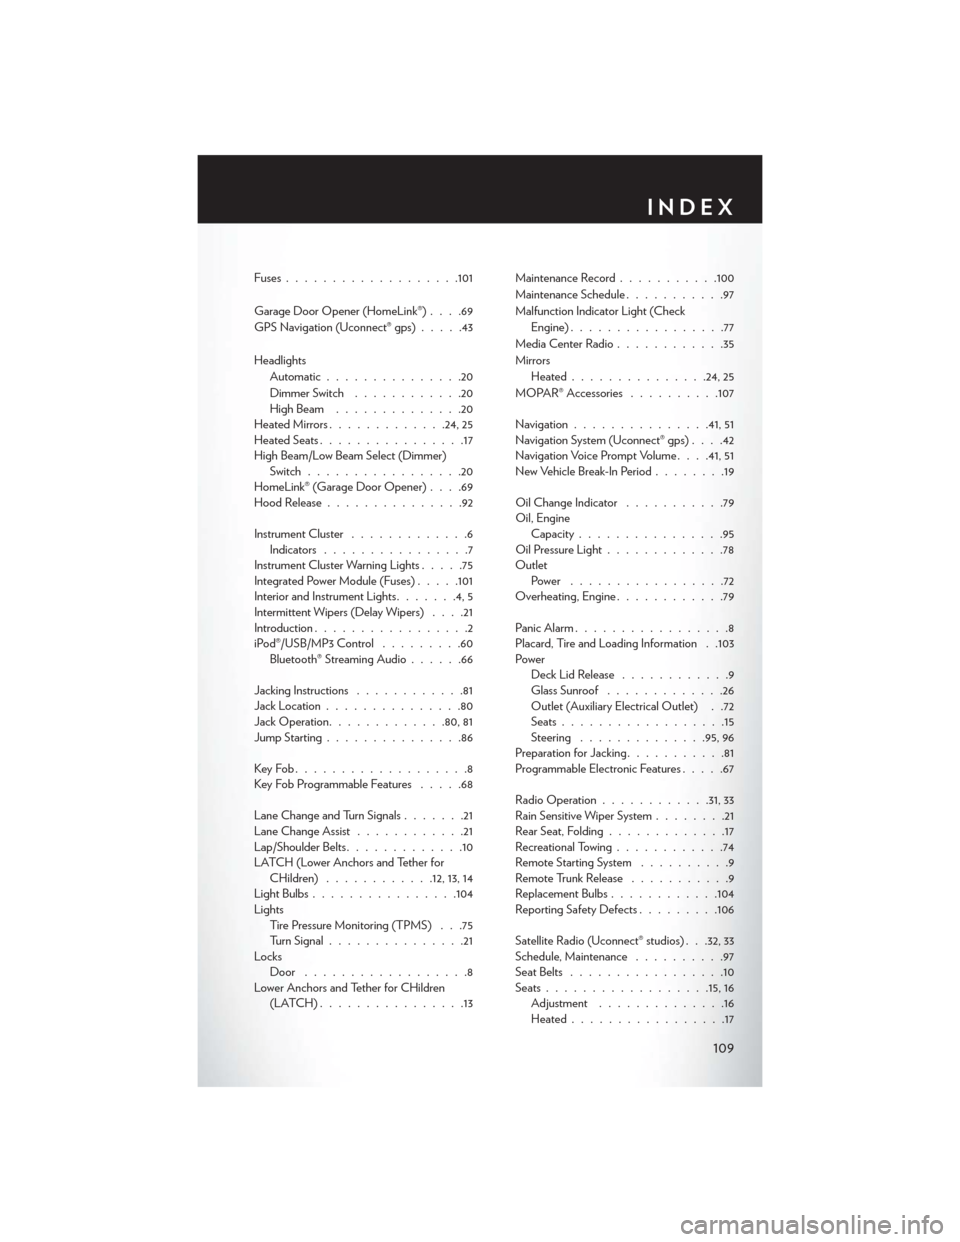
Fuses.................. .101
Garage Door Opener (HomeLink®) ....69
GPS Navigation (Uconnect® gps) .....43
Headlights Automatic ...............20
Dimmer Switch ............20
HighBeam ..............20
Heated Mirrors .............24, 25
Heated Seats ................17
High Beam/Low Beam Select (Dimmer) Switch .................20
HomeLink® (Garage Door Opener) ....69
Hood Release ...............92
Instrument Cluster .............6
Indicators ................7
Instrument Cluster Warning Lights .....75
Integrated Power Module (Fuses) .....101
Interior and Instrument Lights .......4,5
Intermittent Wipers (Delay Wipers) ....21
Introduction .................2
iPod®/USB/MP3 Control .........60
Bluetooth® Streaming Audio ......66
Jacking Instructions ............81
Jack Location ...............80
Jack Operation ............ .80, 81
Jump Starting ...............86
KeyFob...................8
Key Fob Programmable Features .....68
Lane Change and Turn Signals .......21
Lane Change Assist ............21
Lap/Shoulder Belts .............10
LATCH (Lower Anchors and Tether for CHildren) ............12, 13, 14
LightBulbs................104
Lights Tire Pressure Monitoring (TPMS) . . .75
Turn Signal ...............21
Locks Door ..................8
Lower Anchors and Tether for CHildren (LATCH)................13 Maintenance Record
...........100
Maintenance Schedule ...........97
Malfunction Indicator Light (Check Engine) .................77
Media Center Radio ............35
Mirrors Heated .............. .24, 25
MOPAR® Accessories ..........107
Navigation ...............41,51
Navigation System (Uconnect® gps) ....42
Navigation Voice Prompt Volume . . . .41, 51
New Vehicle Break-In Period ........19
Oil Change Indicator ...........79
Oil, Engine Capacity ................95
Oil
Pressure Light .............78
Outlet Power .................72
Overheating, Engine ............79
Panic Alarm .................8
Placard, Tire and Loading Information . .103
Power Deck Lid Release ............9
Glass Sunroof .............26
Outlet (Auxiliary Electrical Outlet) . .72
Seats ..................15
Steering ..............95,96
Preparation for Jacking ...........81
Programmable Electronic Features .....67
Radio Operation ............31, 33
Rain Sensitive Wiper System ........21
Rear Seat, Folding .............17
Recreational Towing ............74
Remote Starting System ..........9
Remote Trunk Release ...........9
Replacement Bulbs ............104
Reporting Safety Defects .........106
Satellite Radio (Uconnect® studios) . . .32, 33
Schedule, Maintenance ..........97
Seat Belts .................10
Seats ................. .15, 16
Adjustment ..............16
Heated .................17
INDEX
109
Page 112 of 116
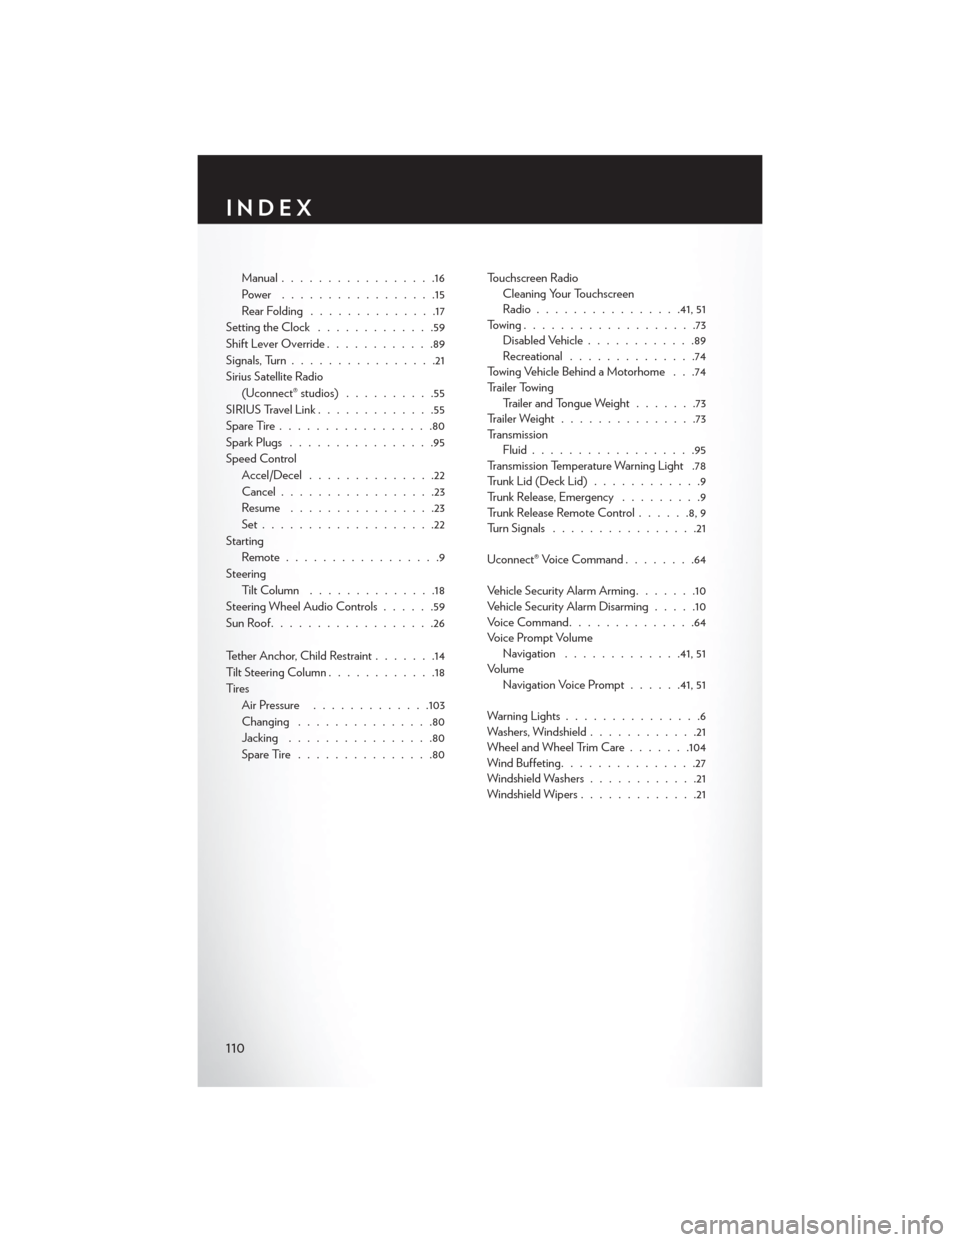
Manual.................16
Power .................15
RearFolding ..............17
Setting the Clock .............59
Shift Lever Override ............89
Signals, Turn ................21
Sirius Satellite Radio (Uconnect® studios) ..........55
SIRIUSTravelLink.............55
SpareTire.................80
Spark Plugs ................95
Speed Control Accel/Decel ..............22
Cancel .................23
Resume ................23
Set...................22
Starting Remote.................9
Steering Tilt Column ..............18
Steering Wheel Audio Controls ......59
SunRoof..................26
Tether Anchor, Child Restraint .......14
Tilt Steering Column ............18
Ti re s Air Pressure .............103
Changing ...............80
Jacking ................80
SpareTire...............80 Touchscreen Radio
Cleaning Your Touchscreen
Radio ............... .41, 51
Towing...................73 Disabled Vehicle ............89
Recreational ..............74
Towing Vehicle Behind a Motorhome . . .74
Trailer Towing Trailer and Tongue Weight .......73
Trailer Weight ...............73
Transmission Fluid ..................95
Transmission Temperature Warning Light .78
TrunkLid(DeckLid)............9
Trunk Release, Emergency .........9
Trunk Release Remote Control ......8,9
Turn Signals ................21
Uconnect® Voice Command ........64
Vehicle Security Alarm Arming .......10
Vehicle Security Alarm Disarming .....10
VoiceCommand..............64
Voice Prompt Volume Navigation .............41, 51
Volume Navigation Voice Prompt ......41, 51
Warning Lights ...............6
Washers, Windshield ............21
Wheel and Wheel Trim Care .......104
Wind Buffeting ...............27
Windshield Washers ............21
Windshield Wipers .............21
INDEX
110
Page 114 of 116
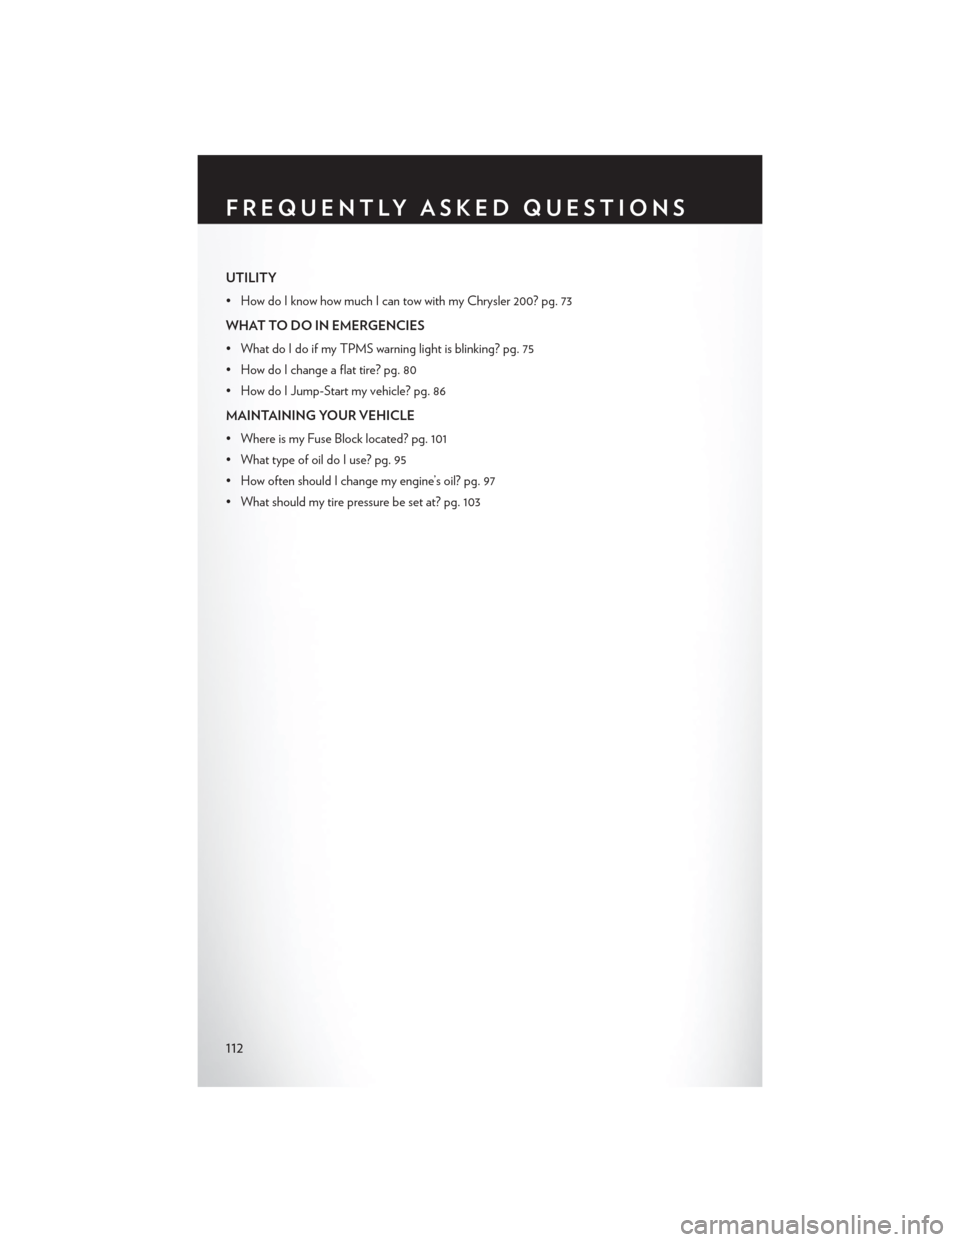
UTILITY
• How do I know how much I can tow with my Chrysler 200? pg. 73
WHAT TO DO IN EMERGENCIES
• What do I do if my TPMS warning light is blinking? pg. 75
• How do I change a flat tire? pg. 80
• How do I Jump-Start my vehicle? pg. 86
MAINTAINING YOUR VEHICLE
• Where is my Fuse Block located? pg. 101
• What type of oil do I use? pg. 95
• How often should I change my engine’s oil? pg. 97
• What should my tire pressure be set at? pg. 103
FREQUENTLY ASKED QUESTIONS
112