wheel bolts CHRYSLER 200 2017 2.G Owners Manual
[x] Cancel search | Manufacturer: CHRYSLER, Model Year: 2017, Model line: 200, Model: CHRYSLER 200 2017 2.GPages: 539, PDF Size: 5.18 MB
Page 67 of 539
WARNING!
Ignoring the Air Bag Warning Light in your instrument
panel could mean you won’t have the air bags to
protect you in a collision. If the light does not come on
as a bulb check when the ignition is first turned on,
stays on after you start the vehicle, or if it comes on as
you drive, have an authorized dealer service the air bag
system immediately.
Redundant Air Bag Warning Light
If a fault with the Air Bag Warning Light is
detected, which could affect the Supplemental
Restraint System (“SRS”), the Redundant Air Bag
Warning Light will illuminate on the instrument
panel. The Redundant Air Bag Warning Light will stay on
until the fault is cleared. In addition, a single chime will
sound to alert you that the Redundant Air Bag Warning
Light has come on and a fault has been detected. If the
Redundant Air Bag Warning Light comes on intermittently
or remains on while driving have an authorized dealer
service the vehicle immediately. For additional information
regarding the Redundant Air Bag Warning Light, refer to
“Warning/Indicator Lights and Messages” in “Getting to
Know Your Instrument Panel” section of this manual.
Maintaining Your Air Bag System
WARNING!
• Modifications to any part of the air bag system could
cause it to fail when you need it. You could be
injured if the air bag system is not there to protect
you. Do not modify the components or wiring, in-
cluding adding any kind of badges or stickers to the
steering wheel hub trim cover or the upper right side
of the instrument panel. Do not modify the front
bumper, vehicle body structure, or add aftermarket
side steps or running boards.
• It is dangerous to try to repair any part of the air bag
system yourself. Be sure to tell anyone who works on
your vehicle that it has an air bag system.
• Do not attempt to modify any part of your air bag
system. The air bag may inflate accidentally or may
not function properly if modifications are made.
Take your vehicle to an authorized dealer for any air
bag system service. If your seat, including your trim
cover and cushion, needs to be serviced in any way
(including removal or loosening/tightening of seat
attachment bolts), take the vehicle to your authorized
(Continued)
2
THINGS TO KNOW BEFORE STARTING YOUR VEHICLE 65
Page 417 of 539
CAUTION!
Driving with a hot cooling system could damage your
vehicle. If the temperature gauge reads “H,” pull over
and stop the vehicle. Idle the vehicle with the air
conditioner turned off until the pointer drops back
into the normal range. If the pointer remains on the
“H,” turn the engine off immediately and call for
service.
WHEEL AND TIRE TORQUE SPECIFICATIONS
Proper lug nut/bolt torque is very important to ensure that
the wheel is properly mounted to the vehicle. Any time a
wheel has been removed and reinstalled on the vehicle the
lug nuts/bolts should be torqued using a properly cali-
brated torque wrench.
Torque Specifications
Lug Nut/Bolt Torque **Lug Nut/Bolt SizeLug Nut/
Bolt
Socket Size
100 Ft-Lbs (135 N·m) M12 x 1.25 19 mm **Use only your Authorized Dealer recommended lug
nuts/bolts and clean or remove any dirt or oil before
tightening.
Inspect the wheel mounting surface prior to mounting the
tire and remove any corrosion or loose particles.
Wheel Mounting Surface
6
WHAT TO DO IN EMERGENCIES 415
Page 418 of 539
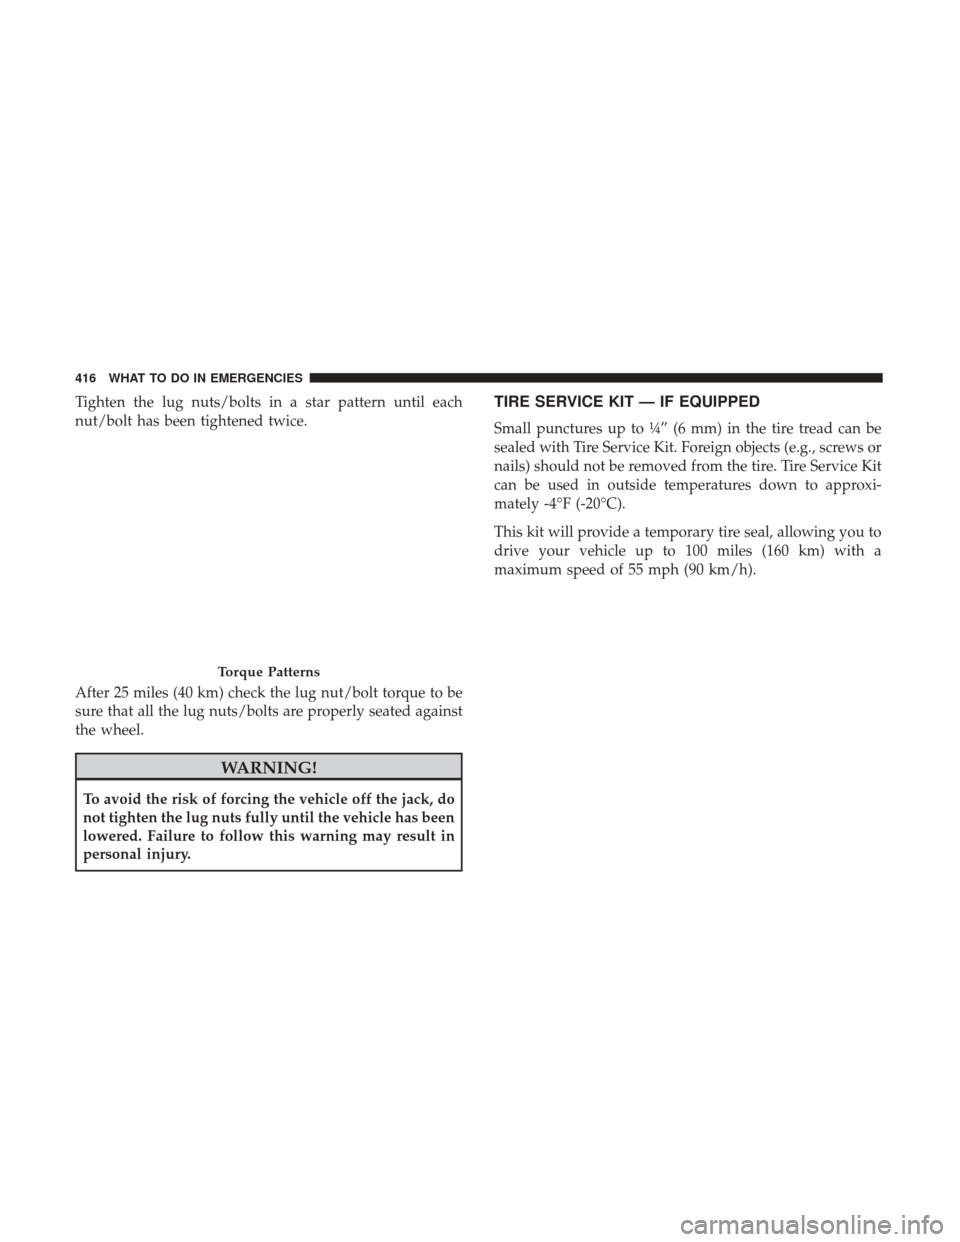
Tighten the lug nuts/bolts in a star pattern until each
nut/bolt has been tightened twice.
After 25 miles (40 km) check the lug nut/bolt torque to be
sure that all the lug nuts/bolts are properly seated against
the wheel.
WARNING!
To avoid the risk of forcing the vehicle off the jack, do
not tighten the lug nuts fully until the vehicle has been
lowered. Failure to follow this warning may result in
personal injury.
TIRE SERVICE KIT — IF EQUIPPED
Small punctures up to ¼” (6 mm) in the tire tread can be
sealed with Tire Service Kit. Foreign objects (e.g., screws or
nails) should not be removed from the tire. Tire Service Kit
can be used in outside temperatures down to approxi-
mately -4°F (-20°C).
This kit will provide a temporary tire seal, allowing you to
drive your vehicle up to 100 miles (160 km) with a
maximum speed of 55 mph (90 km/h).
Torque Patterns
416 WHAT TO DO IN EMERGENCIES
Page 431 of 539
2. Chock both the front and rear of the wheel diagonallyopposite of the jacking position. For example, if chang-
ing the right front tire, chock the left rear wheel. Place
both chocks under the tire.
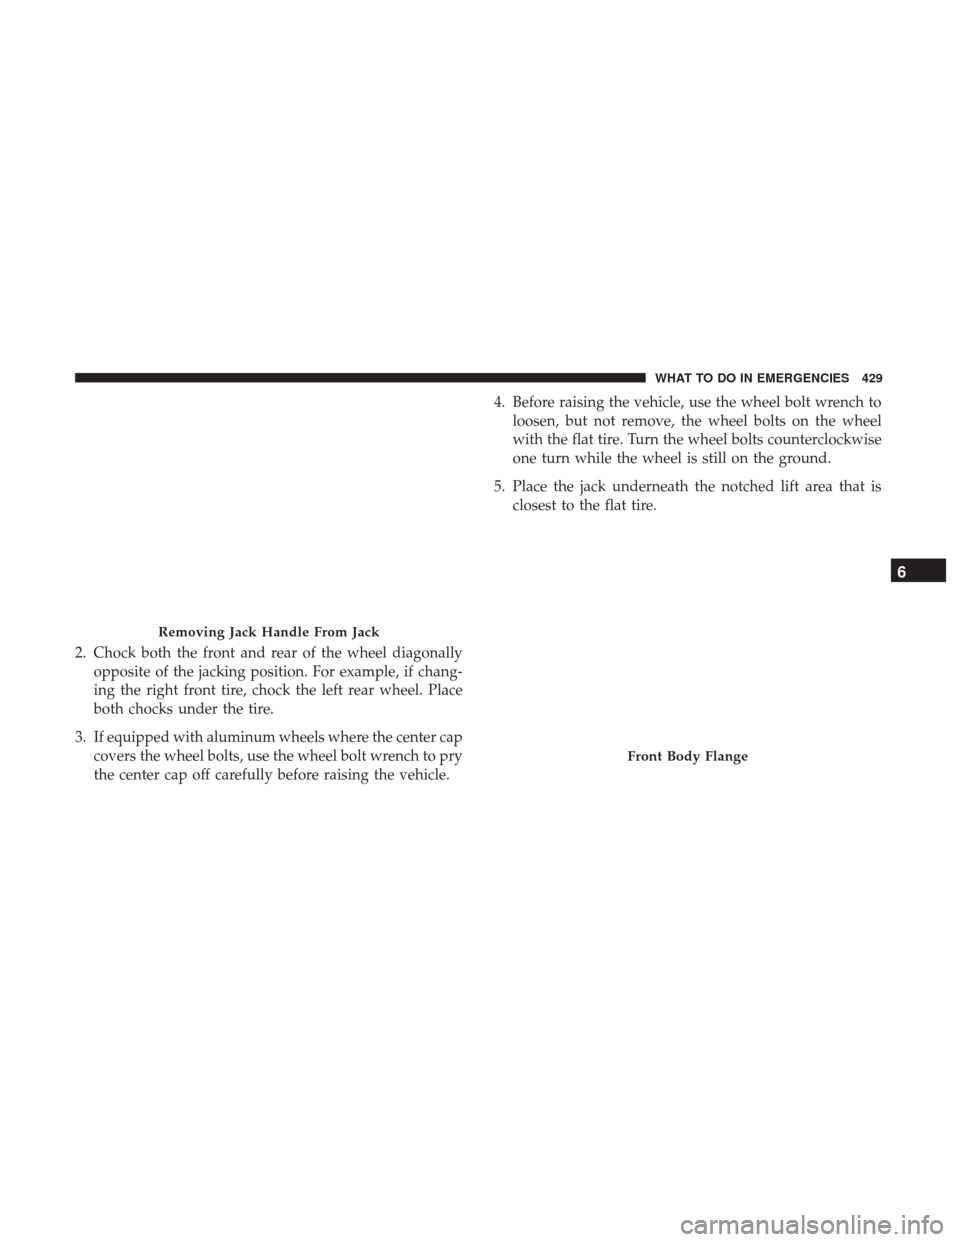
3. If equipped with aluminum wheels where the center cap covers the wheel bolts, use the wheel bolt wrench to pry
the center cap off carefully before raising the vehicle. 4. Before raising the vehicle, use the wheel bolt wrench to
loosen, but not remove, the wheel bolts on the wheel
with the flat tire. Turn the wheel bolts counterclockwise
one turn while the wheel is still on the ground.
5. Place the jack underneath the notched lift area that is closest to the flat tire.
Removing Jack Handle From Jack
Front Body Flange
6
WHAT TO DO IN EMERGENCIES 429
Page 434 of 539
WARNING!
Raising the vehicle higher than necessary can make the
vehicle less stable. It could slip off the jack and hurt
someone near it. Raise the vehicle only enough to
remove the tire.
8. Remove the wheel bolts and tire.
9. Mount the spare tire.
CAUTION!
Be sure to mount the spare tire with the valve stem
facing outward. The vehicle could be damaged if the
spare tire is mounted incorrectly.
Rear Jacking Location
Mounting Spare Tire
432 WHAT TO DO IN EMERGENCIES
Page 435 of 539
NOTE:•For vehicles so equipped, do not attempt to install a
center cap or wheel cover on the compact spare.
• Refer to “Compact Spare Tire” and to “Limited-Use
Spare” under “Tires—General Information” in “Start-
ing And Operating” for additional warnings, cautions,
and information about the spare tire, its use, and
operation.
10. Install the wheel bolts with the threaded end of the wheel bolt toward the wheel. Lightly tighten the wheel
bolts.
WARNING!
To avoid the risk of forcing the vehicle off the jack, do
not fully tighten the wheel bolts until the vehicle has
been lowered. Failure to follow this warning may
result in serious injury.
11. Lower the vehicle to the ground by turning the jack handle counterclockwise.
12. Finish tightening the wheel bolts. Push down on the wrench while at the end of the handle for increased
leverage. Tighten the wheel bolts in a star pattern until each wheel bolt has been tightened twice. Refer to
“Torque Specifications” in this section for proper lug
bolt torque. If in doubt about the correct tightness, have
them checked with a torque wrench by your autho-
rized dealer or at a service station.
13. Lower the jack until it is free. Remove the wheel chocks. Reassemble the lug wrench to the jack assem-
bly and stow it in the spare tire area. Securely stow the
jack, tools, chocks and flat tire. Release the parking
brake before driving the vehicle.
WARNING!
A loose tire or jack thrown forward in a collision or
hard stop could endanger the occupants of the vehicle.
Always stow the jack parts and the spare tire in the
places provided. Have the deflated (flat) tire repaired
or replaced immediately.
Road Tire Installation
Vehicles Equipped With Wheel Covers
1. Mount the road tire on the axle.
2. To ease the installation process for steel wheels withwheel covers, install two wheel bolts on the wheel
6
WHAT TO DO IN EMERGENCIES 433
Page 436 of 539
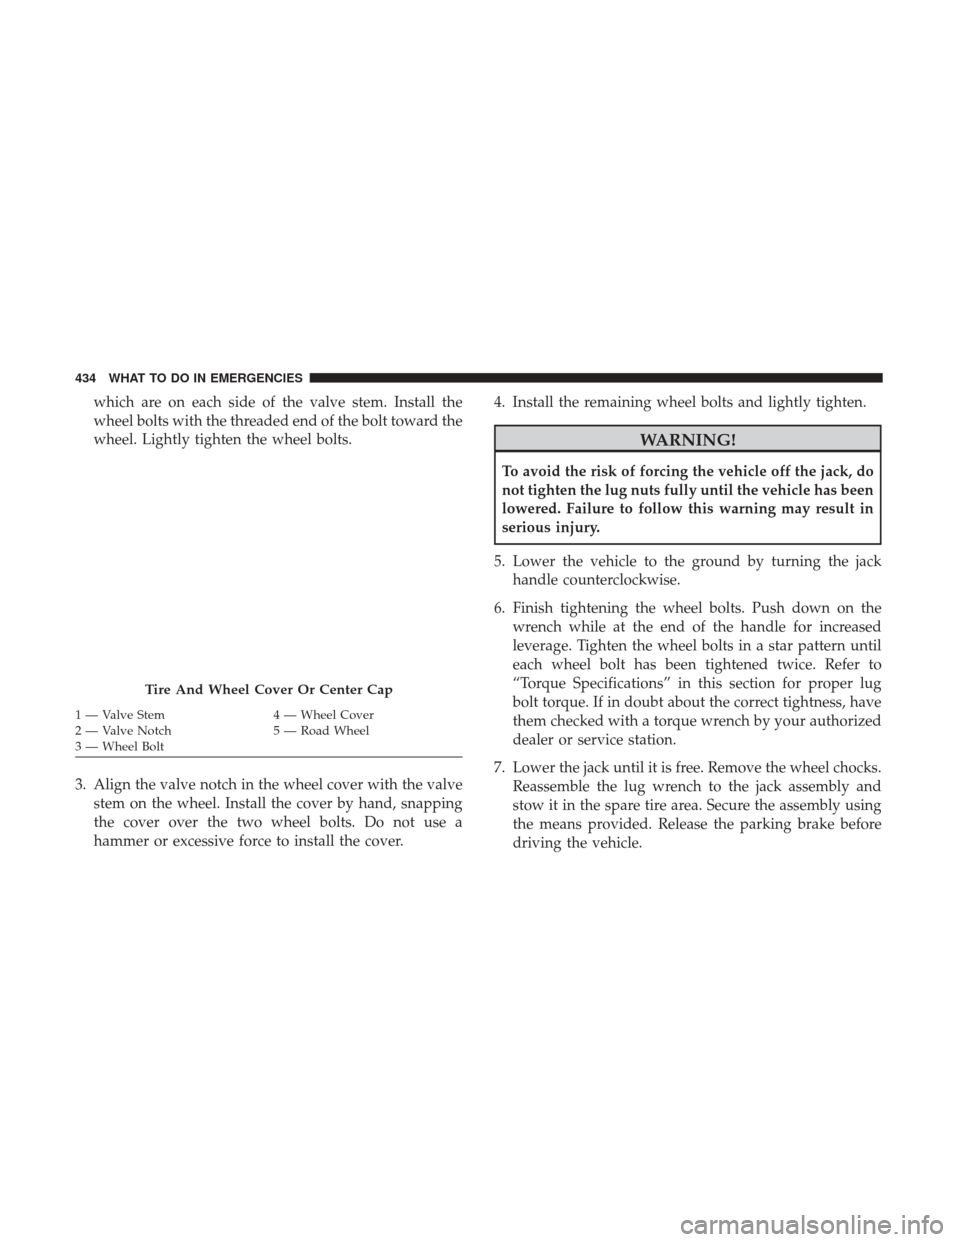
which are on each side of the valve stem. Install the
wheel bolts with the threaded end of the bolt toward the
wheel. Lightly tighten the wheel bolts.
3. Align the valve notch in the wheel cover with the valve stem on the wheel. Install the cover by hand, snapping
the cover over the two wheel bolts. Do not use a
hammer or excessive force to install the cover. 4. Install the remaining wheel bolts and lightly tighten.
WARNING!
To avoid the risk of forcing the vehicle off the jack, do
not tighten the lug nuts fully until the vehicle has been
lowered. Failure to follow this warning may result in
serious injury.
5. Lower the vehicle to the ground by turning the jack handle counterclockwise.
6. Finish tightening the wheel bolts. Push down on the wrench while at the end of the handle for increased
leverage. Tighten the wheel bolts in a star pattern until
each wheel bolt has been tightened twice. Refer to
“Torque Specifications” in this section for proper lug
bolt torque. If in doubt about the correct tightness, have
them checked with a torque wrench by your authorized
dealer or service station.
7. Lower the jack until it is free. Remove the wheel chocks. Reassemble the lug wrench to the jack assembly and
stow it in the spare tire area. Secure the assembly using
the means provided. Release the parking brake before
driving the vehicle.
Tire And Wheel Cover Or Center Cap
1 — Valve Stem 4 — Wheel Cover
2 — Valve Notch 5 — Road Wheel
3 — Wheel Bolt 434 WHAT TO DO IN EMERGENCIES
Page 437 of 539
8. After 25 miles (40 km) check the wheel bolt torque witha torque wrench to ensure that all wheel bolts are
properly seated against the wheel.
Road Tire Installation
1. Mount the road tire on the axle.
2. Install the remaining wheel bolts and lightly tighten.
WARNING!
To avoid the risk of forcing the vehicle off the jack, do
not tighten the lug nuts fully until the vehicle has been
lowered. Failure to follow this warning may result in
serious injury.
3. Lower the vehicle to the ground by turning the jack handle counterclockwise.
4. Finish tightening the wheel bolts. Push down on the wrench while at the end of the handle for increased
leverage. Tighten the wheel bolts in a star pattern until
each wheel bolt has been tightened twice. Refer to
“Torque Specifications” in this section for the proper lug
bolt torque. If in doubt about the correct tightness, have
them checked with a torque wrench by your authorized
dealer or service station. 5. Lower the jack until it is free. Remove the wheel chocks.
Reassemble the lug wrench to the jack assembly and
stow it in the spare tire area. Secure the assembly using
the means provided. Release the parking brake before
driving the vehicle.
6. After 25 miles (40 km) check the wheel bolt torque with a torque wrench to ensure that all wheel bolts are
properly seated against the wheel.
JUMP-STARTING PROCEDURES
If your vehicle has a discharged battery it can be jump-
started using a set of jumper cables and a battery in another
vehicle or by using a portable battery booster pack. Jump-
starting can be dangerous if done improperly so please
follow the procedures in this section carefully.
NOTE: When using a portable battery booster pack follow
the manufacturer ’s operating instructions and precautions.
WARNING!
Do not attempt jump-starting if the battery is frozen. It
could rupture or explode and cause personal injury.
6
WHAT TO DO IN EMERGENCIES 435