clock CHRYSLER 200 CONVERTIBLE 2013 1.G User Guide
[x] Cancel search | Manufacturer: CHRYSLER, Model Year: 2013, Model line: 200 CONVERTIBLE, Model: CHRYSLER 200 CONVERTIBLE 2013 1.GPages: 116, PDF Size: 3.04 MB
Page 32 of 116
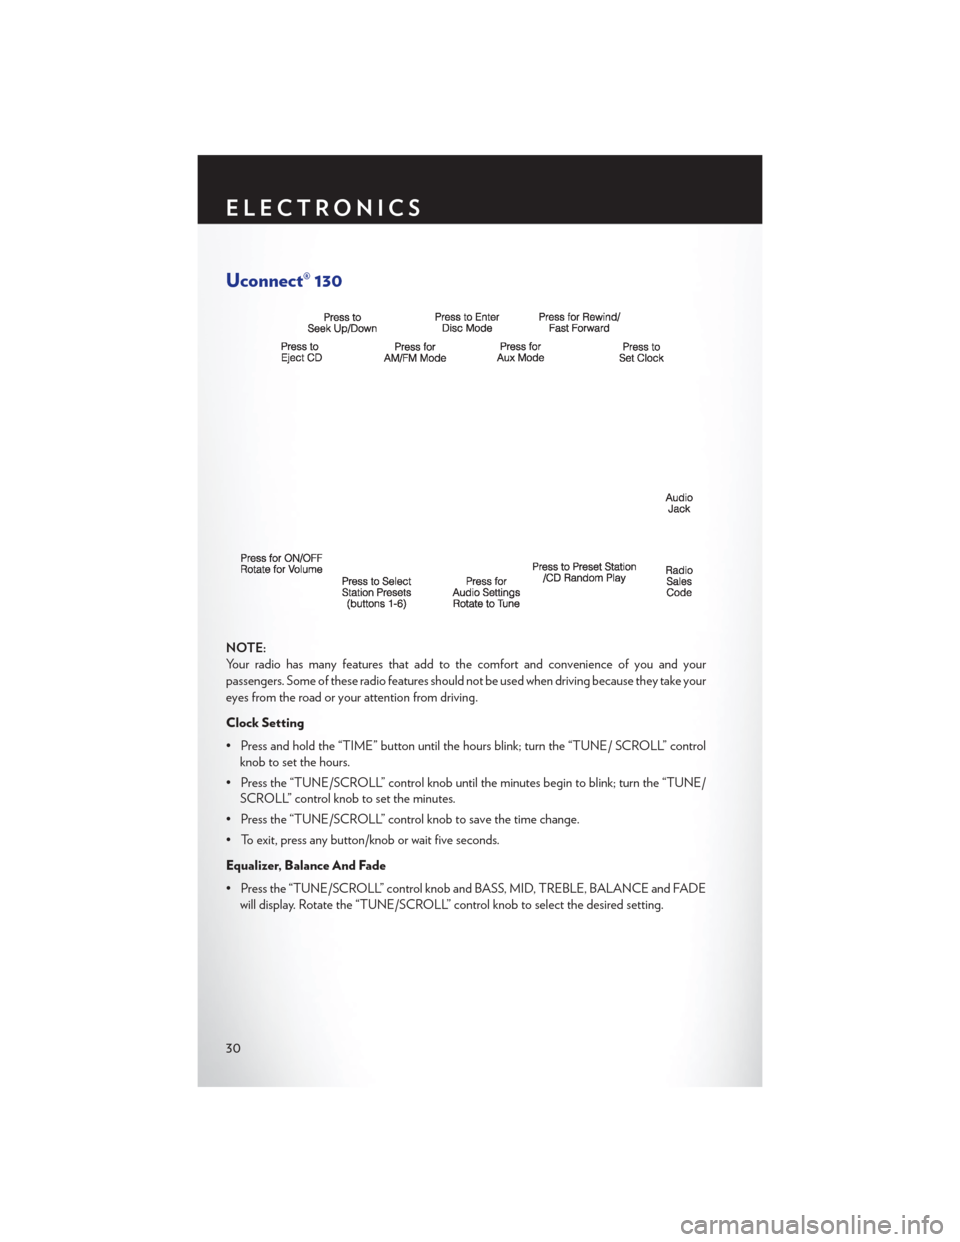
Uconnect® 130
NOTE:
Your radio has many features that add to the comfort and convenience of you and your
passengers. Some of these radio features should not be used when driving because they take your
eyes from the road or your attention from driving.
Clock Setting
• Press and hold the “TIME” button until the hours blink; turn the “TUNE/ SCROLL” controlknob to set the hours.
• Press the “TUNE/SCROLL” control knob until the minutes begin to blink; turn the “TUNE/ SCROLL” control knob to set the minutes.
• Press the “TUNE/SCROLL” control knob to save the time change.
• To exit, press any button/knob or wait five seconds.
Equalizer, Balance And Fade
• Press the “TUNE/SCROLL” control knob and BASS, MID, TREBLE, BALANCE and FADE will display. Rotate the “TUNE/SCROLL” control knob to select the desired setting.
ELECTRONICS
30
Page 34 of 116
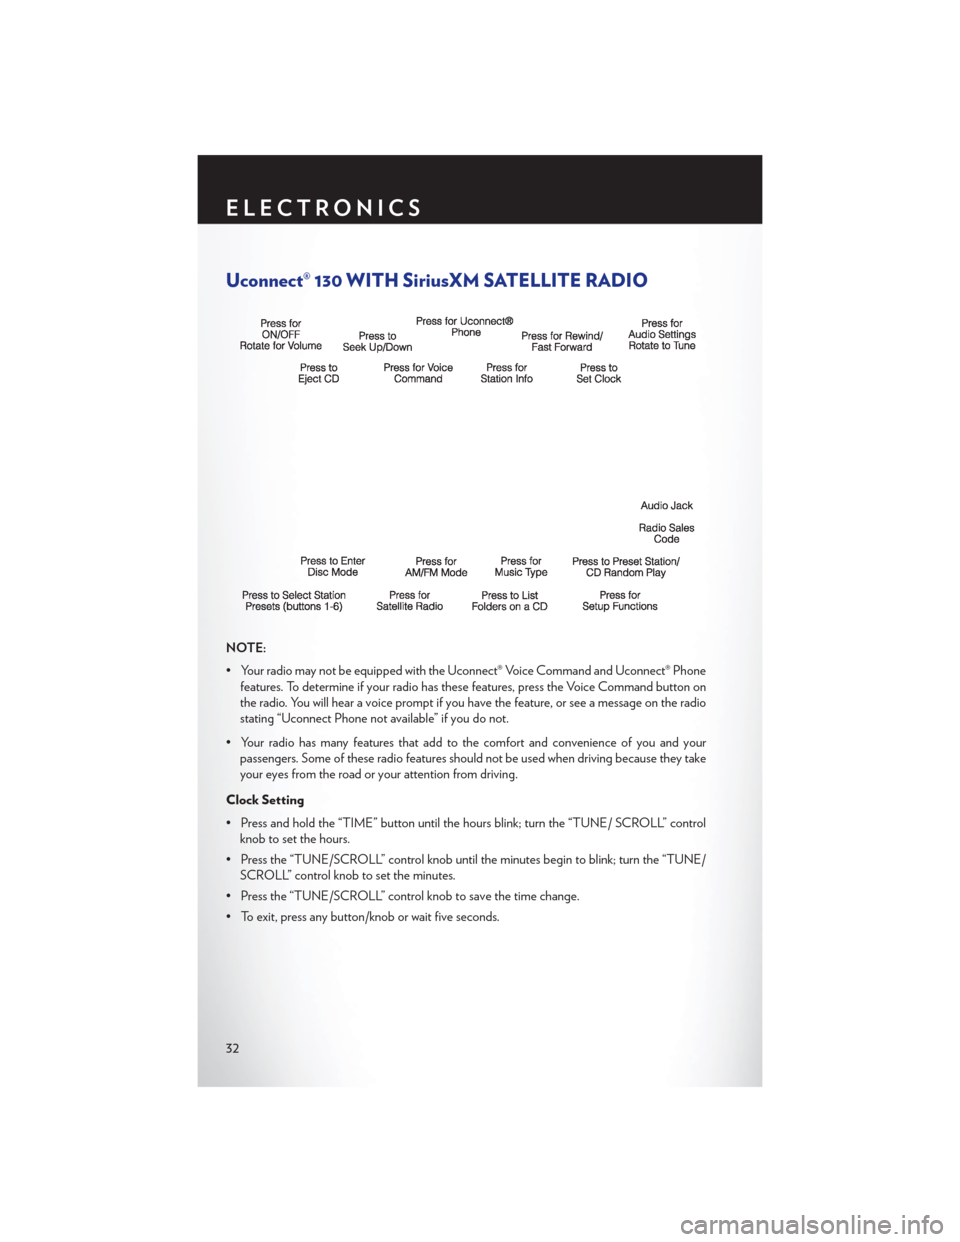
Uconnect® 130 WITH SiriusXM SATELLITE RADIO
NOTE:
• Your radio may not be equipped with the Uconnect® Voice Command and Uconnect® Phonefeatures. To determine if your radio has these features, press the Voice Command button on
the radio. You will hear a voice prompt if you have the feature, or see a message on the radio
stating “Uconnect Phone not available” if you do not.
• Your radio has many features that add to the comfort and convenience of you and your passengers. Some of these radio features should not be used when driving because they take
your eyes from the road or your attention from driving.
Clock Setting
• Press and hold the “TIME” button until the hours blink; turn the “TUNE/ SCROLL” control knob to set the hours.
• Press the “TUNE/SCROLL” control knob until the minutes begin to blink; turn the “TUNE/ SCROLL” control knob to set the minutes.
• Press the “TUNE/SCROLL” control knob to save the time change.
• To exit, press any button/knob or wait five seconds.
ELECTRONICS
32
Page 37 of 116
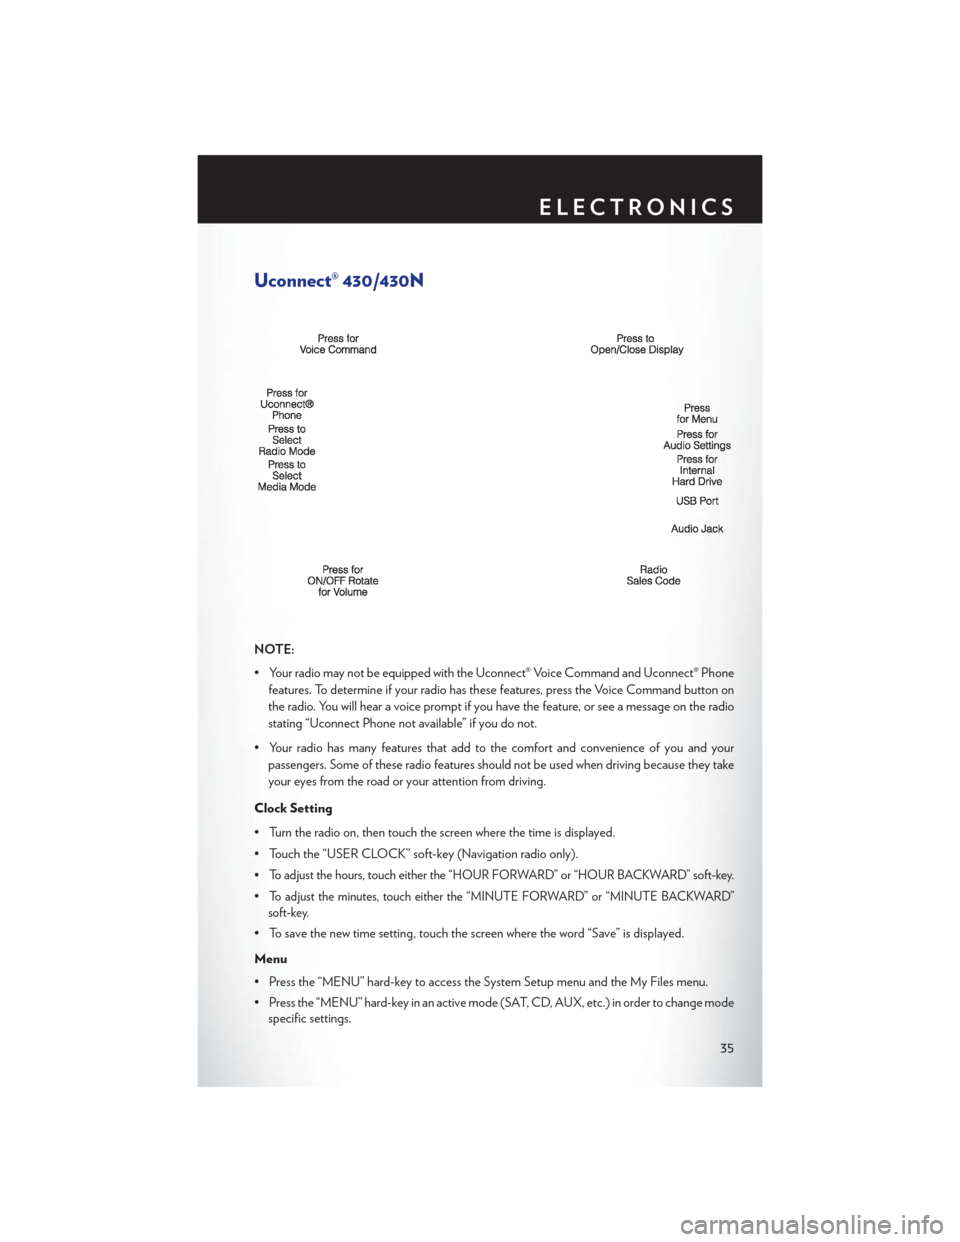
Uconnect® 430/430N
NOTE:
• Your radio may not be equipped with the Uconnect® Voice Command and Uconnect® Phonefeatures. To determine if your radio has these features, press the Voice Command button on
the radio. You will hear a voice prompt if you have the feature, or see a message on the radio
stating “Uconnect Phone not available” if you do not.
• Your radio has many features that add to the comfort and convenience of you and your passengers. Some of these radio features should not be used when driving because they take
your eyes from the road or your attention from driving.
Clock Setting
• Turn the radio on, then touch the screen where the time is displayed.
• Touch the “USER CLOCK” soft-key (Navigation radio only).
•
To adjust the hours, touch either the “HOUR FORWARD” or “HOUR BACKWARD” soft-key.
•To adjust the minutes, touch either the “MINUTE FORWARD” or “MINUTE BACKWARD”
soft-key.
• To save the new time setting, touch the screen where the word “Save” is displayed.
Menu
• Press the “MENU” hard-key to access the System Setup menu and the My Files menu.
• Press the “MENU” hard-key in an active mode (SAT, CD, AUX, etc.) in order to change mode specific settings.
ELECTRONICS
35
Page 47 of 116
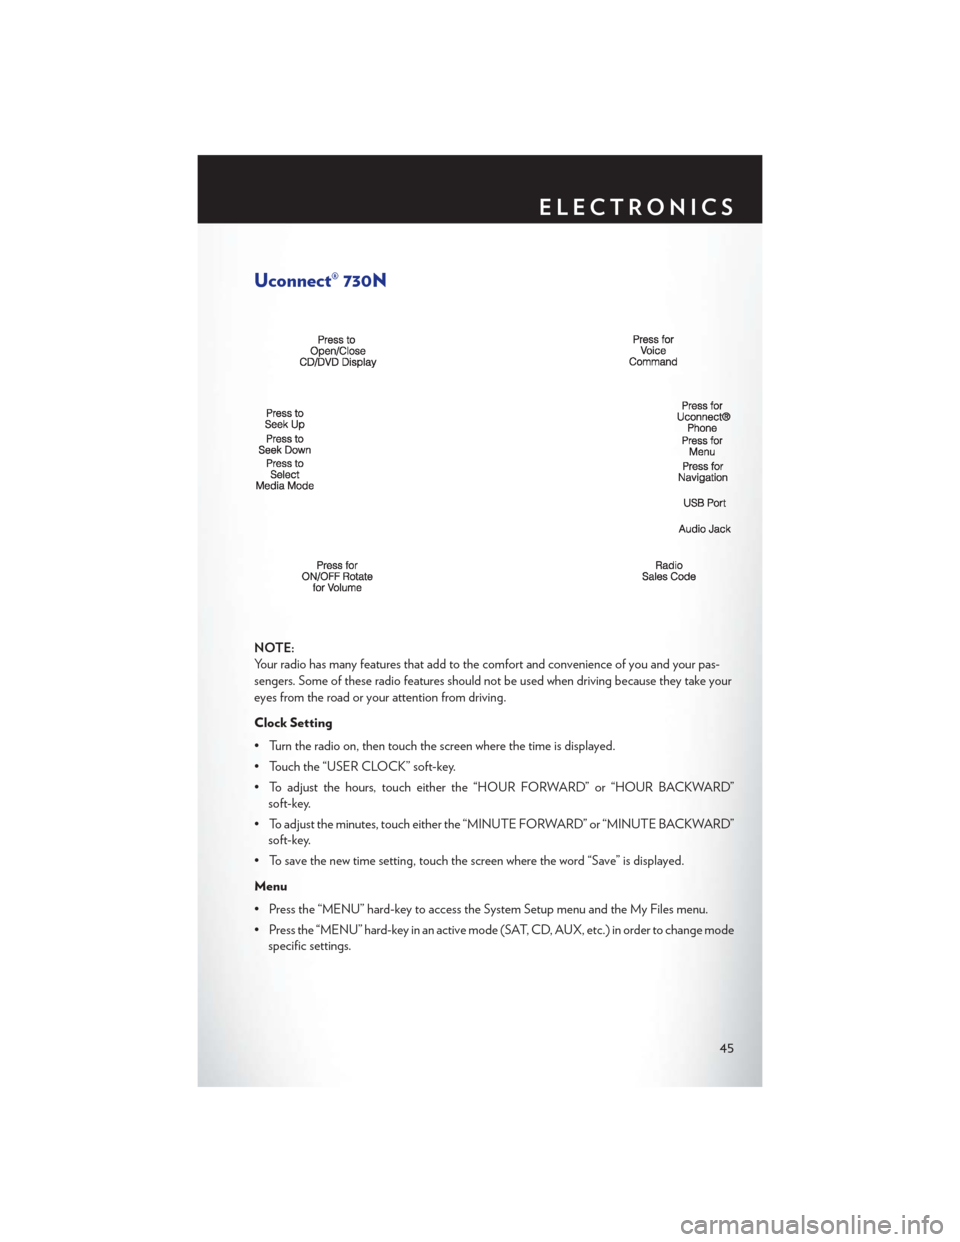
Uconnect® 730N
NOTE:
Your radio has many features that add to the comfort and convenience of you and your pas-
sengers. Some of these radio features should not be used when driving because they take your
eyes from the road or your attention from driving.
Clock Setting
• Turn the radio on, then touch the screen where the time is displayed.
• Touch the “USER CLOCK” soft-key.
• To adjust the hours, touch either the “HOUR FORWARD” or “HOUR BACKWARD”soft-key.
• To adjust the minutes, touch either the “MINUTE FORWARD” or “MINUTE BACKWARD” soft-key.
• To save the new time setting, touch the screen where the word “Save” is displayed.
Menu
• Press the “MENU” hard-key to access the System Setup menu and the My Files menu.
• Press the “MENU” hard-key in an active mode (SAT, CD, AUX, etc.) in order to change mode specific settings.
ELECTRONICS
45
Page 86 of 116
Road Tire Installation
Vehicles Equipped With Wheel Covers
1. Mount the road tire on the axle.
2. To ease the installation process for steel wheels with wheel covers, install two lug nuts on themounting studs which are on each side of the valve stem. Install the lug nuts with the cone
shaped end of the nut toward the wheel. Lightly tighten the lug nuts.
3. Align the valve notch in the wheel cover with the valve stem on the wheel. Install the cover
by hand, snapping the cover over the two
lug nuts. Do not use a hammer or excessive
force to install the cover.
4. Install the remaining lug nuts with the cone shaped end of the nut toward the wheel.
Lightly tighten the lug nuts.
5. Lower the vehicle to the ground by turning the jack handle counterclockwise.
6. Finish tightening the lug nuts. Push down on the wrench while at the end of the handle for
increased leverage. Tighten the lug nuts in a
star pattern until each nut has been tight-
ened twice. The correct tightness of each
lug nut is 100 ft/lbs (135 N·m). If in doubt about the correct tightness, have them checked with
a torque wrench by your authorized dealer or service station.
7. After 25 miles (40 km) check the lug nut torque with a torque wrench to ensure that all lug nuts are properly seated against the wheel.
Vehicles Without Wheel Covers
1. Mount the road tire on the axle.
2. Install the remaining lug nuts with the cone shaped end of the nut toward the wheel. Lightly tighten the lug nuts.
3. Lower the vehicle to the ground by turning the jack handle counterclockwise.
4. Finish tightening the lug nuts. Push down on the wrench while at the end of the handle for increased leverage. Tighten the lug nuts in a star pattern until each nut has been tightened
twice. The correct tightness of each lug nut is 100 ft/lbs (135 N·m). If in doubt about the
correct tightness, have them checked with a torque wrench by your authorized dealer or
service station.
5. After 25 miles (40 km) check the lug nut torque with a torque wrench to ensure that all lug nuts are properly seated against the wheel.
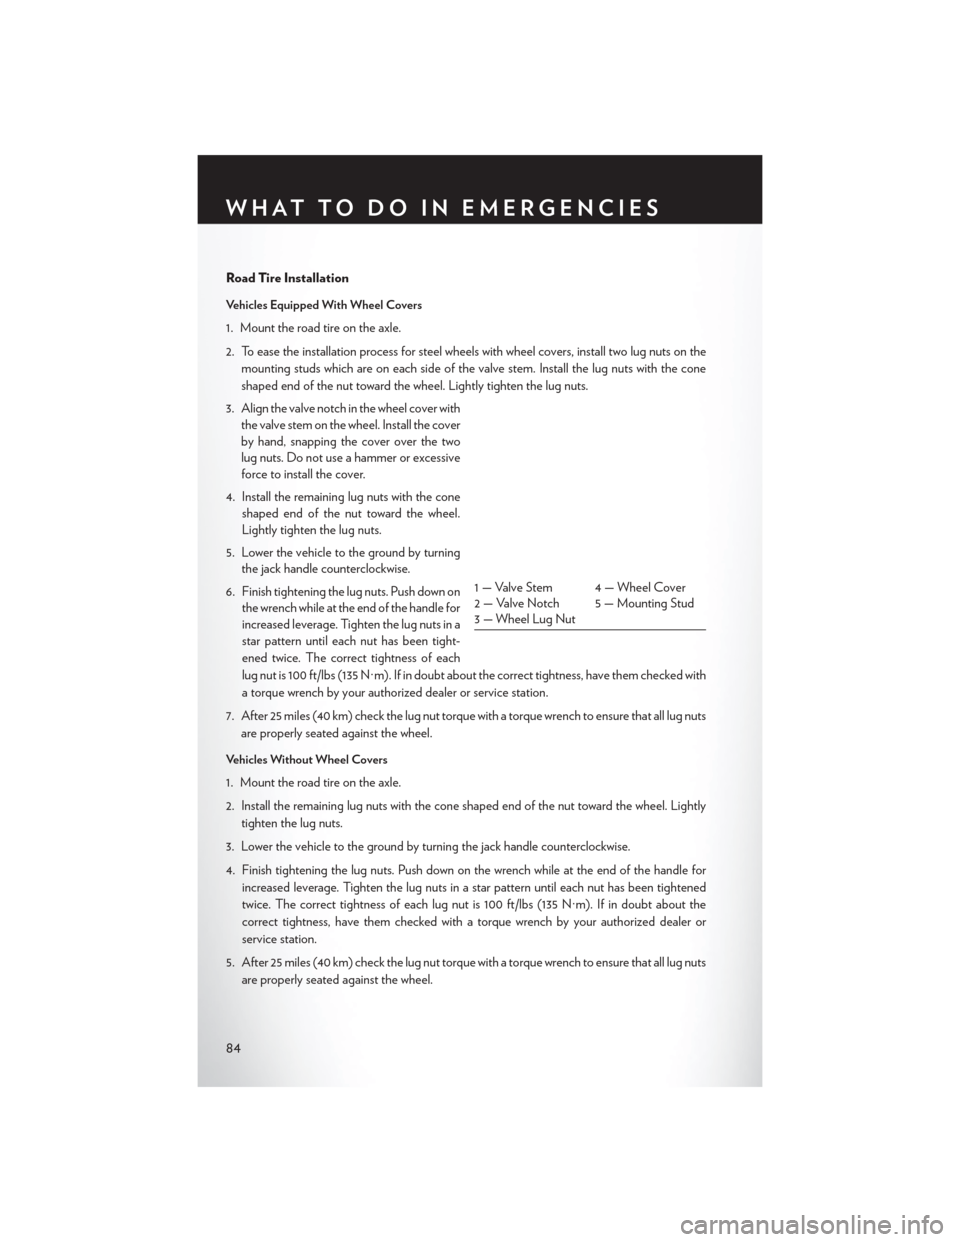
1 — Valve Stem 4 — Wheel Cover
2 — Valve Notch 5 — Mounting Stud
3 — Wheel Lug Nut
WHAT TO DO IN EMERGENCIES
84
Page 103 of 116
FUSES
Integrated Power Module
• The Integrated Power Module (fuses) is located in the engine compartment near the aircleaner assembly. This center contains cartridge fuses and mini fuses. A label that identifies
each component may be printed on the inside of the cover.
Cavity Cartridge Fuse Mini Fuse Description
1 40 Amp Green — Power Top Module – If Equipped
2 — 20 Amp Yellow Brake Vacuum Pump
3 — 10 Amp Red Center High Mounted Stop Light
(CHMSL)/Brake Switch
4 — 10 Amp Red Ignition Switch
5 — 20 Amp Yellow Trailer Tow – If Equipped
6 — 10 Amp Red Power Mirror Switch/Climate Controls
7 — 30 Amp Green Ignition Off Draw (IOD) Sense 1
8 — 30 Amp Green Ignition Off Draw (IOD) Sense 2
9 40 Amp Green Battery Feed – Power Seats – If Equipped
10 — 20 Amp Yellow
Instrument Panel/Power Locks/Interior Lights
11— 15 Amp Lt Blue Selectable Power Outlet
(Inside Center Arm Rest)
12 — 20 Amp Yellow —
13 — 20 Amp Yellow Ignition/Cigar Lighter
14 — 10 Amp Red Instrument Panel
15 40 Amp Green — Radiator Fan Relay
16 — 15 Amp Lt. Blue Sunroof – If Equipped
17 — 10 Amp Red Wireless Control Module (WCM)/Clock/
Steering Control Module (SCM)
18 40 Amp Green — Auto Shutdown (ASD) Relay
MAINTAINING YOUR VEHICLE
101
Page 113 of 116
FREQUENTLY ASKED QUESTIONS
GETTING STARTED
• How do I install my LATCH Equipped Child Seat? pg. 12
• How do I adjust the lumbar on the driver seat? pg. 15
OPERATING YOUR VEHICLE
• How do I operate my convertible top? pg. 25
ELECTRONICS
• Which radio is in my vehicle?• Uconnect® 130 pg. 30
• Uconnect® 130 WITH SiriusXM SATELLITE pg. 32
• Uconnect® 430/430N pg. 35
• Uconnect® 730N pg. 45
• How do I activate the Audio Jack?
• Uconnect® 130 pg. 34
• Uconnect® 130 pg. 34
• Uconnect® 430/430N pg. 39
• Uconnect® 730N pg. 49
• How do I set the clock on my radio?
• Uconnect® 130 pg. 32
• Uconnect® 130 pg. 32
• Uconnect® 430/430N pg. 35
• Uconnect® 730N pg. 45
• How do I use the Navigation feature?
• Uconnect® 430/430N pg. 41
• Uconnect® 730N pg. 53
• How do I pair my cell phone via Bluetooth® with the Uconnect® Hands-Free Voice Activation System? pg. 63
• How do I use my iPod®? pg. 61
• How do I use my USB port to listen to audio through my touch-screen radio? pg. 61
• How do I configure my Universal Garage Door Opener (HomeLink®)? pg. 71
FAQ(HowTo?)
111