phone CHRYSLER 200 CONVERTIBLE 2013 1.G User Guide
[x] Cancel search | Manufacturer: CHRYSLER, Model Year: 2013, Model line: 200 CONVERTIBLE, Model: CHRYSLER 200 CONVERTIBLE 2013 1.GPages: 116, PDF Size: 3.04 MB
Page 3 of 116
INTRODUCTION/WELCOME
WELCOME FROM CHRYSLER
GROUPLLC ..................2
CONTROLS AT A GLANCE
DRIVER COCKPIT...............4
INSTRUMENT CLUSTER ...........6
GETTING STARTED
KEYFOB.....................8
REMOTE START................9
THEFT ALARM .................9
SUPPLEMENTAL RESTRAINT
SYSTEM (SRS) — AIR BAGS .........10
SEATBELT ...................11
CHILD RESTRAINTS .............11
FRONTSEATS ................15
HEATEDSEATS ................17
TILT/TELESCOPING STEERING
COLUMN ...................18
OPERATING YOUR VEHICLE
ENGINE BREAK-IN
RECOMMENDATIONS ............19
TURN SIGNAL/LIGHTS LEVER .......19
WIPER/WASHER LEVER ...........21
SPEED CONTROL ..............22
MANUAL CLIMATE CONTROLS ......23
AUTOMATIC TEMPERATURE
CONTROLS (ATC) ..............24
POWER CONVERTIBLE TOP
OPERATION .................25
WIND BUFFETING . . ............27
ELECTRONICS
YOUR VEHICLE'S SOUND SYSTEM ....28
Uconnect® 130 .................30
Uconnect® 130 WITH SiriusXM SATELLITE
RADIO .....................32
Uconnect® 430/430N ..............35
Uconnect® 730N . . ..............45
SiriusXM SATELLITE RADIO/TRAVEL
LINK .......................57
STEERING WHEEL AUDIO CONTROLS..61
iPod®/USB/MP3 CONTROL .........61
Uconnect® Phone ................62
Uconnect® VOICE COMMAND .......66
Bluetooth® STREAMING AUDIO ......68
ELECTRONIC VEHICLE INFORMATION
CENTER (EVIC) ................69
PROGRAMMABLE FEATURES .......69UNIVERSAL GARAGE DOOR OPENER
(HomeLink®)
..................71
POWER OUTLETS ..............73
UTILITY
TRAILER TOWING WEIGHTS (MAXIMUM
TRAILER WEIGHT RATINGS) ........74
RECREATIONAL TOWING
(BEHIND MOTORHOME, ETC.) ......75
WHAT TO DO IN EMERGENCIES
ROADSIDE ASSISTANCE..........76
INSTRUMENT CLUSTER WARNING
LIGHTS .....................76
IF YOUR ENGINE OVERHEATS ......80
JACKING AND TIRE CHANGING . . . . . 81
BATTERY LOCATION ............86
JUMP-STARTING ...............86
SHIFT LEVER OVERRIDE ..........88
TOWING A DISABLED VEHICLE .....89
FREEING A STUCK VEHICLE .......90
EVENT DATA RECORDER (EDR) . . ....91
MAINTAINING YOUR VEHICLE
OPENING THE HOOD . . .........92
ENGINE COMPARTMENT .........93
FLUIDSANDCAPACITIES .........95
MAINTENANCE SCHEDULE ........97
MAINTENANCE RECORD . ........100
FUSES .....................101
TIRE PRESSURES ...............103
WHEEL AND WHEEL TRIM CARE ....104
EXTERIOR BULBS ..............104
CUSTOMER ASSISTANCE
CHRYSLER GROUP LLC CUSTOMER
CENTER...................105
CHRYSLER CANADA INC. CUSTOMER
CENTER ...................105
ASSISTANCE FOR THE HEARING
IMPAIRED ..................105
PUBLICATIONS ORDERING ........105
REPORTING SAFETY DEFECTS IN
THE 50 UNITED STATES AND
WASHINGTON, D.C. ............106
MOPAR ACCESSORIES
AUTHENTIC ACCESSORIES BY
MOPAR® ...................107
INDEX................... 108
FAQ(HowTo?)
FREQUENTLY ASKED QUESTIONS ....111
TABLE OF CONTENTS
Page 5 of 116
VEHICLES SOLD IN CANADA
With respect to any vehicles sold in Canada, the name Chrysler Group LLC shall be deemed to
be deleted and the name Chrysler Canada Inc. used in substitution.
WARNING!
• Pedals that cannot move freely can cause loss of vehicle control and increase the risk ofserious personal injury.
• Always make sure that objects cannot fall into the driver foot well while the vehicle is
moving. Objects can become trapped under the brake pedal and accelerator pedal
causing a loss of vehicle control.
• Failure to properly follow floor mat installation or mounting can cause interference with
the brake pedal and accelerator pedal operation causing loss of control of the vehicle.
• Never use the ‘PARK’ position as a substitute for the parking brake. Always apply the parking brake fully when parked to guard against vehicle movement and possible injury or
damage.
• Refer to your Owner's Manual on the DVD for further details.
USE OF AFTERMARKET PRODUCTS (ELECTRONICS)
The use of aftermarket devices including cell phones, MP3 players, GPS systems, or chargers
may affect the performance of on-board wireless features including Keyless Enter-N-Go™ and
Remote Start range. If you are experiencing difficulties with any of your wireless features, try
disconnecting your aftermarket devices to see if the situation improves. If your symptoms persist,
please see an authorized dealer.
CHRYSLER, DODGE, JEEP, RAM TRUCK, SRT, ATF+4, MOPAR and Uconnect are regis-
tered trademarks of Chrysler Group LLC.
COPYRIGHT ©2012 CHRYSLER GROUP LLC
INTRODUCTION/WELCOME
3
Page 34 of 116
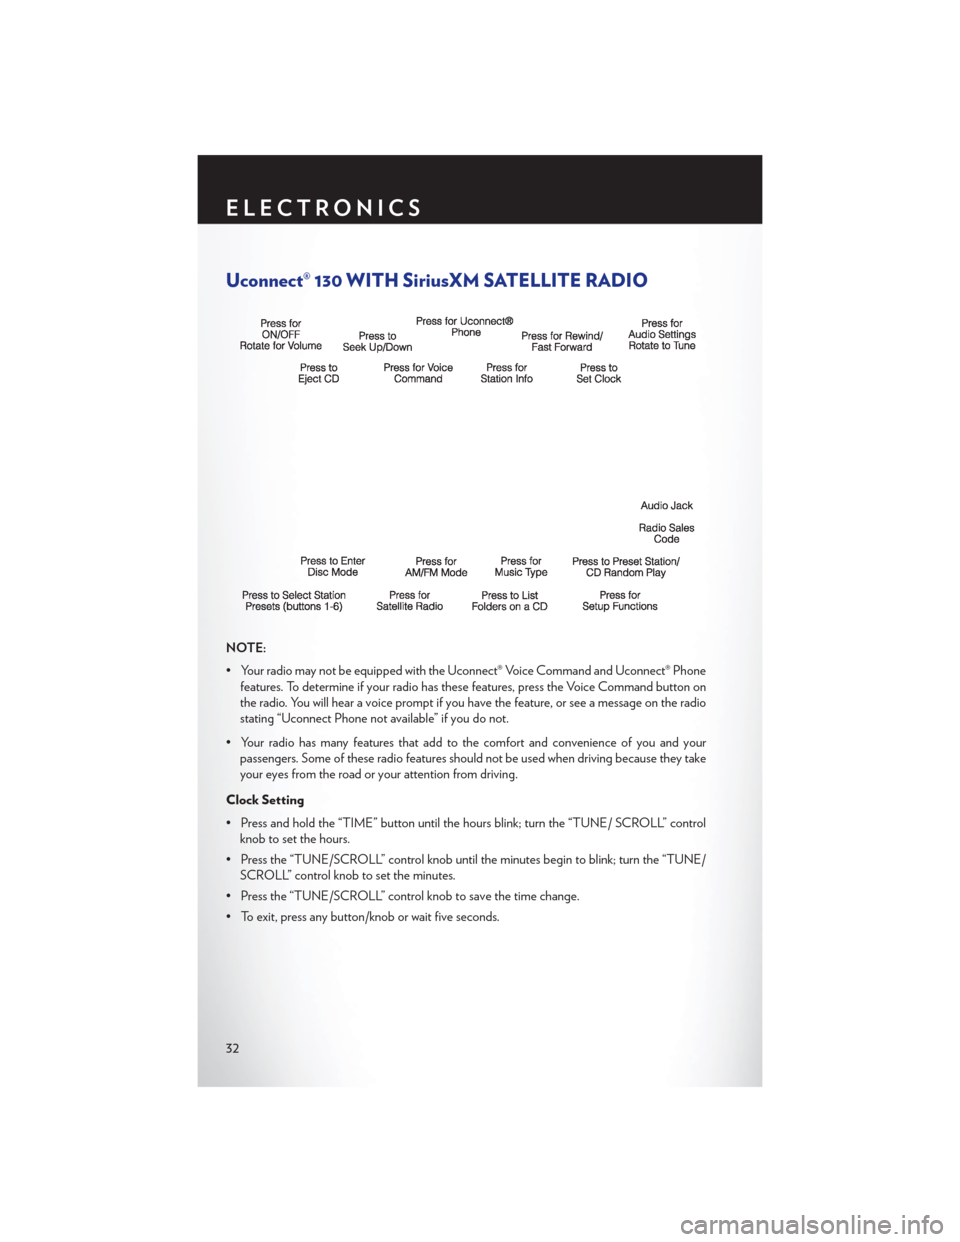
Uconnect® 130 WITH SiriusXM SATELLITE RADIO
NOTE:
• Your radio may not be equipped with the Uconnect® Voice Command and Uconnect® Phonefeatures. To determine if your radio has these features, press the Voice Command button on
the radio. You will hear a voice prompt if you have the feature, or see a message on the radio
stating “Uconnect Phone not available” if you do not.
• Your radio has many features that add to the comfort and convenience of you and your passengers. Some of these radio features should not be used when driving because they take
your eyes from the road or your attention from driving.
Clock Setting
• Press and hold the “TIME” button until the hours blink; turn the “TUNE/ SCROLL” control knob to set the hours.
• Press the “TUNE/SCROLL” control knob until the minutes begin to blink; turn the “TUNE/ SCROLL” control knob to set the minutes.
• Press the “TUNE/SCROLL” control knob to save the time change.
• To exit, press any button/knob or wait five seconds.
ELECTRONICS
32
Page 37 of 116
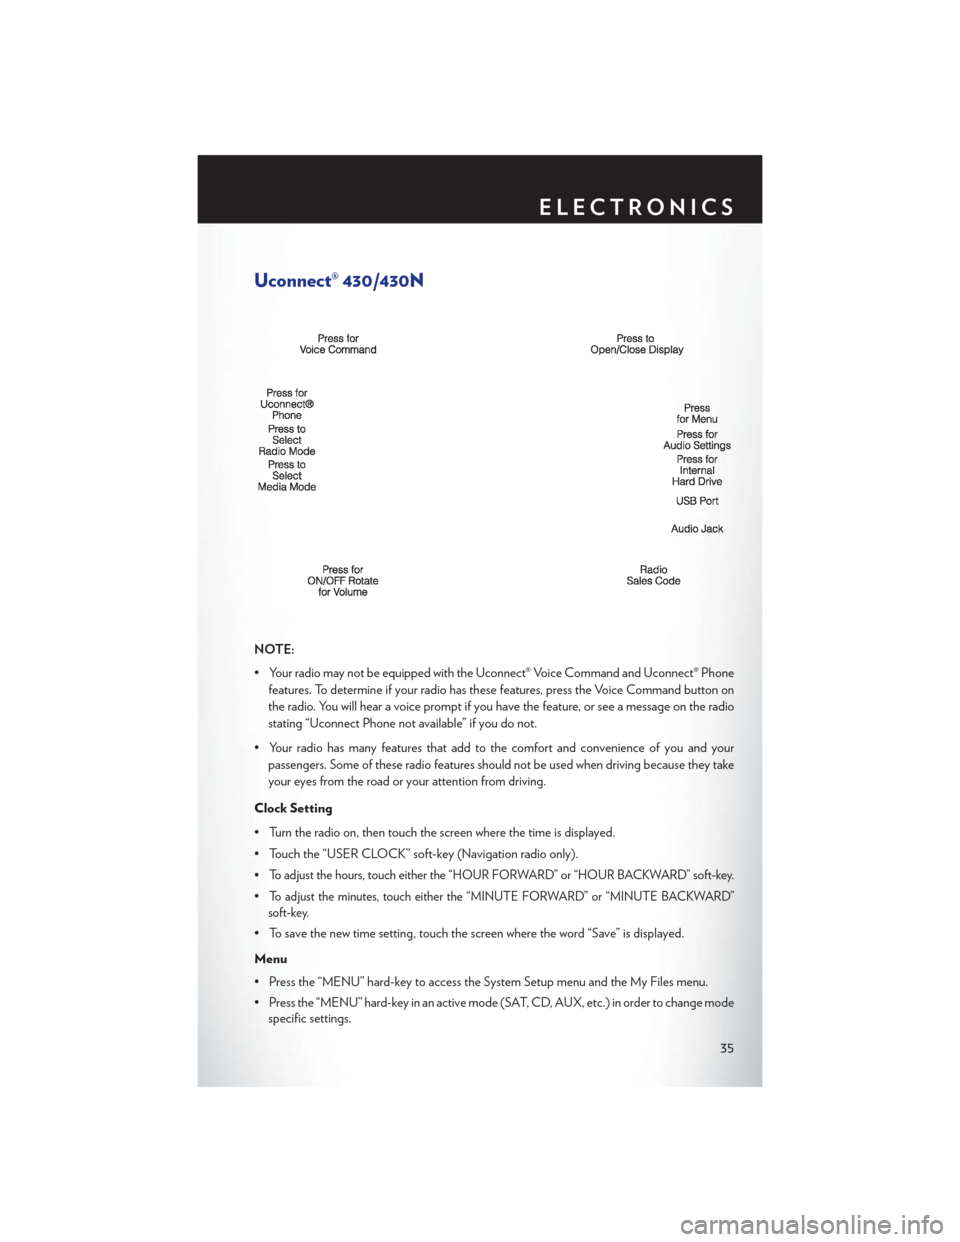
Uconnect® 430/430N
NOTE:
• Your radio may not be equipped with the Uconnect® Voice Command and Uconnect® Phonefeatures. To determine if your radio has these features, press the Voice Command button on
the radio. You will hear a voice prompt if you have the feature, or see a message on the radio
stating “Uconnect Phone not available” if you do not.
• Your radio has many features that add to the comfort and convenience of you and your passengers. Some of these radio features should not be used when driving because they take
your eyes from the road or your attention from driving.
Clock Setting
• Turn the radio on, then touch the screen where the time is displayed.
• Touch the “USER CLOCK” soft-key (Navigation radio only).
•
To adjust the hours, touch either the “HOUR FORWARD” or “HOUR BACKWARD” soft-key.
•To adjust the minutes, touch either the “MINUTE FORWARD” or “MINUTE BACKWARD”
soft-key.
• To save the new time setting, touch the screen where the word “Save” is displayed.
Menu
• Press the “MENU” hard-key to access the System Setup menu and the My Files menu.
• Press the “MENU” hard-key in an active mode (SAT, CD, AUX, etc.) in order to change mode specific settings.
ELECTRONICS
35
Page 64 of 116
•Touch-Screen Radios: To hear audio from devices connected to the USB port, press the
“MEDIA” hard-key, then touch the “AUX” or “iPod®” soft-key.
• When connected to this feature: • The iPod® can be controlled using the
radio buttons to Play, Browse, and List the
iPod® or external devices contents.
• The iPod® battery charges when plugged into the USB port (if supported by the
specific audio device).
• Compatible iPod® devices may also be
controllable using voice commands. Refer
to the Owner's Manual on the DVD for details.
NOTE:
The USB port supports certain Mini, Classic, Nano, Touch, and iPhone® devices. The USB port
also supports playing music from compatible external USB Mass Storage Class memory devices.
For supported audio file formats, refer to the USB Port section in the Owner's Manual on the
DVD. Refer to www.UconnectPhone.com for a list of tested iPods®. Some iPod® software
versions may not fully support the USB port features. Please visit Apple’s website for iPod®
software updates.
WARNING!
Do not plug in or remove the iPod® or external device while driving. Failure to follow this
warning could result in a collision.
Uconnect® Phone
• To determine if your vehicle is equipped with Uconnect® Phone, press the “Uconnect® Phone” button
. If your vehicle has this feature, you will hear a voice prompt. If not, you will see
a message on the radio “Uconnect phone not available”.
• The Uconnect® Phone is a voice-activated, hands-free, in-vehicle communications system with Voice Command Capability (see Voice Command section).
NOTE:
To access the tutorial, press the “Uconnect® Phone” button
. After the BEEP, say “tutorial.”
Press any hard-key/button or touch the display (Touch-Screen radio) to cancel the “tutorial”.
• The Uconnect® Phone allows you to dial a phone number with your mobile phone using simple voice commands.
• Refer to your vehicle Owner's Manual on the DVD for further details.
ELECTRONICS
62
Page 65 of 116
NOTE:
The Uconnect® Phone requires a mobile phone equipped with the Bluetooth® Hands-Free
Profile, Version 1.0 or higher. For Uconnect® Customer Support: U.S. residents - visit
www.UconnectPhone.com or call 1–877–855–8400. Canadian Residents - call, 1-800-465–2001
(English) or 1-800-387-9983 (French). This site will provide specific instructions based on the
type of mobile phone being paired.
Phone Pairing
NOTE:
• Pairing is a one-time initial setup before using the phone.
• Prior to starting the pairing procedure ensure all additional phones within the vehicle havetheir Bluetooth® disabled.
•
The Uconnect® Phone requires a mobile phone equipped with the Bluetooth® Hands-Free
Profile, Version 1.0 or higher. For Uconnect® customer support: U.S. residents - visit
www.UconnectPhone.com or call 1–877–855–8400. Canadian Residents - call 1-800-465–2001
(English) or 1-800-387-9983 (French). This site will provide specific instructions based on the
type of mobile phone being paired.
• Press the “Phone”button to begin.
• Wait for the “ready” prompt and BEEP.
• After the BEEP, say ”setup” or “Uconnect device setup”.
• After the BEEP, say “device pairing”.
• After the BEEP, say “pair a device”.
• Follow the audible prompts.
• You will be asked to say a four-digit Personal Identification Number (PIN), which you will
later need to enter into your mobile phone.
You can say any four-digit PIN. You will not
need to remember this PIN after the initial
pairing process.
• You will then be prompted to give the phone pairing a name (each phone paired should have a unique name).
• Next you will be asked to give this new pairing a priority of 1 thru 7 (up to seven phones may be paired); 1 is the highest and 7 is the lowest priority. The system will only connect to the
highest priority phone that exists within the proximity of the vehicle.
• You will then need to start the pairing procedure on your cell phone. Follow the Bluetooth® instructions in your cell phone Owner's Manual to complete the phone pairing setup.
ELECTRONICS
63
Page 66 of 116
Phonebook
Phonebook Download – Automatic Phonebook Transfer From Mobile Phone
If equipped and specifically supported by your phone, Uconnect® Phone automatically down-
loads names (text names) and number entries from your mobile phone’s phonebook. Specific
Bluetooth® Phones with Phone Book Access Profile may support this feature. Automatic Transfer
is indicated by a green arrow at the bottom of the screen. See www.UconnectPhone.com for
supported phones.
• Automatic download and update, if sup-ported, begins as soon as the Bluetooth®
wireless phone connection is made to the
Uconnect® Phone, for example, after you
start the vehicle.
NOTE:
The mobile phone may require authorization prior to download.
• A maximum of 1000 entries per phone will be downloaded and updated every time a phone is connected to the Uconnect® Phone.
• Depending on the maximum number of entries downloaded, there may be a short delay before the latest downloaded names can be used. Until then, if available, the previously
downloaded phonebook is available for use.
• Only the phonebook of the currently connected mobile phone is accessible.
• Only the mobile phone’s phonebook is downloaded. The SIM card phonebook is not part of the Mobile phonebook.
• This downloaded phonebook cannot be edited or deleted on the Uconnect® Phone. These can only be edited on the mobile phone. The changes are transferred and updated to
Uconnect® Phone on the next phone connection.
Making A Phone Call
• Press the “Phone” button
.
• After the BEEP, say “dial” (or “call” a name).
• After the BEEP, say number (or name).
ELECTRONICS
64
Page 67 of 116
Receiving A Call – Accept (And End)
• When an incoming call rings/is announced on Uconnect®, press the Phone button
.
• To end a call, press the Phone button
.
Mute (Or Unmute) Microphone During Call
• During a call, press the “Voice Command” button
.
• (After the BEEP), say “mute” (or “mute off ”).
Transfer Ongoing Call Between Handset And Vehicle
• During a call, press the “Voice Command” button
.
• (After the BEEP), say “transfer call”.
Changing The Volume
•
Start a dialogue by pressing the “Phone” button, then adjust the volume during a normal call.
• Use the radio ON/OFF VOLUME rotary knob to adjust the volume to a comfortable level while the Uconnect® system is speaking. Please note the volume setting for Uconnect® is
different than the audio system.
WARNING!
• Any voice commanded system should be used only in safe driving conditions following
applicable laws regarding phone use. Your attention should be focused on safely operating
the vehicle. Failure to do so may result in a collision causing you and others to be severely
injured or killed.
• In an emergency, to use Uconnect® Phone, your mobile phone must be:
• turned on,
• paired to Uconnect® Phone,
• and have network coverage.
ELECTRONICS
65
Page 68 of 116
Uconnect® VOICE COMMAND
Voice Command Operation
•
The Uconnect® Voice Command system allows you to control your AM, FM radio, satellite radio,
disc player, HDD, Uconnect® Phone, a memo recorder, and supported portable media devices.
• When you press the “Voice Command” buttonlocated on the radio faceplate or
steering wheel, you will hear a beep. The beep is your signal to give a command. If you do not
say a command within a few seconds, the system will present you with a list of options. If you
ever wish to interrupt the system while it lists options, press the “Voice Command” button
, listen for the BEEP, and say your command.
NOTE:
Visit http://www.driveuconnect.com/features/voiceCommand/ for more info on which voice
command features apply to your vehicle
• Start a dialogue by pressing the “Voice Command” button
, you will hear a beep. The
beep is your signal to give a command. Below are a list of voice commands for each of the
different modes.
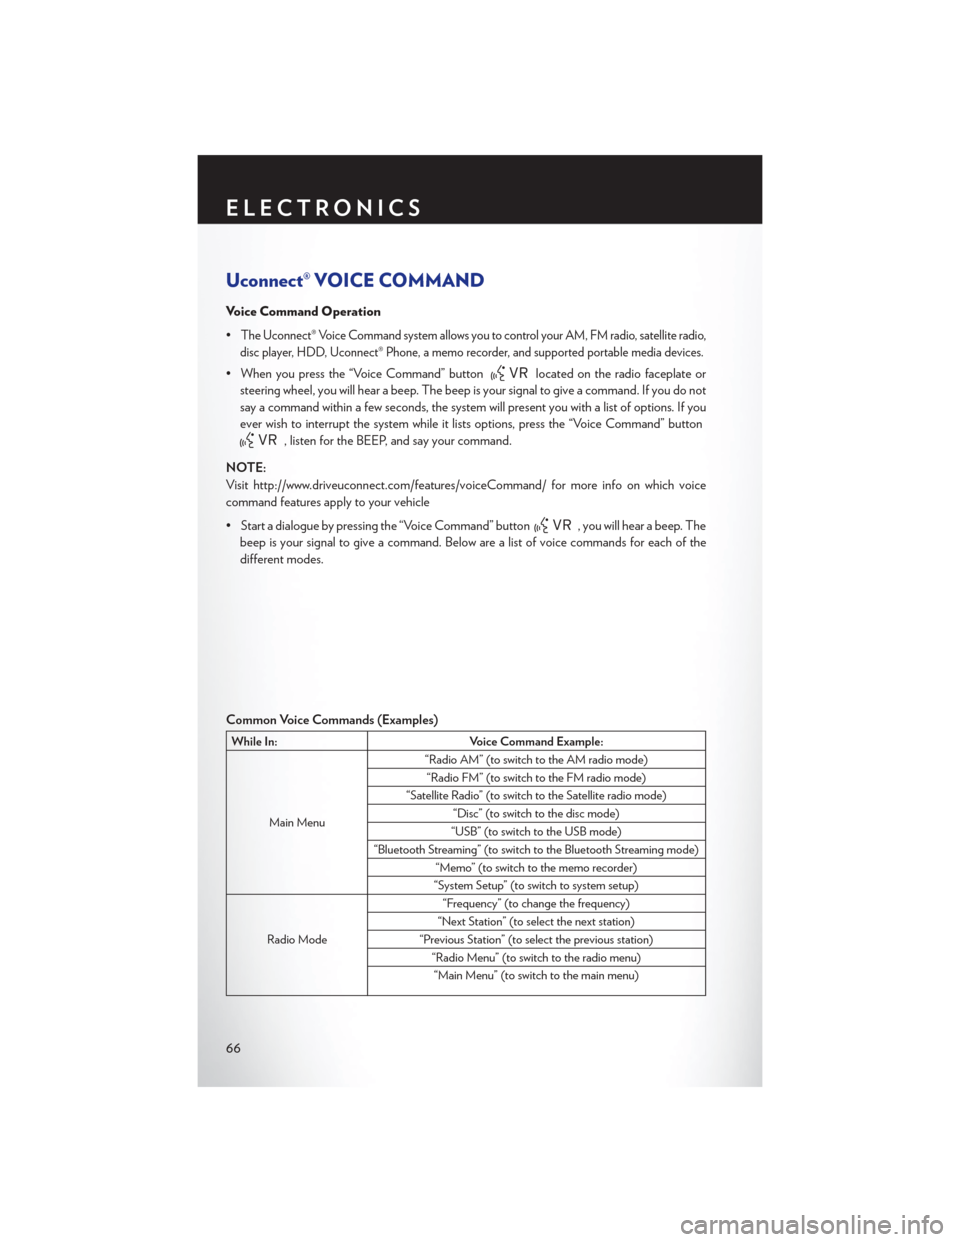
Common Voice Commands (Examples)
While In: Voice Command Example:
Main Menu “Radio AM” (to switch to the AM radio mode)
“Radio FM” (to switch to the FM radio mode)
“Satellite Radio” (to switch to the Satellite radio mode) “Disc” (to switch to the disc mode)
“USB” (to switch to the USB mode)
“Bluetooth Streaming” (to switch to the Bluetooth Streaming mode) “Memo” (to switch to the memo recorder)
“System Setup” (to switch to system setup)
Radio Mode “Frequency” (to change the frequency)
“Next Station” (to select the next station)
“Previous Station” (to select the previous station) “Radio Menu” (to switch to the radio menu)“Main Menu” (to switch to the main menu)
ELECTRONICS
66
Page 70 of 116
Voice Text Reply
• If equipped with Uconnect® Voice Command, your Uconnect® 430N, 730N & 731N radiosmay be able to play incoming Short Message Service (SMS) messages (text messages)
through the vehicle's sound system.
• It also allows you to respond by selecting from various pre-defined phrases.
• Not all phones are compatible with this feature. Refer to the phone compatibility list at www.UconnectPhone.com. Connected mobile phones must be bluetooth-compatible, and
paired with your radio.
• Press the “Voice Command” button
and after the BEEP, say “SMS” to get started.
NOTE:
To access the tutorial, press the “Voice Command” button. After the BEEP, say “tutorial”.
Press any hard-key/button or touch the display (Touch-Screen radio) to cancel the tutorial.
WARNING!
Any voice commanded system should be used only in safe driving conditions following applicable
laws regarding phone use. Your attention should be focused on safely operating the vehicle.
Failure to do so may result in a collision causing you and others to be severely injured or killed.
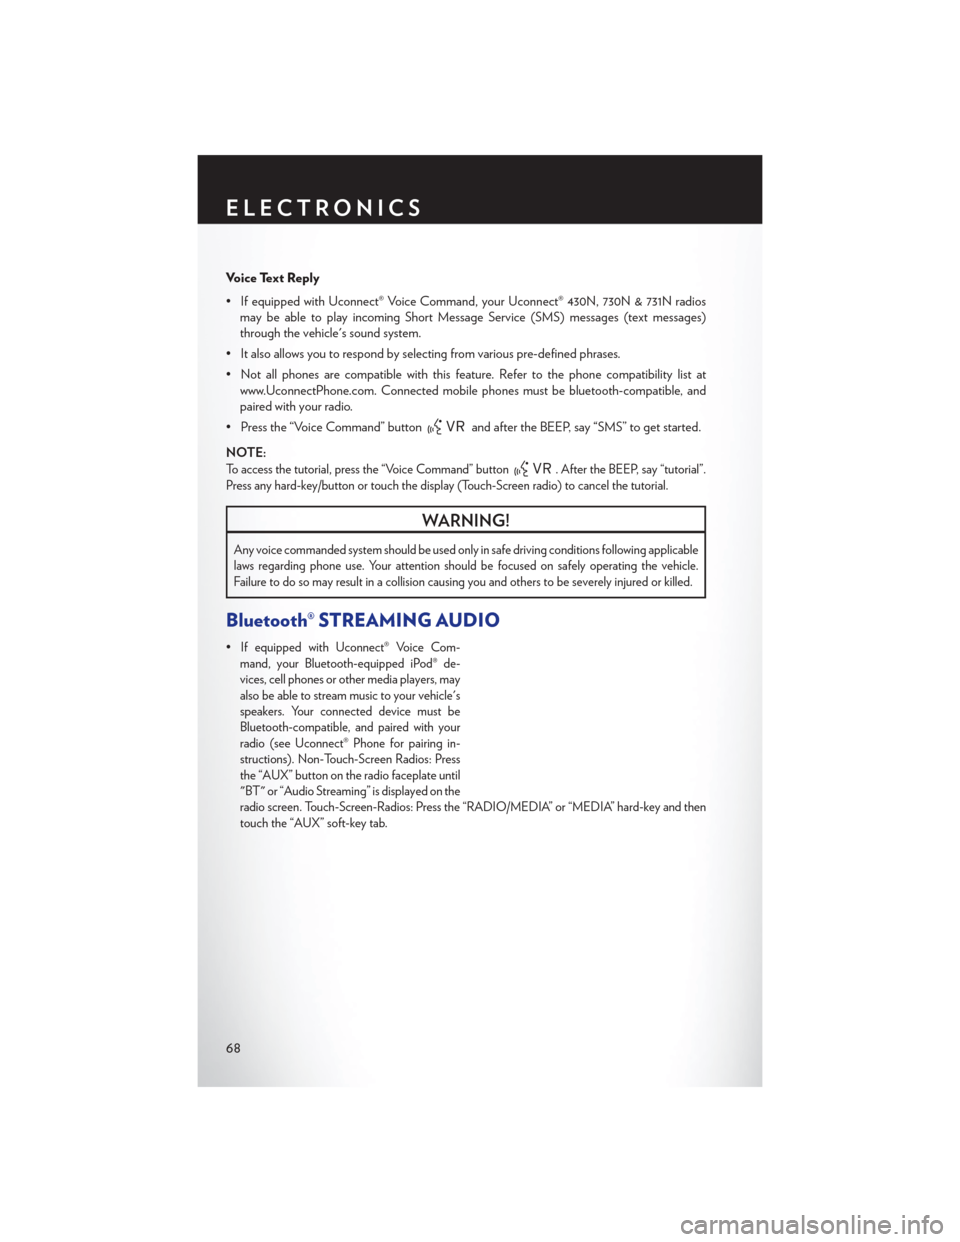
Bluetooth® STREAMING AUDIO
•If equipped with Uconnect® Voice Com-
mand, your Bluetooth-equipped iPod® de-
vices, cell phones or other media players, may
also be able to stream music to your vehicle's
speakers. Your connected device must be
Bluetooth-compatible, and paired with your
radio (see Uconnect® Phone for pairing in-
structions). Non-Touch-Screen Radios: Press
the “AUX” button on the radio faceplate until
"BT" or “Audio Streaming” is displayed on the
radio screen. Touch-Screen-Radios: Press the “RADIO/MEDIA” or “MEDIA” hard-key and then
touch the “AUX” soft-key tab.
ELECTRONICS
68