reset CHRYSLER 200 CONVERTIBLE 2014 1.G User Guide
[x] Cancel search | Manufacturer: CHRYSLER, Model Year: 2014, Model line: 200 CONVERTIBLE, Model: CHRYSLER 200 CONVERTIBLE 2014 1.GPages: 124, PDF Size: 3.31 MB
Page 35 of 124
Radio Operation
Seek Up/Down Buttons
• Press to seek through radio stations in AM or FM bands.
• Hold either button to bypass stations without stopping.
Store Radio Presets
• Press the “SET/RND” or “SET” (depending on the radio) button once and SET 1 will show inthe display. Then select button (1–6).
• A second station may be added to each push button. Press the “SET/RND” or “SET” (depending on the radio) button twice and SET 2 will show in the display. Then select button
(1–6).
CD/DISC Operation
Seek Up/Down Buttons
• Press to seek through CD tracks.
• Hold either button to bypass tracks without stopping.
SET/RND or RND (depending on radio) Button (Random Play)
• Press this button while the CD is playing to activate Random Play.
• This feature plays the selections on the CD in random order to provide an interesting changeof pace.
Audio Jack Operation
• The AUX/Audio Jack provides a means to connect a portable audio device, such as an MP3player or an iPod®, to the vehicle’s sound system. This requires the use of a 3.5 mm stereo audio
patch cable.
• Pressing the AUX button will change the mode to auxiliary device if the Audio Jack is connected, allowing the music from your portable device to play through the vehicle's
speakers.
• The functions of the portable device are controlled using the device buttons, not the buttons on the radio. However, the volume may be controlled using the radio or portable device.
ELECTRONICS
33
Page 37 of 124
Equalizer, Balance And Fade
• Press the “TUNE/SCROLL” control knob and “BASS” will display. Rotate the “TUNE/SCROLL” control knob to select the desired setting. Subsequent presses of the "TUNE/
SCROLL" control knob will display, "MID RANGE," "TREBLE," "BALANCE" and "FADE".
Radio Operation
Seek Up/Down Buttons
• Press to seek through radio stations in AM, FM, or SAT bands.
• Hold either button to bypass stations without stopping.
Store Radio Presets
• Press the “SET/RND” or “SET” (depending on the radio) button once and SET 1 will show inthe display. Then select button (1–6).
• A second station may be added to each push button. Press the “SET/RND” or “SET” (depending on the radio) button twice and SET 2 will show in the display. Then select button
(1–6).
Music Type
NOTE:
The Music Type function only operates when in FM mode.
• Press the “MUSIC TYPE” button to activate this mode. Press the “MUSIC TYPE” button again or turn the “TUNE/SCROLL” control knob to select the desired music type (Adult Hits,
Country, Jazz, Oldies, Rock, etc.).
• When a music type is chosen and the Music type is displayed, press either “SEEK” button and the radio will only search for stations with the selected music type.
SETUP Button
• Pressing the “SETUP” button allows you to select between items that are available in that particular mode.
• Turn the “TUNE/SCROLL” control knob to scroll through the entries. Push the “AUDIO/ SELECT” button to select an entry and make changes.
ELECTRONICS
35
Page 40 of 124
Menu
• Press the “MENU” hard-key to access the System Setup menu and the My Files menu.
• Press the “MENU” hard-key in an active mode (SAT, CD, AUX, etc.) to change mode specificsettings.
Equalizer, Balance And Fade
Audio Control Menu
• Press the “AUDIO” hard-key on the rightside of the radio.
• Use either the arrow soft-keys or the cross- hair on the screen to change Balance and
Fade. The “CENTER” soft-key resets the
settings.
• Touch the “Equalizer” soft-key and use ei- ther the arrow soft-keys or the sliders on the
screen to adjust BASS, MID, and/or
TREBLE.
Display Settings
• Press the “MENU” hard-key and touch the “Display Settings” soft-key to access the
Display Settings menu.
• Select the “Daytime Colors” soft-key to switch to manual daytime mode and to ad-
just the brightness of the display using day-
time colors.
• Select the “Nighttime Colors” soft-key to switch to manual nighttime mode and to
adjust the brightness of the display using nighttime colors.
• Select the “Auto Color Mode” soft-key to switch to automatic daytime/nighttime mode and to control the brightness of the display using the dimmer switch of the vehicle.
• Touch the “EXIT” soft-key to save your settings.
ELECTRONICS
38
Page 41 of 124
Radio Operation
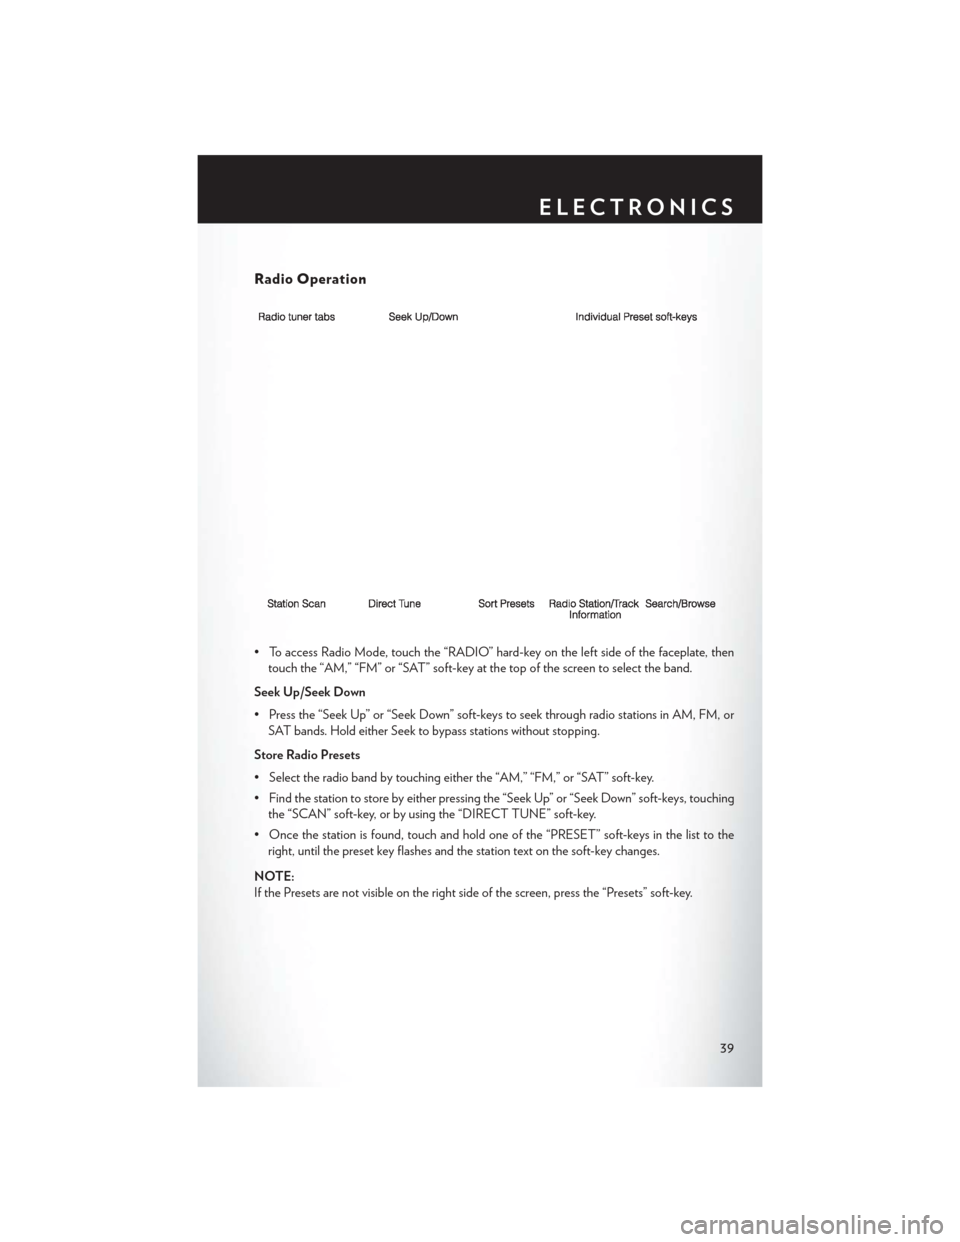
• To access Radio Mode, touch the “RADIO” hard-key on the left side of the faceplate, thentouch the “AM,” “FM” or “SAT” soft-key at the top of the screen to select the band.
Seek Up/Seek Down
• Press the “Seek Up” or “Seek Down” soft-keys to seek through radio stations in AM, FM, or SAT bands. Hold either Seek to bypass stations without stopping.
Store Radio Presets
• Select the radio band by touching either the “AM,” “FM,” or “SAT” soft-key.
• Find the station to store by either pressing the “Seek Up” or “Seek Down” soft-keys, touching the “SCAN” soft-key, or by using the “DIRECT TUNE” soft-key.
• Once the station is found, touch and hold one of the “PRESET” soft-keys in the list to the right, until the preset key flashes and the station text on the soft-key changes.
NOTE:
If the Presets are not visible on the right side of the screen, press the “Presets” soft-key.
ELECTRONICS
39
Page 50 of 124
Equalizer, Balance And Fade
Audio Control Menu
• Press the “MENU” hard-key on the rightside of the radio. Then press the “Audio
Control” soft-key to get to the audio control
menu.
• Use either the arrow soft-keys or the cross- hair on the screen to change Balance and
Fade. The “CENTER” soft-key resets the
settings.
• Touch the “Equalizer” soft-key and use ei- ther the arrow soft-keys or the sliders on the screen to adjust BASS, MID, and/or TREBLE.
Display Settings
• Press the “MENU” hard-key and touch the “Display Settings” soft-key to access the
Display Settings menu.
• Select the “Daytime Colors” soft-key to switch to manual daytime mode and to ad-
just the brightness of the display using day-
time colors.
• Select the “Nighttime Colors” soft-key to switch to manual nighttime mode and to
adjust the brightness of the display using nighttime colors.
• Select the “Auto Color Mode” soft-key to switch to automatic daytime/ nighttime mode and to control the brightness of the display using the dimmer switch of the vehicle.
• Touch the “EXIT” soft-key to save your settings.
ELECTRONICS
48
Page 51 of 124
Radio Operation
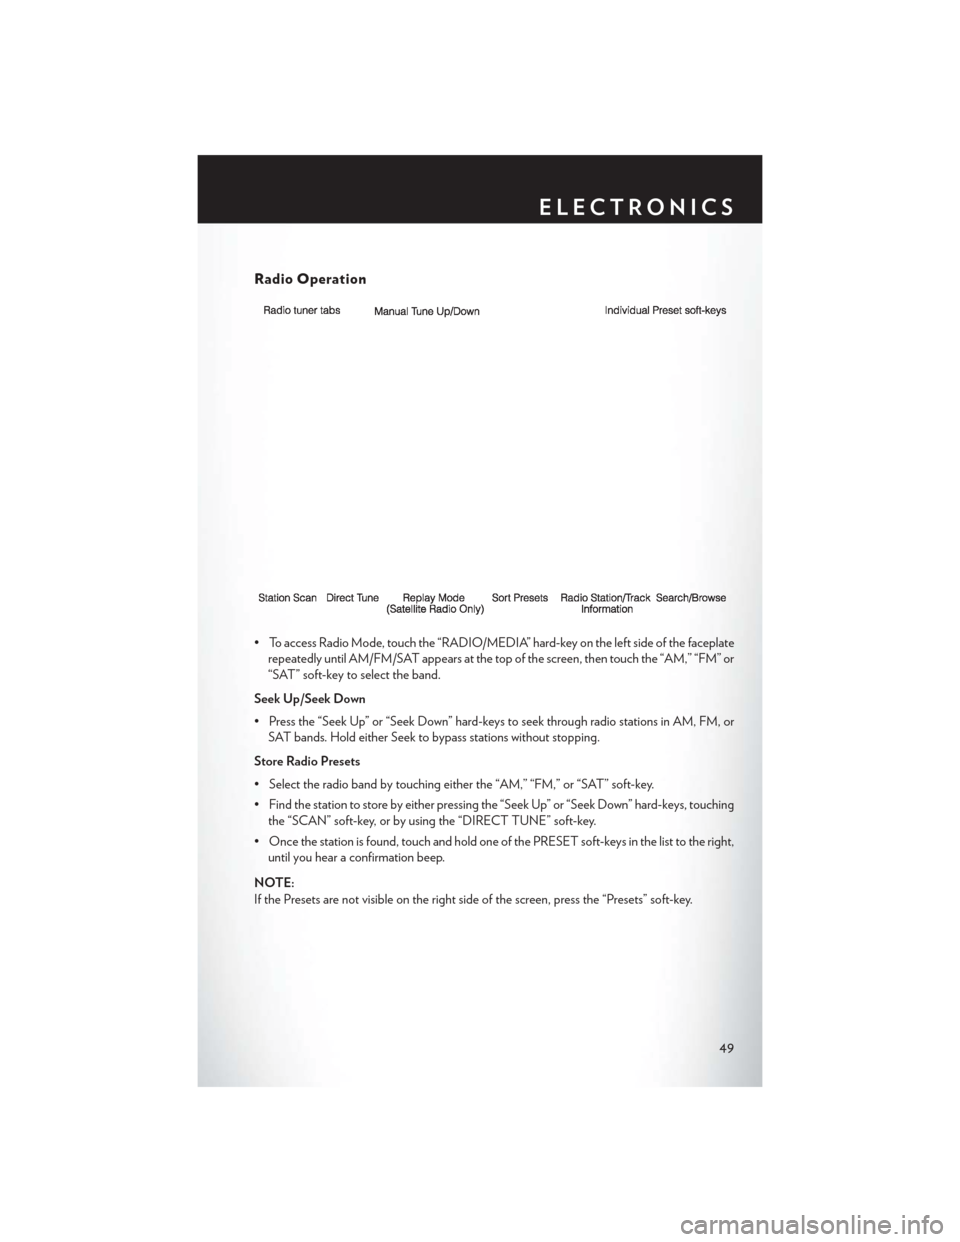
• To access Radio Mode, touch the “RADIO/MEDIA” hard-key on the left side of the faceplaterepeatedly until AM/FM/SAT appears at the top of the screen, then touch the “AM,” “FM” or
“SAT” soft-key to select the band.
Seek Up/Seek Down
• Press the “Seek Up” or “Seek Down” hard-keys to seek through radio stations in AM, FM, or SAT bands. Hold either Seek to bypass stations without stopping.
Store Radio Presets
• Select the radio band by touching either the “AM,” “FM,” or “SAT” soft-key.
• Find the station to store by either pressing the “Seek Up” or “Seek Down” hard-keys, touching the “SCAN” soft-key, or by using the “DIRECT TUNE” soft-key.
• Once the station is found, touch and hold one of the PRESET soft-keys in the list to the right, until you hear a confirmation beep.
NOTE:
If the Presets are not visible on the right side of the screen, press the “Presets” soft-key.
ELECTRONICS
49
Page 63 of 124

1 – FavoritesView and store your favorite location, theater and sport teams for quick
access.
2 – Forecast View detailed weather conditions, forecasts and ski/snowboarding condi-
tions at resorts.
3 – Ski Info View ski and snowboarding conditions at ski resorts.
4 – Fuel Prices View detailed price information for fuel stations.
5 – Movies View information on movies that are playing at theaters.
6 – Sports View sports scores and upcoming events for all major sports.
STEERING WHEEL AUDIO CONTROLS
• The steering wheel audio controls are lo-
cated on the rear surface of the steering
wheel.
Right Switch
• Press the switch up or down to increase ordecrease the volume.
• Press the button in the center to change modes AM/FM/CD/SAT.
Left Switch
• Press the switch up or down to search for the
next listenable station or select the next or previous CD track.
• Press the button in the center to select the next preset station (radio) or to change CDs if equipped with a CD Changer.
ELECTRONICS
61
Page 71 of 124
Bluetooth® STREAMING AUDIO
•If equipped with Uconnect® Voice Com-
mand, your Bluetooth-equipped iPod® de-
vices, cell phones or other media players, may
also be able to stream music to your vehicles
speakers. Your connected device must be
Bluetooth-compatible, and paired with your
radio (see www.UconnectPhone.com for pair-
ing instructions).
• Non-Touch-Screen Radios: Press the
“AUX” button on the radio faceplate until "BT" or “Audio Streaming” is displayed on the radio
screen.
• Touch-Screen-Radios: Press the “RADIO/MEDIA” or “MEDIA” hard-key and then touch
the “AUX” soft-key tab.
ELECTRONIC VEHICLE INFORMATION
CENTER (EVIC)
• The EVIC features a driver interactive dis- play that is located in the instrument cluster.
Pressing the controls on the left side of the
steering wheel allows the driver to select
vehicle information and Personal Settings.
For additional information, refer to “Pro-
grammable Features” located in this guide.
• Press and release the MENU button to ad- vance the display to Trip Functions or Per-
sonal settings or to return to the default
System status display.
• Press and release the DOWN
button to advance the display through the various Trip
Functions or Personal Settings.
• Press and release the COMPASS
button to display the compass heading and the outside
temperature.
• Press and release the SELECT
button to accept a selection. The SELECT Button also
resets various Trip Functions.
ELECTRONICS
69
Page 82 of 124
- Oil Pressure Warning Light
• This light indicates low engine oil pressure. If the light turns on while driving, stop the vehicleand shut off the engine as soon as possible. A chime will sound when this light turns on.
• We recommend you do not operate the vehicle or engine damage will occur. Have the vehicle serviced immediately.
- Anti-Lock Brake (ABS) Light
• This light monitors the Anti-Lock Brake System (ABS).
• If the light is not on during starting, stays on, or turns on while driving, we recommend youdrive to the nearest authorized dealer immediately and have the vehicle serviced immediately.
- Electronic Throttle Control (ETC) Indicator Light
• This light informs you of a problem with the system.
• If a problem is detected, the light will come on while the engine is running. Cycle the ignitionwhen the vehicle has completely stopped and the shift lever is placed in the PARK position; the
light should turn off.
• If the light remains lit with the engine running, your vehicle will usually be drivable; however, see an authorized dealer immediately. If the light is flashing when the engine is running,
immediate service is required and you may experience reduced performance, an elevated/
rough idle or engine stall and your vehicle may require towing.
- Transmission Temperature Warning Light
• This light indicates that there is excessive transmission fluid temperature that might occur withsevere usage such as trailer towing. If this light turns on, stop the vehicle and run the engine at
idle, with the transmission in NEUTRAL, until the light turns off. Once the light turns off, you
may continue to drive normally.
- Air Bag Warning Light
• If the light is not on during starting, stays on, or turns on while driving, have the vehicle servicedby an authorized dealer immediately.
Fuel Cap/Loose Gas Cap Message
• If a “gas cap” message (shown as gASCAP) appears, tighten the gas cap until a “clicking”sound is heard.
• Press the odometer reset button to turn the message off.
• If the message continues to appear for more than three days after tightening the gas cap, see your authorized service center.
Oil Change Indicator
Message
• If an “oil change” message (shown as CHANgE OIL) appears and a single chime sounds, it istime for your next required oil change.
WHAT TO DO IN EMERGENCIES
80
Page 83 of 124
Resetting The Light After Servicing
• Turn the ignition switch to the ON/RUN position (do not start engine).
• Fully depress the accelerator pedal three times within 10 seconds.
• Turn the ignition switch to the OFF/LOCK position.
IF YOUR ENGINE OVERHEATS
• In any of the following situations, you can reduce the potential for overheating by taking theappropriate action.• On the highways — slow down.
• In city traffic — while stopped, shift transmission into NEUTRAL, but do not increase engine
idle speed.
NOTE:
There are steps that you can take to slow down an impending overheat condition:
• If your air conditioner (A/C) is on, turn it off. The A/C system adds heat to the engine cooling system and turning the A/C off can help remove this heat.
• You can also turn the Temperature Control to maximum heat, the Mode Control to floor and the Fan Control to high. This allows the heater core to act as a supplement to the radiator and
aids in removing heat from the engine cooling system.
• If the temperature reading does not return to normal, turn the engine off immediately.
• We recommend that you do not operate the vehicle or engine damage will occur. Have the vehicle serviced immediately.
Engine Oil Overheating — 2.4L Gas
• On hot days the engine oil temperature may become too hot during sustained high-speeddriving or if towing a trailer up long grades. If this happens, a HOTOIL message will flash in the
odometer and the vehicle speed will be reduced to 48 mph (77 km/h) maximum until the
engine oil temperature is reduced.
NOTE:
Although the maximum vehicle speed is reduced to 48 mph (77 km/h), you may reduce vehicle
speed further as needed. Once the engine oil temperature is reduced, you may continue to drive
normally.
CAUTION!
Driving with a hot cooling system could damage your vehicle. If the temperature gauge reads
HOT (H), pull over and stop the vehicle. Idle the vehicle with the air conditioner turned off
until the pointer drops back into the normal range. If the pointer remains on HOT (H), and
you hear continuous chimes, turn the engine off immediately, and call for service.
WHAT TO DO IN EMERGENCIES
81