brake fluid CHRYSLER 300 2014 2.G User Guide
[x] Cancel search | Manufacturer: CHRYSLER, Model Year: 2014, Model line: 300, Model: CHRYSLER 300 2014 2.GPages: 132, PDF Size: 3.65 MB
Page 9 of 132
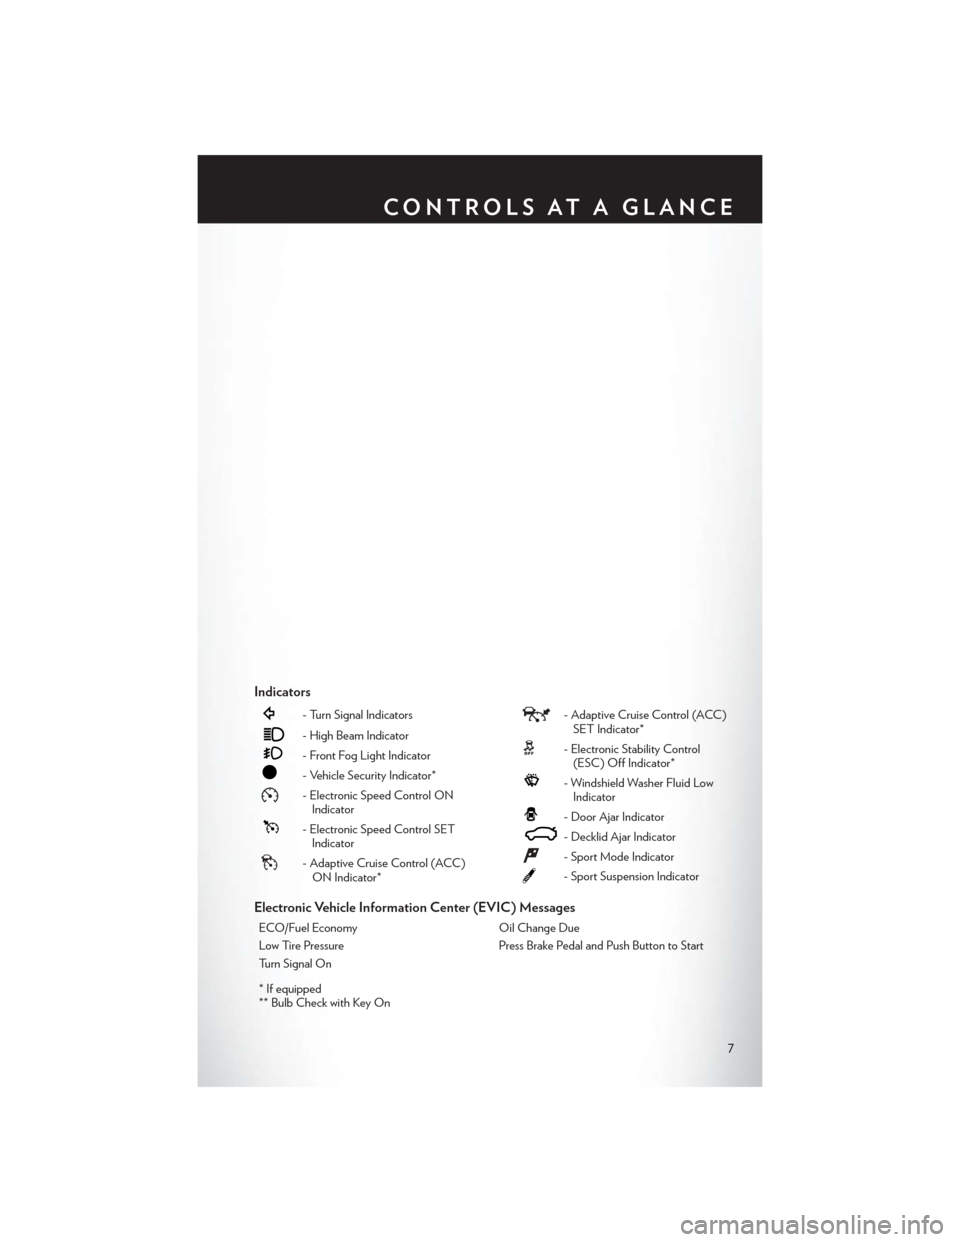
Indicators
- Turn Signal Indicators
- High Beam Indicator
- Front Fog Light Indicator
- Vehicle Security Indicator*
- Electronic Speed Control ONIndicator
- Electronic Speed Control SETIndicator
- Adaptive Cruise Control (ACC)ON Indicator*
- Adaptive Cruise Control (ACC)SET Indicator*
- Electronic Stability Control(ESC) Off Indicator*
- Windshield Washer Fluid LowIndicator
- Door Ajar Indicator
- Decklid Ajar Indicator
- Sport Mode Indicator
- Sport Suspension Indicator
Electronic Vehicle Information Center (EVIC) Messages
ECO/Fuel Economy Oil Change Due
Low Tire Pressure Press Brake Pedal and Push Button to Start
Turn Signal On
* If equipped
** Bulb Check with Key On
CONTROLS AT A GLANCE
7
Page 86 of 132
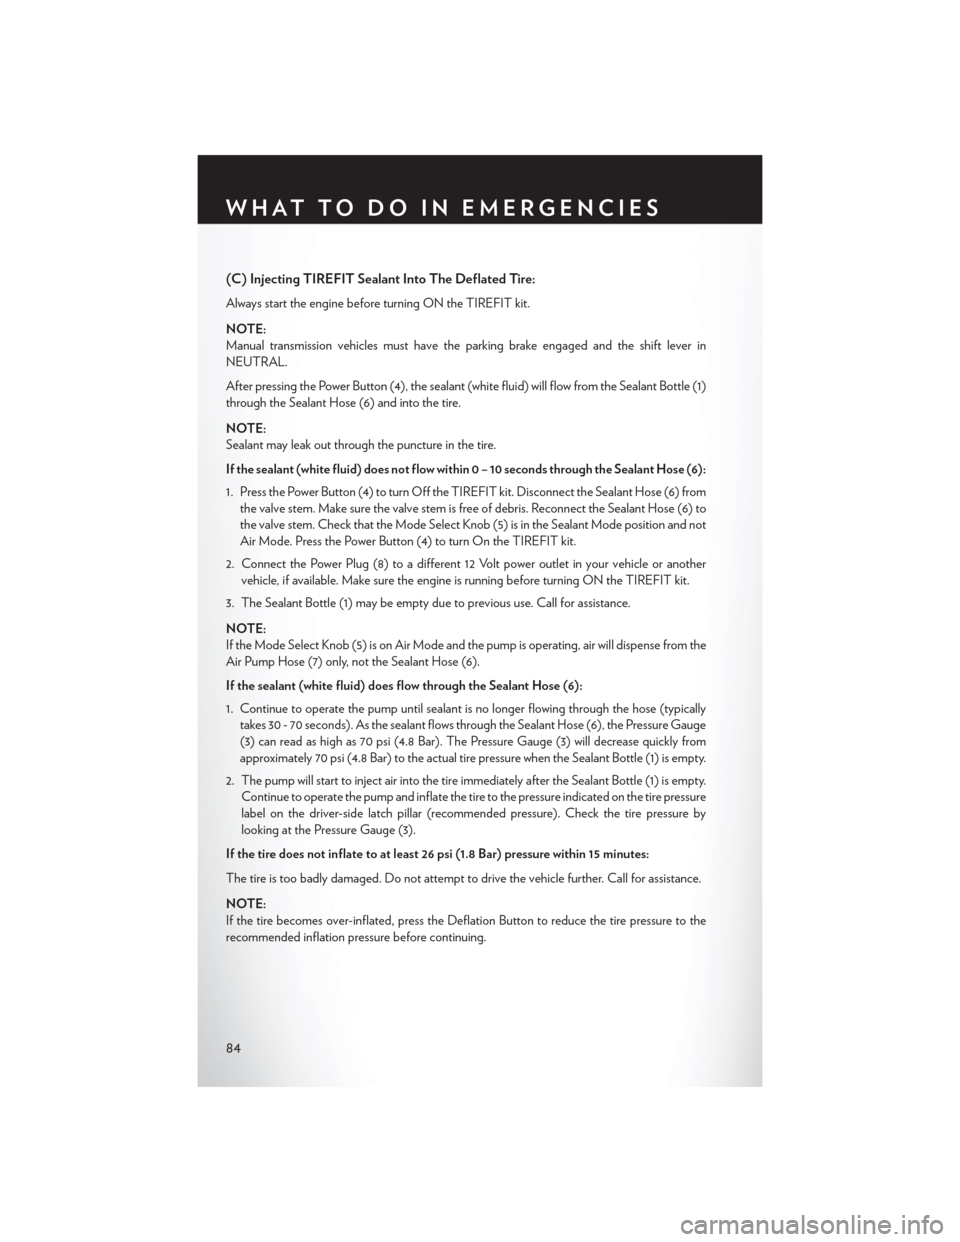
(C) Injecting TIREFIT Sealant Into The Deflated Tire:
Always start the engine before turning ON the TIREFIT kit.
NOTE:
Manual transmission vehicles must have the parking brake engaged and the shift lever in
NEUTRAL.
After pressing the Power Button (4), the sealant (white fluid) will flow from the Sealant Bottle (1)
through the Sealant Hose (6) and into the tire.
NOTE:
Sealant may leak out through the puncture in the tire.
If the sealant (white fluid) does not flow within0–10seconds through the Sealant Hose (6):
1. Press the Power Button (4) to turn Off the TIREFIT kit. Disconnect the Sealant Hose (6) from the valve stem. Make sure the valve stem is free of debris. Reconnect the Sealant Hose (6) to
the valve stem. Check that the Mode Select Knob (5) is in the Sealant Mode position and not
Air Mode. Press the Power Button (4) to turn On the TIREFIT kit.
2. Connect the Power Plug (8) to a different 12 Volt power outlet in your vehicle or another vehicle, if available. Make sure the engine is running before turning ON the TIREFIT kit.
3. The Sealant Bottle (1) may be empty due to previous use. Call for assistance.
NOTE:
If the Mode Select Knob (5) is on Air Mode and the pump is operating, air will dispense from the
Air Pump Hose (7) only, not the Sealant Hose (6).
If the sealant (white fluid) does flow through the Sealant Hose (6):
1. Continue to operate the pump until sealant is no longer flowing through the hose (typically takes 30 - 70 seconds). As the sealant flows through the Sealant Hose (6), the Pressure Gauge
(3) can read as high as 70 psi (4.8 Bar). The Pressure Gauge (3) will decrease quickly from
approximately 70 psi (4.8 Bar) to the actual tire pressure when the Sealant Bottle (1) is empty.
2. The pump will start to inject air into the tire immediately after the Sealant Bottle (1) is empty. Continue to operate the pump and inflate the tire to the pressure indicated on the tire pressure
label on the driver-side latch pillar (recommended pressure). Check the tire pressure by
looking at the Pressure Gauge (3).
If the tire does not inflate to at least 26 psi (1.8 Bar) pressure within 15 minutes:
The tire is too badly damaged. Do not attempt to drive the vehicle further. Call for assistance.
NOTE:
If the tire becomes over-inflated, press the Deflation Button to reduce the tire pressure to the
recommended inflation pressure before continuing.
WHAT TO DO IN EMERGENCIES
84
Page 104 of 132
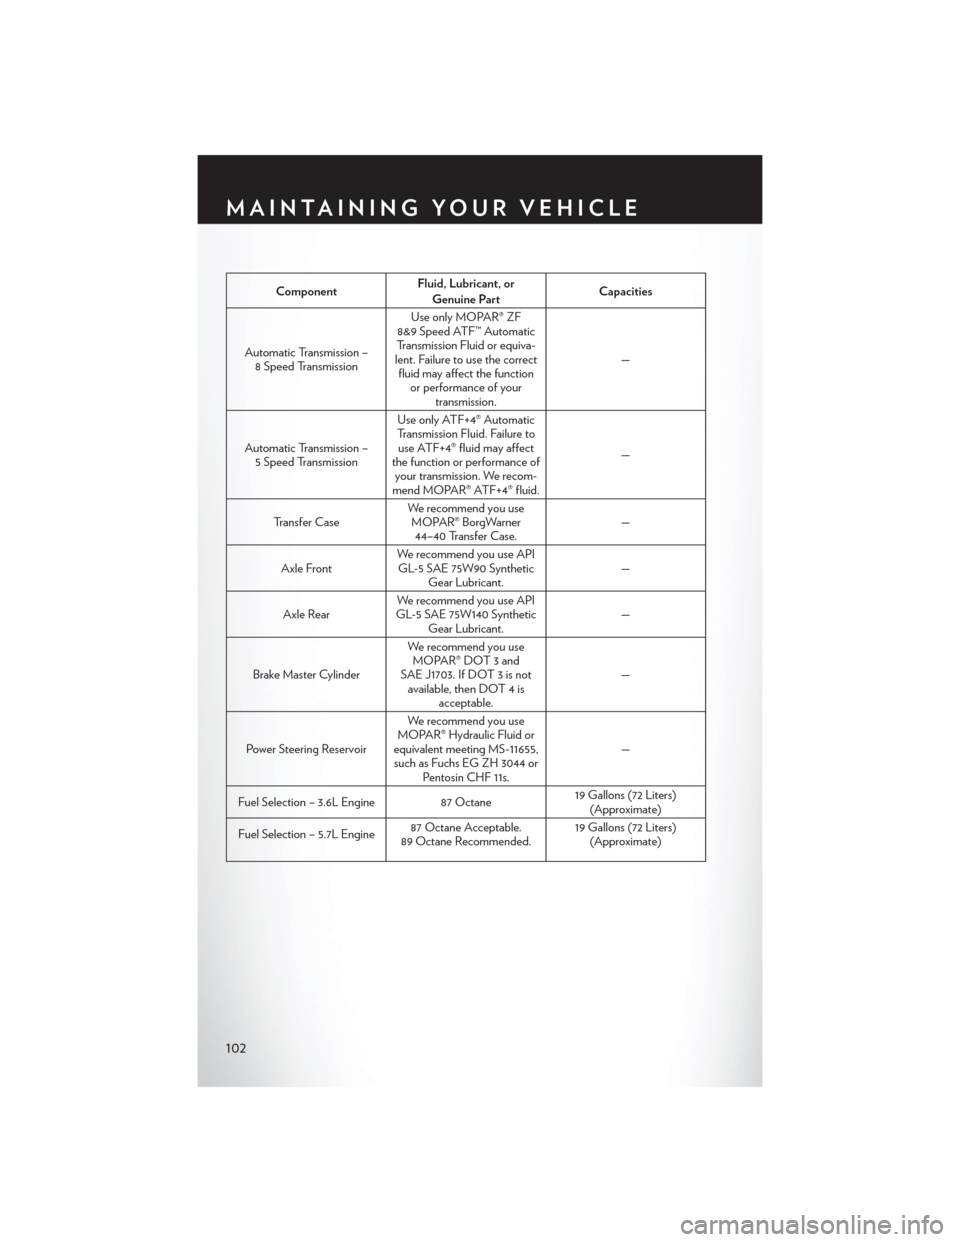
ComponentFluid, Lubricant, or
Genuine Part Capacities
Automatic Transmission – 8 Speed Transmission Use only MOPAR® ZF
8&9 Speed ATF™ Automatic
Transmission Fluid or equiva-
lent. Failure to use the correct fluid may affect the function or performance of your transmission. —
Automatic Transmission – 5 Speed Transmission Use only ATF+4® Automatic
Transmission Fluid. Failure to use ATF+4® fluid may affect
the function or performance of your transmission. We recom-
mend MOPAR® ATF+4® fluid. —
Transfer Case We recommend you use
MOPAR® BorgWarner 44–40 Transfer Case. —
Axle Front We recommend you use API
GL-5 SAE 75W90 Synthetic Gear Lubricant. —
Axle Rear We recommend you use API
GL-5 SAE 75W140 Synthetic Gear Lubricant. —
Brake Master Cylinder We recommend you use
MOPAR® DOT 3 and
SAE J1703. If DOT 3 is not available, then DOT 4 is acceptable. —
Power Steering Reservoir We recommend you use
MOPAR® Hydraulic Fluid or
equivalent meeting MS-11655, such as Fuchs EG ZH 3044 or Pentosin CHF 11s. —
Fuel Selection – 3.6L Engine 87 Octane19 Gallons (72 Liters)
(Approximate)
Fuel Selection – 5.7L Engine 87 Octane Acceptable.
89 Octane Recommended. 19 Gallons (72 Liters)
(Approximate)
MAINTAINING YOUR VEHICLE
102
Page 107 of 132
Your authorized dealer will reset the oil change indicator message after completing the scheduled
oil change. If a scheduled oil change is performed by someone other than your authorized dealer,
the message can be reset by referring to the steps described under “Instrument Cluster Warning
Lights” in “What To Do In Emergencies” in this guide or “Electronic Vehicle Information Center
(EVIC)” in “Understanding Your Instrument Panel” in your Owners Manual on the DVD for
further information.
NOTE:
Under no circumstances should oil change intervals exceed 10,000 miles (16,000 km) or twelve
months, whichever comes first.
Severe Duty All Models
Change Engine Oil at 4000 miles (6,500 km) if the vehicle is operated in a dusty and off road
environment. This type of vehicle use is considered Severe Duty
Once A Month Or Before A Long Trip:
• Check engine oil level
• Check windshield washer fluid level
• Check tire pressure and look for unusual wear or damage. Rotate tires at the first sign ofirregular wear, even if it occurs before your next scheduled service.
• Check the fluid levels of the coolant reservoir, brake master cylinder, and power steering and fill as needed.
• Check function of all interior and exterior lights
Required Maintenance Intervals.
Refer to the maintenance schedules on the following page for the required maintenance intervals.
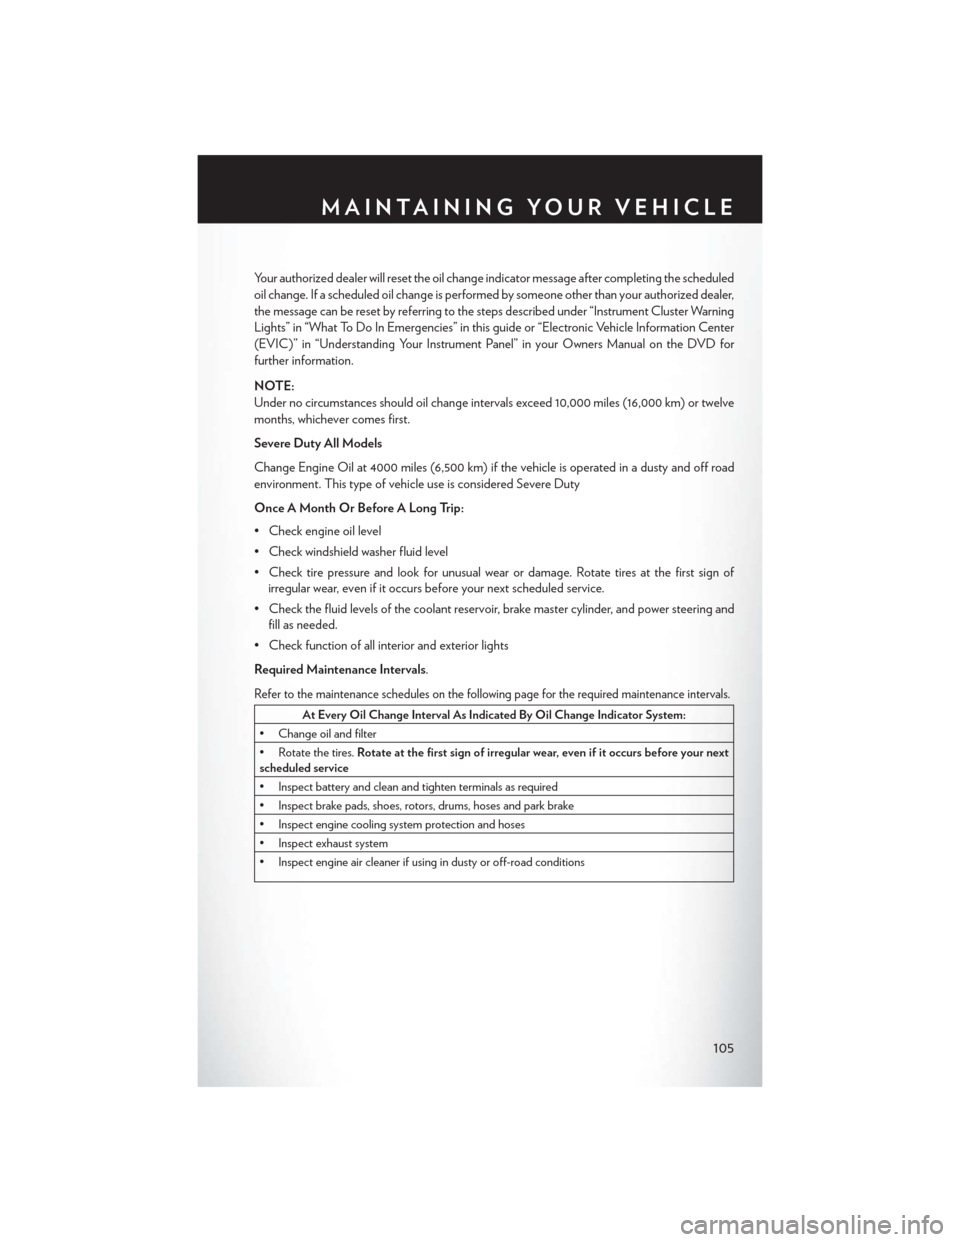
At Every Oil Change Interval As Indicated By Oil Change Indicator System:
• Change oil and filter
• Rotate the tires. Rotate at the first sign of irregular wear, even if it occurs before your next
scheduled service
• Inspect battery and clean and tighten terminals as required
• Inspect brake pads, shoes, rotors, drums, hoses and park brake
• Inspect engine cooling system protection and hoses
• Inspect exhaust system
• Inspect engine air cleaner if using in dusty or off-road conditions
MAINTAINING YOUR VEHICLE
105
Page 108 of 132
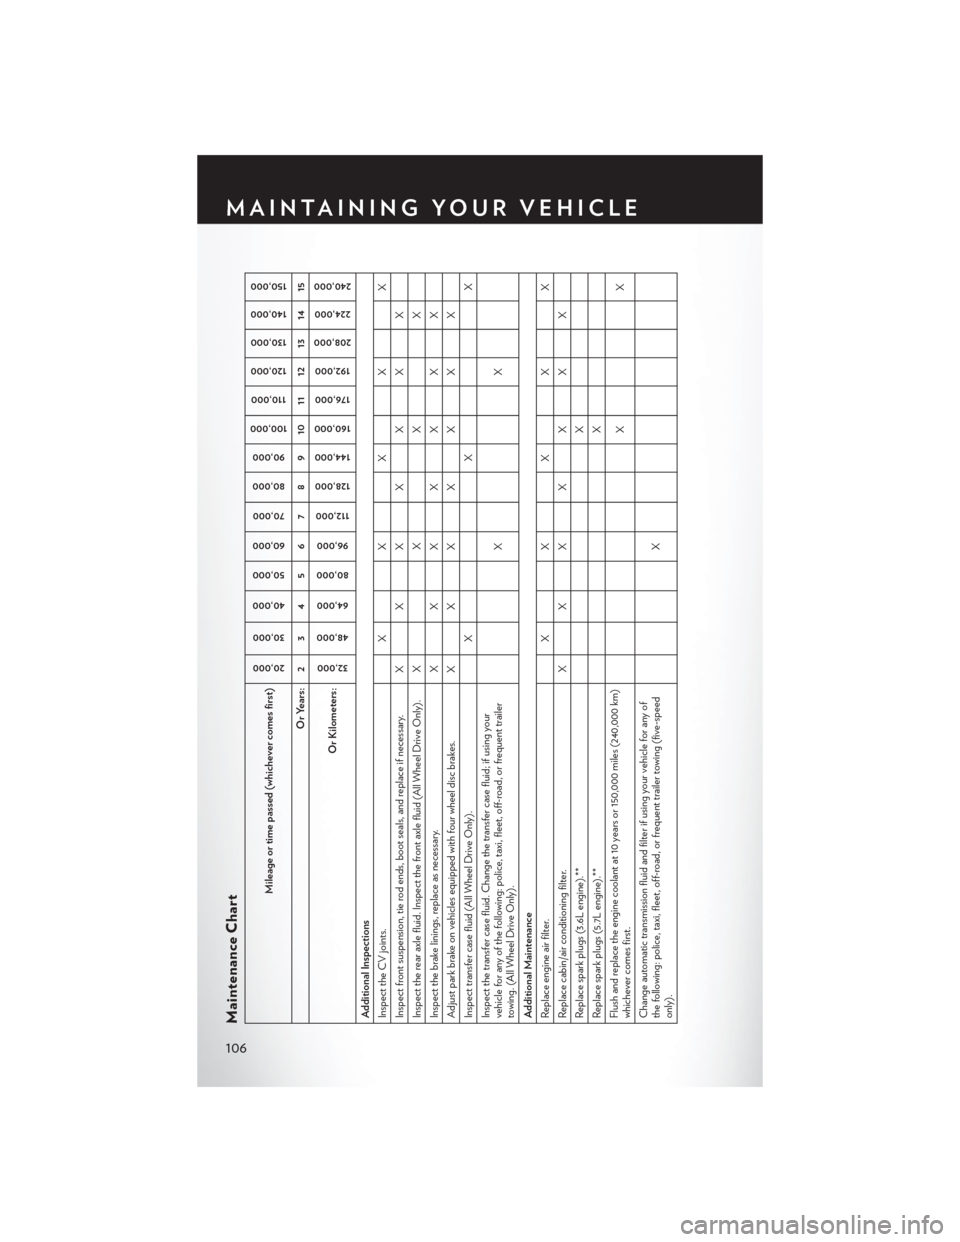
Maintenance Chart
Mileage or time passed (whichever comes first)
20,00030,000
40,000 50,000
60,000 70,000
80,000 90,000
100,000
110,000
120,000 130,000
140,000 150,000
Or Years: 2 3 4 5 6 7 8 9 10 11 12 13 14 15
Or Kilometers:
32,000
48,000
64,000
80,000 96,000
112,000
128,000
144,000
160,000
176,000
192,000
208,000 224,000
240,000
Additional Inspections
Inspect the CV joints. X X X X X
Inspect front suspension, tie rod ends, boot seals, and replace if necessary. X X X X X X X
Inspect the rear axle fluid. Inspect the front axle fluid (All Wheel Drive Only). X X X X
Inspect the brake linings, replace as necessary. X X X X X X X
Adjust park brake on vehicles equipped with four wheel disc brakes. X X X X X X X
Inspect transfer case fluid (All Wheel Drive Only). X X X
Inspect the transfer case fluid. Change the transfer case fluid; if using your
vehicle for any of the following: police, taxi, fleet, off-road, or frequent trailer
towing. (All Wheel Drive Only). XX
Additional Maintenance
Replace engine air filter. X X X X X
Replace cabin/air conditioning filter. X X X X X X X
Replace spark plugs (3.6L engine).** X
Replace spark plugs (5.7L engine).** X
Flush and replace the engine coolant at 10 years or 150,000 miles (240,000 km)
whichever comes first. XX
Change automatic transmission fluid and filter if using your vehicle for any of
the following: police, taxi, fleet, off-road, or frequent trailer towing (five-speed
only). X
MAINTAINING YOUR VEHICLE
106
Page 111 of 132
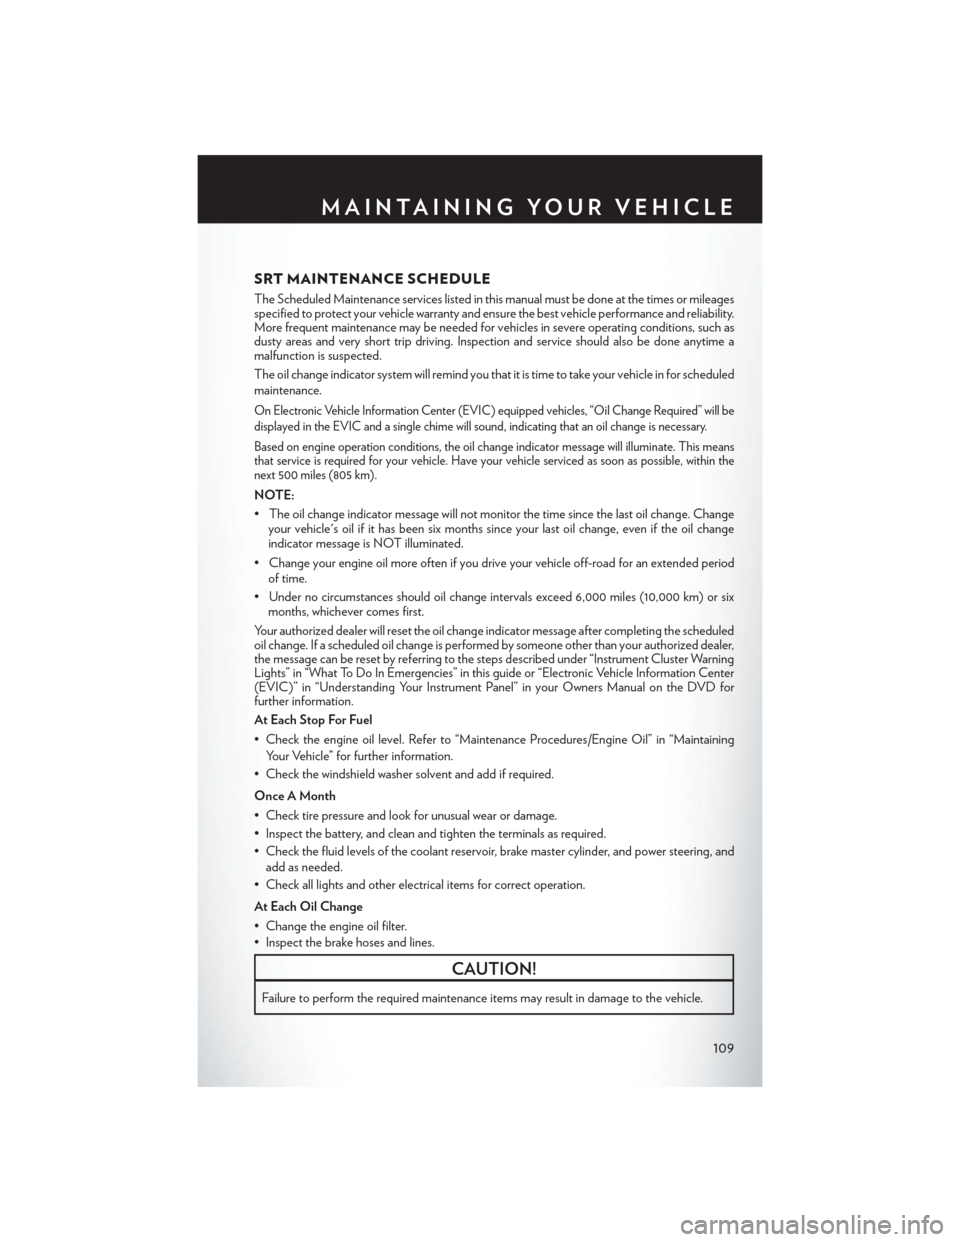
SRT MAINTENANCE SCHEDULE
The Scheduled Maintenance services listed in this manual must be done at the times or mileages
specified to protect your vehicle warranty and ensure the best vehicle performance and reliability.
More frequent maintenance may be needed for vehicles in severe operating conditions, such as
dusty areas and very short trip driving. Inspection and service should also be done anytime a
malfunction is suspected.
The oil change indicator system will remind you that it is time to take your vehicle in for scheduled
maintenance.
On Electronic Vehicle Information Center (EVIC) equipped vehicles, “Oil Change Required” will be
displayed in the EVIC and a single chime will sound, indicating that an oil change is necessary.
Based on engine operation conditions, the oil change indicator message will illuminate. This means
that service is required for your vehicle. Have your vehicle serviced as soon as possible, within the
next 500 miles (805 km).
NOTE:
• The oil change indicator message will not monitor the time since the last oil change. Changeyour vehicle's oil if it has been six months since your last oil change, even if the oil change
indicator message is NOT illuminated.
• Change your engine oil more often if you drive your vehicle off-road for an extended period of time.
• Under no circumstances should oil change intervals exceed 6,000 miles (10,000 km) or six months, whichever comes first.
Your authorized dealer will reset the oil change indicator message after completing the scheduled
oil change. If a scheduled oil change is performed by someone other than your authorized dealer,
the message can be reset by referring to the steps described under “Instrument Cluster Warning
Lights” in “What To Do In Emergencies” in this guide or “Electronic Vehicle Information Center
(EVIC)” in “Understanding Your Instrument Panel” in your Owners Manual on the DVD for
further information.
At Each Stop For Fuel
• Check the engine oil level. Refer to “Maintenance Procedures/Engine Oil” in “Maintaining Your Vehicle” for further information.
• Check the windshield washer solvent and add if required.
Once A Month
• Check tire pressure and look for unusual wear or damage.
• Inspect the battery, and clean and tighten the terminals as required.
• Check the fluid levels of the coolant reservoir, brake master cylinder, and power steering, and add as needed.
• Check all lights and other electrical items for correct operation.
At Each Oil Change
• Change the engine oil filter.
• Inspect the brake hoses and lines.
CAUTION!
Failure to perform the required maintenance items may result in damage to the vehicle.
MAINTAINING YOUR VEHICLE
109
Page 112 of 132
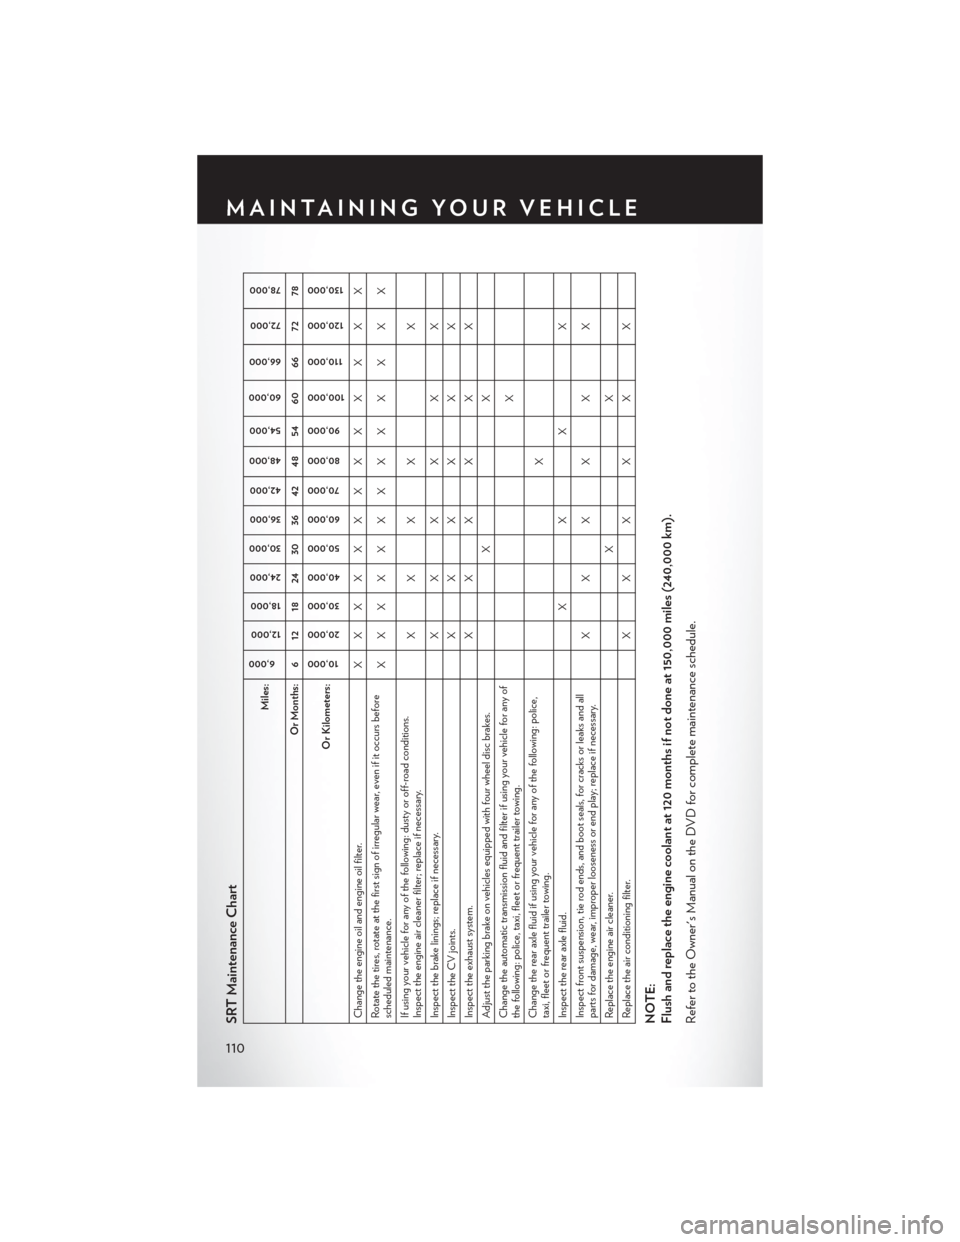
SRT Maintenance Chart
Miles:
6,000
12,000
18,000
24,000
30,000
36,000
42,000
48,000
54,000
60,000
66,000
72,000
78,000
Or Months: 6 12 18 24 30 36 42 48 54 60 66 72 78
Or Kilometers:
10,000
20,000 30,000
40,000
50,000
60,000 70,000
80,000
90,000
100,000
110,000
120,000 130,000
Change the engine oil and engine oil filter. X X XXXXX X X X X X X
Rotate the tires, rotate at the first sign of irregular wear, even if it occurs before
scheduled maintenance. XXXXXXX X X X X X X
If using your vehicle for any of the following: dusty or off-road conditions.
Inspect the engine air cleaner filter; replace if necessary. XX X X
X
Inspect the brake linings; replace if necessary. X X X XXX
Inspect the CV joints. X X X XXX
Inspect the exhaust system. X X X XXX
Adjust the parking brake on vehicles equipped with four wheel disc brakes. XX
Change the automatic transmission fluid and filter if using your vehicle for any of
the following: police, taxi, fleet or frequent trailer towing. X
Change the rear axle fluid if using your vehicle for any of the following: police,
taxi, fleet or frequent trailer towing. X
Inspect the rear axle fluid. XX X X
Inspect front suspension, tie rod ends, and boot seals, for cracks or leaks and all
parts for damage, wear, improper looseness or end play; replace if necessary. XX X X X X
Replace the engine air cleaner. XX
Replace the air conditioning filter. X X X XXXNOTE:
Flush and replace the engine coolant at 120 months if not done at 150,000 miles (240,000 km).
Refer to the Owner's Manual on the DVD for complete maintenance schedule.
MAINTAINING YOUR VEHICLE
110
Page 114 of 132

FUSES
Front Power Distribution Center (Fuses)
The Front Power Distribution Center (fuses) is located in the engine compartment on the right
hand side near the Washer Fluid Reservoir. This module contains fuses and relays.
Front Power Distribution Center
Cavity Cartridge Fuse Mini-FuseDescription
1 – – Fuse–Spare
2 40 Amp Green – Radiator Fan #1
3 50 Amp Red – Power Steering #1
4 30 Amp Pink – Starter
5 40 Amp Green – Anti-Lock Brakes
6 25 Amp Clear – Anti-Lock Brakes
7 – – Fuse–Spare
8 – – Fuse–Spare
9 – 20 Amp Yellow All-Wheel Drive Module –
If Equipped
10 –5 Amp Tan Security
11 – 20 Amp Yellow Horns
12 –10 Amp Red Air Conditioning Clutch
MAINTAINING YOUR VEHICLE
112
Page 125 of 132
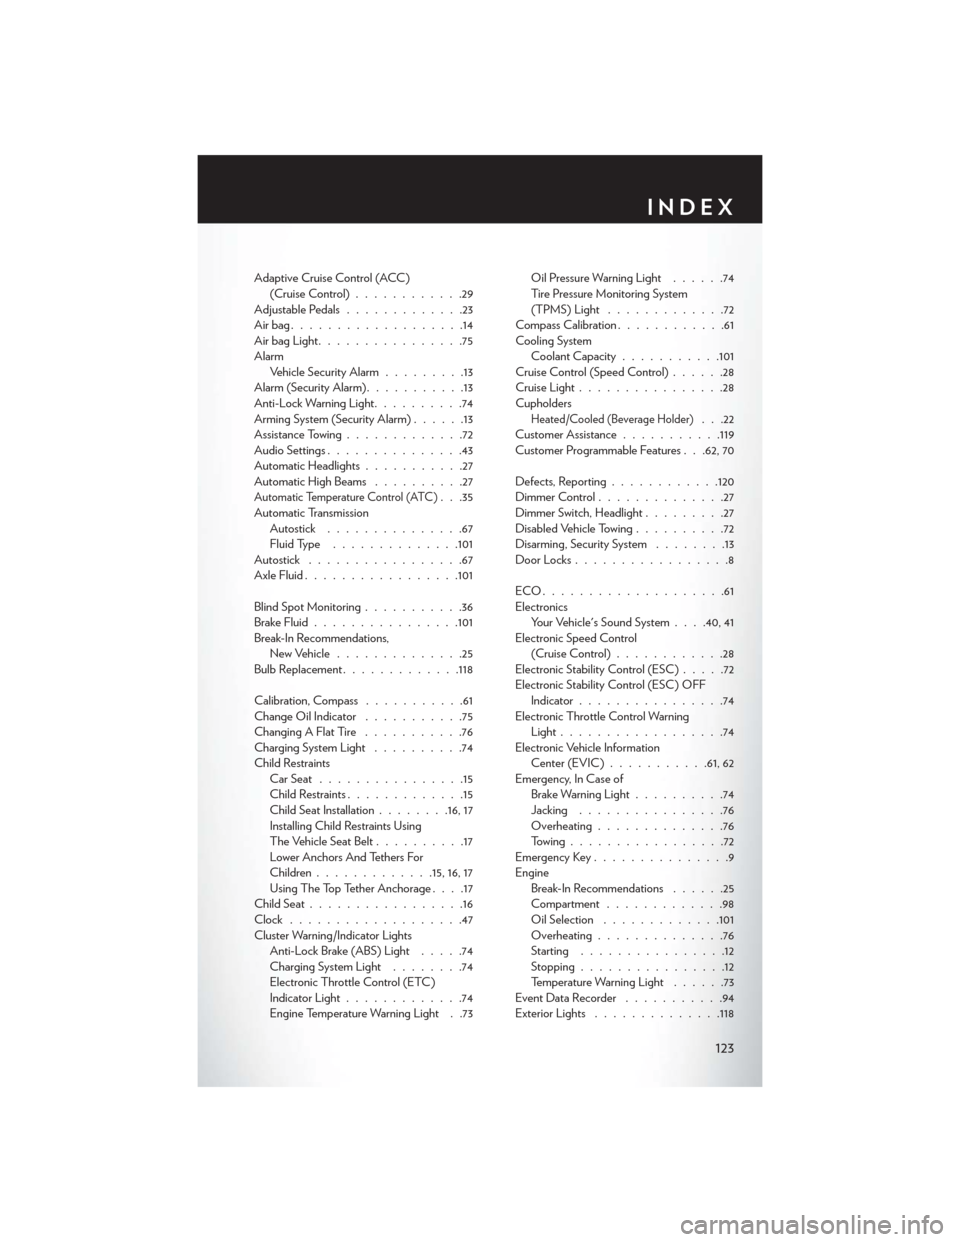
Adaptive Cruise Control (ACC)(Cruise Control) ............29
Adjustable Pedals .............23
Airbag...................14
AirbagLight................75
Alarm Vehicle Security Alarm .........13
Alarm (Security Alarm) ...........13
Anti-Lock Warning Light ..........74
Arming System (Security Alarm) ......13
Assistance Towing .............72
Audio Settings ...............43
Automatic Headlights ...........27
Automatic High Beams ..........27
Automatic Temperature Control (ATC). . .35
Automatic Transmission Autostick ...............67
Fluid Type ..............101
Autostick .................67
Axle Fluid ................ .101
Blind Spot Monitoring ...........36
Brake Fluid ............... .101
Break-In Recommendations, New Vehicle ..............25
Bulb Replacement .............118
Calibration, Compass ...........61
Change Oil Indicator ...........75
ChangingAFlatTire ...........76
Charging System Light ..........74
Child Restraints CarSeat ................15
Child Restraints .............15
Child Seat Installation ........16, 17
Installing Child Restraints Using
The Vehicle Seat Belt ..........17
Lower Anchors And Tethers For
Children ............ .15, 16, 17
Using The Top Tether Anchorage ....17
ChildSeat.................16
Clock ...................47
Cluster Warning/Indicator Lights Anti-Lock Brake (ABS) Light .....74
Charging System Light ........74
Electronic Throttle Control (ETC)
Indicator Light .............74
Engine Temperature Warning Light . .73 Oil Pressure Warning Light
......74
Tire Pressure Monitoring System
(TPMS) Light .............72
Compass Calibration ............61
Cooling System Coolant Capacity ...........101
Cruise Control (Speed Control) ......28
Cruise Light ................28
Cupholders
Heated/Cooled (Beverage Holder). . .22
Customer Assistance ...........119
Customer Programmable Features . . .62, 70
Defects, Reporting ............120
Dimmer Control ..............27
Dimmer Switch, Headlight .........27
Disabled Vehicle Towing ..........72
Disarming, Security System ........13
Door Locks .................8
ECO....................61
Electronics Your Vehicle's Sound System ....40,41
Electronic Speed Control (Cruise Control) ............28
Electronic Stability Control (ESC) .....72
Electronic Stability Control (ESC) OFF Indicator ................74
Electronic Throttle Control Warning Light ..................74
Electronic Vehicle Information Center (EVIC) ...........61, 62
Emergency, In Case of Brake Warning Light ..........74
Jacking ................76
Overheating ..............76
Towing.................72
Emergency Key ...............9
Engine Break-In Recommendations ......25
Compartment .............98
Oil Selection .............101
Overheating ..............76
Starting ................12
Stopping ................12
Temperature Warning Light ......73
EventDataRecorder ...........94
Exterior Lights ............. .118
INDEX
123