tow CHRYSLER 300 2014 2.G User Guide
[x] Cancel search | Manufacturer: CHRYSLER, Model Year: 2014, Model line: 300, Model: CHRYSLER 300 2014 2.GPages: 132, PDF Size: 3.65 MB
Page 3 of 132
INTRODUCTION/WELCOME
WELCOME FROM CHRYSLER GROUP LLC..2
CONTROLS AT A GLANCE
DRIVER COCKPIT...............4
INSTRUMENT CLUSTER ...........6
GETTING STARTED
KEYFOB ....................8
REMOTE START...............10
KEYLESS ENTER-N-GO™ ..........10
VEHICLE SECURITY ALARM ........13
SEATBELT ...................14
SUPPLEMENTAL RESTRAINT
SYSTEM (SRS) — AIR BAGS .........14
CHILD RESTRAINTS .............15
FRONTSEATS ................18
REAR SEAT ...................21
HEATEDSEATS ................21
HEATED AND COOLED CUPHOLDERS..22ADJUSTABLE PEDALS............23TILT/TELESCOPING STEERING COLUMN..24
OPERATING YOUR VEHICLE
ENGINE BREAK-IN
RECOMMENDATIONS ............25
TURN SIGNAL/WIPER/WASHER/HIGH
BEAM LEVER . ................26
HEADLIGHT SWITCH ............27
SPEED CONTROL ..............28
ELECTRONIC SHIFTER — 3.6L ENGINE . . 32
TRANSMISSION MODES/AUTOSTICK® . . 33
CLIMATE CONTROLS ............35
BLIND SPOT MONITORING ........36
POWER SUNROOF ..............37
WIND BUFFETING ..............39
ELECTRONICS
YOUR VEHICLE'S SOUND SYSTEM ....40
IDENTIFYING YOUR RADIO ........42
Uconnect® 8.4 & 8.4N AT A GLANCE ....42
RADIO .....................44
SiriusXM SATELLITE RADIO .........45
STEERING WHEEL AUDIO CONTROLS...47
SETTING THE ANALOG CLOCK .....47
iPod®/CD/AUX CONTROLS .........48
GARMIN® NAVIGATION (8.4N Only) ....48
SiriusXM TRAVEL LINK (8.4N ONLY) . . . . 52
PLAYING iPod/USB/MP3 DEVICES .....53
Uconnect® PHONE
(Bluetooth® HANDS FREE CALLING) ....54
Uconnect® VOICE COMMAND
(8.4&8.4NONLY) ...............58
ELECTRONIC VEHICLE INFORMATION
CENTER (EVIC) ................61
PROGRAMMABLE FEATURES .......62UNIVERSAL GARAGE DOOR OPENER
(HomeLink®)
..................62
POWER OUTLETS ..............65
UTILITY
TRAILER TOWING WEIGHTS (MAXIMUM
TRAILER WEIGHT RATINGS) . ......66
RECREATIONAL TOWING (BEHIND
MOTORHOME, ETC.) . . ..........66
SRT
AUTOSTICK® .................67
ELECTRONIC CONTROL DAMPING
SYSTEM....................68
SRT PERFORMANCE FEATURES .....69
SUMMER/THREE-SEASON TIRES ......71
WHAT TO DO IN EMERGENCIES
ROADSIDE ASSISTANCE..........72
INSTRUMENT CLUSTER WARNING
LIGHTS .....................72
IF YOUR ENGINE OVERHEATS .......76
JACKING AND TIRE CHANGING .....76
TIREFIT KIT ..................82
BATTERY LOCATION ............88
JUMP-STARTING ...............88
SHIFT LEVER OVERRIDE — 5 SPEED
TRANSMISSION ...............90
TOWING A DISABLED VEHICLE . . ....92
FREEING A STUCK VEHICLE ........93
EVENT DATA RECORDER (EDR) ......94
MAINTAINING YOUR VEHICLE
OPENING THE HOOD . . .........95
FUEL DOOR RELEASE . . .........96
ENGINE COMPARTMENT .........98
FLUIDSANDCAPACITIES .........101
MAINTENANCE SCHEDULE .......104
FUSES .....................112
TIRE PRESSURES ...............117
WHEEL AND WHEEL TRIM CARE . ....118
EXTERIOR BULBS ..............118
CONSUMER ASSISTANCE
CHRYSLER GROUP LLC
CUSTOMER CENTER ............119
CHRYSLER CANADA INC.
CUSTOMER CENTER ............119
PUBLICATIONS ORDERING ........119
ASSISTANCE FOR THE HEARING
IMPAIRED ...................119
REPORTING SAFETY DEFECTS IN
THEUNITEDSTATES ............120
MOPAR® ACCESSORIES
AUTHENTIC ACCESSORIES BY MOPAR®. . 121
FREQUENTLY ASKED QUESTIONS
FREQUENTLY ASKED QUESTIONS ....122
INDEX................... 123
TABLE OF CONTENTS
Page 25 of 132

WARNING!
• Persons who are unable to feel pain to the skin because of advanced age, chronic illness,diabetes, spinal cord injury, medication, alcohol use, exhaustion or other physical condi-
tions must exercise care when using the heated cup holders. It may cause burns even at low
temperatures, especially if used for long periods of time.
• Keep the cup holders free of debris such as anything that insulates against heat, for this may cause the cup holders to overheat. Coming in contact with overheated cup holders
could cause serious burns due to the increased surface temperature.
ADJUSTABLE PEDALS
The adjustable pedal switch is located on the front side of the driver’s seat cushion side shield.
• Press the switch forward to move the pedalsforward (toward the front of the vehicle).
• Press the switch rearward to move the ped- als rearward (toward the driver).
NOTE:
The pedals cannot be adjusted when the ve-
hicle is in REVERSE or when the Electronic
Speed Control is set.
CAUTION!
Do not place any article under the adjustable pedals or impede its ability to move, as it may
cause damage to the pedal controls. Pedal travel may become limited if movement is stopped
by an obstruction in the adjustable pedal's path.
WARNING!
Do not adjust the pedals while the vehicle is moving. You could lose control and have a
collision. Always adjust the pedals while the vehicle is parked.
GETTING STARTED
23
Page 26 of 132
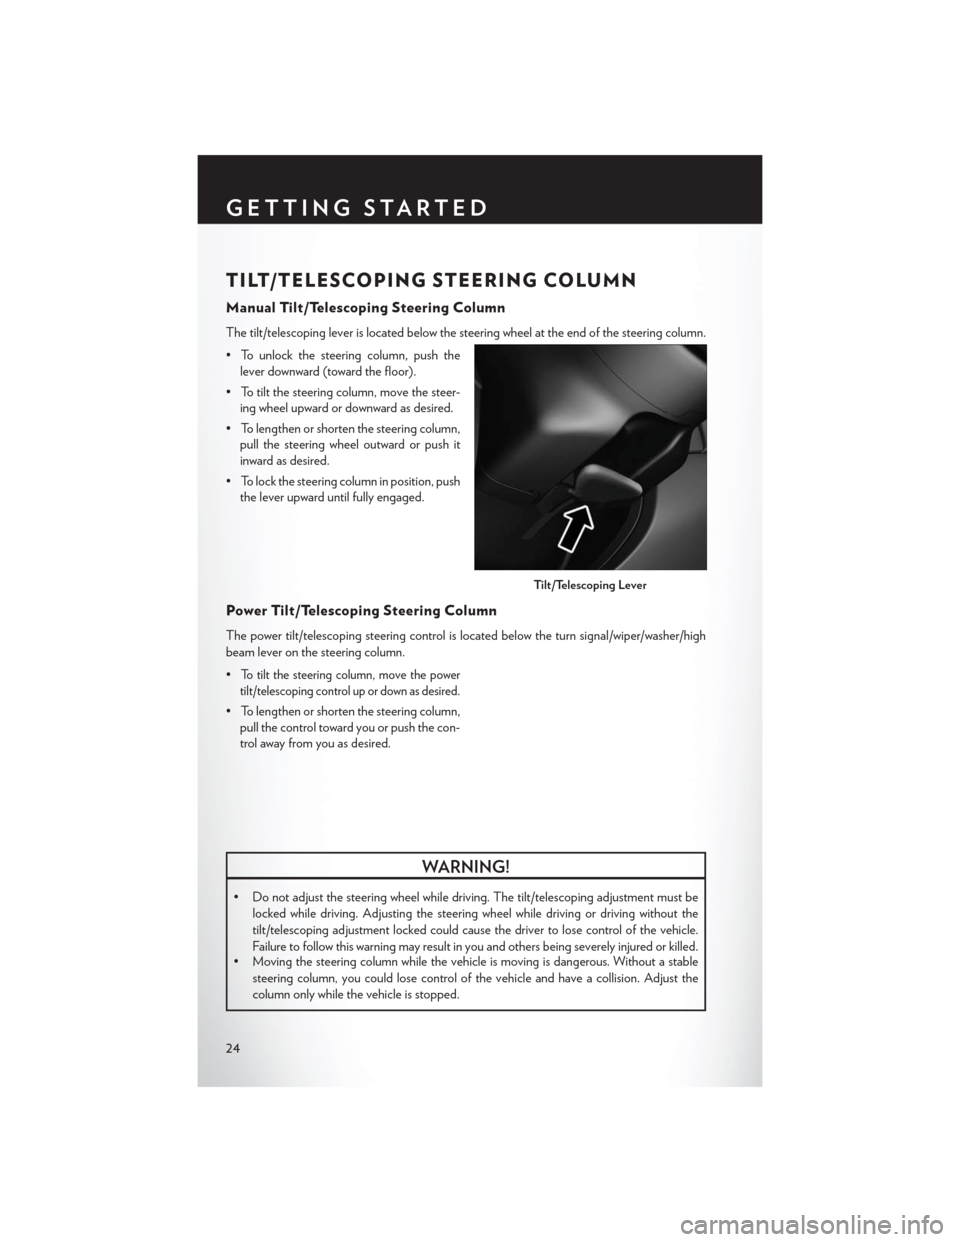
TILT/TELESCOPING STEERING COLUMN
Manual Tilt/Telescoping Steering Column
The tilt/telescoping lever is located below the steering wheel at the end of the steering column.
• To unlock the steering column, push thelever downward (toward the floor).
• To tilt the steering column, move the steer- ing wheel upward or downward as desired.
• To lengthen or shorten the steering column, pull the steering wheel outward or push it
inward as desired.
• To lock the steering column in position, push the lever upward until fully engaged.
Power Tilt/Telescoping Steering Column
The power tilt/telescoping steering control is located below the turn signal/wiper/washer/high
beam lever on the steering column.
•
To tilt the steering column, move the power
tilt/telescoping control up or down as desired.
• To lengthen or shorten the steering column, pull the control toward you or push the con-
trol away from you as desired.
WARNING!
• Do not adjust the steering wheel while driving. The tilt/telescoping adjustment must be
locked while driving. Adjusting the steering wheel while driving or driving without the
tilt/telescoping adjustment locked could cause the driver to lose control of the vehicle.
Failure to follow this warning may result in you and others being severely injured or killed.
• Moving the steering column while the vehicle is moving is dangerous. Without a stable
steering column, you could lose control of the vehicle and have a collision. Adjust the
column only while the vehicle is stopped.
Tilt/Telescoping Lever
GETTING STARTED
24
Page 29 of 132
High Beam Operation
• Push the lever forward to activate the high beams. Pull the lever toward you for flash to pass.
NOTE:
For safe driving, turn off the high beams when oncoming traffic is present to prevent headlight
glare and as a courtesy to other motorists.
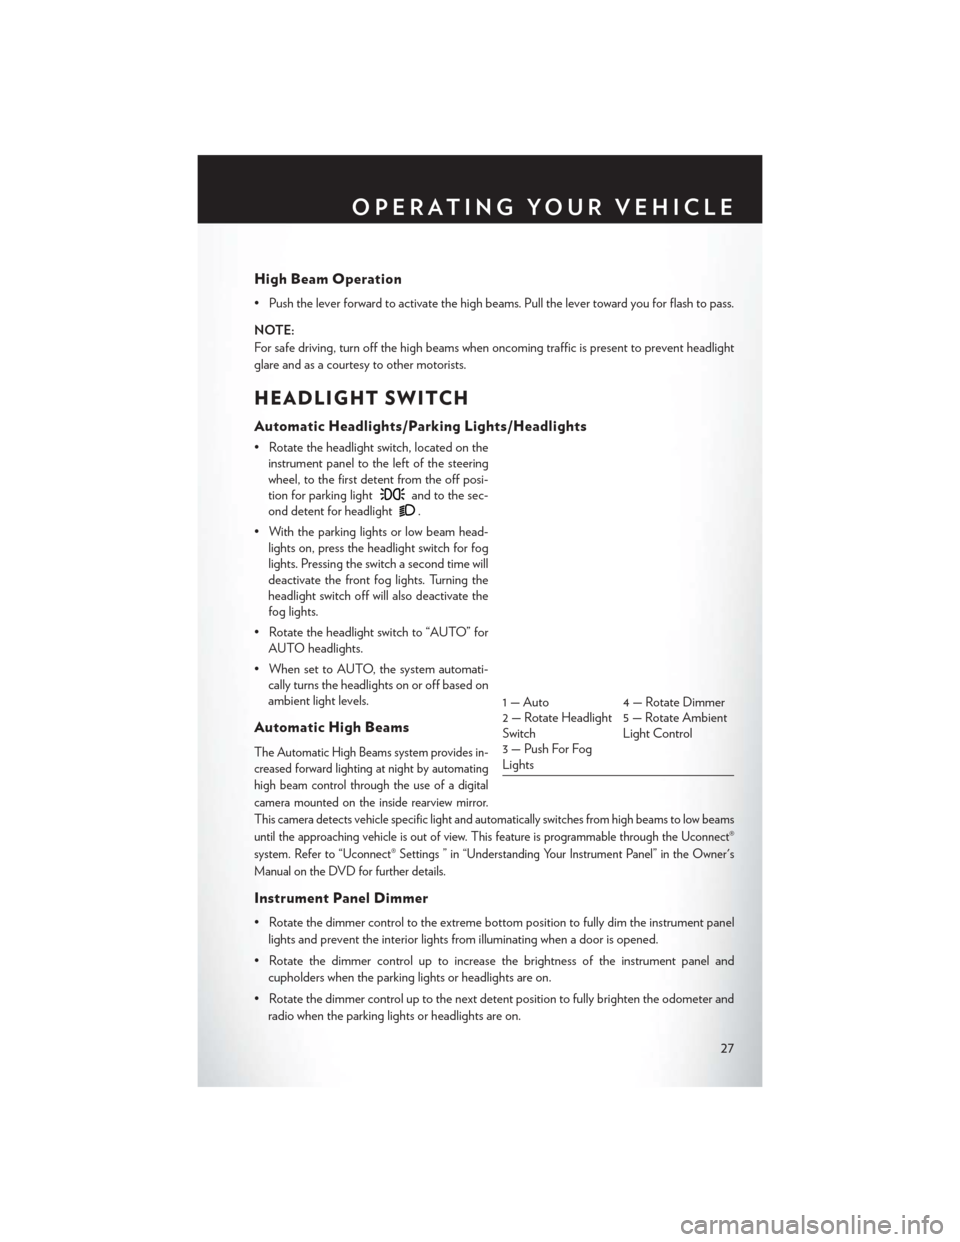
HEADLIGHT SWITCH
Automatic Headlights/Parking Lights/Headlights
• Rotate the headlight switch, located on theinstrument panel to the left of the steering
wheel, to the first detent from the off posi-
tion for parking light
and to the sec-
ond detent for headlight
.
• With the parking lights or low beam head- lights on, press the headlight switch for fog
lights. Pressing the switch a second time will
deactivate the front fog lights. Turning the
headlight switch off will also deactivate the
fog lights.
• Rotate the headlight switch to “AUTO” for AUTO headlights.
• When set to AUTO, the system automati- cally turns the headlights on or off based on
ambient light levels.
Automatic High Beams
The Automatic High Beams system provides in-
creased forward lighting at night by automating
high beam control through the use of a digital
camera mounted on the inside rearview mirror.
This camera detects vehicle specific light and automatically switches from high beams to low beams
until the approaching vehicle is out of view. This feature is programmable through the Uconnect®
system. Refer to “Uconnect® Settings ” in “Understanding Your Instrument Panel” in the Owner's
Manual on the DVD for further details.
Instrument Panel Dimmer
• Rotate the dimmer control to the extreme bottom position to fully dim the instrument panel
lights and prevent the interior lights from illuminating when a door is opened.
• Rotate the dimmer control up to increase the brightness of the instrument panel and cupholders when the parking lights or headlights are on.
• Rotate the dimmer control up to the next detent position to fully brighten the odometer and radio when the parking lights or headlights are on.
1 — Auto 4 — Rotate Dimmer
2 — Rotate Headlight
Switch 5 — Rotate Ambient
Light Control
3 — Push For Fog
Lights
OPERATING YOUR VEHICLE
27
Page 33 of 132
This setting provides less reaction time than the “Far” setting, which allows for a more dynamic
driving experience.
More dynamic or aggressive drivers that want to avoid frequent warnings may prefer this setting.
Off
Changing the FCW status to “Off ” prevents the system from warning you of a potential frontal
collision.
NOTE:
• If FCW is set to “Off ”, “FCW OFF” will be displayed in the EVIC.
• Refer to the Owner's Manual on the DVD for further details.
WARNING!
•Leaving the Electronic or Adaptive Speed Control system on when not in use is dangerous.
You could accidentally set the system or cause it to go faster than you want. You could lose
control and have a collision. Always leave the Electronic or Adaptive Speed Control system
off when you are not using it.
•Electronic Speed Control can be dangerous where the system cannot maintain a constant
speed. Your vehicle could go too fast for the conditions, and you could lose control. A collision
could be the result. Do not use Electronic Speed Control in heavy traffic or on roads that are
winding, icy, snow-covered or slippery.
•Adaptive Cruise Control (ACC) is a convenience system. It is not a substitute for active driving
involvement. Pay attention to road, traffic, and weather conditions, vehicle speed, distance to
the vehicle ahead, and brake operation to ensure safe operation of the vehicle under all road
conditions. Your attention is always required while driving to maintain safe control of your
vehicle. Failure to follow these warnings can result in a collision or serious personal injury.
The ACC system:
• Does not react to pedestrians, oncoming vehicles, and stationary objects (i.e., a stoppedvehicle in a traffic jam or a disabled vehicle).
• Cannot take street, traffic, and weather conditions into account, and may be limited upon adverse sight distance conditions.
• Does not predict the lane curvature or the movement of preceding vehicles and will not compensate for such changes.
• Does not always fully recognize complex driving conditions, which can result in wrong or missing distance warnings.
• Can only apply a maximum of 25% of the vehicle’s braking capability, and may not bring
the vehicle to a complete stop.
You should switch off the ACC system:
• When driving in fog, heavy rain, heavy snow, sleet, heavy traffic, and complex driving situations (i.e., in highway construction zones).
• When entering a turn lane or highway off ramp; when driving on roads that are winding, icy, snow-covered, slippery, or have steep uphill or downhill slopes; and when towing a trailer.
• When circumstances do not allow safe driving at a constant speed.
• Failure to follow these warnings can result in a collision.
•
Forward Collision Warning (FCW) is not intended to avoid a collision on its own. The driver
has the responsibility to avoid a collision by controlling the vehicle via braking and steering.
Failure to follow this warning could lead to serious injury or death.
OPERATING YOUR VEHICLE
31
Page 59 of 132
Common Phone Commands (Examples)
• “Call John Smith”
• “Call John Smith mobile”
• “Dial 1 248 555 1212”
• “Call Emergency”
• “Call Towing Assistance”
• “Redial”
Phonebook
• Uconnect® radios will automatically download your phonebook from your paired phone, if thisfeature is supported by your phone. Entries are updated each time that the phone is
connected. If your phone book entries do not appear, check the settings on your phone. Some
phones require you to enable this feature manually.
• Your phonebook can be browsed on your radio screen, but editing can only be done on your phone. To browse, touch the “Phone” soft-key, then the “Phonebook” soft-key.
• Favorite phonebook entries can be saved as Favorites for quicker access. Favorites are shown at the top of your main phone screen.
Voice Command Tips (8.4A And 8.4AN Only)
• Using complete names (i.e; Call John Doe vs. Call John) will result in greater system accuracy.
•
You can “chain” commands together for faster results. Say “Call John Doe, mobile”, for example.
• If you are listening to available voice command options, you do not have to listen to the entirelist. When you hear the command that you need, press the
button on the steering
wheel, wait for the beep and say your command.
Changing The Volume
• Start a dialogue by pressing the Phone button, then say a command for example -
"Help."
• Use the radio ON/OFF VOLUME rotary knob to adjust the volume to a comfortable level while the Uconnect® system is speaking. Please note the volume setting for Uconnect® is
different than the audio system.
NOTE:
To access help, press the Uconnect® Phone
button on the steering wheel and say "help."
Touch the display or push either
orbutton and say "cancel" to cancel the help
session.
ELECTRONICS
57
Page 62 of 132
Common Navigation Voice Commands
• To access the navigation voice commands, press the Uconnect® Voice Command
button while in any mode and say “Navigation.”
• Once in the Navigation feature, you can simply Say What You Seeon the touchscreen to give
a navigation voice command.
• Locating an address can be given as a one shot entry. For example, after saying “Find
Address” and the system is ready, you can say the entire address in one command, “1234 1st
Street, Any Town, Michigan.” If you are searching for a particular address or Point Of Interest,
the available voice commands depend on what is displayed on the touchscreen.
• When the Voice Command system is ready to be given a command, the green indicator is visible in the right corner of the touchscreen.
• The following chart lists the navigation voice commands that may be available.
Navigation Voice Commands:
“Where To?” (Main Menu command) “View Map” (Main Menu command)
“Repeat guidance” “Cancel Route” “Detour” (During a Route Guidance)“Where Am I?”“Find Address” “Go Home”
“Find Place by Category” “Find Place by Name”
“Find Recently Found” “Find Favorite”“Find City”
“Find Nearest Restaurant” “Find Nearest Fuel” “Find Nearest Transit”
“Find Nearest Lodging”
“Find Nearest Shopping” “Find Nearest Bank”
“Find Nearest Parking”
“Find Nearest Entertainment” “Find Nearest Recreation”
“Find Nearest Attractions” “Find Nearest Hospitals”
“Find Nearest Community”
“Find Nearest Auto Services” “Find Nearest Airport”
“Find Nearest Police Stations” “Find Nearest Fire Stations”
“Find Nearest Auto Dealers”
WARNING!
Any voice commanded system should be used only in safe driving conditions following
applicable laws regarding phone use. Your attention should be focused on safely operating the
vehicle. Failure to do so may result in a collision causing you and others to be severely injured
or killed.
ELECTRONICS
60
Page 68 of 132

TRAILER TOWING WEIGHTS
(MAXIMUM TRAILER WEIGHT RATINGS)
Engine/Transmission Frontal Area Max. GTW(Gross Trailer Wt.)Max. Tongue Wt.
(See Note)
3.6L Automatic 22 sq ft (2.04 sq m) 1,000 lbs (454 kg) 100 lbs (45 kg)
5.7L Automatic 32 sq ft (2.97 sq m) 1,000 lbs (454 kg) 100 lbs (45 kg)
Refer to local laws for maximum trailer towing speeds
NOTE:
The trailer tongue weight must be considered as part of the combined weight of occupants and
cargo, and it should never exceed the weight referenced on the “Tire and Loading Information”
placard.
RECREATIONAL TOWING
(BEHIND MOTORHOME, ETC.)
Two-Wheel Drive And All-Wheel Drive
• Recreational towing (with all four wheels on the ground, or using a tow dolly) is NOT
ALLOWED. The only acceptable method for towing this vehicle (behind another vehicle) is
on a vehicle trailer with all four wheels OFFthe ground.
CAUTION!
Towing this vehicle in violation of the above requirements can cause severe transmission
and/or transfer case damage. Such damage is not covered by the New Vehicle Limited
Warranty.
UTILITY
66
Page 69 of 132

AUTOSTICK®
Steering Wheel Mounted Paddle Shifters Or Console Mounted Shifter
• AutoStick® is a driver-interactive transmis-sion feature that offers manual gear shifting
to provide you with more control of the
vehicle. AutoStick® allows you to maximize
engine braking, and improve overall vehicle
performance.
• This system can also provide you with more control during passing, city driving, cold
slippery conditions, mountain driving, trailer
towing, and many other situations.
Operation
• When the shift lever is in the DRIVE posi-tion, the transmission will operate automati-
cally, shifting between the five available
gears. To engage AutoStick®, simply move
the shift lever to the right or left (+/-) while in the DRIVE position, or press one of the steering
wheel mounted shift paddles (+/-). When AutoStick® is active, the current transmission gear is
displayed in the Electronic Vehicle Information Center (EVIC) portion of the instrument
cluster. In AutoStick® mode, the transmission will shift when manually selected by the driver
(using the shift lever, or the shift paddles), unless an engine lugging or overspeed condition
would result. It will remain in the selected gear until another upshift or downshift is chosen,
except as described below:• The transmission will automatically downshift as the vehicle slows (to prevent engine
lugging) and will display the current gear.
• The transmission will automatically downshift to first gear when coming to a stop.
• You can start out in first or second gear. Tapping (+) (at a stop) will allow starting in second gear. Starting out in second gear is helpful in snowy or icy conditions.
• The system will ignore attempts to upshift at too low of a vehicle speed.
• Transmission shifting will be more noticeable when AutoStick® is engaged. To disengage AutoStick® mode, hold the shift lever to the right or press and hold the (+) shift paddle
until “D” is once again displayed in the instrument cluster. You can shift in or out of the
AutoStick® mode at any time without taking your foot off the accelerator pedal.
SRT
67
Page 76 of 132
BRAKE- Brake Warning Light
The Brake Warning light illuminates when there is either a system malfunction or the parking
brake is applied. If the light is on and the parking brake is not applied, it indicates a possible brake
hydraulic malfunction, brake booster problem or an Anti-Lock Brake System problem.
Please have your vehicle serviced immediately.
WARNING!
Driving a vehicle with the red brake light on is dangerous. Part of the brake system may have
failed. It will take longer to stop the vehicle. You could have a collision. Have the vehicle
checked immediately.
- Malfunction Indicator Light (MIL)
• Certain conditions, such as a poor fuel quality, etc., may illuminate the MIL after engine start.The vehicle should be serviced if the light stays on through several typical driving cycles. In
most situations, the vehicle will drive normally and not require towing.
• If the MIL flashes when the engine is running, serious conditions may exist that could lead to immediate loss of power or severe catalytic converter damage. We recommend you do not
operate the vehicle. Have the vehicle serviced immediately.
- Electronic Stability Control (ESC) OFF Indicator Light
• This light indicates the Electronic Stability Control (ESC) is off.
- Charging System Light
This light shows the status of the electrical charging system. If the charging system light remains
on, it means that the vehicle is experiencing a problem with the charging system.
We recommend you do not continue driving if the charging system light is on. Have the vehicle
serviced immediately.
- Oil Pressure Warning Light
This light indicates low engine oil pressure. If the light turns on while driving, stop the vehicle and
shut off the engine as soon as possible. A chime will sound when this light turns on.
We recommend you do not operate the vehicle or engine damage will occur. Have the vehicle
serviced immediately.
- Anti-Lock Brake (ABS) Light
This light monitors the Anti-Lock Brake System (ABS).
If the light is not on during starting, stays on, or turns on while driving, we recommend you contact
the nearest authorized dealer and have the vehicle serviced immediately.
- Electronic Throttle Control (ETC) Indicator Light
This light informs you of a problem with the system.
WHAT TO DO IN EMERGENCIES
74