steering CHRYSLER 300 2015 2.G Owner's Manual
[x] Cancel search | Manufacturer: CHRYSLER, Model Year: 2015, Model line: 300, Model: CHRYSLER 300 2015 2.GPages: 180, PDF Size: 30.54 MB
Page 90 of 180
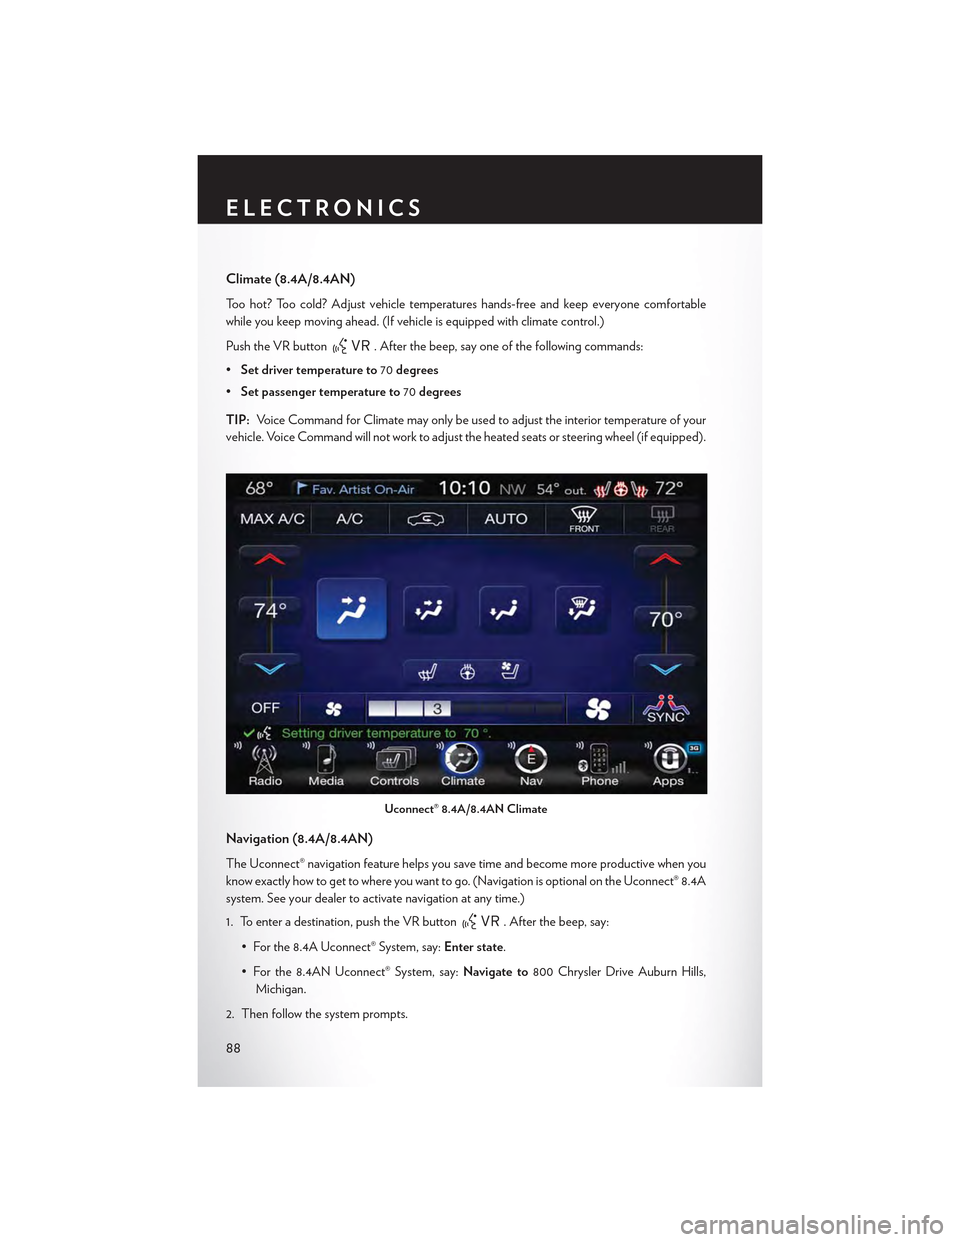
Climate (8.4A/8.4AN)
To o h o t ? To o c o l d ? A d j u s t v e h i c l e t e m p e r a t u r e s h a n d s - f r e e a n d k e e p e v e r y o n e c o m f o r t a b l e
while you keep moving ahead. (If vehicle is equipped with climate control.)
Push the VR button. After the beep, say one of the following commands:
•Set driver temperature to70degrees
•Set passenger temperature to70degrees
TIP:Voice Command for Climate may only be used to adjust the interior temperature of your
vehicle. Voice Command will not work to adjust the heated seats or steering wheel (if equipped).
Navigation (8.4A/8.4AN)
The Uconnect® navigation feature helps you save time and become more productive when you
know exactly how to get to where you want to go. (Navigation is optional on the Uconnect® 8.4A
system. See your dealer to activate navigation at any time.)
1. To enter a destination, push the VR button. After the beep, say:
•Forthe8.4AUconnect®System,say:Enter state.
•Forthe8.4ANUconnect®System,say:Navigate to800 Chrysler Drive Auburn Hills,
Michigan.
2. Then follow the system prompts.
Uconnect® 8.4A/8.4AN Climate
ELECTRONICS
88
Page 103 of 180
USB Port
Connect your iPod® or compatible device using a USB cable into the USB Port. USB Memory
sticks with audio files can also be used. Audio from the device can be played on the vehicle's
sound system while providing metadata (artist, track title, album, etc.) information on the radio
display.
When connected, the iPod®/compatible USB device can be controlled using the radio or
Steering Wheel Audio Controls to play, skip to the next or previous track, browse, and list the
contents.
The iPod® battery charges when plugged into the USB port (if supported by the specific device).
To route the USB/iPod® cable out of the center console, use the access cut out.
NOTE:
•WhenconnectingyouriPod®deviceforthefirsttime,thesystemmaytakeseveralminutesto
read your music, depending on the number of files. For example, the system will take
approximately five minutes for every 1000 songs loaded on the device. Also during the
reading process, the Shuffle and Browse functions will be disabled. This process is needed to
ensure the full use of your iPod® features and only happens the first time it is connected. After
the first time, the reading process of your iPod® will take considerably less time unless changes
are made or new songs are added to the playlist.
• The USB port supports certain Mini, Classic, Nano, Touch, and iPhone® devices. The USB
port also supports playing music from compatible external USB Mass Storage Class memory
devices. Some iPod® software versions may not fully support the USB port features. Please visit
Apple’s website for iPod® software updates.
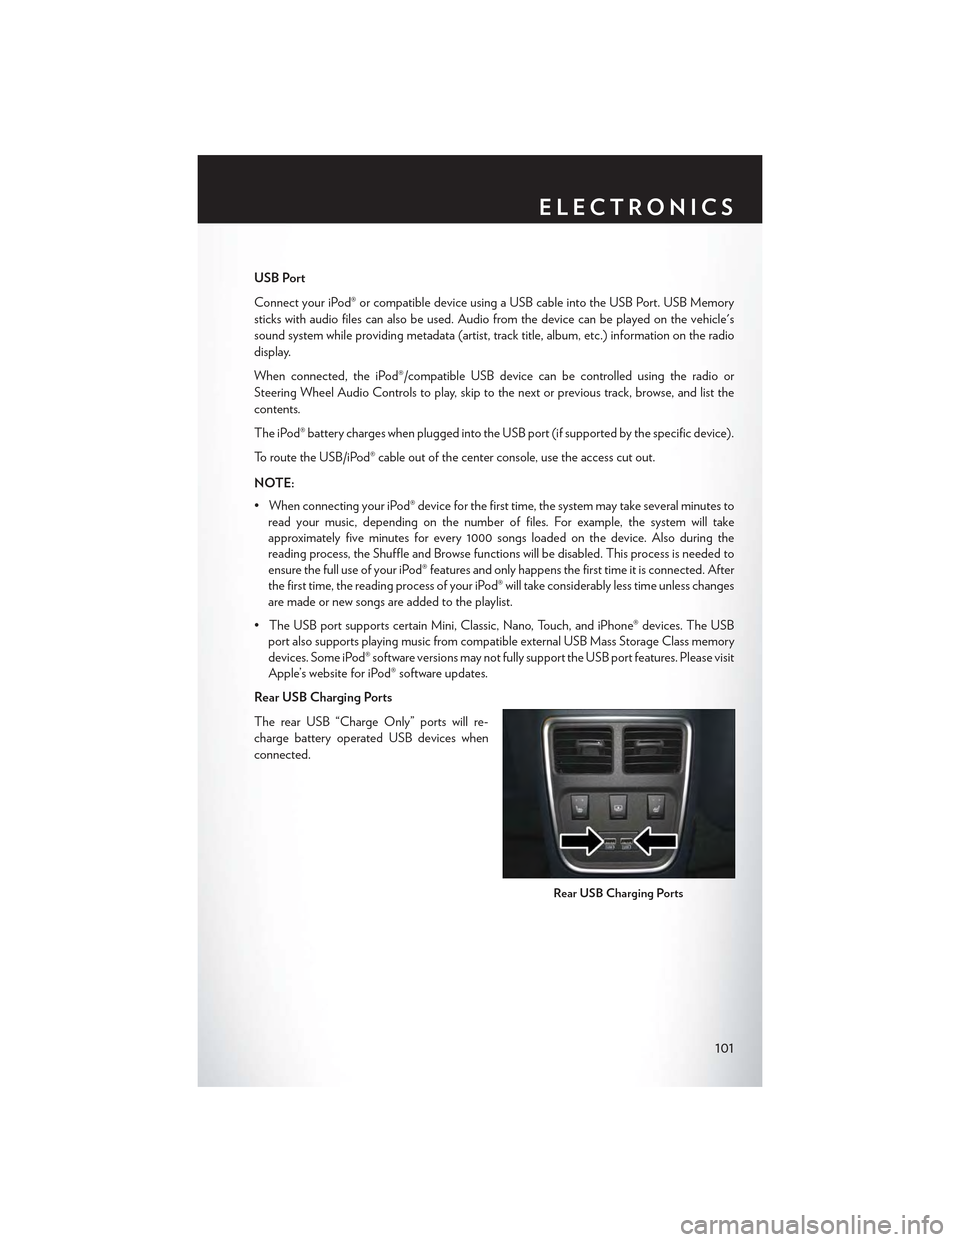
Rear USB Charging Ports
The rear USB “Charge Only” ports will re-
charge battery operated USB devices when
connected.
Rear USB Charging Ports
ELECTRONICS
101
Page 104 of 180
Audio Jack (AUX)
The AUX allows a portable device, such as an MP3 player or an iPod®, to be plugged into the radio
and utilize the vehicle’s sound system, using a 3.5 mm stereo audio cable, to amplify the source and
play through the vehicle speakers.
• Pressing the “AUX” button on the touchscreen will change the mode to auxiliary device if the
audio jack is connected, allowing the music from your portable device to be heard through the
vehicle's speakers. In order to activate the AUX, plug in the audio jack.
•Thefunctionsoftheportabledevicearecontrolledusingthedevicebuttons.Thevolumemay
be controlled using the radio or portable device.
• To route the audio cable out of the center console, use the access cut out in the front of the
console.
SD Card
• Play songs stored on an SD card inserted into the SD card slot.
•SongplaybackcanbecontrolledusingtheradioorSteeringWheelAudioControlstoplay,
skip to the next or previous track, browse, and list the contents.
Bluetooth® Streaming Audio
If using a Bluetooth® - equipped device, you may also be able to stream music to your vehicle's
sound system. Your connected device must be Bluetooth-compatible, and paired with your
system (see Uconnect® Phone for pairing instructions).
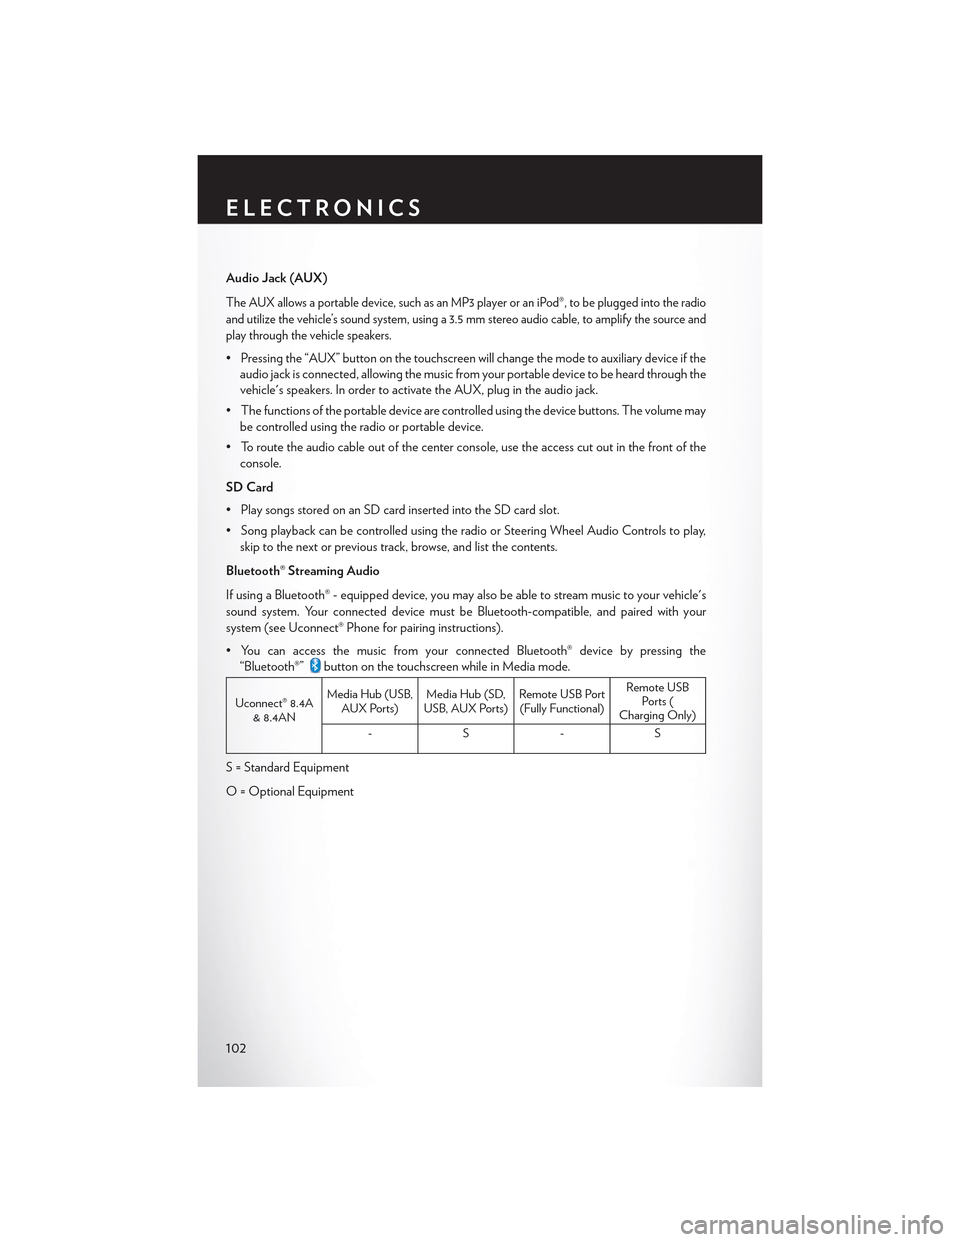
•YoucanaccessthemusicfromyourconnectedBluetooth®devicebypressingthe
“Bluetooth®”button on the touchscreen while in Media mode.
Uconnect® 8.4A& 8.4AN
Media Hub (USB,AUX Ports)Media Hub (SD,USB, AUX Ports)Remote USB Port(Fully Functional)
Remote USBPorts (Charging Only)
-S-S
S = Standard Equipment
O = Optional Equipment
ELECTRONICS
102
Page 111 of 180
Uconnect® PHONE
Uconnect® Phone (Bluetooth® Hands Free Calling)
The Uconnect® Phone feature enables you to place and receive hands-free mobile phone calls.
Drivers can also place mobile phone calls using their voice or by using the buttons on the
touchscreen (see Voice Command section).
The hands-free calling feature is made possible through Bluetooth® technology — the global
standard that enables different electronic devices to connect to each other wirelessly.
If the Uconnect® Phone Buttonexists on your steering wheel, you then have the Uconnect®
Phone features.
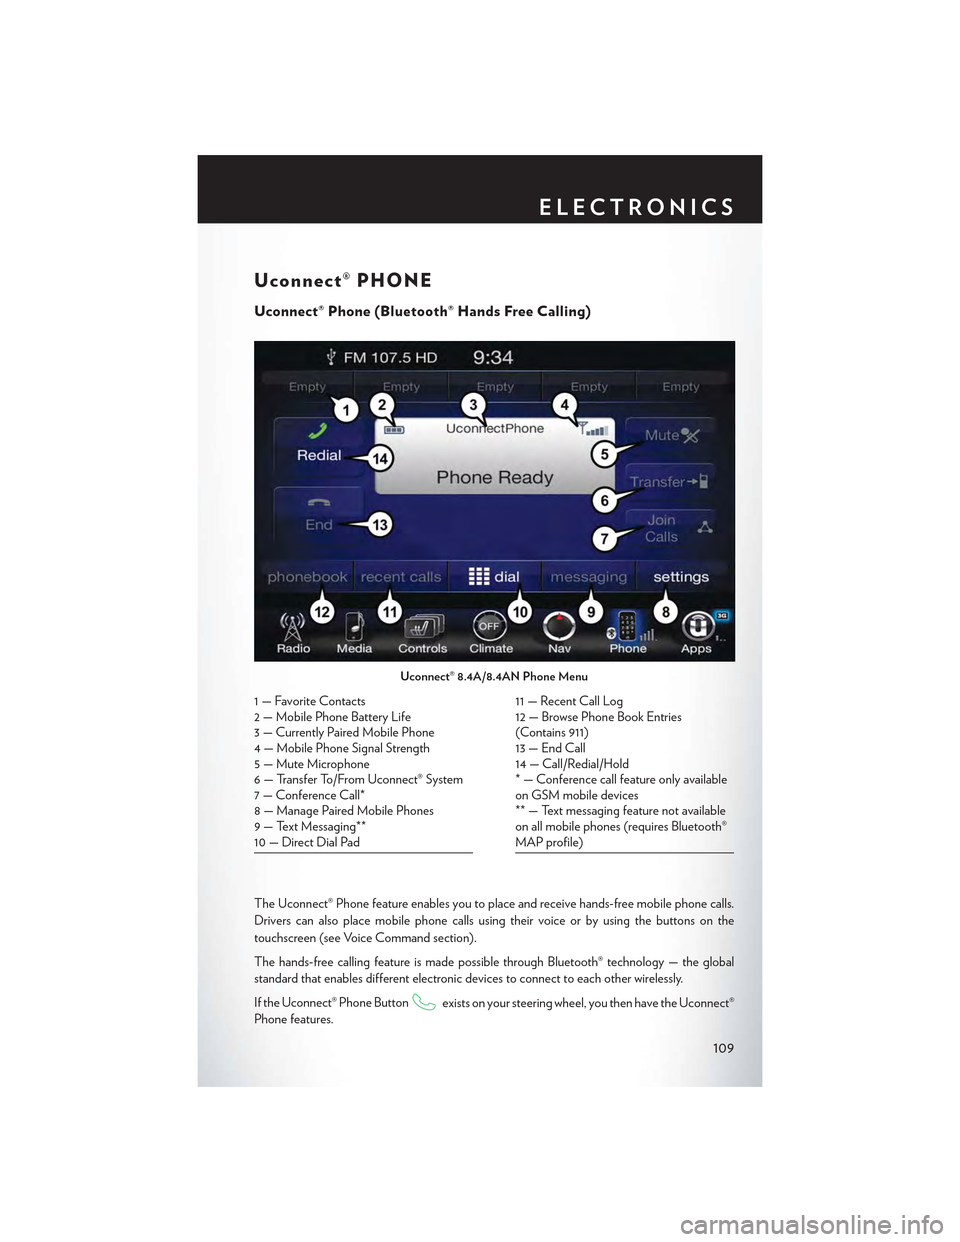
Uconnect® 8.4A/8.4AN Phone Menu
1—FavoriteContacts2 — Mobile Phone Battery Life3—CurrentlyPairedMobilePhone4—MobilePhoneSignalStrength5—MuteMicrophone6—TransferTo/FromUconnect®System7 — Conference Call*8—ManagePairedMobilePhones9—TextMessaging**10 — Direct Dial Pad
11 — Recent Call Log12 — Browse Phone Book Entries(Contains 911)13 — End Call14 — Call/Redial/Hold* — Conference call feature only availableon GSM mobile devices** — Text messaging feature not availableon all mobile phones (requires Bluetooth®MAP profile)
ELECTRONICS
109
Page 115 of 180
Select The Android Mobile Phone's Priority Level
When the pairing process has successfully completed, the system will prompt you to choose
whether or not this is your favorite mobile phone. Selecting “Yes” will make this mobile phone the
highest priority. This mobile phone will take precedence over other paired mobile phones within
range and will connect to the Uconnect system automatically when entering the vehicle. Only
one mobile phone and/or one Bluetooth audio device can be connected to the Uconnect®
system at a time. If “No” is selected, simply select “Uconnect” from the mobile phone/audio
device Bluetooth screen, and the Uconnect system will reconnect to the Bluetooth device.
You are now ready to make hands-free calls. Press the Uconnect® “Phone” buttonon your
steering wheel to begin.
NOTE:
Refer to UconnectPhone.com website for additional information on mobile phone pairing and
for a list of compatible phones.
Common Phone Commands (Examples)
• “Call John Smith”
• “Call John Smith mobile”
• “Dial 1 248 555 1212”
• “Redial”
Mute (Or Unmute) Microphone During Call
•Duringacall,pressthe“Mute”buttononthePhonemainscreentomuteandunmutethecall.
Tr a n s f e r O n g o i n g C a l l B e t w e e n H a n d s e t A n d Ve h i c l e
• During an on-going call, press the “Transfer” button on the Phone main screen to transfer an
on-going call between handset and vehicle.
Phonebook
The Uconnect® system will automatically sync your phonebook from your paired phone, if this
feature is supported by your phone. Phonebook contacts are updated each time that the phone
is connected. If your phone book entries do not appear, check the settings on your phone. Some
phones require you to enable this feature manually.
•YourphonebookcanbebrowsedontheUconnect®systemtouchscreen,buteditingcanonly
be done on your phone. To browse, press the “Phone” button on the touchscreen, then the
“Phonebook” button on the touchscreen.
Favorite phonebook entries can be saved as Favorites for quicker access. Favorites are shown at
the top of the main phone screen.
ELECTRONICS
113
Page 116 of 180
Vo i c e C o m m a n d T i p s
•Speakingcompletenames(i.e;CallJohnDoevs.CallJohn)willresultingreatersystem
accuracy.
• You can “link” commands together for faster results. Say “Call John Doe, mobile,” for example.
•Ifyouarelisteningtoavailablevoicecommandoptions,youdonothavetolistentotheentire
list. When you hear the command that you need, push thebutton on the steering
wheel, wait for the beep and say your command.
Changing The Volume
• Start a dialogue by pushing the Phone button, then say a command for example -
"Help".
•UsetheradioVOLUME/MUTErotaryknobtoadjustthevolumetoacomfortablelevelwhile
the Uconnect® system is speaking. Please note the volume setting for Uconnect® is different
than the audio system.
NOTE:
To access help, push the Uconnect® Phone buttonon the steering wheel and say "help."
Press the display or press either the Phoneor VRbutton and say "cancel" to cancel
the help session.
Incoming Text Messages
After pairing your Uconnect® system with a Bluetooth® enabled mobile device with the Message
Access Profile (MAP), the Uconnect® system can announce a new incoming text message and
read it to you over the vehicle’s audio system.
NOTE:
Only incoming text messages received during the current ignition cycle can be viewed/read.
ELECTRONICS
114
Page 120 of 180
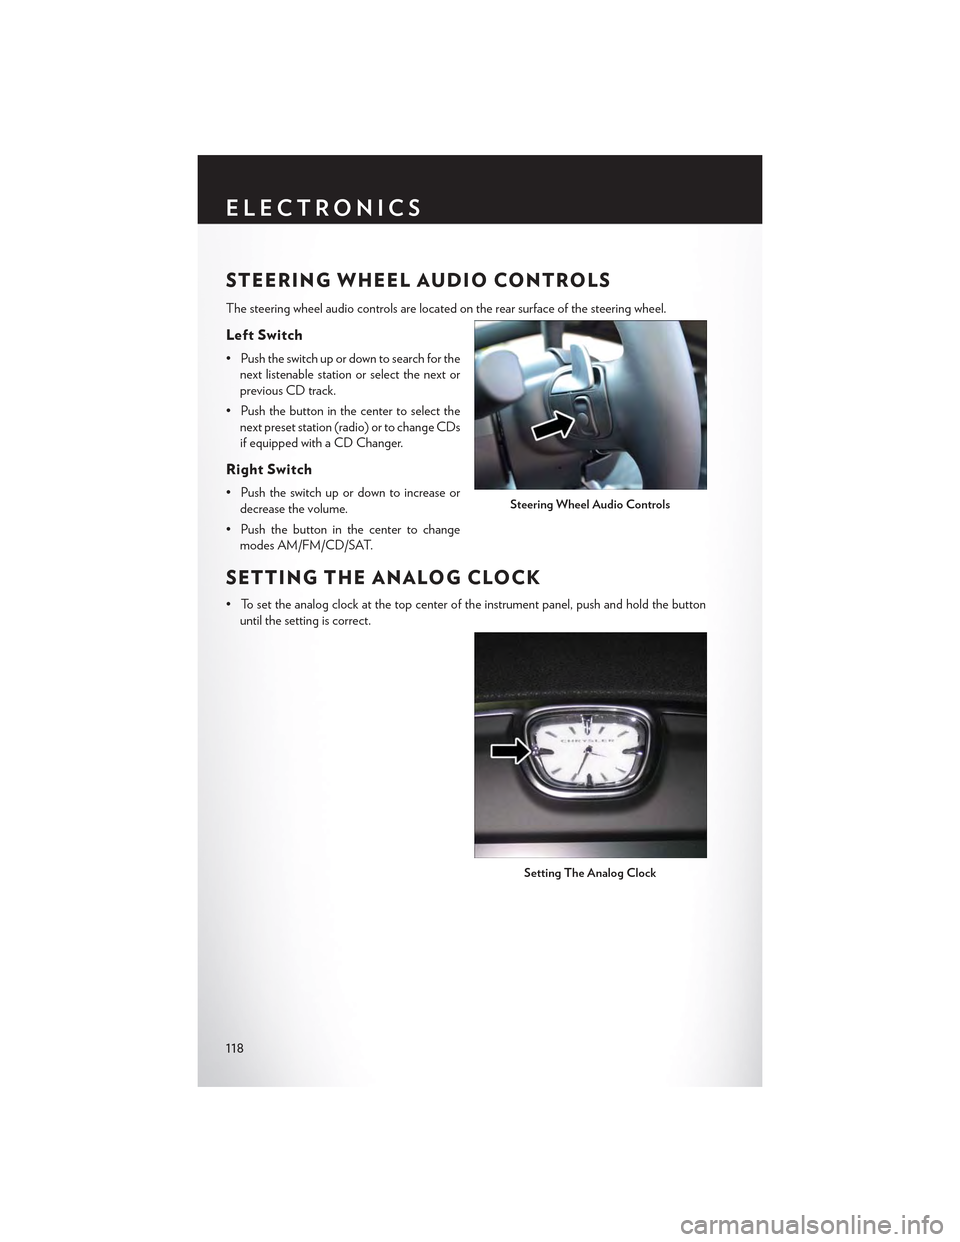
STEERING WHEEL AUDIO CONTROLS
The steering wheel audio controls are located on the rear surface of the steering wheel.
Left Switch
• Push the switch up or down to search for the
next listenable station or select the next or
previous CD track.
• Push the button in the center to select the
next preset station (radio) or to change CDs
if equipped with a CD Changer.
Right Switch
• Push the switch up or down to increase or
decrease the volume.
• Push the button in the center to change
modes AM/FM/CD/SAT.
SETTING THE ANALOG CLOCK
•Tosettheanalogclockatthetopcenteroftheinstrumentpanel,pushandholdthebutton
until the setting is correct.
Steering Wheel Audio Controls
Setting The Analog Clock
ELECTRONICS
118
Page 121 of 180
DRIVER INFORMATION DISPLAY (DID)
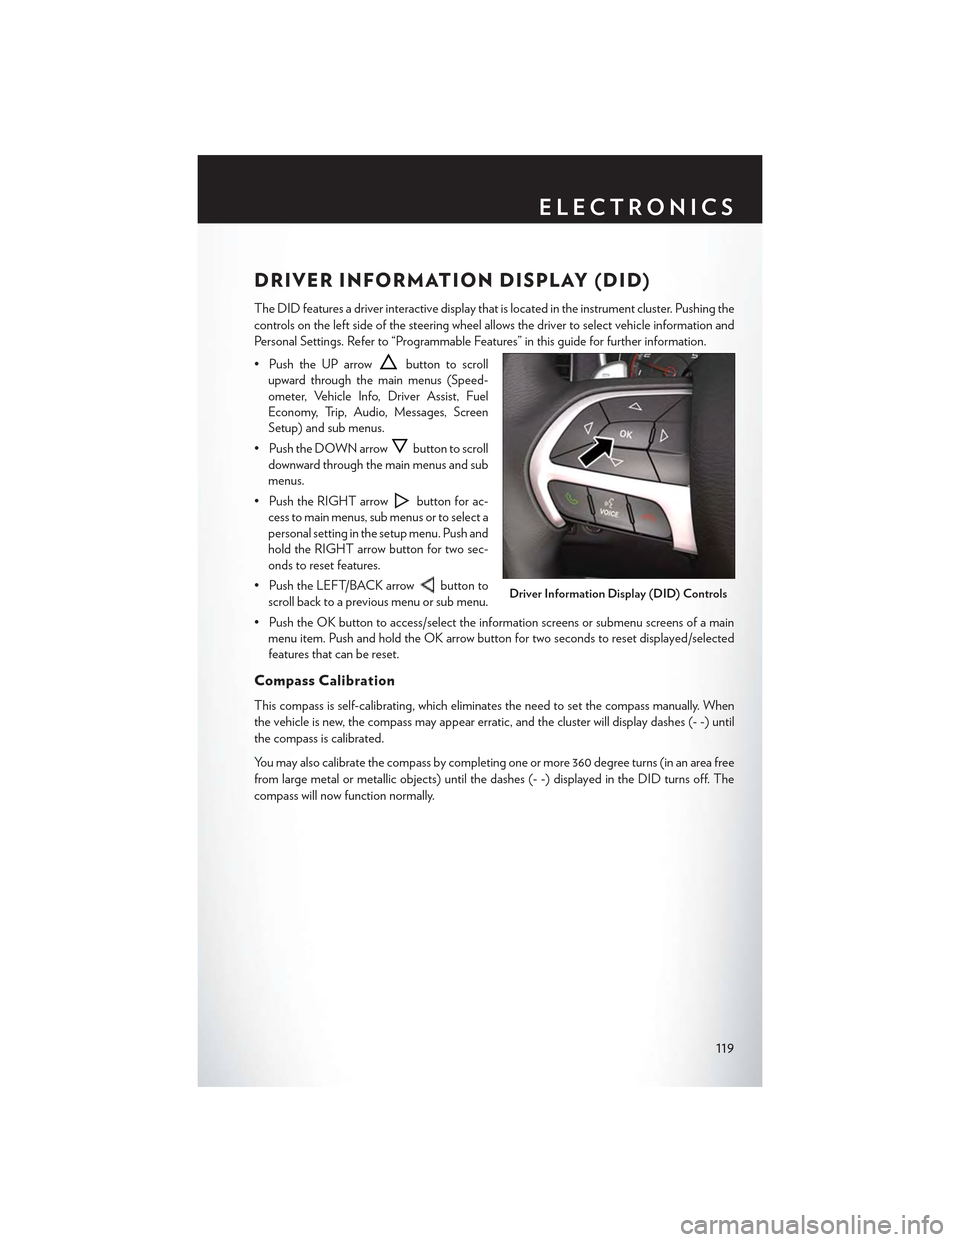
The DID features a driver interactive display that is located in the instrument cluster. Pushing the
controls on the left side of the steering wheel allows the driver to select vehicle information and
Personal Settings. Refer to “Programmable Features” in this guide for further information.
• Push the UP arrowbutton to scroll
upward through the main menus (Speed-
ometer, Vehicle Info, Driver Assist, Fuel
Economy, Trip, Audio, Messages, Screen
Setup) and sub menus.
• Push the DOWN arrowbutton to scroll
downward through the main menus and sub
menus.
• Push the RIGHT arrowbutton for ac-
cess to main menus, sub menus or to select a
personal setting in the setup menu. Push and
hold the RIGHT arrow button for two sec-
onds to reset features.
• Push the LEFT/BACK arrowbutton to
scroll back to a previous menu or sub menu.
• Push the OK button to access/select the information screens or submenu screens of a main
menu item. Push and hold the OK arrow button for two seconds to reset displayed/selected
features that can be reset.
Compass Calibration
This compass is self-calibrating, which eliminates the need to set the compass manually. When
the vehicle is new, the compass may appear erratic, and the cluster will display dashes (- -) until
the compass is calibrated.
Yo u m a y a l s o c a l i b r a t e t h e c o m p a s s b y c o m p l e t i n g o n e o r m o r e 3 6 0 d e g r e e t u r n s ( i n a n a r e a f r e e
from large metal or metallic objects) until the dashes (- -) displayed in the DID turns off. The
compass will now function normally.
Driver Information Display (DID) Controls
ELECTRONICS
119
Page 133 of 180
–ElectronicStabilityControl(ESC)OFFIndicatorLight
This light indicates the Electronic Stability Control (ESC) is off.
–DoorAjarIndicator
This indicator will illuminate when a door(s) is left ajar and not fully closed.
–SportShifting
This light will illuminate whenSPORT MODEis selected. Sport Mode will provide improved
throttle response and modified shifting for an enhanced driving experience as well as the greatest
amount of steering feel. (SPORT MODEwill enable AWD (if equipped) in the AWD Sport
mode providing an enhanced AWD driving performance).
Oil Change Due
Yo u r v e h i c l e i s e q u i p p e d w i t h a n e n g i n e o i l c h a n g e i n d i c a t o r s y s t e m . T h e “ O i l C h a n g e D u e ”
message will display for 5 seconds along with a single chime to indicate the next scheduled oil
change interval. The engine oil change indicator system is duty cycle based, which means the
engine oil change interval may fluctuate dependent upon your personal driving style.
Resetting The Light After Servicing
Vehicles Equipped With Keyless Enter-N-Go
1. Without pushing the brake pedal, push the ENGINE START/STOP button and cycle the
ignition to the ON/RUN position (do not start the engine).
2. Fully depress the accelerator pedal, slowly, three times within 10 seconds.
3. Without pushing the brake pedal, push the ENGINE START/STOP button once to return the
ignition to the OFF/LOCK position.
Vehicles Not Equipped With Keyless Enter-N-Go
1. Turn the ignition switch to the ON/RUN position (do not start the engine).
2. Fully depress the accelerator pedal, slowly, three times within 10 seconds.
3. Turn the ignition switch to the OFF/LOCK position.
NOTE:
If the indicator message illuminates when you start the vehicle, the oil change indicator system did
not reset. If necessary, repeat this procedure.
NOTE:
Resetting the oil life can also be done within the "Oil Life" menu under “Vehicle Info.”
WHAT TO DO IN EMERGENCIES
131
Page 154 of 180
MAINTENANCE PROCEDURES
For information on the maintenance procedures for your vehicle, please refer to “Maintenance
Procedures” in “Maintaining Your Vehicle” in your Owner’s Manual or applicable supplement on
the DVD for further details.
MAINTENANCE SCHEDULE
Yo u r v e h i c l e i s e q u i p p e d w i t h a n a u t o m a t i c o i l c h a n g e i n d i c a t o r s y s t e m . T h e o i l c h a n g e i n d i c a t o r
system will remind you that it is time to take your vehicle in for scheduled maintenance.
Based on engine operation conditions, the oil change indicator message will illuminate. This
means that service is required for your vehicle. Operating conditions such as frequent short-trips,
trailer tow, extremely hot or cold ambient temperatures, and E85 fuel usage will influence when
the “Change Oil” or “Oil Change Required” message is displayed. Severe Operating Conditions
can cause the change oil message to illuminate as early as 3,500 miles (5,600 km) since last reset.
Have your vehicle serviced as soon as possible, within the next 500 miles (805 km).
The “Oil Change Required” message will be displayed in the DID and a single chime will sound,
indicating that an oil change is necessary.
Your authorized dealer will reset the oil change indicator message after completing the scheduled
oil change. If a scheduled oil change is performed by someone other than your authorized dealer,
the message can be reset by referring to the steps described under “Instrument Cluster Warning
Lights” in “What To Do In Emergencies” in this guide or “Driver Information Dispay (DID)” in
“Understanding Your Instrument Panel” in your Owners Manual on the DVD for further infor-
mation.
NOTE:
Under no circumstances should oil change intervals exceed 10,000 miles (16,000 km) or twelve
months, whichever comes first.
Severe Duty All Models
Change Engine Oil at 4,000 miles (6,500 km) if the vehicle is operated in a dusty and off road
environment. This type of vehicle use is considered Severe Duty
Once A Month Or Before A Long Trip:
•Checkengineoillevel
•Checkwindshieldwasherfluidlevel
• Check tire pressure and look for unusual wear or damage. Rotate tires at the first sign of
irregular wear, even if it occurs before your next scheduled service.
•Checkthefluidlevelsofthecoolantreservoir,brakemastercylinder,andpowersteering(if
equipped) and fill as needed.
• Check function of all interior and exterior lights
MAINTAINING YOUR VEHICLE
152