CHRYSLER 300 2020 Owners Manual
Manufacturer: CHRYSLER, Model Year: 2020, Model line: 300, Model: CHRYSLER 300 2020Pages: 328, PDF Size: 14.28 MB
Page 211 of 328

IN CASE OF EMERGENCY209
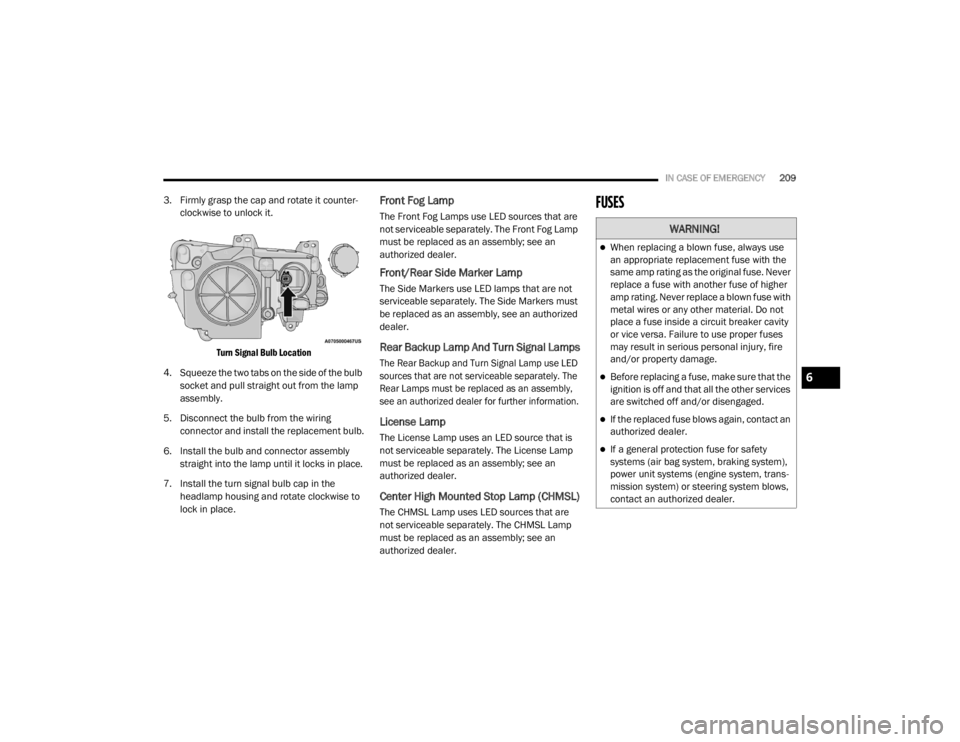
3. Firmly grasp the cap and rotate it counter -
clockwise to unlock it.
Turn Signal Bulb Location
4. Squeeze the two tabs on the side of the bulb socket and pull straight out from the lamp
assembly.
5. Disconnect the bulb from the wiring connector and install the replacement bulb.
6. Install the bulb and connector assembly straight into the lamp until it locks in place.
7. Install the turn signal bulb cap in the headlamp housing and rotate clockwise to
lock in place.Front Fog Lamp
The Front Fog Lamps use LED sources that are
not serviceable separately. The Front Fog Lamp
must be replaced as an assembly; see an
authorized dealer.
Front/Rear Side Marker Lamp
The Side Markers use LED lamps that are not
serviceable separately. The Side Markers must
be replaced as an assembly, see an authorized
dealer.
Rear Backup Lamp And Turn Signal Lamps
The Rear Backup and Turn Signal Lamp use LED
sources that are not serviceable separately. The
Rear Lamps must be replaced as an assembly,
see an authorized dealer for further information.
License Lamp
The License Lamp uses an LED source that is
not serviceable separately. The License Lamp
must be replaced as an assembly; see an
authorized dealer.
Center High Mounted Stop Lamp (CHMSL)
The CHMSL Lamp uses LED sources that are
not serviceable separately. The CHMSL Lamp
must be replaced as an assembly; see an
authorized dealer.
FUSES
WARNING!
When replacing a blown fuse, always use
an appropriate replacement fuse with the
same amp rating as the original fuse. Never
replace a fuse with another fuse of higher
amp rating. Never replace a blown fuse with
metal wires or any other material. Do not
place a fuse inside a circuit breaker cavity
or vice versa. Failure to use proper fuses
may result in serious personal injury, fire
and/or property damage.
Before replacing a fuse, make sure that the
ignition is off and that all the other services
are switched off and/or disengaged.
If the replaced fuse blows again, contact an
authorized dealer.
If a general protection fuse for safety
systems (air bag system, braking system),
power unit systems (engine system, trans -
mission system) or steering system blows,
contact an authorized dealer.
6
20_LX_OM_EN_USC_t.book Page 209
Page 212 of 328

210IN CASE OF EMERGENCY
(Continued)
GENERAL INFORMATION
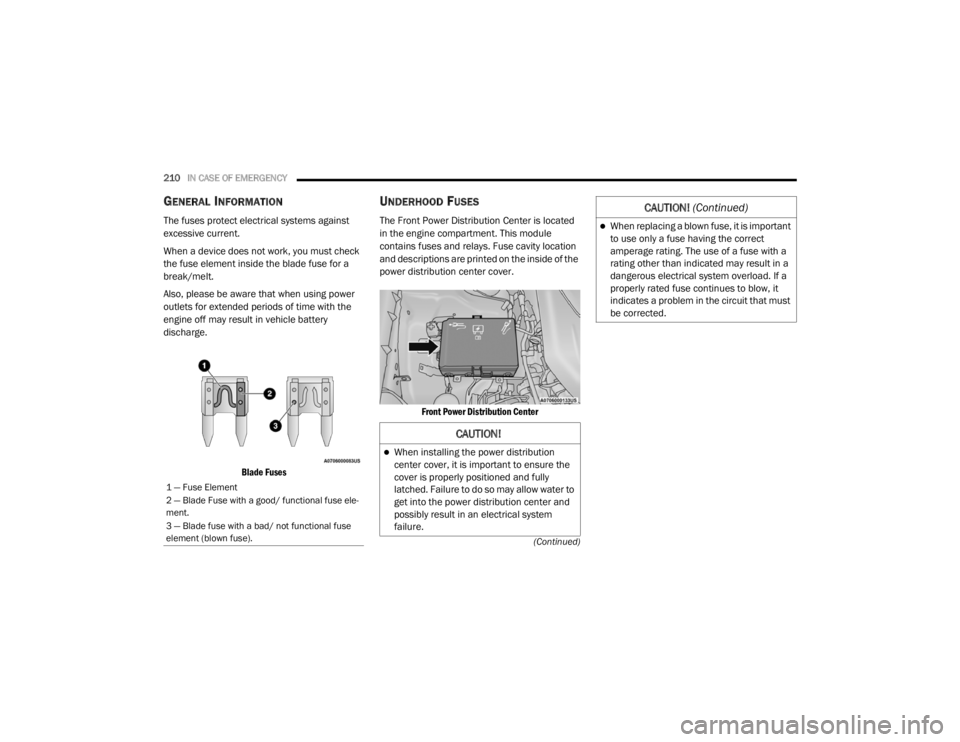
The fuses protect electrical systems against
excessive current.
When a device does not work, you must check
the fuse element inside the blade fuse for a
break/melt.
Also, please be aware that when using power
outlets for extended periods of time with the
engine off may result in vehicle battery
discharge.
Blade Fuses
UNDERHOOD FUSES
The Front Power Distribution Center is located
in the engine compartment. This module
contains fuses and relays. Fuse cavity location
and descriptions are printed on the inside of the
power distribution center cover.
Front Power Distribution Center
1 — Fuse Element
2 — Blade Fuse with a good/ functional fuse ele -
ment.
3 — Blade fuse with a bad/ not functional fuse
element (blown fuse).
CAUTION!
When installing the power distribution
center cover, it is important to ensure the
cover is properly positioned and fully
latched. Failure to do so may allow water to
get into the power distribution center and
possibly result in an electrical system
failure.
When replacing a blown fuse, it is important
to use only a fuse having the correct
amperage rating. The use of a fuse with a
rating other than indicated may result in a
dangerous electrical system overload. If a
properly rated fuse continues to blow, it
indicates a problem in the circuit that must
be corrected.
CAUTION! (Continued)
20_LX_OM_EN_USC_t.book Page 210
Page 213 of 328

IN CASE OF EMERGENCY211
Cavity Cartridge Fuse Mini-FuseDescription
1– –Fuse – Spare
2 40 Amp Green –Radiator Fan #1 – (Non 6.2L Supercharged)
3 50 Amp Red –Electric Power Steering #1 – If Equipped
4 30 Amp Pink –Starter
5 40 Amp Green –Anti-Lock Brake
6 30 Amp Pink –Anti-Lock Brake
7 20 Amp Blue –Police Ignition Run / ACC #1
8 50 Amp Red /
20 Amp Blue –
Radiator Fan (6.2L Supercharged) / Police Ignition Run / ACC # 2
9 –20 Amp Yellow All-Wheel Drive Module – If Equipped
10 –10 Amp Red Intrusion MOD (300) – If Equipped / Under Hood Lamp – Police
11 –20 Amp Yellow Horns
12 –10 Amp Red Air Conditioning Clutch
13 – –Fuse – Spare
14 – –Fuse – Spare
15 –20 Amp Yellow Left HID Headlamp – If Equipped
16 –20 Amp Yellow Right HID Headlamp – If Equipped
18 50 Amp Red –Radiator Fan – (Non 6.2L Supercharged)
19 50 Amp Red –Electric Power Steering #2 – If Equipped
20 30 Amp Pink –Wiper Motor
6
20_LX_OM_EN_USC_t.book Page 211
Page 214 of 328

212IN CASE OF EMERGENCY
2130 Amp Pink
20 Amp Blue – Police –Headlamp Washers – If Equipped
Police Bat Feed #2
22 40 Amp Green /
20 Amp Blue – Police –
Engine Cooling Pump (6.2L Supercharged) / Police Bat Feed # 3
23 20 Amp Blue –Police Bat Feed # 1
24 50 Amp Red /
20 Amp Blue –
Radiator Fan (6.2L Supercharged) / Police Ignition Run/ACC Feed # 3
28 – –Fuse – Spare
29 –15 Amp Blue Transmission Control Module (Challenger / Charger Police)
30 – –Fuse – Spare
31 –25 Amp Clear Engine Module
32 – –Fuse – Spare
33 – –Fuse – Spare
34 –25 Amp Clear ASD Feed #1
35 –20 Amp Yellow ASD Feed #2
36 –10 Amp RedAnti-Lock Brake Module / Steering Column Lock Module (300 if
equipped)
37 –10 Amp Red Engine Controller
38 –10 Amp Red Airbag Module
39 –10 Amp Red A/C Clutch / EPS – If Equipped / Vacuum Pump – If Equipped
Cavity Cartridge Fuse Mini-FuseDescription
20_LX_OM_EN_USC_t.book Page 212
Page 215 of 328

IN CASE OF EMERGENCY213
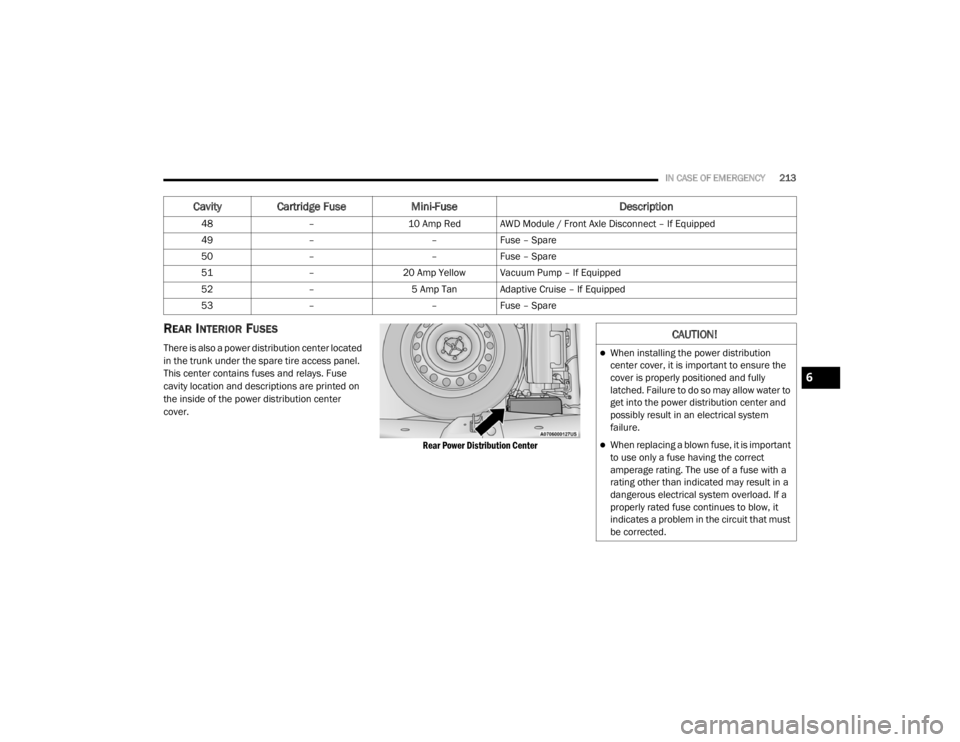
REAR INTERIOR FUSES
There is also a power distribution center located
in the trunk under the spare tire access panel.
This center contains fuses and relays. Fuse
cavity location and descriptions are printed on
the inside of the power distribution center
cover.
Rear Power Distribution Center
48
–10 Amp Red AWD Module / Front Axle Disconnect – If Equipped
49 – –Fuse – Spare
50 – –Fuse – Spare
51 –20 Amp Yellow Vacuum Pump – If Equipped
52 –5 Amp Tan Adaptive Cruise – If Equipped
53 – –Fuse – Spare
Cavity Cartridge Fuse Mini-FuseDescription
CAUTION!
When installing the power distribution
center cover, it is important to ensure the
cover is properly positioned and fully
latched. Failure to do so may allow water to
get into the power distribution center and
possibly result in an electrical system
failure.
When replacing a blown fuse, it is important
to use only a fuse having the correct
amperage rating. The use of a fuse with a
rating other than indicated may result in a
dangerous electrical system overload. If a
properly rated fuse continues to blow, it
indicates a problem in the circuit that must
be corrected.
6
20_LX_OM_EN_USC_t.book Page 213
Page 216 of 328

214IN CASE OF EMERGENCY
Cavity Cartridge Fuse Mini-FuseDescription
260 Amp Yellow –Front PDC Feed #1
3 – –Fuse – Spare
4 60 Amp Yellow –Front PDC Feed #2
5 30 Amp Pink
20 Amp Blue – Police –
Sunroof/Dome Lamp – Police
6 40 Amp Green –Exterior Lighting #1
7 40 Amp Green –Exterior Lighting #2
8 30 Amp Pink –Interior Lighting
9 40 Amp Green –Power Locks
10 30 Amp Pink –Driver Door Control Module
11 30 Amp Pink –Passenger Door Control Module
12 –20 Amp Yellow Dual USB Center Console Rear/+12 Volt Power Outlet IP –
If Equipped / IP APO – If Equipped
15 40 Amp Green –HVAC Blower
16 20 Amp Blue –Left Spot Lamp – Police
17 20 Amp Blue –Right Spot Lamp – Police
18 30 Amp Pink –Mod Network Interface – Police
19 – –Fuse – Spare
20 – –Fuse – Spare
20_LX_OM_EN_USC_t.book Page 214
Page 217 of 328

IN CASE OF EMERGENCY215
2130 Amp Pink –Fuel Pump (Non 6.2L SRT)
22 –5 Amp Tan Cyber Gateway Module
23 –10 Amp Red Fuel Door – If Equipped/Diagnostic Port
24 –10 Amp Red Integrated Center Stack
25 –10 Amp Red Tire Pressure Monitor System
26 –15 Amp Blue Cygnus Transmission Module (Charger Non - Police/300)
27 –25 Amp Clear Amplifier – If Equipped
31 –25 Amp Breaker Power Seats – If Equipped
32 –15 Amp Blue HVAC Module/Cluster
33 –15 Amp BlueIgnition Switch/RF Hub Module/Steering Column Lock (300) –
If Equipped / Remote Start – If Equipped
34 –10 Amp Red Steering Column Module/Clock (300)
35 –5 Amp Tan Battery Sensor
36 –15 Amp Blue Electronic Exhaust Valve – If Equipped
37 –20 Amp Yellow Radio
38 –20 Amp Yellow Media Hub / Console APO
40 30 Amp Pink –Fuel Pump (6.2L SRT – If Equipped)
41 30 Amp Pink –Fuel Pump (6.2L SRT – If Equipped)
42 30 Amp Pink –Rear Defrost
Cavity Cartridge Fuse Mini-FuseDescription
6
20_LX_OM_EN_USC_t.book Page 215
Page 218 of 328

216IN CASE OF EMERGENCY
43–20 Amp Yellow Rear Heated Seats – If Equipped / Heated Steering Wheel –
If Equipped
44 –10 Amp Red Park Assist / Blind Spot / Rear View Camera
45 –15 Amp Blue Cluster / Rearview Mirror / Lane Departure
46 – –Fuse – Spare
47 –10 Amp Red Adaptive Front Lighting / Day Time Running Lamps – If Equipped
48 –20 Amp Yellow Active Suspension – (6.4L)
49 – –Fuse – Spare
50 – –Fuse – Spare
51 –20 Amp Yellow Front Heated / Vented Seats – If Equipped
52 –10 Amp RedHeated/Cooled Cup Holders/Rear Heated Seat Switches –
If Equipped
53 –10 Amp Red HVAC Module/In Vehicle Temperature Sensor
54 – –Fuse – Spare
55 – –Fuse – Spare
56 – –Fuse – Spare
57 – –Fuse – Spare
58 –10 Amp Red Airbag Module
59 –20 Amp Yellow Adjustable Pedals – Police
Cavity Cartridge Fuse Mini-FuseDescription
20_LX_OM_EN_USC_t.book Page 216
Page 219 of 328

IN CASE OF EMERGENCY217
(Continued)
(Continued)
JACKING AND TIRE CHANGING
60
– –Fuse – Spare
61 – –Fuse – Spare
62 – –Fuse – Spare
63 – –Fuse – Spare
64 –25 Amp Breaker Rear Windows (Charger/300)
65 –10 Amp Red Airbag Module
66 – –Fuse – Spare
67 –10 Amp RedRain and Light Sensor / Sunroof / Inside RearView Mirror /
Police Run Acc Relay
68 –10 Amp Red Rear USB Timer / Rear Sunshade – If Equipped
69 – –Fuse – Spare
70 – –Fuse – Spare
Cavity Cartridge Fuse Mini-FuseDescription
WARNING!
Do not attempt to change a tire on the side
of the vehicle close to moving traffic. Pull
far enough off the road to avoid the danger
of being hit when operating the jack or
changing the wheel.
Being under a jacked-up vehicle is
dangerous. The vehicle could slip off the
jack and fall on you. You could be crushed.
Never put any part of your body under a
vehicle that is on a jack. If you need to get
under a raised vehicle, take it to a service
center where it can be raised on a lift.
WARNING! (Continued)
Never start or run the engine while the
vehicle is on a jack.
The jack is designed to be used as a tool for
changing tires only. The jack should not be
used to lift the vehicle for service purposes.
The vehicle should be jacked on a firm level
surface only. Avoid ice or slippery areas.
WARNING! (Continued)
6
20_LX_OM_EN_USC_t.book Page 217
Page 220 of 328

218IN CASE OF EMERGENCY
JACK LOCATION/SPARE TIRE STOWAGE
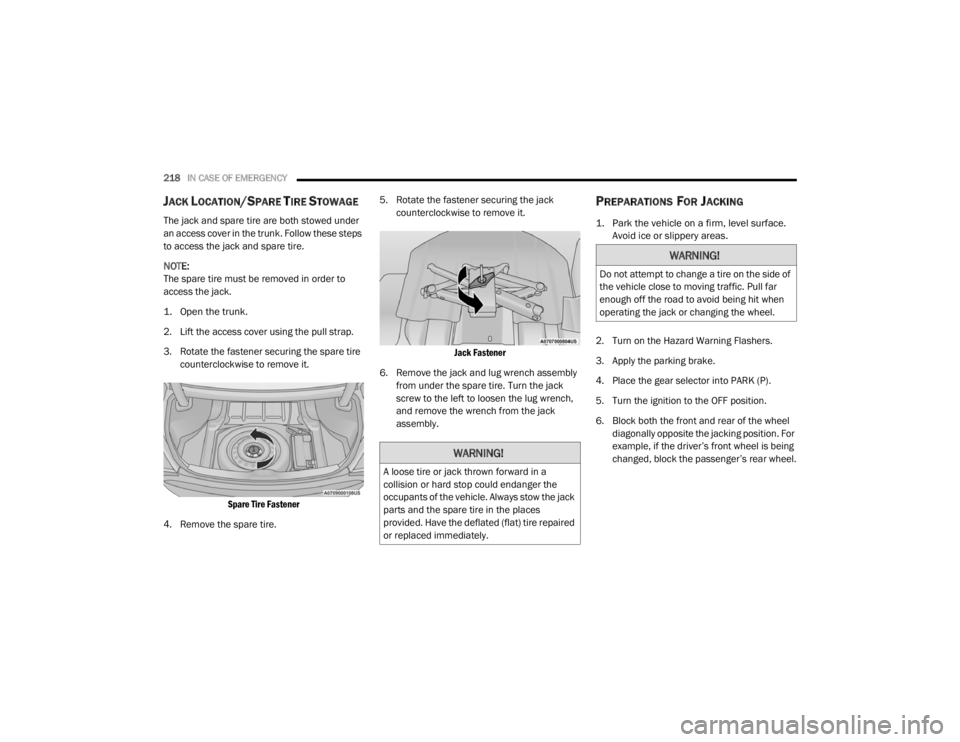
The jack and spare tire are both stowed under
an access cover in the trunk. Follow these steps
to access the jack and spare tire.
NOTE:
The spare tire must be removed in order to
access the jack.
1. Open the trunk.
2. Lift the access cover using the pull strap.
3. Rotate the fastener securing the spare tire
counterclockwise to remove it.
Spare Tire Fastener
4. Remove the spare tire. 5. Rotate the fastener securing the jack
counterclockwise to remove it.
Jack Fastener
6. Remove the jack and lug wrench assembly from under the spare tire. Turn the jack
screw to the left to loosen the lug wrench,
and remove the wrench from the jack
assembly.
PREPARATIONS FOR JACKING
1. Park the vehicle on a firm, level surface. Avoid ice or slippery areas.
2. Turn on the Hazard Warning Flashers.
3. Apply the parking brake.
4. Place the gear selector into PARK (P).
5. Turn the ignition to the OFF position.
6. Block both the front and rear of the wheel diagonally opposite the jacking position. For
example, if the driver’s front wheel is being
changed, block the passenger’s rear wheel.
WARNING!
A loose tire or jack thrown forward in a
collision or hard stop could endanger the
occupants of the vehicle. Always stow the jack
parts and the spare tire in the places
provided. Have the deflated (flat) tire repaired
or replaced immediately.
WARNING!
Do not attempt to change a tire on the side of
the vehicle close to moving traffic. Pull far
enough off the road to avoid being hit when
operating the jack or changing the wheel.
20_LX_OM_EN_USC_t.book Page 218