display CHRYSLER 300 2021 Workshop Manual
[x] Cancel search | Manufacturer: CHRYSLER, Model Year: 2021, Model line: 300, Model: CHRYSLER 300 2021Pages: 268, PDF Size: 15.24 MB
Page 131 of 268
MULTIMEDIA 129
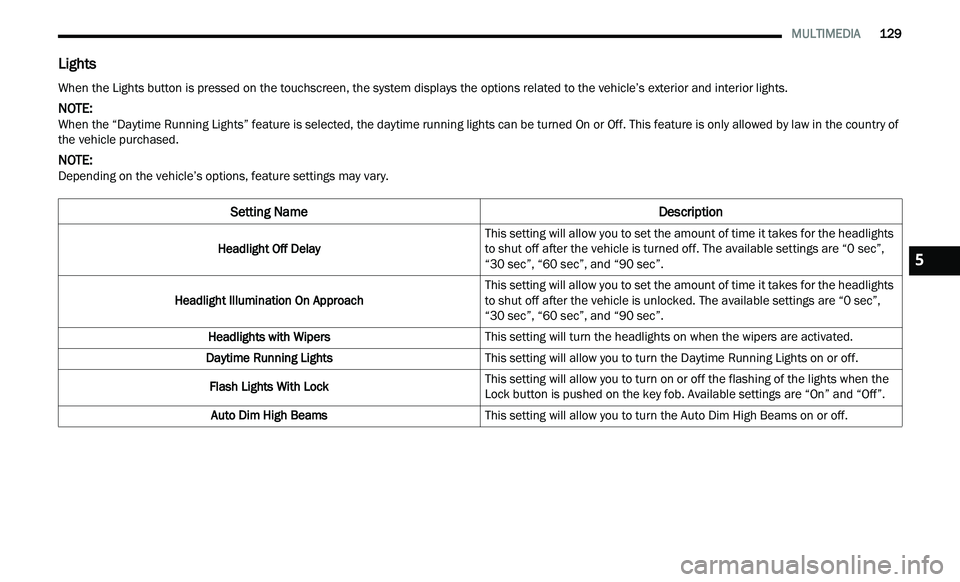
Lights
When the Lights button is pressed on the touchscreen, the system displays the options related to the vehicle’s exterior and interior lights.
NOTE:
When the “Daytime Running Lights” feature is selected, the daytime running lights can be turned On or Off. This feature is only allowed by law in the country of
t h
e vehicle purchased.
NOTE:
Depending on the vehicle’s options, feature settings may vary.
Setting Name Description
Headlight Off DelayThis setting will allow you to set the amount of time it takes for the headlights
t
o
shut off after the vehicle is turned off. The available settings are “0 sec”,
“30 sec”, “60 sec”, and “90 sec”.
Headlight Illumination On Approach This setting will allow you to set the amount of time it takes for the headlights
t
o
shut off after the vehicle is unlocked. The available settings are “0 sec”,
“30 sec”, “60 sec”, and “90 sec”.
Headlights with Wipers This setting will turn the headlights on when the wipers are activated.
Daytime Running Lights This setting will allow you to turn the Daytime Running Lights on or off.
Flash Lights With Lock This setting will allow you to turn on or off the flashing of the lights when the
Lock
button is pushed on the key fob. Available settings are “On” and “Off”.
Auto Dim High Beams This setting will allow you to turn the Auto Dim High Beams on or off.
5
Page 132 of 268
130 MULTIMEDIA
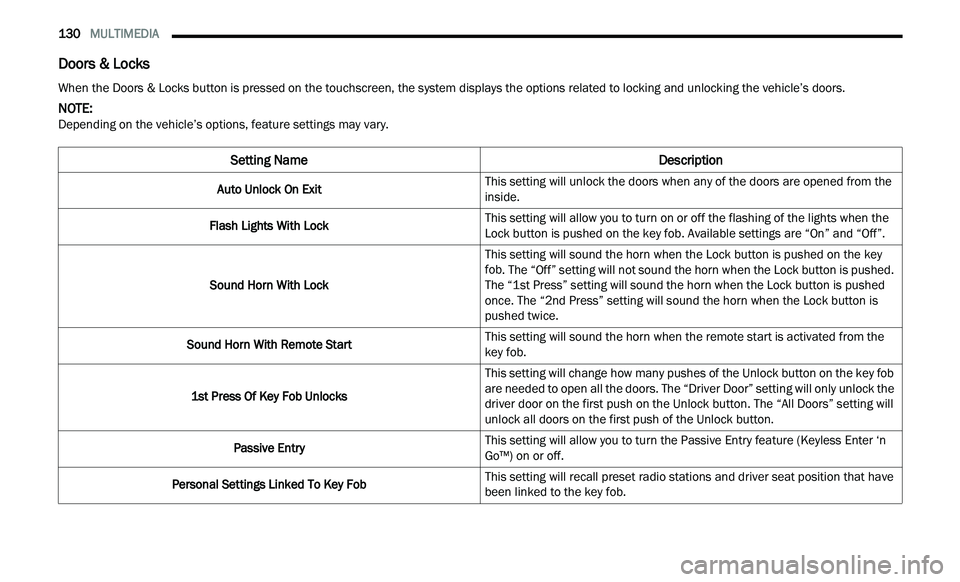
Doors & Locks
When the Doors & Locks button is pressed on the touchscreen, the system displays the options related to locking and unlocking the vehicle’s doors.
NOTE:
Depending on the vehicle’s options, feature settings may vary.
Setting Name Description
Auto Unlock On ExitThis setting will unlock the doors when any of the doors are opened from the
i
n
side.
Flash Lights With Lock This setting will allow you to turn on or off the flashing of the lights when the
Loc
k
button is pushed on the key fob. Available settings are “On” and “Off”.
Sound Horn With Lock This setting will sound the horn when the Lock button is pushed on the key
f
ob
. The “Off” setting will not sound the horn when the Lock button is pushed.
The “1st Press” setting will sound the horn when the Lock button is pushed
once. The “2nd Press” setting will sound the horn when the Lock button is
pushed twice.
Sound Horn With Remote Start This setting will sound the horn when the remote start is activated from the
ke
y fob.
1st Press Of Key Fob Unlocks This setting will change how many pushes of the Unlock button on the key fob
a
r
e needed to open all the doors. The “Driver Door” setting will only unlock the
driver door on the first push on the Unlock button. The “All Doors” setting will
unlock all doors on the first push of the Unlock button.
Passive Entry This setting will allow you to turn the Passive Entry feature (Keyless Enter ‘n
G
o™
) on or off.
Personal Settings Linked To Key Fob This setting will recall preset radio stations and driver seat position that have
b
e
en linked to the key fob.
Page 133 of 268
MULTIMEDIA 131
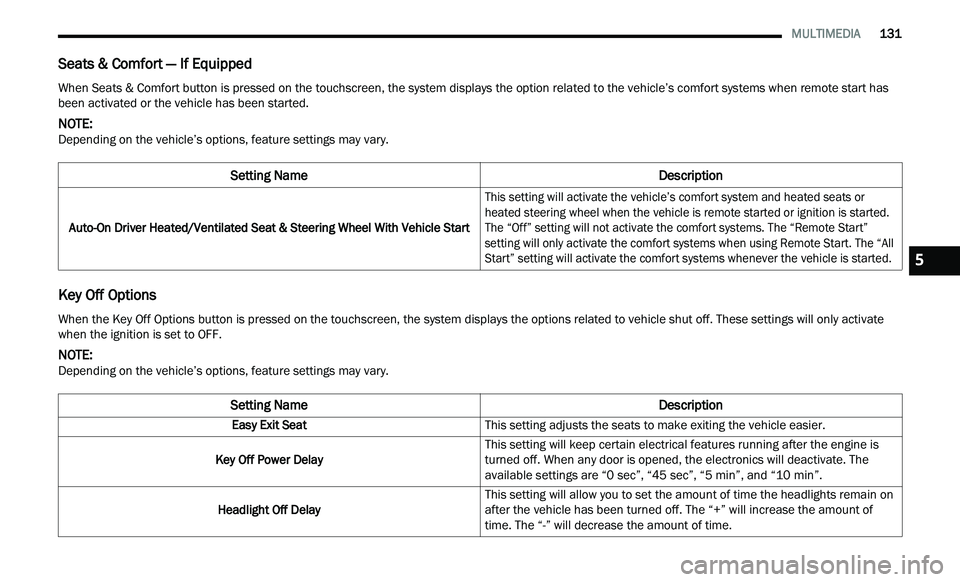
Seats & Comfort — If Equipped
Key Off Options
When Seats & Comfort button is pressed on the touchscreen, the system displays the option related to the vehicle’s comfort systems when remote start has
been activated or the vehicle has been started.
NOTE:
Depending on the vehicle’s options, feature settings may vary.
Setting Name Description
Auto-On Driver Heated/Ventilated Seat & Steering Wheel With Vehicle Start
This setting will activate the vehicle’s comfort system and heated seats or
he
ated steering wheel when the vehicle is remote started or ignition is started.
The “Off” setting will not activate the comfort systems. The “Remote Start”
setting will only activate the comfort systems when using Remote Start. The “All
Start” setting will activate the comfort systems whenever the vehicle is started.
When the Key Off Options button is pressed on the touchscreen, the system displays the options related to vehicle shut off. These settings will only activate
when the ignition is set to OFF.
NOTE:
Depending on the vehicle’s options, feature settings may vary.
Setting Name Description
Easy Exit SeatThis setting adjusts the seats to make exiting the vehicle easier.
Key Off Power Delay This setting will keep certain electrical features running after the engine is
tu
rned off. When any door is opened, the electronics will deactivate. The
available settings are “0 sec”, “45 sec”, “5 min”, and “10 min”.
Headlight Off Delay This setting will allow you to set the amount of time the headlights remain on
af
ter the vehicle has been turned off. The “+” will increase the amount of
time. The “-” will decrease the amount of time.
5
Page 134 of 268
132 MULTIMEDIA
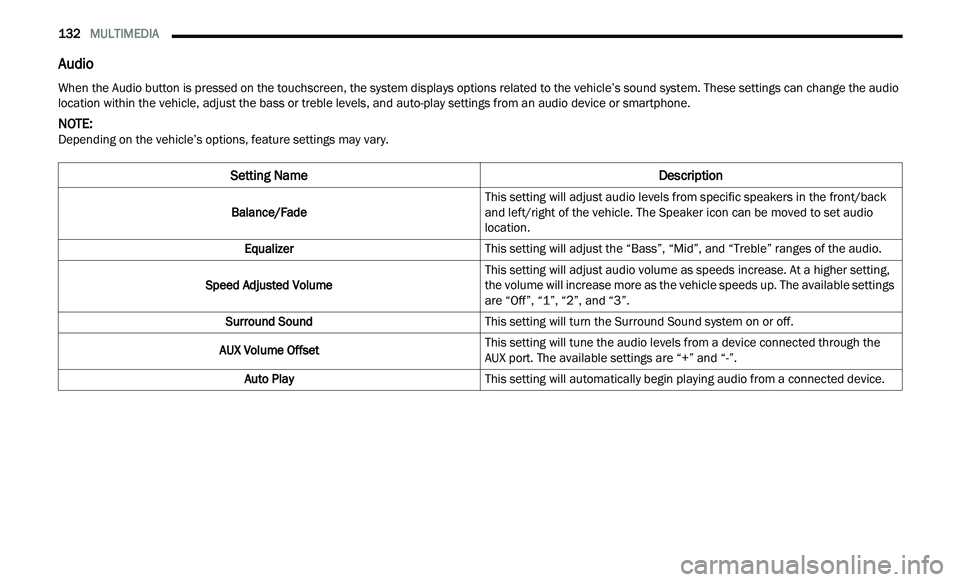
Audio
When the Audio button is pressed on the touchscreen, the system displays options related to the vehicle’s sound system. These settings can change the audio
location within the vehicle, adjust the bass or treble levels, and auto-play settings from an audio device or smartphone.
NOTE:
Depending on the vehicle’s options, feature settings may vary.
Setting Name Description
Balance/FadeThis setting will adjust audio levels from specific speakers in the front/back
a
n
d left/right of the vehicle. The Speaker icon can be moved to set audio
location.
Equalizer This setting will adjust the “Bass”, “Mid”, and “Treble” ranges of the audio.
Speed Adjusted Volume This setting will adjust audio volume as speeds increase. At a higher setting,
th
e volume will increase more as the vehicle speeds up. The available settings
are “Off”, “1”, “2”, and “3”.
Surround Sound This setting will turn the Surround Sound system on or off.
AUX Volume Offset This setting will tune the audio levels from a device connected through the
AU
X port. The available settings are “+” and “-”.
Auto Play This setting will automatically begin playing audio from a connected device.
Page 135 of 268
MULTIMEDIA 133
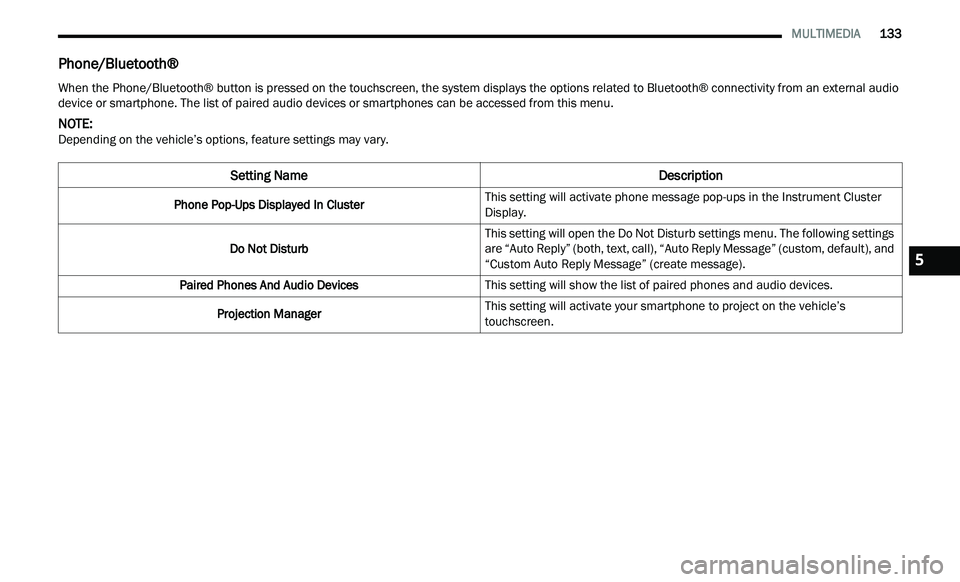
Phone/Bluetooth®
When the Phone/Bluetooth® button is pressed on the touchscreen, the system displays the options related to Bluetooth® connectivity from an external audio
device or smartphone. The list of paired audio devices or smartphones can be accessed from this menu.
NOTE:
Depending on the vehicle’s options, feature settings may vary.
Setting Name Description
Phone Pop-Ups Displayed In ClusterThis setting will activate phone message pop-ups in the Instrument Cluster
D
i
splay.
Do Not Disturb This setting will open the Do Not Disturb settings menu. The following settings
a
r
e “Auto Reply” (both, text, call), “Auto Reply Message” (custom, default), and
“Custom Auto Reply Message” (create message).
Paired Phones And Audio Devices This setting will show the list of paired phones and audio devices.
Projection Manager This setting will activate your smartphone to project on the vehicle’s
tou
chscreen.
5
Page 136 of 268
134 MULTIMEDIA
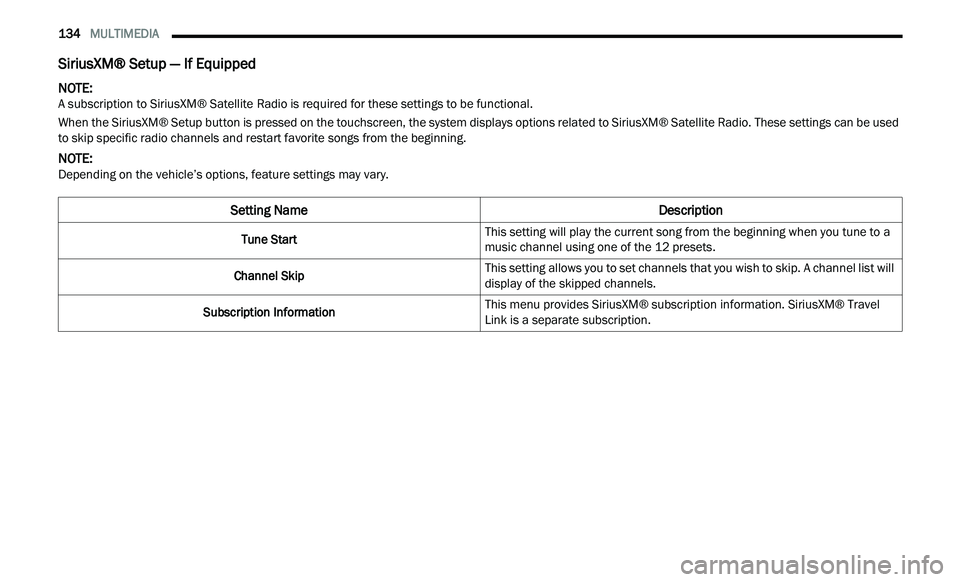
SiriusXM® Setup — If Equipped
NOTE:
A subscription to SiriusXM® Satellite Radio is required for these settings to be functional.
When the SiriusXM® Setup button is pressed on the touchscreen, the system displays options related to SiriusXM® Satellite Radio. These settings can be used
t o
skip specific radio channels and restart favorite songs from the beginning.
NOTE:
Depending on the vehicle’s options, feature settings may vary.
Setting Name Description
Tune StartThis setting will play the current song from the beginning when you tune to a
m
u
sic channel using one of the 12 presets.
Channel Skip This setting allows you to set channels that you wish to skip. A channel list will
d
i
splay of the skipped channels.
Subscription Information This menu provides SiriusXM® subscription information. SiriusXM® Travel
Li
n
k is a separate subscription.
Page 137 of 268
MULTIMEDIA 135
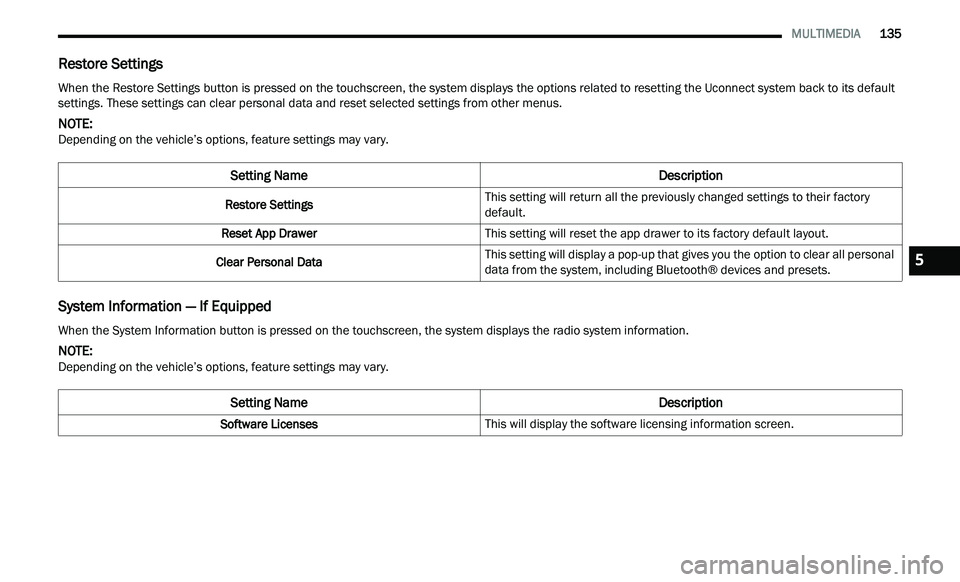
Restore Settings
System Information — If Equipped
When the Restore Settings button is pressed on the touchscreen, the system displays the options related to resetting the Uconnect system back to its default
settings. These settings can clear personal data and reset selected settings from other menus.
NOTE:
Depending on the vehicle’s options, feature settings may vary.
Setting Name Description
Restore SettingsThis setting will return all the previously changed settings to their factory
d
e
fault.
Reset App Drawer This setting will reset the app drawer to its factory default layout.
Clear Personal Data This setting will display a pop-up that gives you the option to clear all personal
d
a
ta from the system, including Bluetooth® devices and presets.
When the System Information button is pressed on the touchscreen, the system displays the radio system information.
NOTE:
Depending on the vehicle’s options, feature settings may vary.
Setting Name Description
Software LicensesThis will display the software licensing information screen.
5
Page 142 of 268
140 SAFETY
(Continued)
Partial Off
This mode may be useful if the vehicle becomes
st
uck. This mode may modify TCS and ESC
thresholds for activation, which allows for more
wheel spin than normally allowed.
To enter the “Partial Off” mode, momentarily push
th
e ESC OFF button and the ESC OFF Indicator
Light will illuminate. To turn the ESC on again,
momentarily push the ESC OFF button and the ESC
OFF Indicator Light will turn off.
NOTE:
For vehicles with multiple partial ESC modes,
the push and release of the button will toggle
the ESC modes. Multiple attempts may be
required to return to "ESC On" mode.
Trailer Sway Control (TSC) is disabled when the
ESC system is in the “Partial Off” mode.
If Equipped — "ESC Sport" and "ESC Track" are
ESC “Partial Off” mode(s).
Full Off – If Equipped
This mode is intended for off-highway or off-road
u s
e only and should not be used on any public
roadways. In this mode, TCS and ESC features are
turned off. To enter the “Full Off” mode, push and
hold the ESC OFF button for five seconds while the
vehicle is stopped with the engine running. After
five seconds, a chime will sound, the ESC OFF
Indicator Light will illuminate, and the “ESC OFF”
message will display in the instrument cluster. To
turn ESC on again, momentarily push the ESC OFF
button.
ESC Activation/Malfunction Indicator Light
And ESC OFF Indicator Light
The ESC Activation/Malfunction Indicator
Light in the instrument cluster will come
o n
when the ignition is placed in the ON
position. It should go out with the engine
running. If the ESC Activation/Malfunction
Indicator Light comes on continuously with the
engine running, a malfunction has been detected
in the ESC system. If this light remains on after
several ignition cycles, and the vehicle has been
driven several miles (kilometers) at speeds greater
WARNING!
When in “Partial Off” mode, the TCS functionality
of ESC (except for the limited slip feature
described in the TCS section) has been disabled
and the ESC OFF Indicator Light will be
illuminated. When in “Partial Off” mode, the
engine power reduction feature of TCS is
disabled, and the enhanced vehicle stability
offered by the ESC system is reduced.
WARNING!
In the ESC “Full Off” mode, the engine torque
reduction and stability features are disabled.
Therefore, enhanced vehicle stability offered
by the ESC system is unavailable. In an emer -
gency evasive maneuver, the ESC system will
n ot
engage to assist in maintaining stability.
ESC “Full Off” mode is intended for
off-highway or off-road use only.
With the ESC switched off, the enhanced
vehicle stability offered by ESC is unavailable.
In an emergency evasive maneuver, the ESC
system will not engage to assist in maintaining
stability. ESC “Full Off” mode is only intended
for off-highway or off-road use.
The Electronic Stability Control (ESC) cannot
prevent the natural laws of physics from
acting on the vehicle, nor can it increase the
traction afforded by prevailing road condi -
tions. ESC cannot prevent all accidents,
i n
cluding those resulting from excessive
speed in turns, driving on very slippery
surfaces, or hydroplaning. ESC also cannot
prevent collisions.
WARNING!
Page 145 of 268
SAFETY 143
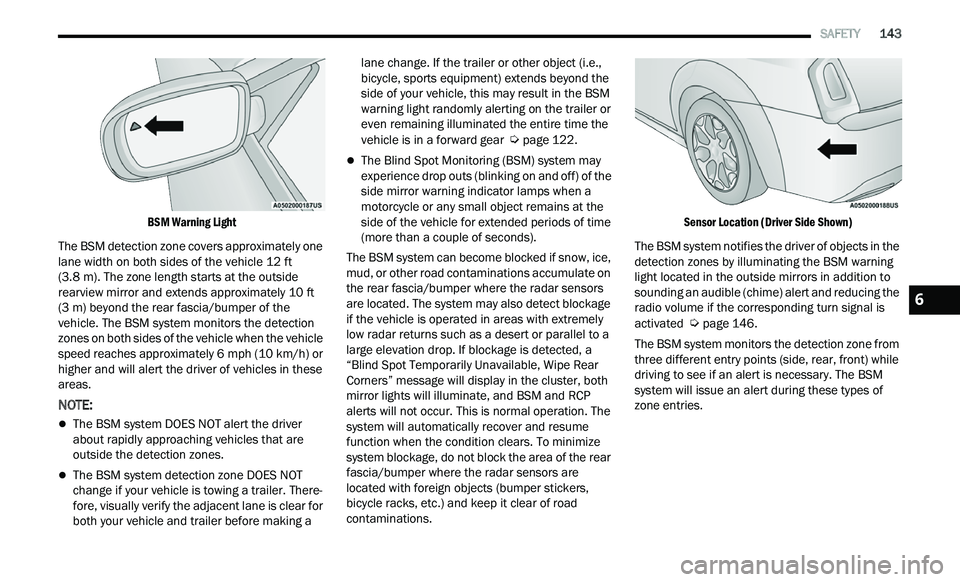
BSM Warning Light
The BSM detection zone covers approximately one
la
ne width on both sides of the vehicle 12 ft
( 3
.8 m). The zone length starts at the outside
r e
arview mirror and extends approximately 10 ft
( 3
m) beyond the rear fascia/bumper of the
v e
hicle. The BSM system monitors the detection
zones on both sides of the vehicle when the vehicle
speed reaches approximately 6 mph (10 km/h) or
h i
gher and will alert the driver of vehicles in these
areas.
NOTE:
The BSM system DOES NOT alert the driver
about rapidly approaching vehicles that are
outside the detection zones.
The BSM system detection zone DOES NOT
change if your vehicle is towing a trailer. There -
fore, visually verify the adjacent lane is clear for
b ot
h your vehicle and trailer before making a lane change. If the trailer or other object (i.e.,
bicycle, sports equipment) extends beyond the
side of your vehicle, this may result in the BSM
warning light randomly alerting on the trailer or
even remaining illuminated the entire time the
vehicle is in a forward gear
Ú page 122.
The Blind Spot Monitoring (BSM) system may
experience drop outs (blinking on and off) of the
side mirror warning indicator lamps when a
motorcycle or any small object remains at the
side of the vehicle for extended periods of time
(more than a couple of seconds).
The BSM system can become blocked if snow, ice,
mu
d, or other road contaminations accumulate on
the rear fascia/bumper where the radar sensors
are located. The system may also detect blockage
if the vehicle is operated in areas with extremely
low radar returns such as a desert or parallel to a
large elevation drop. If blockage is detected, a
“Blind Spot Temporarily Unavailable, Wipe Rear
Corners” message will display in the cluster, both
mirror lights will illuminate, and BSM and RCP
alerts will not occur. This is normal operation. The
system will automatically recover and resume
function when the condition clears. To minimize
system blockage, do not block the area of the rear
fascia/bumper where the radar sensors are
located with foreign objects (bumper stickers,
bicycle racks, etc.) and keep it clear of road
contaminations.
Sensor Location (Driver Side Shown)
The BSM system notifies the driver of objects in the
d e
tection zones by illuminating the BSM warning
light located in the outside mirrors in addition to
sounding an audible (chime) alert and reducing the
radio volume if the corresponding turn signal is
activated
Ú page 146.
The BSM system monitors the detection zone from
t h
ree different entry points (side, rear, front) while
driving to see if an alert is necessary. The BSM
system will issue an alert during these types of
zone entries.
6
Page 148 of 268
146 SAFETY
Blind Spot Modes
Blind Spot has three selectable modes of
operation that are available in the Uconnect
system.
Blind Spot Alert Lights Only
When operating in Blind Spot Alert mode, the BSM
sy
stem will provide a visual alert in the appropriate
side view mirror based on a detected object.
However, when the system is operating in Rear
Cross Path (RCP) mode, the system will respond
with both visual and audible alerts when a
detected object is present. Whenever an audible
alert is requested, the radio is muted.
Blind Spot Alert Lights/Chime
When operating in Blind Spot Alert Lights/Chime
m od
e, the BSM system will provide a visual alert in
the appropriate side view mirror based on a
detected object. If the turn signal is then activated,
and it corresponds to an alert present on that side
of the vehicle, an audible chime will also be
sounded. Whenever a turn signal and detected
object are present on the same side at the same
time, both the visual and audible alerts will be
issued. In addition to the audible alert the radio (if
on) will also be muted.
NOTE:
Whenever an audible alert is requested by the
B S
M system, the radio is also muted. When the system is in RCP, the system shall
r
e
spond with both visual and audible alerts when a
detected object is present. Whenever an audible
alert is requested, the radio is also muted. Turn/
hazard signal status is ignored; the RCP state
always requests the chime.
Blind Spot Alert Off
When the BSM system is turned off there will be no
v i
sual or audible alerts from either the BSM or RCP
systems.
NOTE:
The BSM system will store the current operating
m od
e when the vehicle is shut off. Each time the
vehicle is started the previously stored mode will
be recalled and used.
FORWARD COLLISION WARNING (FCW)
W
ITH MITIGATION OPERATION —
I
F EQUIPPED
FCW with Mitigation provides the driver with
audible warnings, visual warnings (within the
instrument cluster display), and may apply a brake
jerk to warn the driver when it detects a potential
frontal collision. The warnings and limited braking
are intended to provide the driver with enough time
to react, avoid or mitigate the potential collision.
NOTE:
FCW monitors the information from the forward
l ook
ing sensors, as well as the Electronic Stability
Control (ESC) system, to calculate the probability of
a forward collision. When the system determines
that a forward collision is probable, the driver will
be provided with audible and visual warnings and
may provide a brake jerk warning. If the driver does
not take action based upon these progressive
warnings, then the system will provide a limited
level of active braking to help slow the vehicle and
mitigate the potential forward collision. If the driver
reacts to the warnings by braking and the system
determines that the driver intends to avoid the
collision by braking but has not applied sufficient
brake force, the system will compensate and
provide additional brake force as required. If a
Forward Collision Warning with Mitigation event
begins at a speed below 20 mph (32 km/h), the
s y
stem may provide the maximum or partial
braking to mitigate the potential forward collision.
If the Forward Collision Warning with Mitigation
event stops the vehicle completely, the system will
hold the vehicle at standstill for two seconds and
then release the brakes.