engine CHRYSLER 300 LX 2005 Owner's Manual
[x] Cancel search | Manufacturer: CHRYSLER, Model Year: 2005, Model line: 300 LX, Model: CHRYSLER 300 LX 2005Pages: 374, PDF Size: 7.09 MB
Page 144 of 374
CAUTION!
Driving with a hot engine cooling system could
damage your vehicle. If temperature gauge reads (H),
pull over and stop the vehicle. Idle the vehicle with
the air conditioner turned off until the pointer drops
back into the normal range. If the pointer remains on
the ªHº, and you hear continuous chimes, turn the
engine off immediately, and call for service.
WARNING!
A hot engine cooling system is dangerous. You or
others could be badly burned by steam or boiling
coolant. You may want to call a service center if your
vehicle overheats. If you decide to look under the
hood yourself, see Section 7 of this manual. Follow
the warnings under the Cooling System Pressure
Cap paragraph.
15. Trip Odometer Button
Trip Odometer Button Ð Standard Cluster
The word9TRIP9will appear when this button is pressed.
Push in and hold the button for two seconds when the
trip odometer is displayed to reset it to 0 miles or
kilometers. A second press of the button will display the
outside temperature in the odometer.
Trip Odometer Button Ð Premium Cluster
Press this button to change the display from odometer to
either of the two trip odometer settings. The letter ªAº or
ªBº will appear when in the trip odometer mode. Push in
and hold the button for two seconds to reset the trip
odometer to 0 miles or kilometers. The odometer must be
in trip mode to reset.
16. High Beam Light
This light shows that the headlights are on high
beam. Push the Multi-Function lever away from
the steering wheel to switch the headlights to high
beam.
144 UNDERSTANDING YOUR INSTRUMENT PANEL
ProCarManuals.com
Page 145 of 374

17. Transmission Range Indicator
This display indicator shows the automatic transmission
gear selection.
18. Seat Belt Reminder Light
When the ignition switch is first turned ON, this
light will turn on for 5 to 8 seconds as a bulb
check. During the bulb check, if the driver's seat
belt is unbuckled, a chime will sound. After the bulb
check or when driving, if the driver seat belt remains
unbuckled, the Seat Belt Warning Light will flash or
remain on continuously. Refer to9Enhanced Driver
Seat Belt Reminder System (BeltAlertŸ)9in the Occu-
pant Restraints section for more information.
19. Fuel Gauge
The pointer shows the level of fuel in the fuel tank when
the ignition switch is in the ON position.
20. Electronic Throttle Control (ETC) Light
This light informs you of a problem with the
Electronic Throttle Control system. If a prob-
lem is detected the light will come on while
the engine is running. Cycle the ignition key
when the vehicle has completely stopped and the gearselector is placed in the PARK position. The light
should turn off. If the light remains lit with the engine
running your vehicle will usually be drivable, how-
ever, see your dealer for service as soon as possible. If
the light is flashing when the engine is running,
immediate service is required and you may experience
reduced performance, an elevated/rough idle or en-
gine stall and your vehicle may require towing. The
light will come on when the ignition is first turned on
and remain on briefly as a bulb check. If the light does
not come on during starting, have the system checked
by an authorized dealer.
21. Tire Pressure Monitor Warning Light Ð If
Equipped
This light will turn on continuously when
there is a Low tire pressure condition. The
light will also turn on if a problem exist with
any tire sensor. When a system fault is
detected, the indicator lamp will flash repetitively for
ten seconds. The flash cycle will repeat every ten
minutes or until the fault condition is removed and
UNDERSTANDING YOUR INSTRUMENT PANEL 145
4
ProCarManuals.com
Page 146 of 374

reset. The light will remain on or flashing until the tire
pressure is properly set or the problem with the sensor
is corrected.
This light will turn on momentarily as a bulb check when
the engine is started.
When the tire pressure monitoring system warning light
is lit, one or more of your tires is significantly underin-
flated. You should stop and check your tires as soon as
possible, and inflate them to the proper pressure as
indicated on the tire and loading information placard.
Driving on a significantly underinflated tire causes the
tire to overheat and can lead to tire failure. Underinfla-
tion also reduces fuel efficiency and tire tread life, and
may affect the vehicle's handling and stopping ability.
Each tire, including the spare, should be checked
monthly when cold and set to the recommended inflation
pressure as specified in the tire and loading information
placard.
22. Voltage Light
This light monitors the electrical system volt-
age. The light should turn on momentarily as
the engine is started. If the light stays on or turns onwhile driving, it indicates a problem with the charging
system. Immediate service should be obtained.
23. Malfunction Indicator Light
This light is part of an onboard diagnostic
system called OBD that monitors engine and
automatic transmission control systems. The
light will illuminate when the key is in the ON
position before engine start. If the bulb does not come
on when turning the key from OFF to ON, have the
condition checked promptly.
Certain conditions such as a loose or missing gas cap,
poor fuel quality, etc. may illuminate the light after
engine start. The vehicle should be serviced if the light
stays on through several of your typical driving cycles. In
most situations the vehicle will drive normally and will
not require towing.
The Malfunction Indicator Light flashes to alert you to
serious conditions that could lead to immediate loss of
power or severe catalytic converter damage. The vehicle
should be serviced as soon as possible if this occurs.
146 UNDERSTANDING YOUR INSTRUMENT PANEL
ProCarManuals.com
Page 197 of 374

is re-used. Use this mode to rapidly cool the inside of
the vehicle. The Recirculation mode can also be used
to temporarily block out outside odors, smoke, and
dust.
Window Fogging
Interior fogging on the windshield can be quickly re-
moved by turning the mode selector to Defrost. The
Defrost/Floor mode can be used to maintain a clear
windshield and provide sufficient heating. If side win-
dow fogging becomes a problem increase blower speed.
Vehicle windows tend to fog on the inside in mild but
rainy or humid weather.
NOTE:Recirculate without A/C should not be used for
long periods as fogging may occur.
Automatic Temperature Control Ð If Equipped
The Infrared Dual-Zone Climate Control System auto-
matically maintains the interior comfort level desired by
the driver and passenger. This is accomplished by a dual
sun-sensor in the top of the instrument panel, and an
infrared sensor located in the face of the control unit.
There are also various sensors monitored by this system
which take account for vehicle speed, A/C pressure,outside temperature, and engine cooling temperature.
The infrared sensor independently measures the surface
temperature of the driver and passenger. Based on the
sensor input, the system automatically adjusts the air
flow temperature, the air flow volume, and amount of
outside air recirculation. This maintains a comfortable
temperature even under changing conditions.
Operation of the system is quite simple. Begin by turning
the right mode knob to AUTO, and place the blower
control (left knob) to either LO AUTO or HI AUTO. The
UNDERSTANDING YOUR INSTRUMENT PANEL 197
4
ProCarManuals.com
Page 199 of 374
NOTE:
²
The surface of the climate control panel, and the top
center of the instrument panel should be kept free of
debris due to the climate control sensor's location.
Mud on the windshield may also cause poor operation
of this system.
²To provide you with maximum comfort in the auto-
matic mode, during cold start-ups the blower fan will
remain off until the engine warms up. However, the
fan will engage immediately if the defrost mode is
selected or if you manually select a blower speed.
²Under certain conditions (after the vehicle is turned
off) the climate control system may recalibrate and a
noise may be heard for 20 seconds. This is part of
normal operation.
Manual Operation
This system offers a full complement of manual override
features which consist of Blower Preferred Automatic,
Mode Preferred Automatic, or Blower and Mode Pre-
ferred Automatic. This means the customer can override
the blower, the mode, or both. There is a manual blower
range used when the AUTO setting is not desired. The
left control can be set to any fixed blower speed by
rotating the knob.
NOTE:Please read the Automatic Temperature Control
Operation Chart below for details.
UNDERSTANDING YOUR INSTRUMENT PANEL 199
4
ProCarManuals.com
Page 202 of 374
ON. The defroster automatically turns off after approxi-
mately 10 minutes of operation for the first push of the
button, and will turn off after approximately 5 minutes
for the second push of the button.
CAUTION!
To avoid damaging the electrical conductors of the
rear window defroster, do not use scrapers, sharp
instruments, or abrasive window cleaners on the
interior surface of the window.
Labels can be peeled off after soaking with warm
water.
This button can be used to block out smoke,
odors, dust, high humidity, or if rapid cooling
is desired. The recirculation mode should only
be used temporarily. The button includes an
LED that illuminates, and an audible beep indicates that
the recirculation mode is active. You may use this feature
separately.
NOTE:Extended use of recirculation may cause the
windows to fog. If the interior of the windows begins to
fog, press the ªRecirculateº icon button to return to
outside air. Some temp./humidity conditions will cause
captured interior air to condense on windows and ham-
per visibility. For this reason, the system will not allow
ªRecirculateº to be selected while in the defrost or
defrost/floor modes. Attempting to use the recirculation
while in these modes will cause the LED in the button to
blink and then turn off.
Summer Operation
The engine cooling system in air conditioned vehicles
must be protected with a high-quality antifreeze coolant
to provide proper corrosion protection and to protect
against engine overheating. A 50% solution of ethylene
glycol antifreeze coolant in water is recommended. Refer
to section 7, Maintenance Procedures, of this manual for
proper coolant selection.
202 UNDERSTANDING YOUR INSTRUMENT PANEL
ProCarManuals.com
Page 205 of 374

STARTING AND OPERATING
CONTENTS
mStarting Procedures....................207
NNormal Starting......................207
mEngine Block Heater Ð If Equipped........209
mTransmission Shifting...................209
N4 Speed Automatic Transmission..........209
N5 Speed Automatic Transmission..........214
NAutomatic Transmission Ð General
Information.........................219
mAutoStick Ð If Equipped................222
NAutoStick Operation...................222
mParking Brake.........................222
mBrake System.........................224NAnti-Lock Brake System................225
mPower Steering........................227
mTire Safety Information..................228
NTire Markings........................228
NTire Identification Number (TIN)..........231
NTire Loading And Tire Pressure...........232
mTiresÐGeneral Information...............236
NTire Pressure.........................236
NTire Inflation Pressures.................237
NRadial-Ply Tires......................239
NCompact Spare Tire Ð If Equipped.........239
NTire Spinning........................240
5
ProCarManuals.com
Page 207 of 374
STARTING PROCEDURES
CAUTION!
Long periods of engine idling, especially at high
engine speeds, can cause excessive exhaust tempera-
tures which can damage your vehicle. Do not leave
your vehicle unattended with the engine running.
WARNING!
Do not leave animals or children inside parked
vehicles in hot weather; interior heat build up may
cause serious injury or death.
The gear selector must be in the NEUTRAL or PARK
position before you can start the engine. Apply the brakes
before shifting into any driving gear.
Normal Starting
Normal Startingof either a cold or a warm engine is
obtained without pumping or depressing the accelerator
pedal. Turn the key to the ªSTARTº position and release
when the engine starts. If the engine has not started
within 3 seconds, slightly depress the accelerator pedal
while continuing to crank. If the engine fails to start
within 15 seconds, turn the key to the ªOFFº position,
wait 10 to 15 seconds, then repeat the normal starting
procedure.
Extremely Cold Weather(below220ÉF or229ÉC) To
insure reliable starting at these temperatures, use of an
externally powered electric engine block heater (available
from your dealer) is recommended.
STARTING AND OPERATING 207
5
ProCarManuals.com
Page 208 of 374

WARNING!
²Do not attempt to push or tow your vehicle to get
it started. Vehicles equipped with an automatic
transmission cannot be started this way. Un-
burned fuel could enter the catalytic converter and
once the engine has started, ignite and damage the
converter and vehicle. If the vehicle has a dis-
charged battery, booster cables may be used to
obtain a start from a booster battery or the battery
in another vehicle. This type of start can be
dangerous if done improperly. See section 6 of
this manual for the proper jump starting proce-
dures and follow them carefully.
²Never pour fuel or other flammable liquid into
the throttle body air inlet opening in an attempt to
start the vehicle. This could result in flash fire
causing serious personal injury.
If Engine Fails to Start
If the engine fails to start after you have followed the
ªNORMAL STARTINGº procedure, it may be flooded.Push the accelerator pedal all the way to the floor and
hold it there while cranking the engine. This should clear
any excess fuel in case the engine is flooded.
CAUTION!
To prevent damage to the starter, do not crank the
engine for more than 15 seconds at a time. Wait 10 to
15 seconds before trying again.
If the engine has been flooded, it may start to run, but not
have enough power to continue running when the key is
released. If this occurs, continue cranking up to 15
seconds with the accelerator pedal pushed all the way to
the floor. Release the accelerator pedal and the key once
the engine is running smoothly. Do not overspeed en-
gine.
If the engine shows no sign of starting after two 15
second periods of cranking with the accelerator pedal
held to the floor, the ªNORMAL STARTINGº procedure
should be repeated.
208 STARTING AND OPERATING
ProCarManuals.com
Page 209 of 374
After Starting
The idle speed will automatically decrease as the engine
warms up.
ENGINE BLOCK HEATER Ð IF EQUIPPED
The engine block heater warms engine coolant and
permits quicker starts in cold weather. Connect the cord
to a standard 110-115 volt AC electrical outlet with a
grounded, three-wire extension cord.
The engine block heater cord is routed under the hood on
the driver side of the vehicle. It has a removable cap that
is located on the driver side of the Integrated Power
Module.
WARNING!
Remember to disconnect the cord before driving.
Damage to the 110-115 volt electrical cord could
cause electrocution.
TRANSMISSION SHIFTING
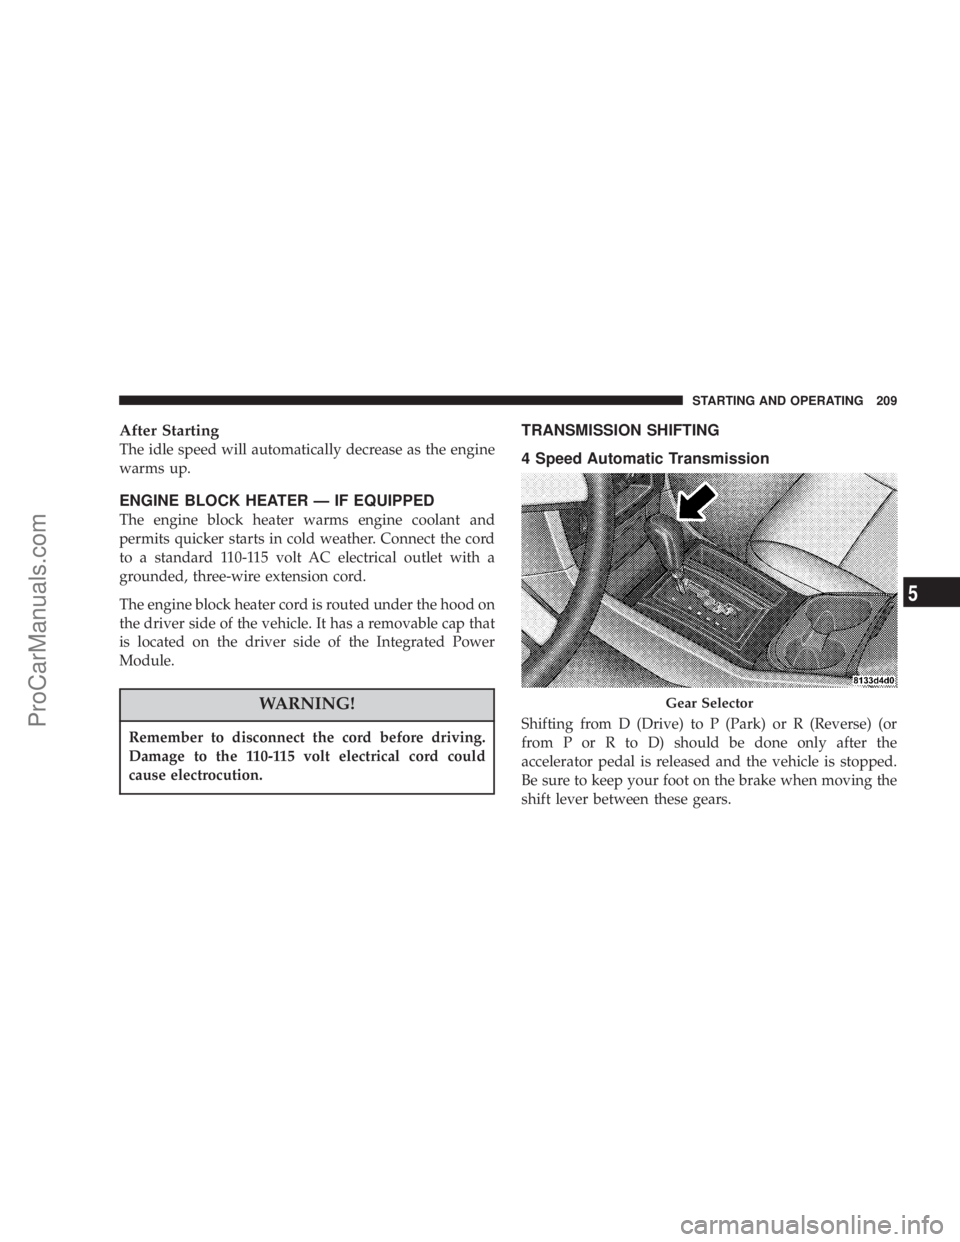
4 Speed Automatic Transmission
Shifting from D (Drive) to P (Park) or R (Reverse) (or
from P or R to D) should be done only after the
accelerator pedal is released and the vehicle is stopped.
Be sure to keep your foot on the brake when moving the
shift lever between these gears.
Gear Selector
STARTING AND OPERATING 209
5
ProCarManuals.com