relay CHRYSLER ASPEN 2007 2.G Owners Manual
[x] Cancel search | Manufacturer: CHRYSLER, Model Year: 2007, Model line: ASPEN, Model: CHRYSLER ASPEN 2007 2.GPages: 472, PDF Size: 7.51 MB
Page 398 of 472
FUSE BLOCK
CAUTION!
When replacing a blown fuse, it is important to use
only a fuse having the correct amperage rating. The
use of a fuse with a rating other than indicated may
result in a dangerous electrical system overload. If a
properly rated fuse continues to blow, it suggests a
problem in the circuit that must be corrected.
NOTE:If you are leaving your vehicle dormant for
longer than 21 days you may want to take steps to protect
your battery. You may do this by disconnecting the
battery or by disconnecting the two ignition-off draw
(I.O.D.) fuses located in the Auxiliary Power Distribution
Center (PDC) located in the engine compartment. The
I.O.D. cavities include a snap-in retainer that allows the
fuse to be disconnected, without removing it from the
fuse block. Pressing the I.O.D. fuse back into the cavity
reconnects it.
Fuses (Interior)
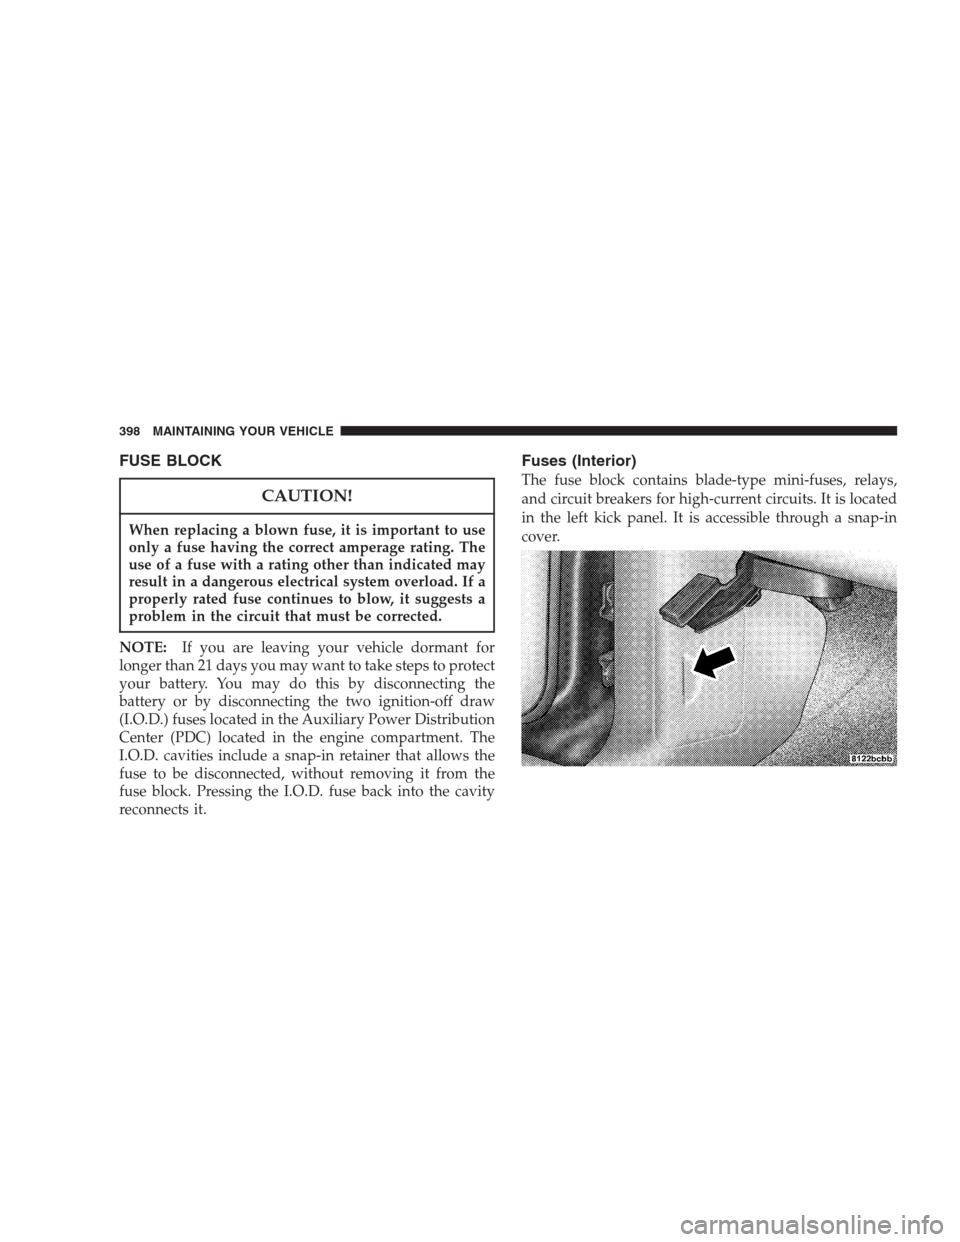
The fuse block contains blade-type mini-fuses, relays,
and circuit breakers for high-current circuits. It is located
in the left kick panel. It is accessible through a snap-in
cover.
398 MAINTAINING YOUR VEHICLE
Page 399 of 472
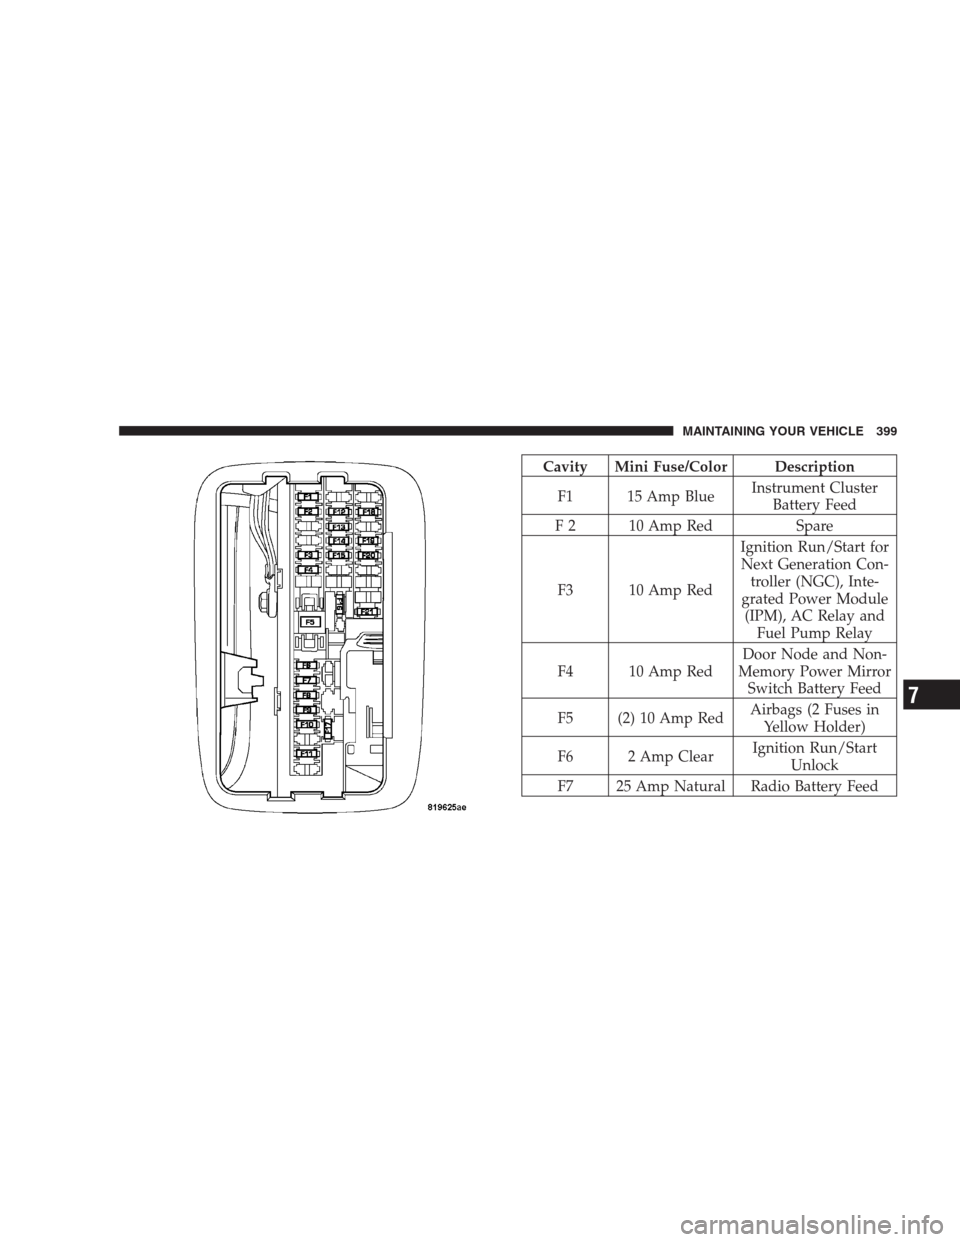
Cavity Mini Fuse/Color Description
F1 15 Amp BlueInstrument Cluster
Battery Feed
F 2 10 Amp Red Spare
F3 10 Amp RedIgnition Run/Start for
Next Generation Con-
troller (NGC), Inte-
grated Power Module
(IPM), AC Relay and
Fuel Pump Relay
F4 10 Amp RedDoor Node and Non-
Memory Power Mirror
Switch Battery Feed
F5 (2) 10 Amp RedAirbags (2 Fuses in
Yellow Holder)
F6 2 Amp ClearIgnition Run/Start
Unlock
F7 25 Amp Natural Radio Battery Feed
MAINTAINING YOUR VEHICLE 399
7
Page 400 of 472

F8 10 Amp RedIgnition Run/Start for
Cluster/Transfer
Case/Seat Sw. Back
lighting
F9 10 Amp RedSatellite Digital Audio
Receiver (SDAR)/
Digital Video Disc
(DVD) Battery Feed
F10 10 Amp Red Spare
F11 10 Amp Red Heated Mirrors
F12 20 Amp Yellow Cluster Battery Feed
F13 10 Amp RedIgnition Run HVAC
Module/Heated Rear
Glass (EBL) Relay
F14 10 Amp RedABS Module Ignition
RunF15 15 Amp BlueBattery Feed Blue
Tooth, Compass/Trip
Computer (CMTC),
Sentry Key Diagnos-
tics
F16 20 Amp YellowReconfigurable Power
Outlets
F17 20 Amp YellowIgnition Run / Rear
Park Assist / Second
Row Heated Seats
F18 20 Amp Yellow Cigar Lighter Ignition
F19 10 Amp Red Spare Fuse
F20 15 Amp BlueHeating & Air Condi-
tioning w/ATC Only
Battery Feed
F21 25 Amp Natural Amplifier Battery Feed
400 MAINTAINING YOUR VEHICLE
Page 401 of 472
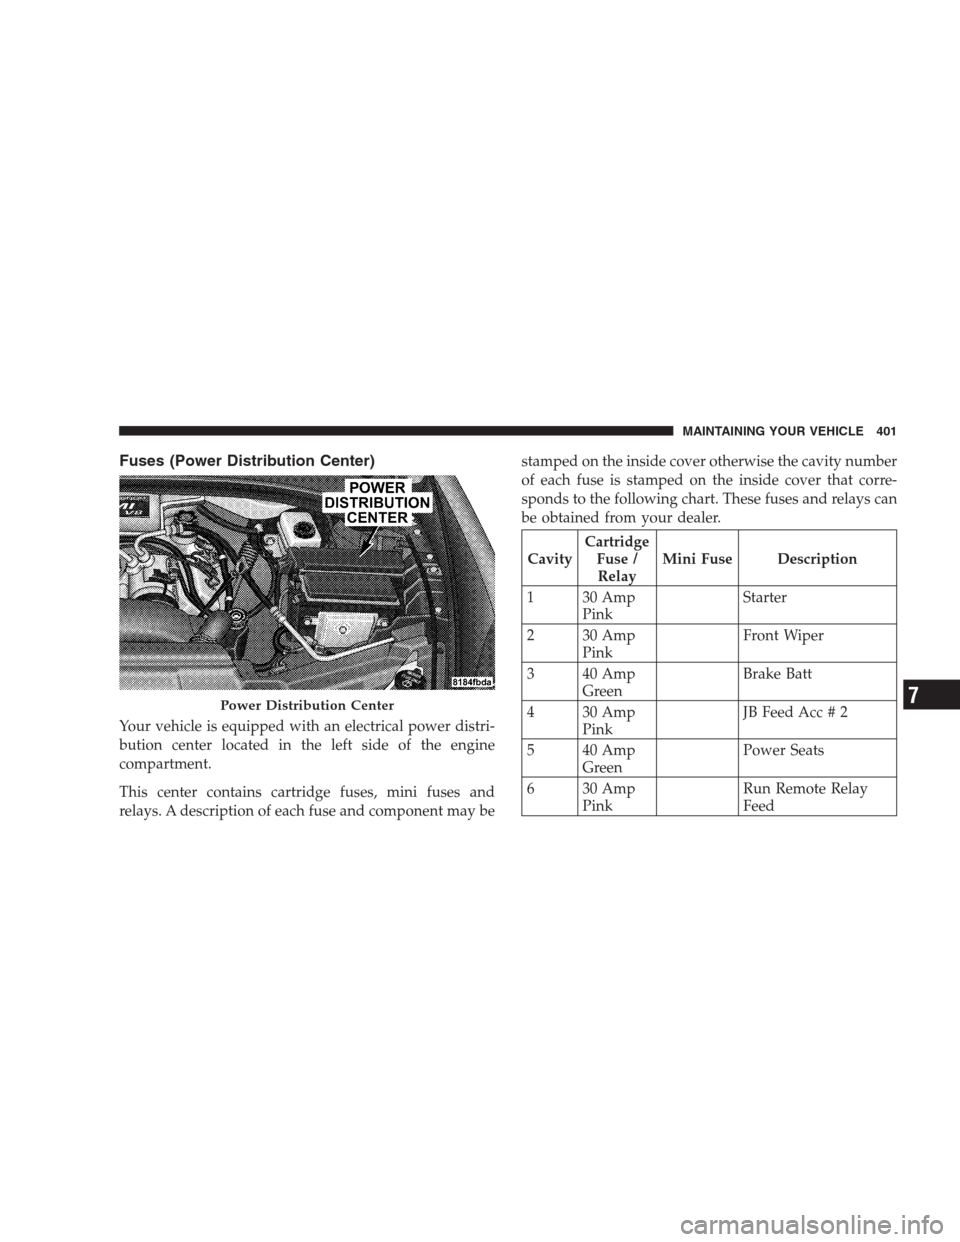
Fuses (Power Distribution Center)
Your vehicle is equipped with an electrical power distri-
bution center located in the left side of the engine
compartment.
This center contains cartridge fuses, mini fuses and
relays. A description of each fuse and component may bestamped on the inside cover otherwise the cavity number
of each fuse is stamped on the inside cover that corre-
sponds to the following chart. These fuses and relays can
be obtained from your dealer.
CavityCartridge
Fuse /
RelayMini Fuse Description
1 30 Amp
PinkStarter
2 30 Amp
PinkFront Wiper
3 40 Amp
GreenBrake Batt
4 30 Amp
PinkJB Feed Acc # 2
5 40 Amp
GreenPower Seats
6 30 Amp
PinkRun Remote Relay
Feed
Power Distribution Center
MAINTAINING YOUR VEHICLE 401
7
Page 402 of 472

CavityCartridge
Fuse /
RelayMini Fuse Description
7 40 Amp
GreenBlower Motor Relay
Feed
8 40 Amp
GreenJB Feed Acc Delay
9 Spare
10 30 Amp
PinkASD
11 40 Amp
GreenPower Liftgate ( If
Equipped)
12 40 Amp
GreenJB Feed / Heated
Rear Glass (EBL)/ T
Case Brake
13 30 Amp
PinkJB Feed RR
14 40 Amp
GreenESP PumpCavityCartridge
Fuse /
RelayMini Fuse Description
15 50 Amp
RedJB Feed
16 10 Amp
RedSpare
17 Spare
18 20 Amp
YellowFuel Pump
19 20 Amp
YellowNext Generation Con-
troller (NGC)
20 25 Amp
Clear115v Power Inverter
21 20 Amp
YellowABS Batt
22 20 Amp
YellowNext Generation Con-
troller (NGC) Batt
402 MAINTAINING YOUR VEHICLE
Page 403 of 472
CavityCartridge
Fuse /
RelayMini Fuse Description
23 20 Amp
YellowTrailer Tow
24 15 Amp
BlueA/C Clutch
25 15 Amp
BlueStop Lamp Switch
26 Spare
27 20 Amp
YellowRun/Start Relay Feed
28 Spare
29 Relay Run Start
30 Relay Run Remote
31 Spare
32 Relay StarterCavityCartridge
Fuse /
RelayMini Fuse Description
33 Relay Electronic Automatic
Transaxle (EATX)
34 Relay AC Clutch
35 Relay Fuel Pump Rly
36 Spare
37 Relay Stop Lamp Switch
38 Spare
39 Relay Blower Motor
40 Relay Auto Shut Down
(ASD) Rly
MAINTAINING YOUR VEHICLE 403
7
Page 404 of 472
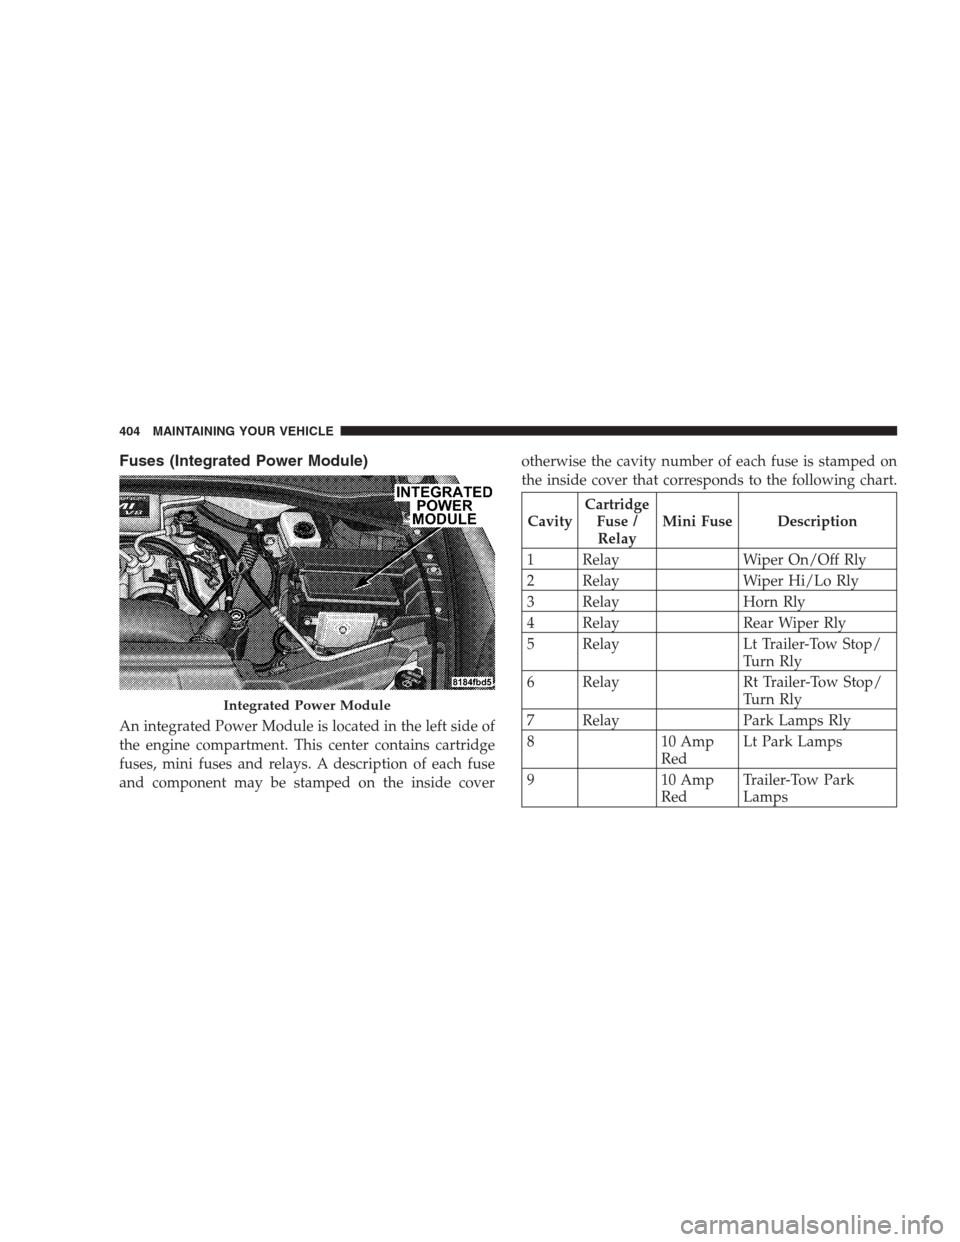
Fuses (Integrated Power Module)
An integrated Power Module is located in the left side of
the engine compartment. This center contains cartridge
fuses, mini fuses and relays. A description of each fuse
and component may be stamped on the inside coverotherwise the cavity number of each fuse is stamped on
the inside cover that corresponds to the following chart.
CavityCartridge
Fuse /
RelayMini Fuse Description
1 Relay Wiper On/Off Rly
2 Relay Wiper Hi/Lo Rly
3 Relay Horn Rly
4 Relay Rear Wiper Rly
5 Relay Lt Trailer-Tow Stop/
Turn Rly
6 Relay Rt Trailer-Tow Stop/
Turn Rly
7 Relay Park Lamps Rly
8 10 Amp
RedLt Park Lamps
9 10 Amp
RedTrailer-Tow Park
Lamps
Integrated Power Module
404 MAINTAINING YOUR VEHICLE
Page 405 of 472
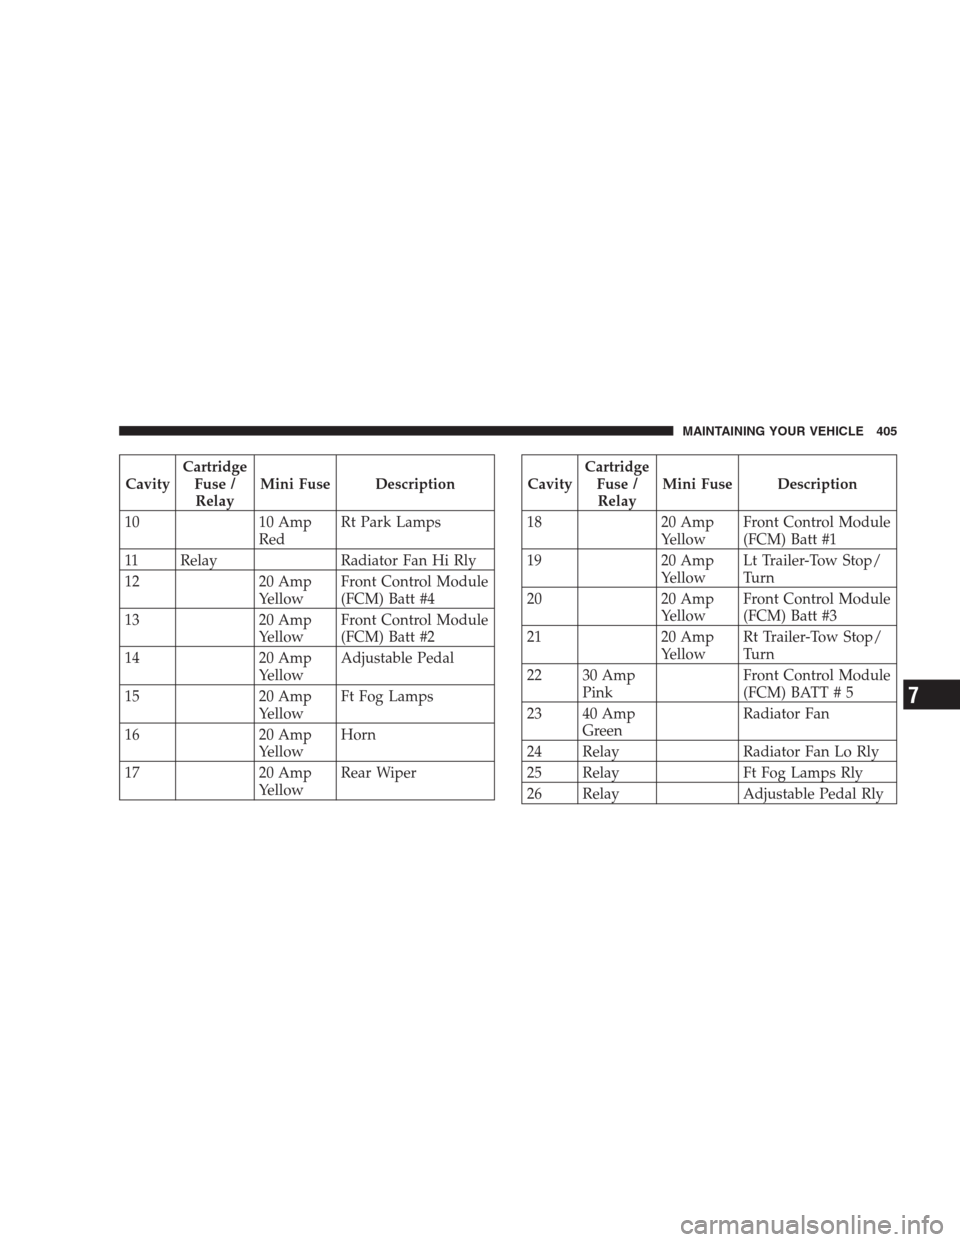
CavityCartridge
Fuse /
RelayMini Fuse Description
10 10 Amp
RedRt Park Lamps
11 Relay Radiator Fan Hi Rly
12 20 Amp
YellowFront Control Module
(FCM) Batt #4
13 20 Amp
YellowFront Control Module
(FCM) Batt #2
14 20 Amp
YellowAdjustable Pedal
15 20 Amp
YellowFt Fog Lamps
16 20 Amp
YellowHorn
17 20 Amp
YellowRear WiperCavityCartridge
Fuse /
RelayMini Fuse Description
18 20 Amp
YellowFront Control Module
(FCM) Batt #1
19 20 Amp
YellowLt Trailer-Tow Stop/
Turn
20 20 Amp
YellowFront Control Module
(FCM) Batt #3
21 20 Amp
YellowRt Trailer-Tow Stop/
Turn
22 30 Amp
PinkFront Control Module
(FCM) BATT # 5
23 40 Amp
GreenRadiator Fan
24 Relay Radiator Fan Lo Rly
25 Relay Ft Fog Lamps Rly
26 Relay Adjustable Pedal Rly
MAINTAINING YOUR VEHICLE 405
7
Page 406 of 472

CavityCartridge
Fuse /
RelayMini Fuse Description
27 30 Amp
GreenIgnition Off Draw
(IOD) #1
28 30 Amp
GreenIgnition Off Draw
(IOD) #2
29 Spare
30 Spare
VEHICLE STORAGE
If you are storing your vehicle for more than 21 days, we
recommend that you take the following steps to mini-
mize the drain on your vehicle’s battery:
•Disconnect the Ignition-Off Draw fuse (I.O.D.) fuse
located in the Power Distribution Center (PDC). The
I.O.D. cavity includes a snap-in retainer that allows the
fuse to be disconnected, without removing it from the
fuse block.
•The transfer case should be placed in the 4HI mode
and kept in this position to minimize the battery drain.
•As an alternative to the above steps you may discon-
nect the negative cable from the battery.
406 MAINTAINING YOUR VEHICLE