engine CHRYSLER ASPEN 2008 2.G Owner's Manual
[x] Cancel search | Manufacturer: CHRYSLER, Model Year: 2008, Model line: ASPEN, Model: CHRYSLER ASPEN 2008 2.GPages: 479, PDF Size: 4.3 MB
Page 120 of 479

þCONTINUE (to continue recording)
þDELETE (to delete the recording)
²PLAY MEMOS (to play previously recorded memos)
Ð During the playback you may press the VR hard-
key to stop playing memos. You continue by saying
one of the following commands:
þREPEAT (to repeat a memo)
þNEXT (to play the next memo)
þPREVIOUS (to play the previous memo)
þDELETE (to delete a memo)
²DELETE ALL (to delete all memos)
NOTE:Keep in mind that you have to press the VR
hard-key first and wait for the beep, before speaking the
ªbarge inº commands.
Voice Training
For users experiencing difficulty with the system recog-
nizing their voice commands or numbers, the UConnectt
system Voice Training feature may be used.
1. Press the VR hard-key, speak ªSystem Setupº and once
you are in that menu then speak ªVoice Training.º This
will train your own voice to the system and will improve
recognition.
2. Repeat the words and phrases when prompted by the
UConnecttSystem. For best results, the Voice Training
session should be completed when the vehicle is parked,
engine running, all windows closed, and the blower fan
switched OFF. This procedure may be repeated with a
new user. The system will adapt to the last trained voice
only.
UNDERSTANDING THE FEATURES OF YOUR VEHICLE 119
3
Page 147 of 479
If the ignition is off and any door is left ajar for eight
minutes or the dimmer control is rotated upwards for 15
minutes, the interior lights will automatically turn off.
If the headlights remain on while the ignition is cycled
off, the exterior lights will automatically turn off after
eight minutes. If the headlights are turned on and left on
for eight minutes while the ignition is off, the exterior
lights will automatically turn off.
NOTE:Battery Saver mode is cancelled if the ignition is
ON.
NOTE:While the engine is running, the system will
deactivate the Fog Lights and Heated seats if a low
battery system voltage is detected.Headlight Delay
To aid in your exit, your vehicle is equipped with a
headlight delay that will leave the headlights on for 90
seconds. This delay is initiated when the ignition is
cycled off while the headlight switch is on, and then the
headlight switch is cycled off. The headlights will remain
on for 90 seconds. Headlight delay can be cancelled by
either turning the headlight switch ON then OFF or by
turning the ignition ON.
The headlight delay time is programmable on vehicles
equipped with the Electronic Vehicle Information Center
(EVIC). For details, refer to ªPersonal Settings (Customer
Programmable Features)º under ªOverhead Console
with Electronic Vehicle Information Center (EVIC) ± If
Equippedº in Section 3.
146 UNDERSTANDING THE FEATURES OF YOUR VEHICLE
Page 148 of 479
Automatic Headlights Ð If Equipped
Automatic headlights can be activated by rotating the
rotary headlight switch to the symbol ªA.º The head-
lights will turn on when the engine is running and the
ambient light sensor indicates that the headlights should
be activated. The headlights will turn off if the headlight
switch is rotated to the OFF position or 90 seconds after
the ignition is turned to OFF.
Headlights, Parking Lights, Panel Lights
When the headlight switch is rotated to the first position
to the right, the parking lights, taillights, side marker
lights, license plate light and instrument panel lights are
all turned on. The headlights will turn ON when the
switch is rotated to the second position.
Your vehicle is equipped with plastic headlight lenses
that are lighter and less susceptible to stone breakage
than glass headlights.Plastic is not as scratch resistant as glass and therefore
different lens cleaning procedures must be followed.
To minimize the possibility of scratching the lenses and
reducing light output, avoid wiping with a dry cloth. To
remove road dirt, wash with a mild soap solution fol-
lowed by rinsing.
Do not use abrasive cleaning components, solvents, steel
wool or other abrasive materials to clean the lenses.Illuminated Entry
Headlights turn on for 90 seconds, when the Remote
Keyless Entry UNLOCK button is pressed.
The illuminated entry time is programmable on vehicles
equipped with the Electronic Vehicle Information Center
(EVIC). For details, refer to ªPersonal Settings (Customer
Programmable Features)º under ªOverhead Console
with Electronic Vehicle Information Center (EVIC) ± If
Equippedº in Section 3.
UNDERSTANDING THE FEATURES OF YOUR VEHICLE 147
3
Page 149 of 479
Daytime Running Lights (Canada Only)
The headlights on your vehicle will illuminate when the
engine is started. This provides a constant ªLights ONº
condition until the ignition is turned OFF. The lights
illuminate at reduced intensity. If the parking brake is
applied the Daytime Running Lights (DRLs) will turn off.
If the headlights are activated, the DRL feature will
transition to the normal headlight operating mode.
Lights-on Reminder
If the headlights, parking lights, or courtesy lights are left
on after the ignition is turned OFF, a continuous fast
chime will sound when the driver's door is opened.
Fog Lights Ð If Equipped
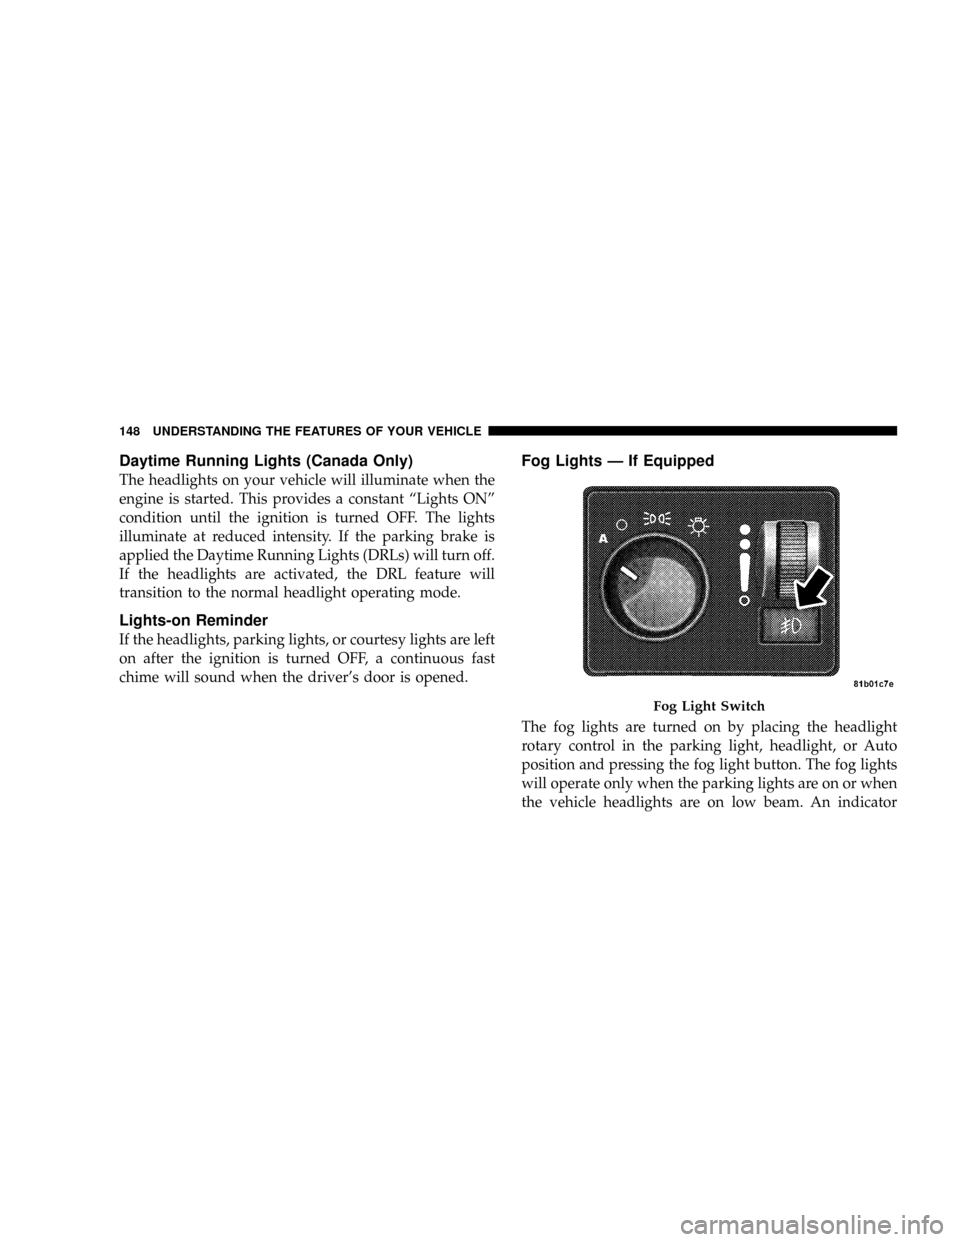
The fog lights are turned on by placing the headlight
rotary control in the parking light, headlight, or Auto
position and pressing the fog light button. The fog lights
will operate only when the parking lights are on or when
the vehicle headlights are on low beam. An indicator
Fog Light Switch
148 UNDERSTANDING THE FEATURES OF YOUR VEHICLE
Page 157 of 479

CAUTION!
Do not place any article under the adjustable pedals
or impede its ability to move as it may cause damage
to the pedal controls. Pedal travel may become lim-
ited if movement is stopped by an obstruction in the
adjustable pedal's path.
ELECTRONIC SPEED CONTROL Ð IF EQUIPPED
When engaged, this device takes over accelerator opera-
tion at speeds greater than (refer to the following table for
the speed for your specific engine). The controls are
mounted on the steering wheel.
To Activate
NOTE:The Vehicle Speed Control System has been
designed to shut down if multiple speed control switch
buttons (i.e., SET and CANCEL) are operated simulta-
neously in order to ensure proper operation. The System
156 UNDERSTANDING THE FEATURES OF YOUR VEHICLE
Page 158 of 479
can be reactivated by pushing the speed control switch
ON/OFF button and re-establishing the desired vehicle
SET speed.
Push the ON/OFF button to the ON position. In the
instrument cluster, the word ªCRUISEº illuminates when
the system is on.
To Set At A Desired Speed
When the vehicle has reached the desired speed, press
and release the SET button. Release the accelerator and
the vehicle will operate at the selected speed.
To Deactivate
A soft tap on the brake pedal, normal braking, or pressing
the CANCEL button will deactivate the speed control
without erasing the memory. Pushing the ON/OFF but-
ton to the OFF position or turning off the ignition erases
the memory.
WARNING!
Leaving the Speed Control on when not in use is
dangerous. You could accidentally set the system to
cause it to go faster than you want. You could lose
control and have an accident. Always leave the sys-
tem off when you aren't using it.
To Resume Speed
To resume a previously set speed, push and release the
RESUME button. Resume can be used at any speed above
(refer to the following table for the speed for your specific
engine).
UNDERSTANDING THE FEATURES OF YOUR VEHICLE 157
3
Page 159 of 479

To Vary The Speed Setting
When the speed control is on, speed can be increased by
pressing and holding the RESUME/ACCEL button.
When the button is released, a new set speed will be
established.
Tapping the RESUME/ACCEL button once will result in
a speed increase (refer to the table below for the speed for
your specific engine). Each time the button is tapped,
speed increases, so tapping the button three times will
increase speed by three increments.Tapping the DECEL button once will result in a speed
decrease (refer to the following table for the speed for
your specific engine). Each time the button is tapped,
speed will decrease. For example, tapping the button
three times will decrease the speed by three times the
speed listed in the table below (refer to the following
table for the speed for your specific engine).
To decrease speed while the speed control is on, press
and hold the DECEL button. Release the button when the
desired speed is reached, and the new speed will be set.
Functions Speeds
Engage Speed 25 mph (40 km/h)
Minimun RESUME Speed 20 mph (32 km/h)
ACCEL Increase 1 mph (2 km/h)
DECEL Decrease 1 mph (2 km/h)
Dropout Speed 20 mph (32 km/h)
158 UNDERSTANDING THE FEATURES OF YOUR VEHICLE
Page 160 of 479
To Accelerate For Passing
Depress the accelerator as you would normally. When the
pedal is released, the vehicle will return to the set speed.
NOTE:When driving uphill, at elevations above 2,000 ft
(610 m), or when the vehicle is heavily loaded (especially
when towing) the vehicle may slow below the SET speed.
If the vehicle speed drops below (refer to the previous
table for the speed for your specific engine), the speed
control will automatically disengage. If this happens, you
can push down on the accelerator pedal to maintain the
desired speed.Vehicles equipped with an automatic transmission may
exhibit several downshifts under the above conditions.
To reduce the frequency of the downshifts and to im-
prove vehicle performance, it is advisable to lock out
OVERDRIVE by pressing the ªTOW/HAULº button
located at the end of the gear shifter.
WARNING!
Speed Control can be dangerous where the system
can't maintain a constant speed. Your vehicle could
go too fast for the conditions, and you could lose
control. An accident could be the result. Don't use
Speed Control in heavy traffic or on roads that are
winding, icy, snow-covered, or slippery.
UNDERSTANDING THE FEATURES OF YOUR VEHICLE 159
3
Page 164 of 479
NOTE:
²Ensure that the rear bumper is free of dirt and debris
to keep the system operating properly.
²Jackhammers, large trucks, and other vibrations could
affect the performance of the system.
If ªService Park Assist Systemº appears in the Electronic
Vehicle Information Center (EVIC) after making sure the
rear bumper is clean, please see your authorized dealer.
To turn on/off the rear park assist system, refer to
ªPersonal Settings (Customer Programmable Features)º
under ªOverhead Console with Electronic Vehicle Infor-
mation Center (EVIC) ± If Equippedº in Section 3.
REAR CAMERA Ð IF EQUIPPED
Your vehicle may be equipped with a Rear Camera
system that allows you to see an on-screen image (located
in the screen of your Radio) of the rear of your vehicle
whenever it is put into REVERSE. The camera is located
in the light bar over the rear license plate.
NOTE:Refer to ªSetting Display Propertiesº under
ªSystem Settingsº in the Navigation User's Manual for
instructions regarding navigation screen brightness ad-
justments.
Use the following steps to access the Rear Backup Cam-
era feature:
1. Start the engine.
2. Depress the brake pedal and place the shift lever in
REVERSE.
3. Wait one to two seconds, and the camera view will
display on the Radio screen.
UNDERSTANDING THE FEATURES OF YOUR VEHICLE 163
3
Page 169 of 479
before the reset. (Example: If your EVIC displays 18
AVG. MPG and the RESET button is pressed, the
previous averaging history will be erased and the
display will return to the 18 AVG. MPG, not to 0 AVG.
MPG). The display may take several miles/kilometers
for the value to change, depending upon driving
habits. If equipped with a 5.7L engine and Multi
Displacement System (MDS), FUEL SAVER may be
displayed along with the actual AVG. MPG. If
equipped with MDS option, the EVIC will display
FUEL SAVER when in fuel economy mode.
²MI TO EMPTY (Distance To Empty) ± Shows the
estimated distance that can be traveled with the fuel
remaining in the tank. This estimated distance is
determined by a weighted average of fuel economy,
according to the current fuel tank level. MI TO EMPTY
cannot be reset through the RESET button.NOTE:Significant changes in driving style or vehicle
loading will greatly affect the actual drivable distance of
the vehicle, regardless of the DTE displayed value.
²When the DTE value is less than 30 miles (48 km)
estimated driving distance, the DTE display will
change to a text display of9LOW FUEL.9This display
will continue until the vehicle runs out of fuel. Adding
a significant amount of fuel to the vehicle will turn off
the9LOW FUEL9text and a new DTE value will
display.
²Global Reset ± If the RESET button is pressed twice
within two seconds while in any of the three resettable
displays (AVG. MPG, ET (ELAPSED TIME) and TRIP),
all three displays will be reset.
System Status (EVIC Displays)
When the appropriate conditions exist, the EVIC displays
the following messages:
168 UNDERSTANDING THE FEATURES OF YOUR VEHICLE