clock CHRYSLER ASPEN 2009 2.G Owner's Manual
[x] Cancel search | Manufacturer: CHRYSLER, Model Year: 2009, Model line: ASPEN, Model: CHRYSLER ASPEN 2009 2.GPages: 481, PDF Size: 9.28 MB
Page 375 of 481
WARNING!
Carefully follow these tire changing warnings to
help prevent personal injury or damage to your
vehicle:
²Always park on a firm, level surface as far from
the edge of the roadway as possible before raising
the vehicle.
²Block the wheel diagonally opposite the wheel to
be raised.
²Set the parking brake firmly and set an automatic
transmission in PARK; a manual transmission in
REVERSE.
²Never start or run the engine with the vehicle on a
jack.
²Do not let anyone sit in the vehicle when it is on a
jack.
²Do not get under the vehicle when it is on a jack.
(Continued)
WARNING! (Continued)
²Only use the jack in the positions indicated and
for lifting this vehicle during a tire change.
²If working on or near a roadway, be extremely
careful of motor traffic.
²To assure that spare tires, flat or inflated are
securely stowed, spares must be stowed with the
valve stem facing the ground.
²Turn on the Hazard warning flasher.
1. Remove the spare wheel, jack, and tools from storage.
2. Using the wheel wrench, loosen, but do not remove,
the wheel nuts by turning them counterclockwise one
turn while the wheel is still on the ground.
WHAT TO DO IN EMERGENCIES 373
6
Page 377 of 481
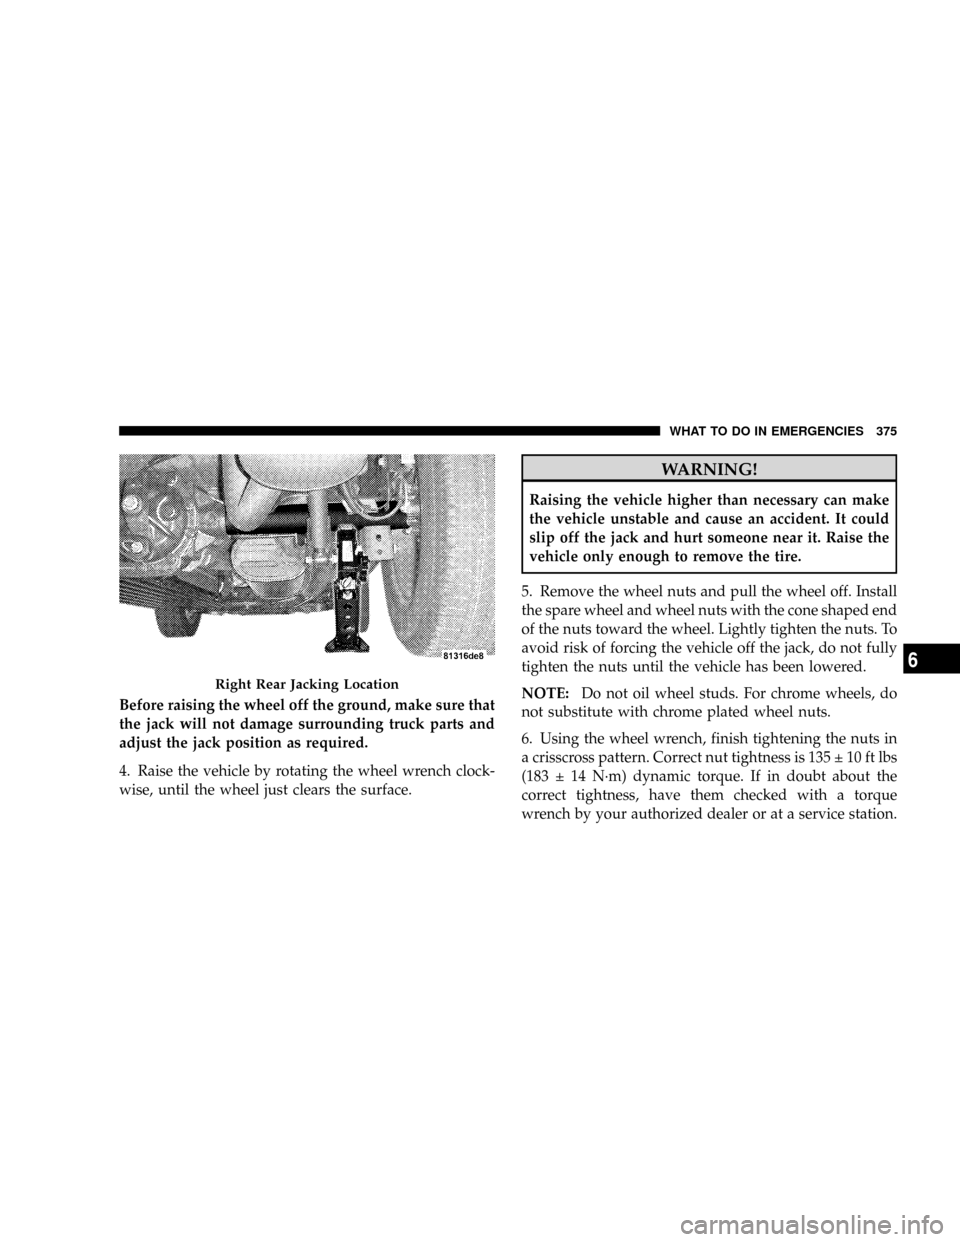
Before raising the wheel off the ground, make sure that
the jack will not damage surrounding truck parts and
adjust the jack position as required.
4. Raise the vehicle by rotating the wheel wrench clock-
wise, until the wheel just clears the surface.
WARNING!
Raising the vehicle higher than necessary can make
the vehicle unstable and cause an accident. It could
slip off the jack and hurt someone near it. Raise the
vehicle only enough to remove the tire.
5. Remove the wheel nuts and pull the wheel off. Install
the spare wheel and wheel nuts with the cone shaped end
of the nuts toward the wheel. Lightly tighten the nuts. To
avoid risk of forcing the vehicle off the jack, do not fully
tighten the nuts until the vehicle has been lowered.
NOTE:Do not oil wheel studs. For chrome wheels, do
not substitute with chrome plated wheel nuts.
6. Using the wheel wrench, finish tightening the nuts in
a crisscross pattern. Correct nut tightness is 135 10 ft lbs
(183 14 N´m) dynamic torque. If in doubt about the
correct tightness, have them checked with a torque
wrench by your authorized dealer or at a service station.
Right Rear Jacking Location
WHAT TO DO IN EMERGENCIES 375
6
Page 429 of 481
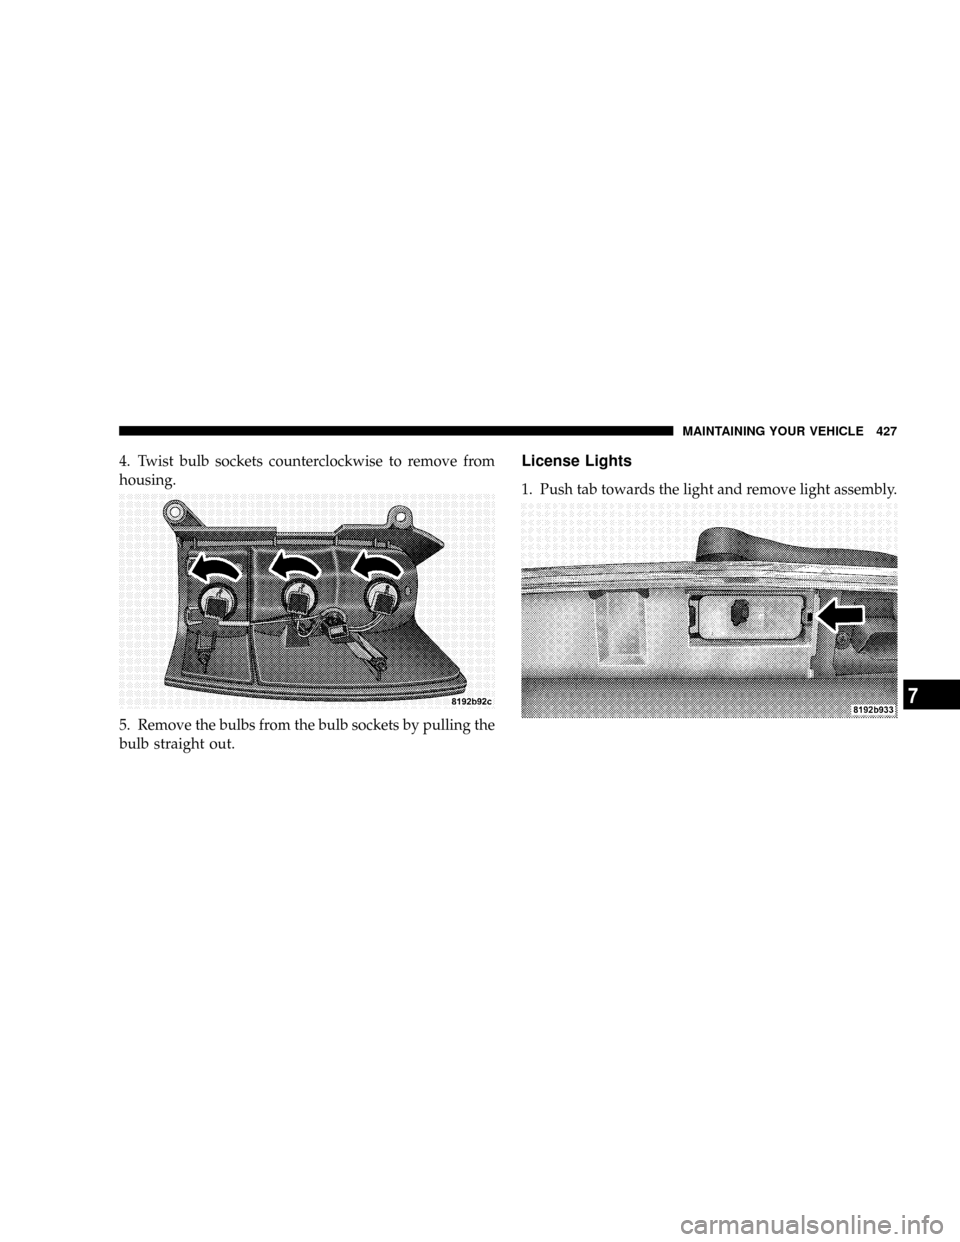
4. Twist bulb sockets counterclockwise to remove from
housing.
5. Remove the bulbs from the bulb sockets by pulling the
bulb straight out.License Lights
1. Push tab towards the light and remove light assembly.
MAINTAINING YOUR VEHICLE 427
7
Page 430 of 481
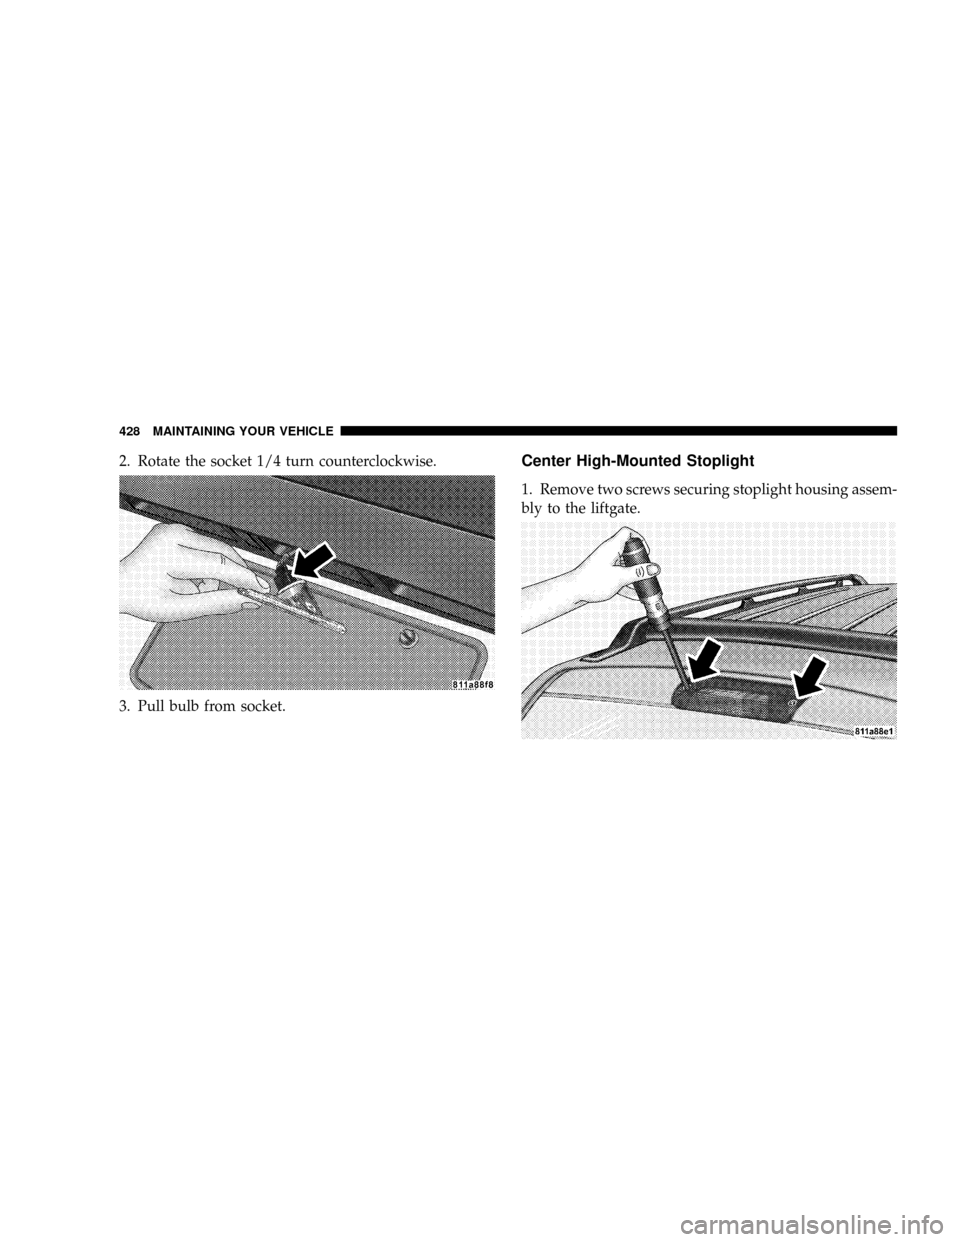
2. Rotate the socket 1/4 turn counterclockwise.
3. Pull bulb from socket.Center High-Mounted Stoplight
1. Remove two screws securing stoplight housing assem-
bly to the liftgate.
428 MAINTAINING YOUR VEHICLE
Page 431 of 481
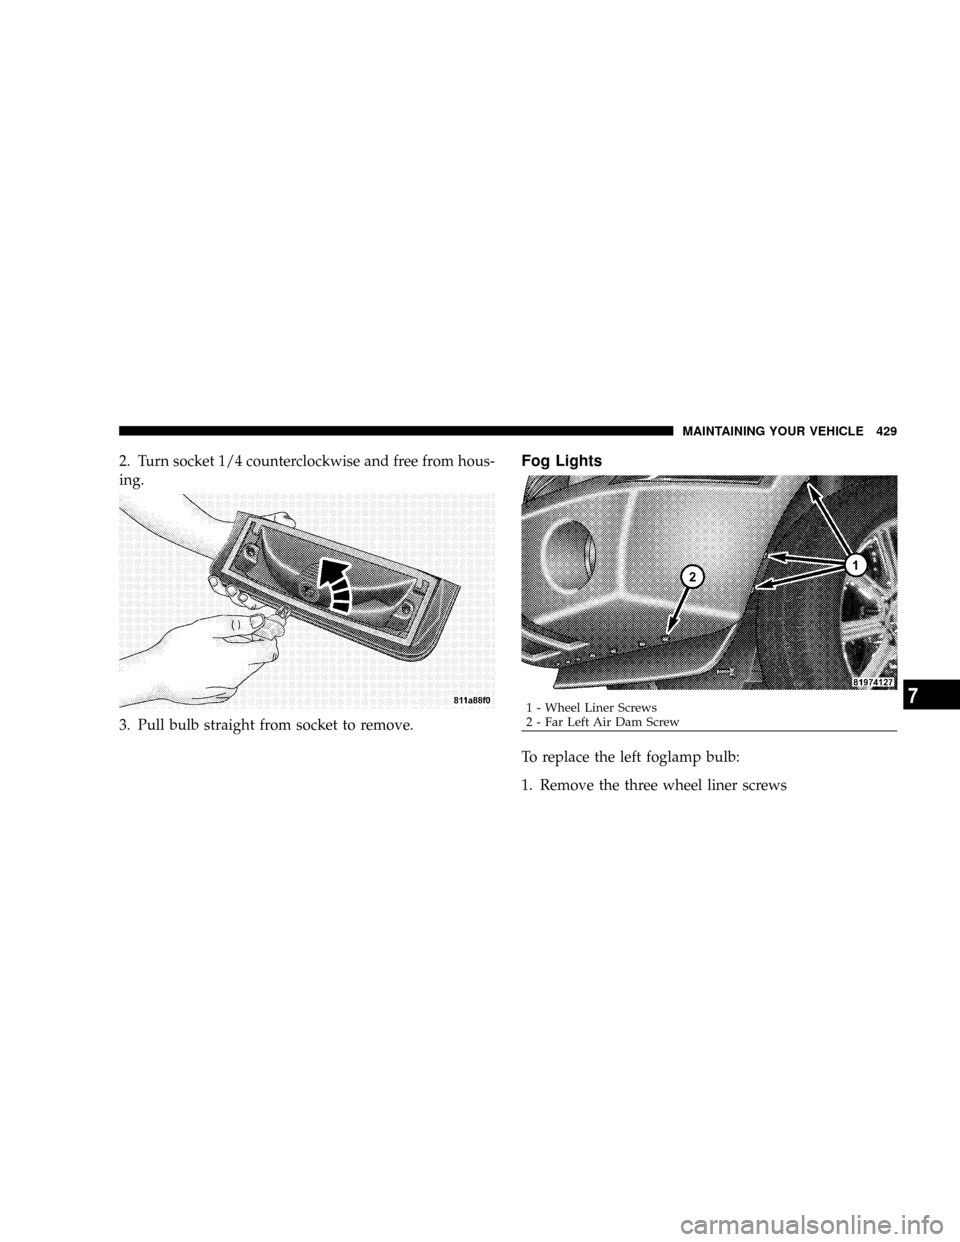
2. Turn socket 1/4 counterclockwise and free from hous-
ing.
3. Pull bulb straight from socket to remove.Fog Lights
To replace the left foglamp bulb:
1. Remove the three wheel liner screws
1 - Wheel Liner Screws
2 - Far Left Air Dam ScrewMAINTAINING YOUR VEHICLE 4297
Page 432 of 481
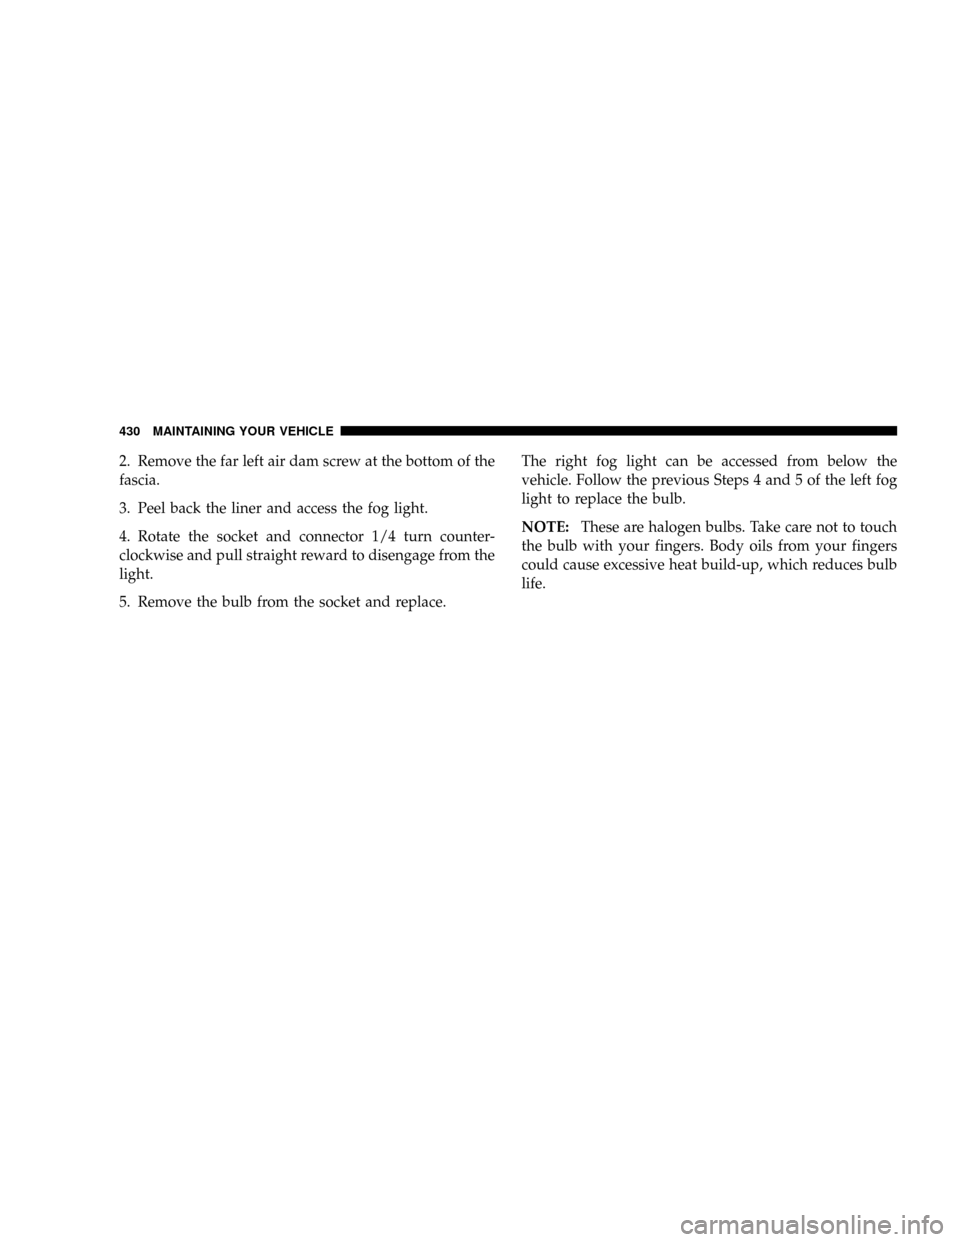
2. Remove the far left air dam screw at the bottom of the
fascia.
3. Peel back the liner and access the fog light.
4. Rotate the socket and connector 1/4 turn counter-
clockwise and pull straight reward to disengage from the
light.
5. Remove the bulb from the socket and replace.The right fog light can be accessed from below the
vehicle. Follow the previous Steps 4 and 5 of the left fog
light to replace the bulb.
NOTE:These are halogen bulbs. Take care not to touch
the bulb with your fingers. Body oils from your fingers
could cause excessive heat build-up, which reduces bulb
life.
430 MAINTAINING YOUR VEHICLE
Page 464 of 481
Cargo Organizer........................ 193
Cargo (Vehicle Loading)................... 346
Cellular Phone........................88,254
Center High Mounted Stop Light............ 428
Certification Label....................... 346
Charging.............................. 377
Chart, Tire Sizing........................ 309
Check Engine Light (Malfunction Indicator Light). . 388
Child Restraint........................65,66
Child Restraint Tether Anchors.............68,73
Child Seat.............................. 70
Circuit Breakers......................... 415
Cleaning
Wheels............................. 412
Climate Control......................... 255
Climate Control, Rear Zone..............259,265
Clock........................216,218,221,231
Compact Disc (CD) Maintenance............. 253
Compact Spare Tire...................... 319Compass Calibration..................... 174
Compass Variance....................... 174
Connector
UCI ................................ 241
Universal Consumer Interface (UCI)......... 241
Console, Floor.......................189,192
Console, Overhead....................165,166
Contract, Service........................ 453
Coolant Pressure Cap (Radiator Cap)....385,386,402
Cooling System......................... 400
Adding Coolant (Antifreeze).............. 401
Coolant Capacity...................... 431
Coolant Level......................400,403
Disposal of Used Coolant................ 403
Drain, Flush, and Refill.................. 400
Inspection........................... 403
Points to Remember.................... 404
Pressure Cap......................... 402
Radiator Cap......................... 402
462 INDEX
Page 475 of 481
Extender............................. 53
Front Seat............................ 41
Pretensioners.......................... 51
Reminder............................ 205
Seats................................. 120
Adjustment.......................... 120
Cleaning............................ 412
Fold and Tumble Rear................125,127
Heated............................. 123
Lumbar Support....................... 121
Memory............................. 136
Rear Folding.......................125,127
Reclining............................ 120
Security Alarm (Theft Alarm).............19,206
Selection of Coolant (Antifreeze)..........401,432
Selection of Oil......................... 391
Sentry Key (Immobilizer)................... 15
Sentry Key Programming................... 17
Sentry Key Replacement................... 17Service and Maintenance.................. 390
Service Assistance....................... 451
Service Contract......................... 453
Service Manuals........................ 455
Setting the Clock.............216,217,218,221,231
Settings, Personal........................ 170
Shifting
Automatic Transmission................. 278
Transfer Case......................... 284
Transfer Case, Shifting into Transfer Case
Neutral (N).......................... 363
Transfer Case, Shifting out of Transfer Case
Neutral (N).......................... 365
Shoulder Belt Upper Anchorage.............. 46
Shoulder Belts........................... 41
Signals, Turn.....................148,204,425
Snow Chains (Tire Chains)................. 325
Snow Plow............................ 362
Snow Tires............................ 326
INDEX 473
10