headlamp CHRYSLER CONCORDE 2004 2.G Owners Manual
[x] Cancel search | Manufacturer: CHRYSLER, Model Year: 2004, Model line: CONCORDE, Model: CHRYSLER CONCORDE 2004 2.GPages: 273, PDF Size: 6 MB
Page 91 of 273

feature selected. Pressing the STEP button when in this
display will select “Yes” or “No.”
Headlamp Delay
When this feature is selected the driver can choose, when
exiting the vehicle, to have the headlamps remain on for
30, 60, or 90 seconds, or not remain on. Pressing the STEP
button when in this display will select 30, 60, 90, or OFF.
Headlamp On With Wipers (Available with Auto
Headlights Only)
When this feature is selected and the headlight switch
has at least once been moved to the AUTO position, the
headlights will turn on when the wipers are turned on.
The headlights will also turn off when the wipers are
turned off if they were turned on in this way. Pressing the
STEP button when in this display will select “Yes” or
“No.”
NOTE:Turning the headlights on during the daytime
causes the instrument panel lights to dim. To increase the
brightness, refer to “Lights” in this section.
Service Interval
When this feature is selected a service interval between
2,000 (3 200 km) and 6,000 miles (9 600 km) in 500 mile
(800 km) increments may be selected. Pressing the STEP
button when in this display will select distances between
2,000 (3 200 km) and 6,000 miles (9 600 km) in 500 mile
(800 km) increments.
Reset Service Distance (Displays Only if Service
Interval was Changed)
When this feature is selected the current accumulated
service distance can be reset to the newly selected service
interval. Pressing the STEP button when in this display
will select “Yes” or “No.”
Easy Exit Seat
When this feature is selected the driver’s seat moves
rearward two inches (55 mm) or to the farthest rearward
position if this distance is less than two inches (55 mm)
when the key is removed from the ignition switch so that
the driver can more easily exit the vehicle. The seat will
return to the memorized seat location (if REMOTE LINK
TO MEMORY is set to YES) when the remote keyless
entry transmitter is used to unlock the door. Pressing the
UNDERSTANDING THE FEATURES OF YOUR VEHICLE 91
3
Page 228 of 273

3. Remove the headlamp jackscrews on both sides of the
vehicle.4. Remove the windshield filler neck screw.
228 MAINTAINING YOUR VEHICLE
Page 229 of 273

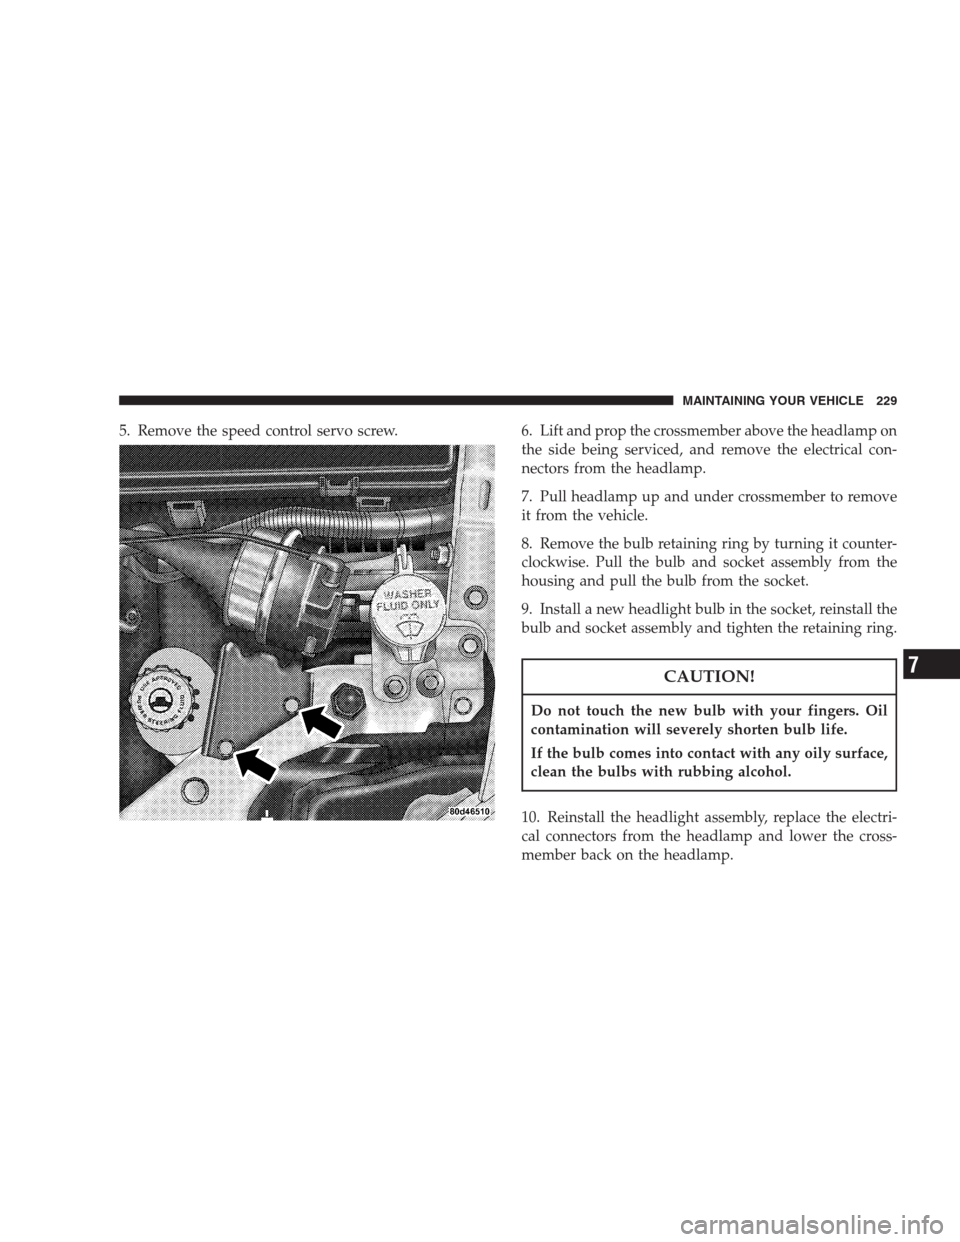
5. Remove the speed control servo screw. 6. Lift and prop the crossmember above the headlamp on
the side being serviced, and remove the electrical con-
nectors from the headlamp.
7. Pull headlamp up and under crossmember to remove
it from the vehicle.
8. Remove the bulb retaining ring by turning it counter-
clockwise. Pull the bulb and socket assembly from the
housing and pull the bulb from the socket.
9. Install a new headlight bulb in the socket, reinstall the
bulb and socket assembly and tighten the retaining ring.
CAUTION!
Do not touch the new bulb with your fingers. Oil
contamination will severely shorten bulb life.
If the bulb comes into contact with any oily surface,
clean the bulbs with rubbing alcohol.
10. Reinstall the headlight assembly, replace the electri-
cal connectors from the headlamp and lower the cross-
member back on the headlamp.
MAINTAINING YOUR VEHICLE 229
7