wheel nut CHRYSLER PACIFICA 2006 1.G Owners Manual
[x] Cancel search | Manufacturer: CHRYSLER, Model Year: 2006, Model line: PACIFICA, Model: CHRYSLER PACIFICA 2006 1.GPages: 440, PDF Size: 13.69 MB
Page 73 of 440
Periodic Safety Checks You Should Make Outside
The Vehicle
Tires
Examine tires for excessive tread wear or uneven wear
patterns. Check for stones, nails, glass, or other objects
lodged in the tread. Inspect tread and sidewall for cuts or
cracks. Check wheel nuts for tightness, and tires (includ-
ing spare) for proper pressure.
Lights
Have someone observe the operation of exterior lights
while you work the controls. Check turn signal and high
beam indicator lights on the instrument panel.
Fluid Leaks
Check area under vehicle after overnight parking for fuel,
engine coolant, oil or other fluid leaks. Also, if gasoline
fumes are detected or fuel, power steering fluid or brake
fluid leaks are suspected, the cause should be located and
corrected immediately.
THINGS TO KNOW BEFORE STARTING YOUR VEHICLE 73
2
Page 292 of 440
1,2,3, OR 4 TIRE(S) LOW PRESSURE
Low tire pressure levels of 26 psi [1.79 bars] (179 kPa) or
less detected in one or more tires.
Inspect all tires for proper inflation pressure, once the
proper tire pressure has been set, the TPMS system
warning will reset automatically when the vehicle has
been driven for at least 2 minutes at or above 20 mph (32
km/h).
CHECK TPM SYSTEM
The Tire Pressure Monitor System (TPMS) system re-
quires service.
See your authorized dealer for service.
CAUTION!
The TPMS system has been optimized for the origi-
nal equipment tires and wheels. TPMS system pres-
sures have been established for the tire size
equipped on your vehicle. Undesirable system op-
eration or sensor damage may result when using
replacement equipment that is not of the same size,
type, and/or style. After-market wheels can cause
sensor damage. Do not use tire sealant or balance
beads if your vehicle is equipped with a TPMS
system, as damage to the sensors may result.
NOTE:
•The TPMS system can inform the driver of a low tire
pressure condition of 26 psi [1.79 bars] (179 kPa) or
less.
292 STARTING AND OPERATING
Page 323 of 440
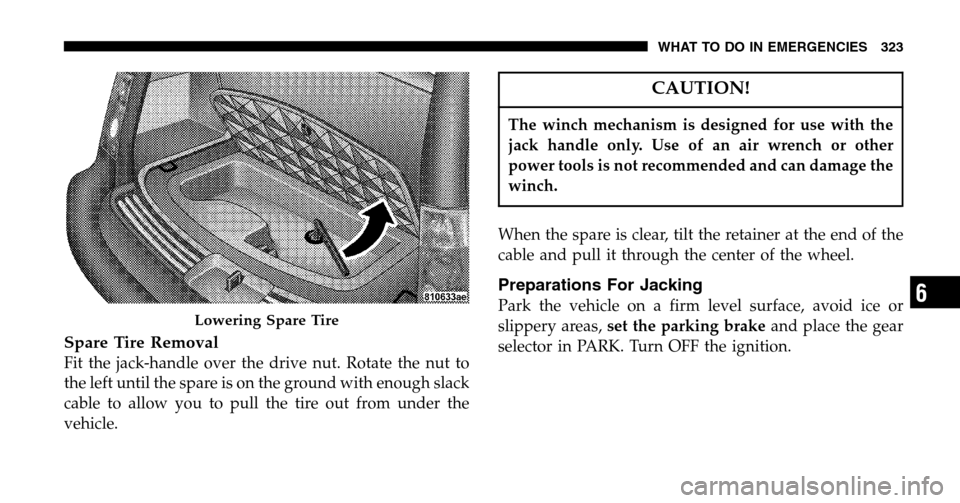
Spare Tire Removal
Fit the jack-handle over the drive nut. Rotate the nut to
the left until the spare is on the ground with enough slack
cable to allow you to pull the tire out from under the
vehicle.
CAUTION!
The winch mechanism is designed for use with the
jack handle only. Use of an air wrench or other
power tools is not recommended and can damage the
winch.
When the spare is clear, tilt the retainer at the end of the
cable and pull it through the center of the wheel.
Preparations For Jacking
Park the vehicle on a firm level surface, avoid ice or
slippery areas, set the parking brake and place the gear
selector in PARK. Turn OFF the ignition.Lowering Spare Tire
WHAT TO DO IN EMERGENCIES 323
6
Page 324 of 440
WARNING!
Do not attempt to change a tire on the side of the
vehicle close to moving traffic. Pull far enough off
the road to avoid the danger of being hit when
operating the jack or changing the wheel.
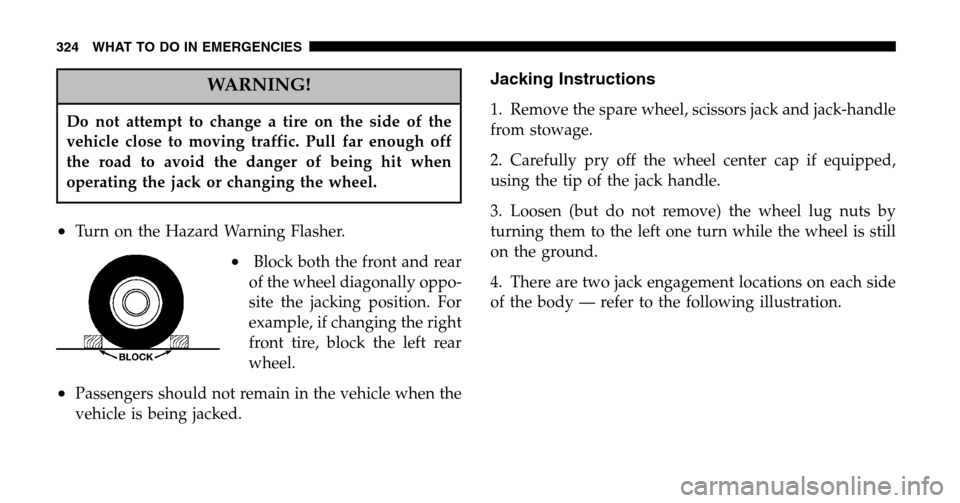
•Turn on the Hazard Warning Flasher.
•Block both the front and rear
of the wheel diagonally oppo-
site the jacking position. For
example, if changing the right
front tire, block the left rear
wheel.
•Passengers should not remain in the vehicle when the
vehicle is being jacked.
Jacking Instructions
1. Remove the spare wheel, scissors jack and jack-handle
from stowage.
2. Carefully pry off the wheel center cap if equipped,
using the tip of the jack handle.
3. Loosen (but do not remove) the wheel lug nuts by
turning them to the left one turn while the wheel is still
on the ground.
4. There are two jack engagement locations on each side
of the body — refer to the following illustration.
324 WHAT TO DO IN EMERGENCIES
Page 326 of 440
7. Remove the wheel lug nuts, for vehicles with wheel
covers, remove the cover from the wheel by hand. Do not
pry the wheel cover off. Then pull the wheel off the hub.
8. Install the spare wheel, for vehicles with wheel covers,
align the notch in the wheel cover with the valve stem on
the wheel. Install the cover on the wheel by hand only
and install the wheel lug nuts with the cone shaped end
of the nut toward the wheel. Lightly tighten the lug nuts.
To avoid the risk of forcing the vehicle off the jack, do not
tighten the lug nuts fully until the vehicle has been
lowered.
NOTE: Do not install the wheel cover on the compact
spare.
Do not use a hammer or force to install the wheel covers.
9. Lower the vehicle by turning the jack screw to the left.
10. Finish tightening the lug nuts. Push down on the
wrench while tightening for increased leverage. Alternate lug nuts until each nut has been tightened twice. Correct
wheel nut tightness is 130 N·m (95 ft. lbs). If in doubt
about the correct tightness, have them checked with a
torque wrench by your dealer or at a service station.
11. Lower the jack to its fully closed position.
WARNING!
A loose tire or jack, thrown forward in a collision or
hard stop could endanger the occupants of the ve-
hicle. Always stow the jack parts and the spare tire in
the places provided.
12. Secure the flat or spare tire as follows:
•If your vehicle is equipped with cast aluminum
wheels, the center cap of the wheel must be re-
moved prior to flat tire stowage. Store the center cap
inside the glove box or other storage compartment.
326 WHAT TO DO IN EMERGENCIES
Page 327 of 440
•Turn the wheel so that the valve-stem is down. Slide
the wheel retainer through the center of the wheel
and position it properly across the wheel opening.
•For convenience in checking the spare tire inflation,
stow with the valve-stem toward the rear of the
vehicle.
•Using the jack-handle, rotate the drive nut to the
right until the wheel is drawn into place against the
underside of the vehicle.
•Continue to rotate the nut until you hear the mecha-
nism click three times. It cannot be overtightened.
Push against the tire several times to be sure it is
securely in place.
13. Stow the jack and jack handle. 14. Check the tire pressure as soon as possible. Correct
pressure as required.
NOTE:
When reinstalling the wheel center cap, insure
that the valve stem symbol on the back of the cap is
pointed toward the wheel valve stem. Install the center
cap using hand pressure only. Do not use a hammer.
JUMP-STARTING PROCEDURES IF BATTERY IS
LOW
WARNING!
Take care to avoid the radiator cooling fan whenever
the hood is raised. It can start anytime the ignition
switch is on. You can be hurt by the fan.
WHAT TO DO IN EMERGENCIES 327
6
Page 329 of 440
5. Connect the other cable, first to the negative terminal
of the booster battery and then to the engine of the
vehicle with the discharged battery. Make sure you have
a good contact on the engine.
6. Start the engine in the vehicle which has the booster
battery, let the engine idle a few minutes, then start the
engine in the vehicle with the discharged battery.
7. When removing the jumper cables, reverse the above
sequence exactly. Be careful of the moving belts and fan.
DRIVING ON SLIPPERY SURFACES
Acceleration
Rapid acceleration on snow covered, wet, or other slip-
pery surfaces may cause the front wheels to pull errati-
cally to the right or left. This phenomenon occurs when
there is a difference in the surface traction under the front
(driving) wheels.
WARNING!
Rapid acceleration on slippery surfaces is danger-
ous. Unequal traction can cause sudden pulling of
the front wheels. You could lose control of the
vehicle and possibly have an accident. Accelerate
slowly and carefully whenever there is likely to be
poor traction (ice, snow, wet mud, loose sand, etc.).
Traction
When driving on wet or slushy roads, it is possible for a
wedge of water to build up between the tire and road
surface. This is known as hydroplaning and may cause
partial or complete loss of vehicle control and stopping
ability. To reduce this possibility, the following precau-
tions should be observed:
1. Slow down during rainstorms or when roads are
slushy.
WHAT TO DO IN EMERGENCIES 329
6
Page 370 of 440
Severe Usage is defined as:
•Police, taxi, limousine, commercial type operation, or
trailer towing where the vehicle driven regularly for
more than 45 minutes of continuous operation.
NOTE: Refer to Section 8 of this manual for Mainte-
nance Schedules.
If the transmission is disassembled for any reason, the
fluid and filter should be changed.
Special Additives
Do not add any fluid additives to the transmission. The
only exception to this policy is the use of special dyes to
aid in detecting fluid leaks. The use of transmission
sealers should be avoided as they may adversely affect
seals.
All Wheel Drive (AWD) — If Equipped
Under normal operating conditions, periodic fluid level
checks and lubricant changes for the Power Transfer
Unit, Overrunning Clutch and Rear Carrier, are not
required. However when the vehicle is serviced for other
reasons, the exterior surface of these components should
be inspected for evidence of fluid leaks. Confirmed leaks
should be repaired as soon as possible.
Power Transfer Unit
The fill plug is located on the side of the power transfer
unit housing. The fluid should be maintained at a level
even with the bottom of the fill plug hole when the
vehicle is parked on a level surface. If it becomes neces-
sary to add or replace the fluid, use only the manufac-
turers recommended fluid, refer to Fluids, Lubricants
and Genuine Parts for correct fluid type.
370 MAINTAINING YOUR VEHICLE