Motor CHRYSLER PACIFICA 2018 Owners Manual
[x] Cancel search | Manufacturer: CHRYSLER, Model Year: 2018, Model line: PACIFICA, Model: CHRYSLER PACIFICA 2018Pages: 696, PDF Size: 8.48 MB
Page 2 of 696

VEHICLES SOLD IN CANADA
With respect to any Vehicles Sold in Canada, the name
FCA US LLC shall be deemed to be deleted and the name
FCA Canada Inc. used in substitution therefore.
DRIVING AND ALCOHOL
Drunken driving is one of the most frequent causes of
accidents.
Your driving ability can be seriously impaired with blood
alcohol levels far below the legal minimum. If you are
drinking, don’t drive. Ride with a designated non-
drinking driver, call a cab, a friend, or use public trans-
portation.
WARNING!
Driving after drinking can lead to an accident.
Your perceptions are less sharp, your reflexes are
slower, and your judgment is impaired when you
have been drinking. Never drink and then drive.
This manual illustrates and describes the operation of
features and equipment that are either standard or op-
tional on this vehicle. This manual may also include a
description of features and equipment that are no longer
available or were not ordered on this vehicle. Please
disregard any features and equipment described in this
manual that are not on this vehicle.
FCA US LLC reserves the right to make changes in design
and specifications, and/or make additions to or improve-
ments to its products without imposing any obligation
upon itself to install them on products previously manu-
factured.
Copyright © 2018 FCA US LLC
INSTALLATION OF RADIO TRANSMITTING
EQUIPMENT
Special design considerations are incorporated into this
vehicle’s electronic system to provide immunity to radio
frequency signals. Mobile two-way radios and telephone
equipment must be installed properly by trained person-
nel. The following must be observed during installation.
The positive power connection should be made directly
to the battery and fused as close to the battery as possible.
The negative power connection should be made to body
sheet metal adjacent to the negative battery connection.
This connection should not be fused.
Antennas for two-way radios should be mounted on the
roof or the rear area of the vehicle. Care should be used
in mounting antennas with magnet bases. Magnets may
affect the accuracy or operation of the compass on
vehicles so equipped.
The antenna cable should be as short as practical and
routed away from the vehicle wiring when possible. Use
only fully shielded coaxial cable.
Carefully match the antenna and cable to the radio to
ensure a low Standing Wave Ratio (SWR).Mobile radio equipment with output power greater than
normal may require special precautions.
All installations should be checked for possible interfer-
ence between the communications equipment and the
vehicle’s electronic systems.
WARNING:
Operating, servicing and maintaining a
passenger vehicle or off-road highway
motor vehicle can expose you to chemicals
including engine exhaust, carbon monoxide,
phthalates, and lead, which are known to
the State of California to cause cancer and
birth defects or other reproductive harm.
To minimize exposure, avoid breathing
exhaust, do not idle the engine except as
necessary, service your vehicle in a
well-ventilated area and wear gloves or
wash your hands frequently when servicing
your vehicle. For more information go to
www.P65Warnings.ca.gov/passenger-vehicle.
Page 58 of 696
To move the selected seat(s) back in the forward or reverse
direction, push and hold the Fold forward or rearward
button. Release the button when the desired position is
reached.
NOTE:
1. Disconnect the center shoulder belt from the mini-buckle before attempting to fold/stow the power third
row seats.
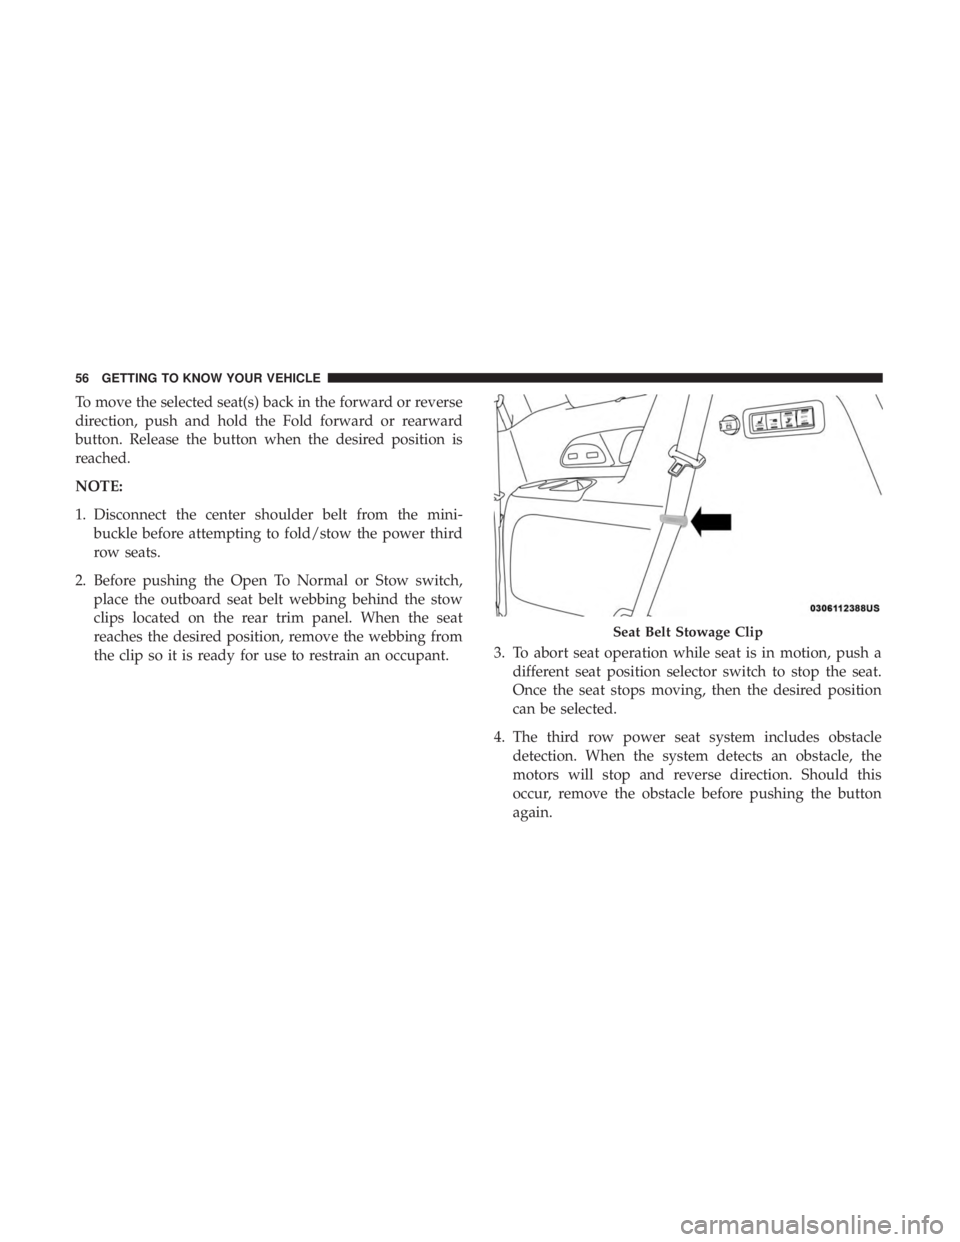
2. Before pushing the Open To Normal or Stow switch, place the outboard seat belt webbing behind the stow
clips located on the rear trim panel. When the seat
reaches the desired position, remove the webbing from
the clip so it is ready for use to restrain an occupant. 3. To abort seat operation while seat is in motion, push a
different seat position selector switch to stop the seat.
Once the seat stops moving, then the desired position
can be selected.
4. The third row power seat system includes obstacle detection. When the system detects an obstacle, the
motors will stop and reverse direction. Should this
occur, remove the obstacle before pushing the button
again.
Seat Belt Stowage Clip
56 GETTING TO KNOW YOUR VEHICLE
Page 103 of 696
Parade Mode (Daytime Brightness Feature)
Rotate the instrument panel dimmer control upward to the
first detent. This feature brightens all text displays such as
the odometer, instrument cluster display, and radio when
the position lights or headlights are on.
WINDSHIELD WIPER AND WASHERS
Windshield Wiper Operation
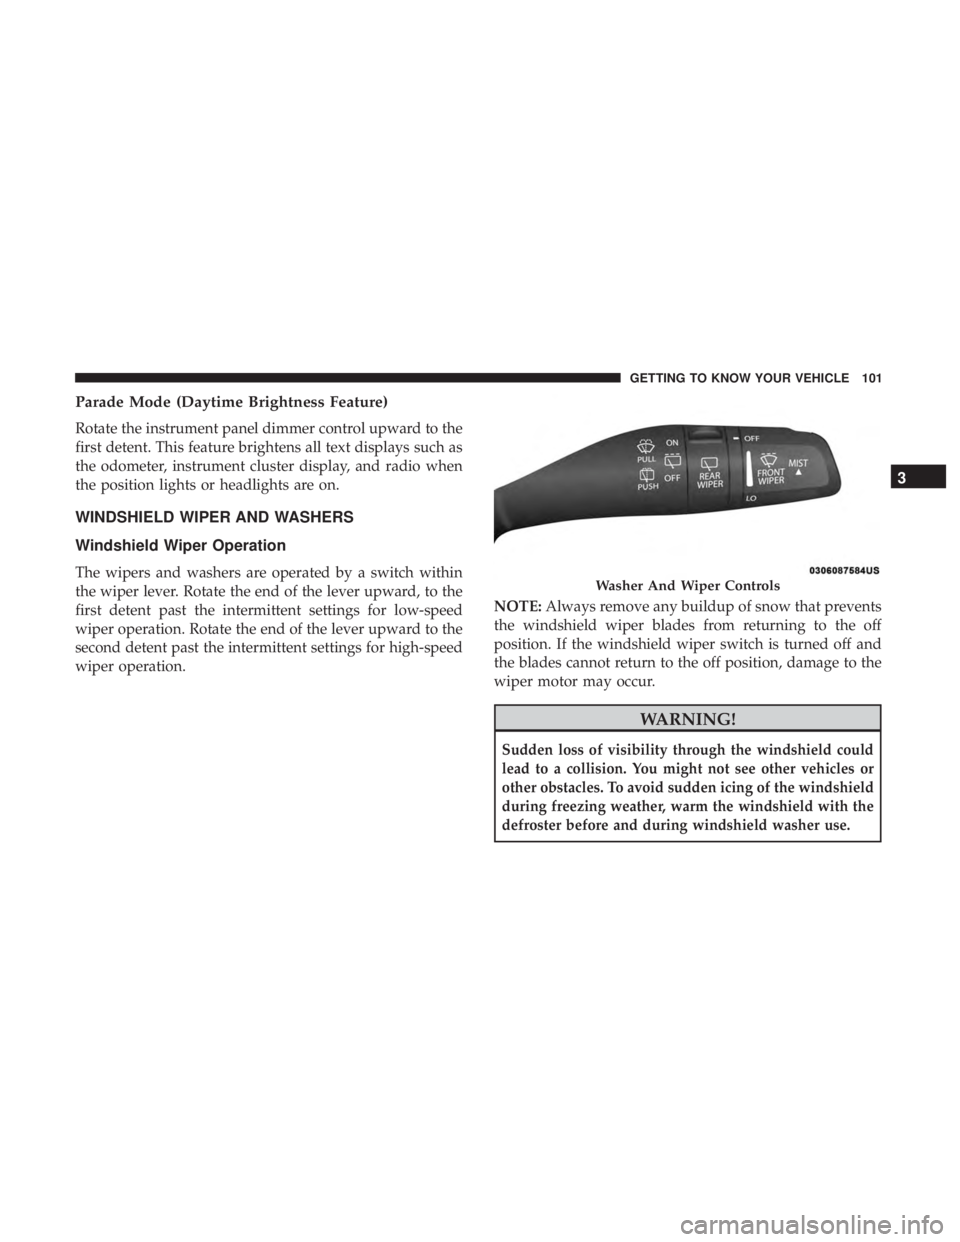
The wipers and washers are operated by a switch within
the wiper lever. Rotate the end of the lever upward, to the
first detent past the intermittent settings for low-speed
wiper operation. Rotate the end of the lever upward to the
second detent past the intermittent settings for high-speed
wiper operation.NOTE:
Always remove any buildup of snow that prevents
the windshield wiper blades from returning to the off
position. If the windshield wiper switch is turned off and
the blades cannot return to the off position, damage to the
wiper motor may occur.
WARNING!
Sudden loss of visibility through the windshield could
lead to a collision. You might not see other vehicles or
other obstacles. To avoid sudden icing of the windshield
during freezing weather, warm the windshield with the
defroster before and during windshield washer use.
Washer And Wiper Controls
3
GETTING TO KNOW YOUR VEHICLE 101
Page 118 of 696
IconDescription
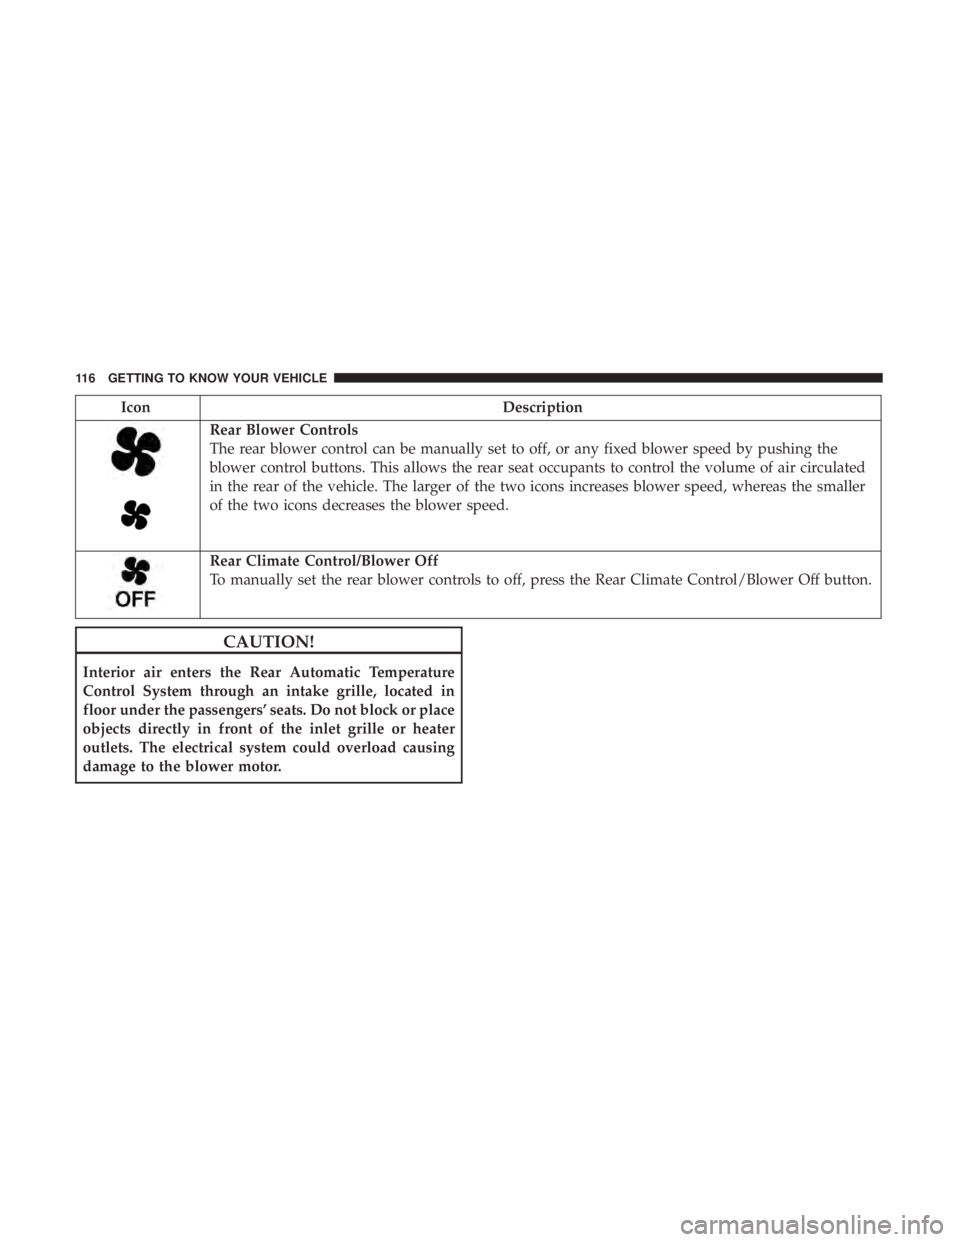
Rear Blower Controls
The rear blower control can be manually set to off, or any fixed blower speed by pushing the
blower control buttons. This allows the rear seat occupants to control the volume of air circulated
in the rear of the vehicle. The larger of the two icons increases blower speed, whereas the smaller
of the two icons decreases the blower speed.
Rear Climate Control/Blower Off
To manually set the rear blower controls to off, press the Rear Climate Control/Blower Off button.
CAUTION!
Interior air enters the Rear Automatic Temperature
Control System through an intake grille, located in
floor under the passengers’ seats. Do not block or place
objects directly in front of the inlet grille or heater
outlets. The electrical system could overload causing
damage to the blower motor.
116 GETTING TO KNOW YOUR VEHICLE
Page 151 of 696
WARNING!
This equipment incorporates parts such as switches,
motors, or the like that tend to produce arcs or sparks
that can cause an explosion. When using your vacuum
near gasoline-dispensing equipment or service sta-
tions, park vehicle at least 20 ft (6 m) away from the
exterior enclosure of any dispensing pump. The
vacuum is mounted more than 18 inches (45 cm) above
ground level in your vehicle.
1. Before Using Vacuum:
Accessory (ACC) Mode Operation - For up to 10 minutes
of operation
Always apply the parking brake, shift the transmission into
PARK, and push ignition button to place ignition in
Accessory (ACC) mode. The engine will not be running in
this mode. Do not leave the key fob in or near the vehicle,
or in a location accessible to children.
NOTE: The vacuum system will run for 10 minutes off
battery power and then the vacuum will shut down. A low
battery indication light (LOW PWR) located below the
vacuum nozzle storage location will come on one minute
before the vacuum shuts down. Engine Running (ON) Operation - For more than 10
minutes of operation
•Position vehicle outdoors and fully open all side
windows.
• Always apply the parking brake, shift the transmission
into PARK, and leave engine running.
WARNING!
Carbon monoxide (CO) in exhaust gases can cause
serious injury or death. Follow the precautions below
to prevent carbon monoxide poisoning:
•Do not inhale exhaust gases.
• Do not start or run an engine in a closed garage or
confined area. Always position vehicle outdoors and
fully open all side windows before using vacuum
system with the engine running.
• Guard against carbon monoxide with proper main-
tenance. Have the exhaust system inspected every
time the vehicle is raised. Have any abnormal condi-
tions repaired promptly.
3
GETTING TO KNOW YOUR VEHICLE 149
Page 154 of 696
WARNING!(Continued)
•Do not allow to be used as a toy. Close attention is
necessary when used by or near children.
• Do not leave the vacuum running while unattended.
• Use only as described in this manual. Use only
attachments provided with your vehicle.
• Do not put any object into openings. Do not use with
any opening blocked; keep free of dust, lint, hair,
and anything that may reduce air flow.
• Do not vacuum toxic material such as chlorine
bleach, ammonia, drain cleaner, etc.
• Do not vacuum hard or sharp objects such as glass,
nails, screws, coins, etc.
• Keep hair, loose clothing, fingers, and all parts of
body away from openings and moving parts.
• Only use with filter in place. Periodically check that
the filter is in place and in good condition.
WARNING!
This equipment incorporates parts such as switches,
motors, or the like that tend to produce arcs or sparks
that can cause an explosion. When using your vacuum
(Continued)
WARNING! (Continued)
near gasoline-dispensing equipment or service sta-
tions, park vehicle at least 20 ft (6 m) away from the
exterior enclosure of any dispensing pump. The
vacuum is mounted more than 18 inches (45 cm) above
ground level in your vehicle.
5. When finished, push power button to turn vacuum off and store vacuum hose and any attachments.
6. Before exiting the vehicle: •If vehicle is in ACC mode, push ignition button to
place ignition in the OFF mode, remove key fob from
the vehicle, and lock the vehicle.
• If the engine is running, raise all of the windows, push
ignition button to place ignition in the OFF mode,
remove key fob from the vehicle, close all of the doors
and the liftgate and lock the vehicle.
Vacuum Troubleshooting
• DO NOT use with any opening blocked. If an object
becomes lodged in the hose, attempt to fully extend the
hose in a straight line while the vacuum motor is
running. If this does not dislodge the object, turn the
vacuum OFF and remove the hose from the vehicle
152 GETTING TO KNOW YOUR VEHICLE
Page 156 of 696
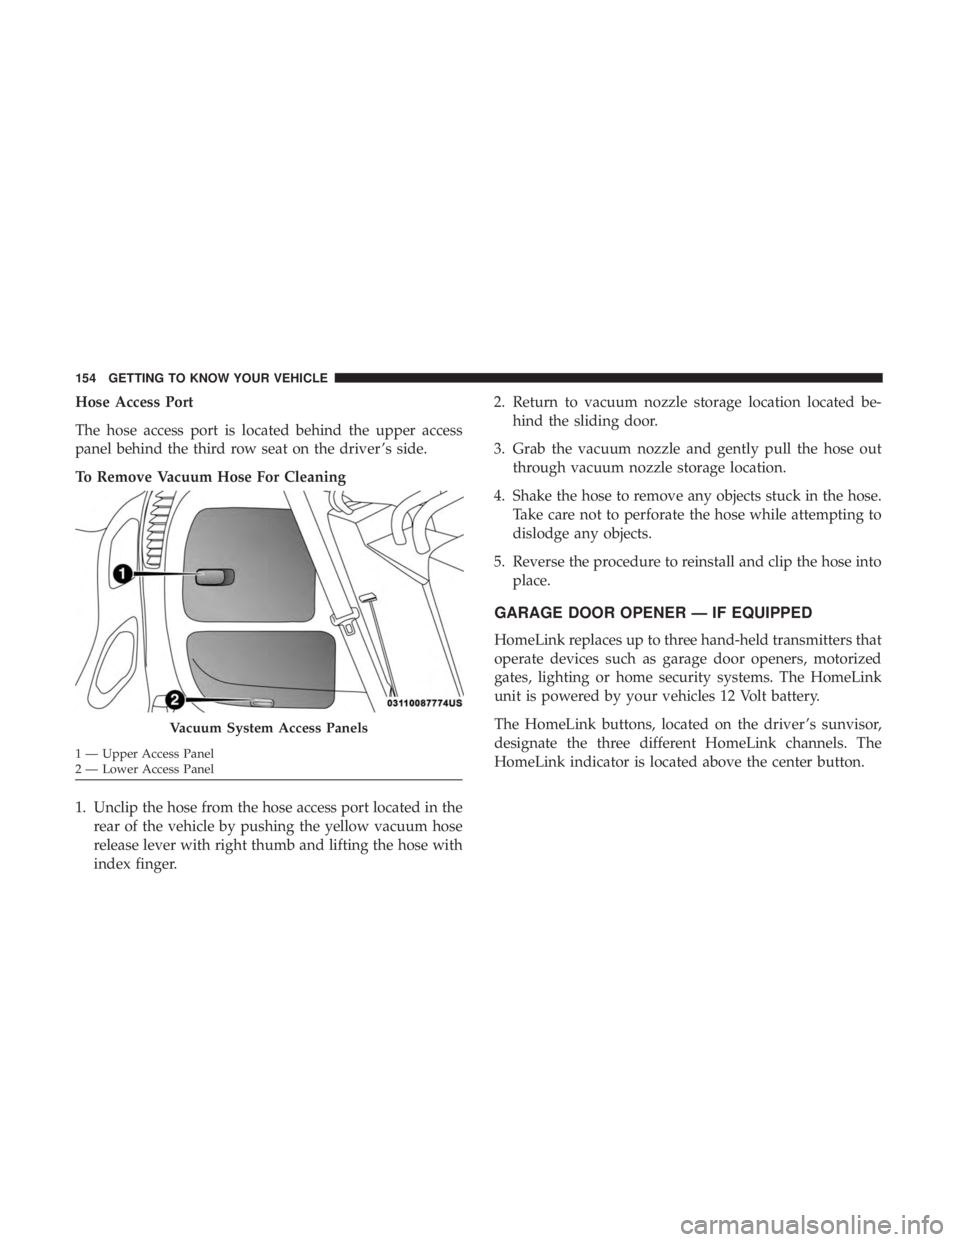
Hose Access Port
The hose access port is located behind the upper access
panel behind the third row seat on the driver ’s side.
To Remove Vacuum Hose For Cleaning
1. Unclip the hose from the hose access port located in therear of the vehicle by pushing the yellow vacuum hose
release lever with right thumb and lifting the hose with
index finger. 2. Return to vacuum nozzle storage location located be-
hind the sliding door.
3. Grab the vacuum nozzle and gently pull the hose out through vacuum nozzle storage location.
4. Shake the hose to remove any objects stuck in the hose. Take care not to perforate the hose while attempting to
dislodge any objects.
5. Reverse the procedure to reinstall and clip the hose into place.
GARAGE DOOR OPENER — IF EQUIPPED
HomeLink replaces up to three hand-held transmitters that
operate devices such as garage door openers, motorized
gates, lighting or home security systems. The HomeLink
unit is powered by your vehicles 12 Volt battery.
The HomeLink buttons, located on the driver ’s sunvisor,
designate the three different HomeLink channels. The
HomeLink indicator is located above the center button.
Vacuum System Access Panels
1 — Upper Access Panel
2 — Lower Access Panel 154 GETTING TO KNOW YOUR VEHICLE
Page 158 of 696
1. Place the ignition in the ON/RUN position.
2. Place the hand-held transmitter 1 to 3 inches (3 to 8 cm)away from the HomeLink button you wish to program
while keeping the HomeLink indicator light in view.
3. Push and hold the HomeLink button you want to program while you push and hold the hand-held trans-
mitter button. 4. Continue to hold both buttons and observe the indicator
light. The HomeLink indicator will flash slowly and
then rapidly after HomeLink has received the frequency
signal from the hand-held transmitter. Release both
buttons after the indicator light changes from slow to
rapid.
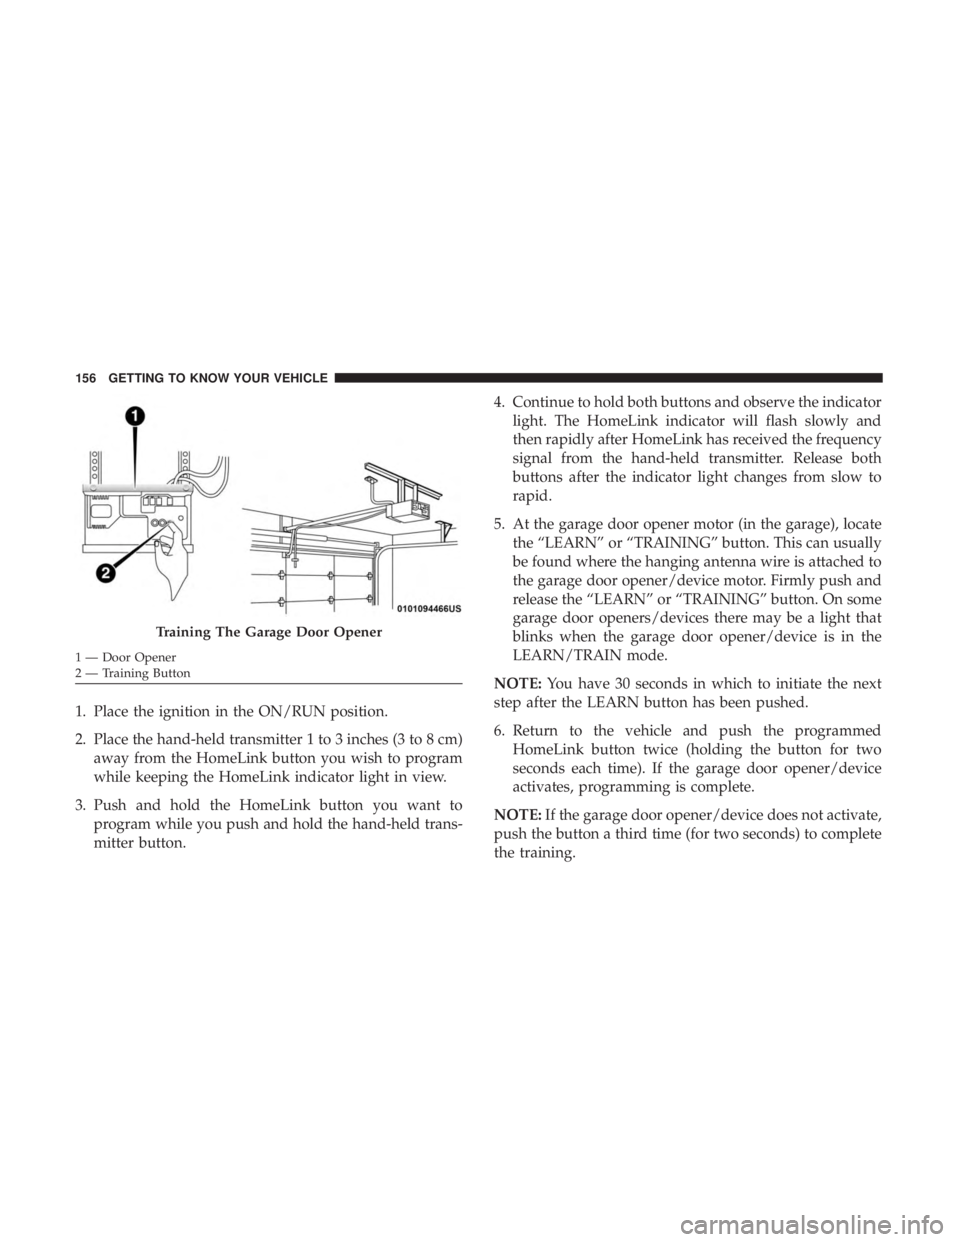
5. At the garage door opener motor (in the garage), locate the “LEARN” or “TRAINING” button. This can usually
be found where the hanging antenna wire is attached to
the garage door opener/device motor. Firmly push and
release the “LEARN” or “TRAINING” button. On some
garage door openers/devices there may be a light that
blinks when the garage door opener/device is in the
LEARN/TRAIN mode.
NOTE: You have 30 seconds in which to initiate the next
step after the LEARN button has been pushed.
6. Return to the vehicle and push the programmed HomeLink button twice (holding the button for two
seconds each time). If the garage door opener/device
activates, programming is complete.
NOTE: If the garage door opener/device does not activate,
push the button a third time (for two seconds) to complete
the training.
Training The Garage Door Opener
1 — Door Opener
2 — Training Button 156 GETTING TO KNOW YOUR VEHICLE
Page 160 of 696
2. Press and hold the desired HomeLink button until theindicator light begins to flash after 20 seconds. Do not
release the button.
3. Without releasing the button, proceed with “Program- ming A Non-Rolling Code” step 2 and follow all remain-
ing steps.
Canadian/Gate Operator Programming
For programming transmitters in Canada/United States
that require the transmitter signals to “time-out” after
several seconds of transmission.
Canadian radio frequency laws require transmitter signals
to time-out (or quit) after several seconds of transmission –
which may not be long enough for HomeLink to pick up
the signal during programming. Similar to this Canadian
law, some U.S. gate operators are designed to time-out in
the same manner.
It may be helpful to unplug the device during the cycling
process to prevent possible overheating of the garage door
or gate motor.
1. Cycle the ignition to the ON/RUN position. 2. Place the hand-held transmitter 1 to 3 inches (3 to 8 cm)
away from the HomeLink button you wish to program
while keeping the HomeLink indicator light in view.
3. Continue to press and hold the HomeLink button, while you press and release (“cycle”) your hand-held trans-
mitter every two seconds until HomeLink has success-
fully accepted the frequency signal. The indicator light
will flash slowly and then rapidly when fully trained.
4. Watch for the HomeLink indicator to change flash rates. When it changes, it is programmed. It may take up to 30
seconds or longer in rare cases. The garage door may
open and close while you are programming.
5. Press and hold the programmed HomeLink button and observe the indicator light.
NOTE: •If the indicator light stays on constantly, programming
is complete and the garage door/device should acti-
vate when the HomeLink button is pressed.
• To program the two remaining HomeLink buttons,
repeat each step for each remaining button. DO NOT
erase the channels.
158 GETTING TO KNOW YOUR VEHICLE
Page 162 of 696
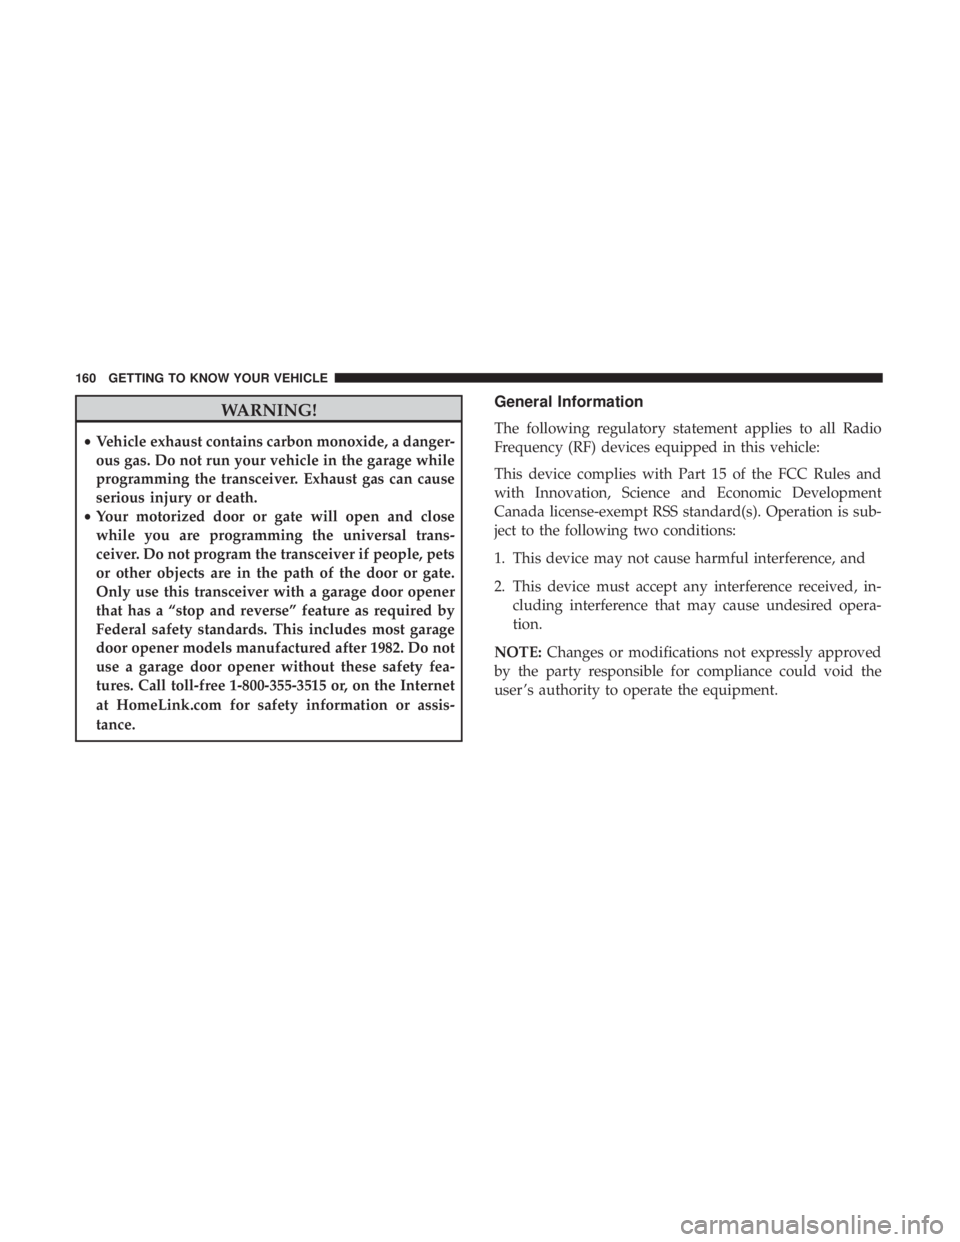
WARNING!
•Vehicle exhaust contains carbon monoxide, a danger-
ous gas. Do not run your vehicle in the garage while
programming the transceiver. Exhaust gas can cause
serious injury or death.
• Your motorized door or gate will open and close
while you are programming the universal trans-
ceiver. Do not program the transceiver if people, pets
or other objects are in the path of the door or gate.
Only use this transceiver with a garage door opener
that has a “stop and reverse” feature as required by
Federal safety standards. This includes most garage
door opener models manufactured after 1982. Do not
use a garage door opener without these safety fea-
tures. Call toll-free 1-800-355-3515 or, on the Internet
at HomeLink.com for safety information or assis-
tance.
General Information
The following regulatory statement applies to all Radio
Frequency (RF) devices equipped in this vehicle:
This device complies with Part 15 of the FCC Rules and
with Innovation, Science and Economic Development
Canada license-exempt RSS standard(s). Operation is sub-
ject to the following two conditions:
1. This device may not cause harmful interference, and
2. This device must accept any interference received, in-
cluding interference that may cause undesired opera-
tion.
NOTE: Changes or modifications not expressly approved
by the party responsible for compliance could void the
user ’s authority to operate the equipment.
160 GETTING TO KNOW YOUR VEHICLE