flush CHRYSLER PACIFICA 2018 Owners Manual
[x] Cancel search | Manufacturer: CHRYSLER, Model Year: 2018, Model line: PACIFICA, Model: CHRYSLER PACIFICA 2018Pages: 696, PDF Size: 8.48 MB
Page 463 of 696
WARNING!(Continued)
provided. Failure to follow these warnings can result
in injuries that are serious or fatal to you, your
passengers, and others around you.
• Take care not to allow the contents of Tire Service Kit
to come in contact with hair, eyes, or clothing. Tire
Service Kit sealant is harmful if inhaled, swallowed,
or absorbed through the skin. It causes skin, eye, and
respiratory irritation. Flush immediately with plenty
of water if there is any contact with eyes or skin.
Change clothing as soon as possible, if there is any
contact with clothing.
• Tire Service Kit Sealant solution contains latex. In
case of an allergic reaction or rash, consult a physi-
cian immediately. Keep Tire Service Kit out of reach
of children. If swallowed, rinse mouth immediately
with plenty of water and drink plenty of water. Do
not induce vomiting! Consult a physician immedi-
ately.
Whenever You Stop To Use Tire Service Kit:
1. Pull over to a safe location and turn on the vehicle’s Hazard Warning flashers. 2. Verify that the valve stem (on the wheel with the
deflated tire) is in a position that is near to the ground.
This will allow the Tire Service Kit Hose to reach the
valve stem and keep the Tire Service Kit flat on the
ground. This will provide the best positioning of the kit
when running the air pump. Move the vehicle as
necessary to place the valve stem in this position before
proceeding.
3. Place the transmission in PARK and cycle the ignition in the OFF position.
4. Ensure the park brake is engaged.
Setting Up To Use Tire Service Kit:
1. Remove the Tire Service Kit from the storage location.
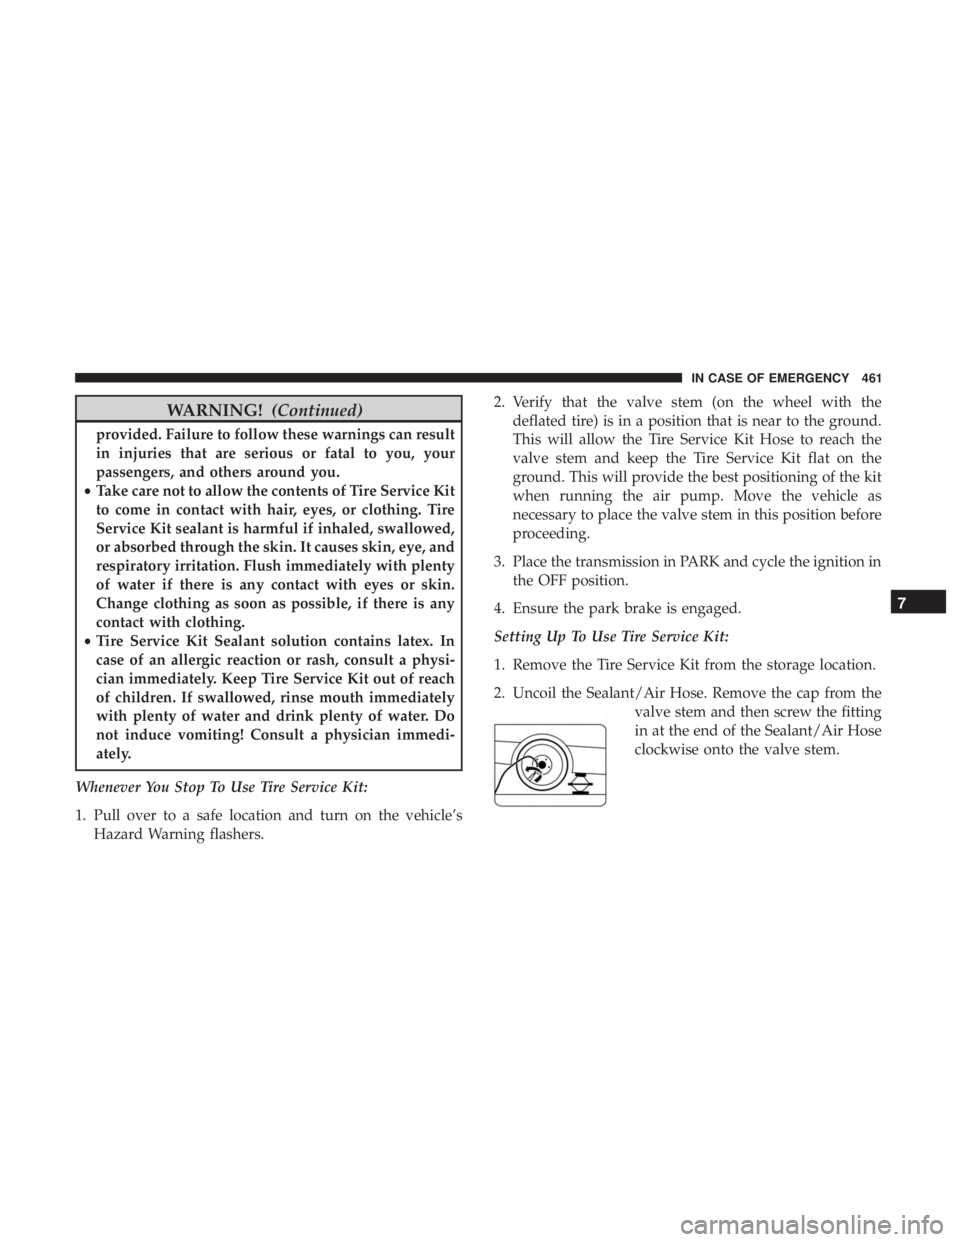
2. Uncoil the Sealant/Air Hose. Remove the cap from the valve stem and then screw the fitting
in at the end of the Sealant/Air Hose
clockwise onto the valve stem.
7
IN CASE OF EMERGENCY 461
Page 469 of 696
and make sure the Mode Select Knob is in the Air Mode
when inflating such items to avoid injecting sealant into
them.
• Do not lift or carry the Tire Service Kit by the hoses.
WARNING!
•Do not attempt to seal a tire on the side of the vehicle
closest to traffic. Pull far enough off the road to avoid
the danger of being hit when using the Tire Service
Kit.
• Do not use Tire Service Kit or drive the vehicle under
the following circumstances:
– If the puncture in the tire tread is approximately 1/4 inch (6 mm) or larger.
– If the tire has any sidewall damage.
– If the tire has any damage from driving with extremely low tire pressure.
–
If the tire has any damage from driving on a flat tire.
– If the wheel has any damage.
– If you are unsure of the condition of the tire or the wheel.
• Keep Tire Service Kit away from open flames or heat
source.
(Continued)
WARNING! (Continued)
•A loose Tire Service Kit thrown forward in a collision
or hard stop could endanger the occupants of the
vehicle. Always stow the Tire Service Kit in the place
provided. Failure to follow these warnings can result
in injuries that are serious or fatal to you, your
passengers, and others around you.
• Take care not to allow the contents of Tire Service Kit
to come in contact with hair, eyes, or clothing. Tire
Service Kit sealant is harmful if inhaled, swallowed,
or absorbed through the skin. It causes skin, eye, and
respiratory irritation. Flush immediately with plenty
of water if there is any contact with eyes or skin.
Change clothing as soon as possible, if there is any
contact with clothing.
•
Tire Service Kit Sealant solution contains latex. In case
of an allergic reaction or rash, consult a physician
immediately. Keep Tire Service Kit out of reach of
children. If swallowed, rinse mouth immediately with
plenty of water and drink plenty of water. Do not
induce vomiting! Consult a physician immediately.
7
IN CASE OF EMERGENCY 467
Page 493 of 696
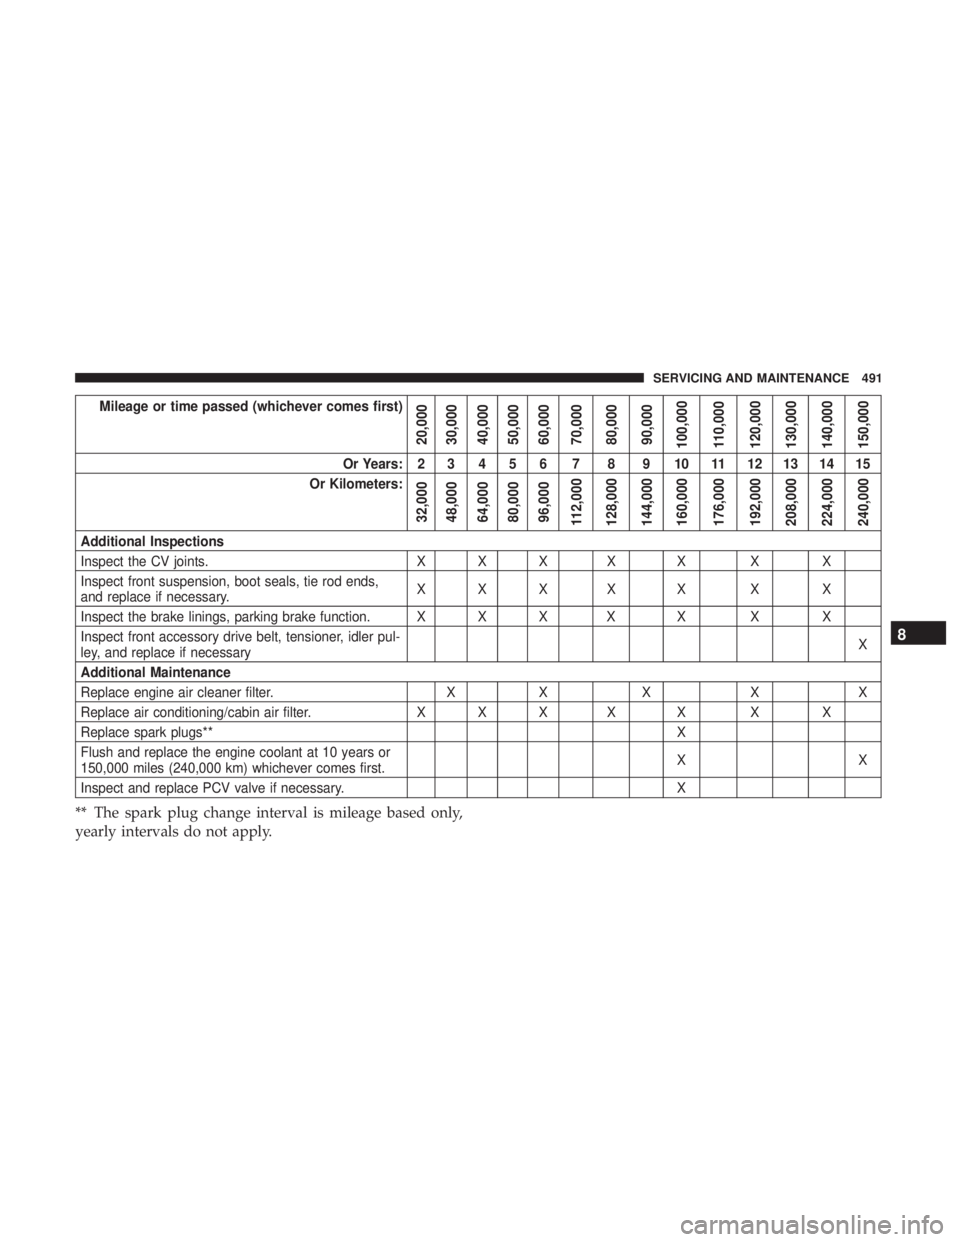
Mileage or time passed (whichever comes first)
20,000
30,000
40,000
50,000
60,000
70,000
80,000
90,000
100,000
110,000
120,000
130,000
140,000
150,000
Or Years: 2 3 4 5 6 7 8 9 10 11 12 13 14 15
Or Kilometers:
32,000
48,000
64,000
80,000
96,000
112,000
128,000
144,000
160,000
176,000
192,000
208,000
224,000
240,000
Additional Inspections
Inspect the CV joints. X X X X X X X
Inspect front suspension, boot seals, tie rod ends,
and replace if necessary. XXX X X X X
Inspect the brake linings, parking brake function. X X X X X X X
Inspect front accessory drive belt, tensioner, idler pul-
ley, and replace if necessary X
Additional Maintenance
Replace engine air cleaner filter. XX X XX
Replace air conditioning/cabin air filter. X X X X X X X
Replace spark plugs** X
Flush and replace the engine coolant at 10 years or
150,000 miles (240,000 km) whichever comes first. XX
Inspect and replace PCV valve if necessary. X
** The spark plug change interval is mileage based only,
yearly intervals do not apply.
8
SERVICING AND MAINTENANCE 491
Page 496 of 696
Checking Oil Level
To assure proper engine lubrication, the engine oil must be
maintained at the correct level. Check the oil level at
regular intervals, such as every fuel stop. The best time to
check the engine oil level is about five minutes after a fully
warmed engine is shut OFF.
Checking the oil while the vehicle is on level ground will
improve the accuracy of the oil level readings. Maintain the
oil level between the MIN and MAX markings on the
dipstick. Adding one quart or one liter of oil when the
reading is at the MIN mark will result in a MAX reading on
these engines.
CAUTION!
•Overfilling or underfilling will cause oil aeration, or
loss of oil pressure. This could damage your engine.
• Never use Non-Detergent Oil or Straight Mineral Oil
in the engine or damage may result.
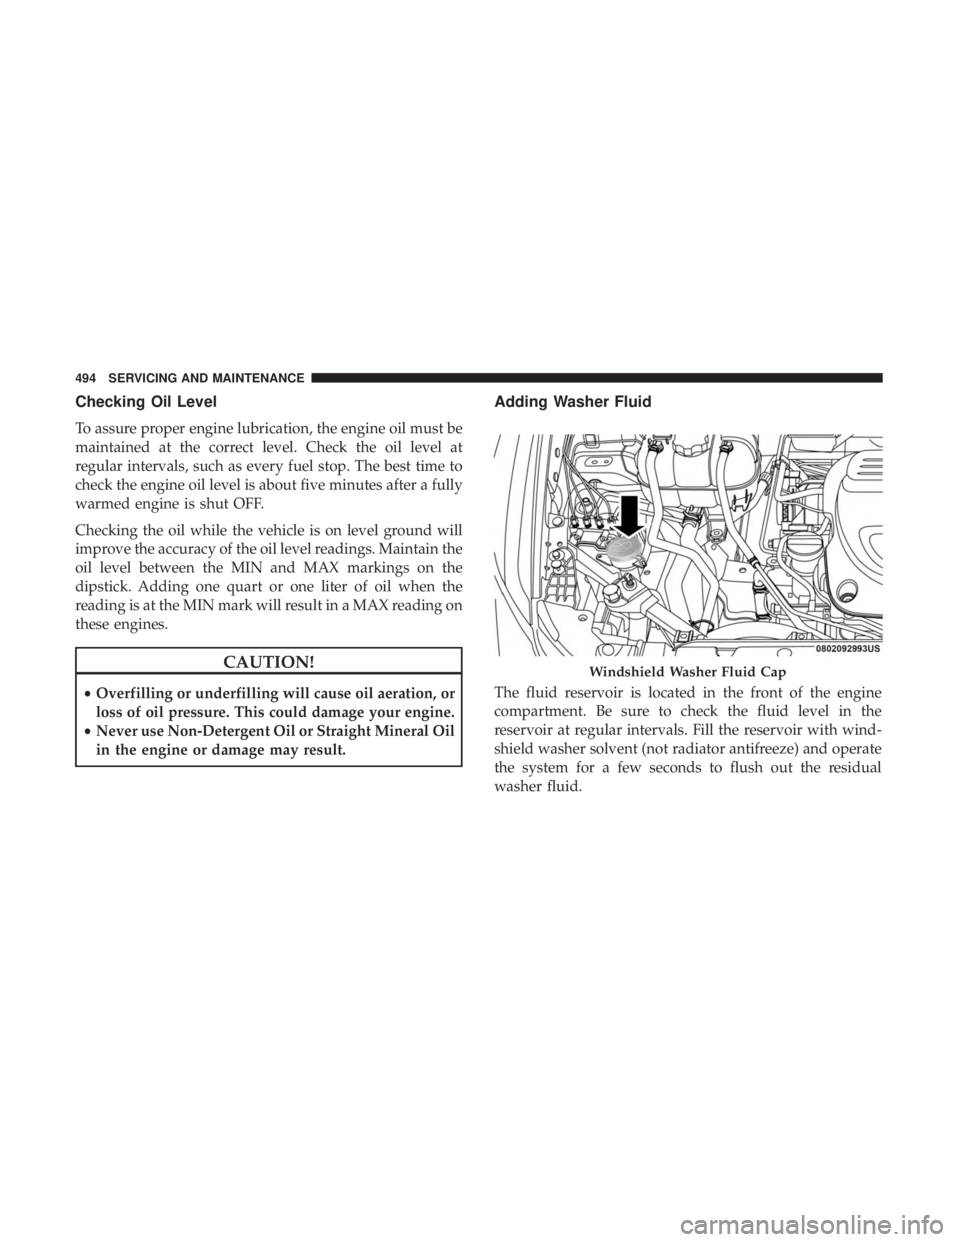
Adding Washer Fluid
The fluid reservoir is located in the front of the engine
compartment. Be sure to check the fluid level in the
reservoir at regular intervals. Fill the reservoir with wind-
shield washer solvent (not radiator antifreeze) and operate
the system for a few seconds to flush out the residual
washer fluid.
Windshield Washer Fluid Cap
494 SERVICING AND MAINTENANCE
Page 497 of 696
When refilling the washer fluid reservoir, take some
washer fluid, apply it to a cloth or towel, and wipe clean
the wiper blades; this will help blade performance.
To prevent freeze-up of your windshield washer system in
cold weather, select a solution or mixture that meets or
exceeds the temperature range of your climate. This rating
information can be found on most washer fluid containers.
WARNING!
Commercially available windshield washer solvents
are flammable. They could ignite and burn you. Care
must be exercised when filling or working around the
washer solution.
Maintenance-Free Battery
Your vehicle is equipped with a maintenance-free battery.
You will never have to add water, nor is periodic mainte-
nance required.
WARNING!
•Battery fluid is a corrosive acid solution and can
burn or even blind you. Do not allow battery fluid to
(Continued)
WARNING! (Continued)
contact your eyes, skin, or clothing. Do not lean over
a battery when attaching clamps. If acid splashes in
eyes or on skin, flush the area immediately with
large amounts of water. Refer to “Jump Starting
Procedure” in “In Case Of Emergency” for further
information.
• Battery gas is flammable and explosive. Keep flame
or sparks away from the battery. Do not use a booster
battery or any other booster source with an output
greater than 12 Volts. Do not allow cable clamps to
touch each other.
• Battery posts, terminals, and related accessories con-
tain lead and lead compounds. Wash hands after
handling.
CAUTION!
•It is essential when replacing the cables on the
battery that the positive cable is attached to the
positive post and the negative cable is attached to the
negative post. Battery posts are marked positive (+)
and negative (-) and are identified on the battery
(Continued)
8
SERVICING AND MAINTENANCE 495
Page 499 of 696
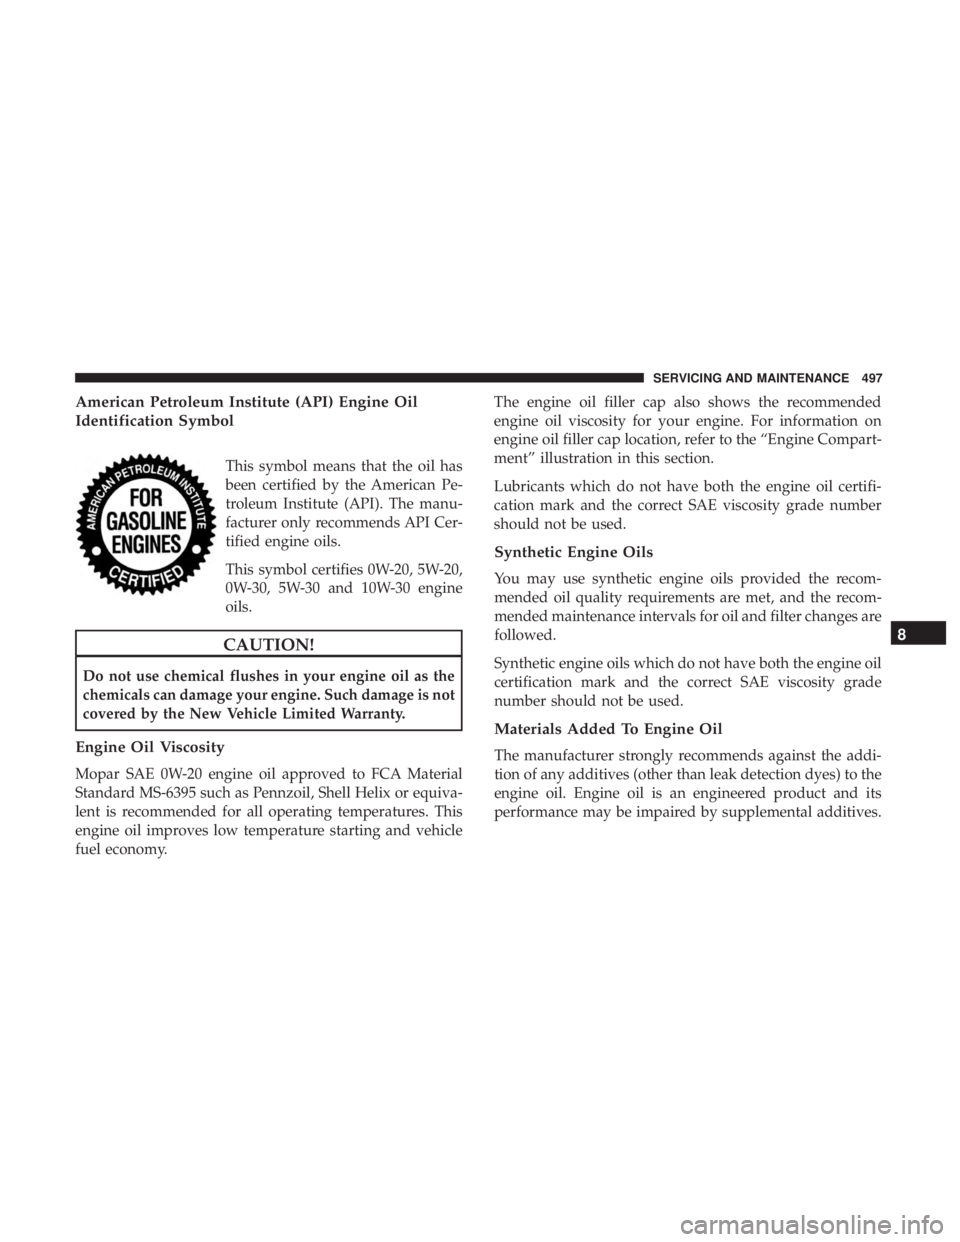
American Petroleum Institute (API) Engine Oil
Identification Symbol
This symbol means that the oil has
been certified by the American Pe-
troleum Institute (API). The manu-
facturer only recommends API Cer-
tified engine oils.
This symbol certifies 0W-20, 5W-20,
0W-30, 5W-30 and 10W-30 engine
oils.
CAUTION!
Do not use chemical flushes in your engine oil as the
chemicals can damage your engine. Such damage is not
covered by the New Vehicle Limited Warranty.
Engine Oil Viscosity
Mopar SAE 0W-20 engine oil approved to FCA Material
Standard MS-6395 such as Pennzoil, Shell Helix or equiva-
lent is recommended for all operating temperatures. This
engine oil improves low temperature starting and vehicle
fuel economy.The engine oil filler cap also shows the recommended
engine oil viscosity for your engine. For information on
engine oil filler cap location, refer to the “Engine Compart-
ment” illustration in this section.
Lubricants which do not have both the engine oil certifi-
cation mark and the correct SAE viscosity grade number
should not be used.
Synthetic Engine Oils
You may use synthetic engine oils provided the recom-
mended oil quality requirements are met, and the recom-
mended maintenance intervals for oil and filter changes are
followed.
Synthetic engine oils which do not have both the engine oil
certification mark and the correct SAE viscosity grade
number should not be used.
Materials Added To Engine Oil
The manufacturer strongly recommends against the addi-
tion of any additives (other than leak detection dyes) to the
engine oil. Engine oil is an engineered product and its
performance may be impaired by supplemental additives.
8
SERVICING AND MAINTENANCE 497
Page 502 of 696
•Noise (objectionable squeal, squeak, or rumble is heard
or felt while drive belt is in operation)
Some conditions can be caused by a faulty component such
as a belt pulley. Belt pulleys should be carefully inspected
for damage and proper alignment.
Belt replacement on some models requires the use of
special tools, we recommend having your vehicle serviced
at an authorized dealer.
Air Conditioner Maintenance
For best possible performance, your air conditioner should
be checked and serviced by an authorized dealer at the
start of each warm season. This service should include
cleaning of the condenser fins and a performance test.
Drive belt tension should also be checked at this time.
WARNING!
•Use only refrigerants and compressor lubricants ap-
proved by the manufacturer for your air conditioning
system. Some unapproved refrigerants are flammable
and can explode, injuring you. Other unapproved
(Continued)
WARNING! (Continued)
refrigerants or lubricants can cause the system to fail,
requiring costly repairs. Refer to Warranty Information
Book, located in your owner ’s information kit, for
further warranty information.
•The air conditioning system contains refrigerant un-
der high pressure. To avoid risk of personal injury or
damage to the system, adding refrigerant or any
repair requiring lines to be disconnected should be
done by an experienced technician.
CAUTION!
Do not use chemical flushes in your air conditioning
system as the chemicals can damage your air condition-
ing components. Such damage is not covered by the
New Vehicle Limited Warranty.
Refrigerant Recovery And Recycling — R–1234yf
R–1234yf Air Conditioning Refrigerant is a hydrofluo-
roolefin (HFO) that is endorsed by the Environmental
Protection Agency and is an ozone-friendly substance with
500 SERVICING AND MAINTENANCE
Page 508 of 696
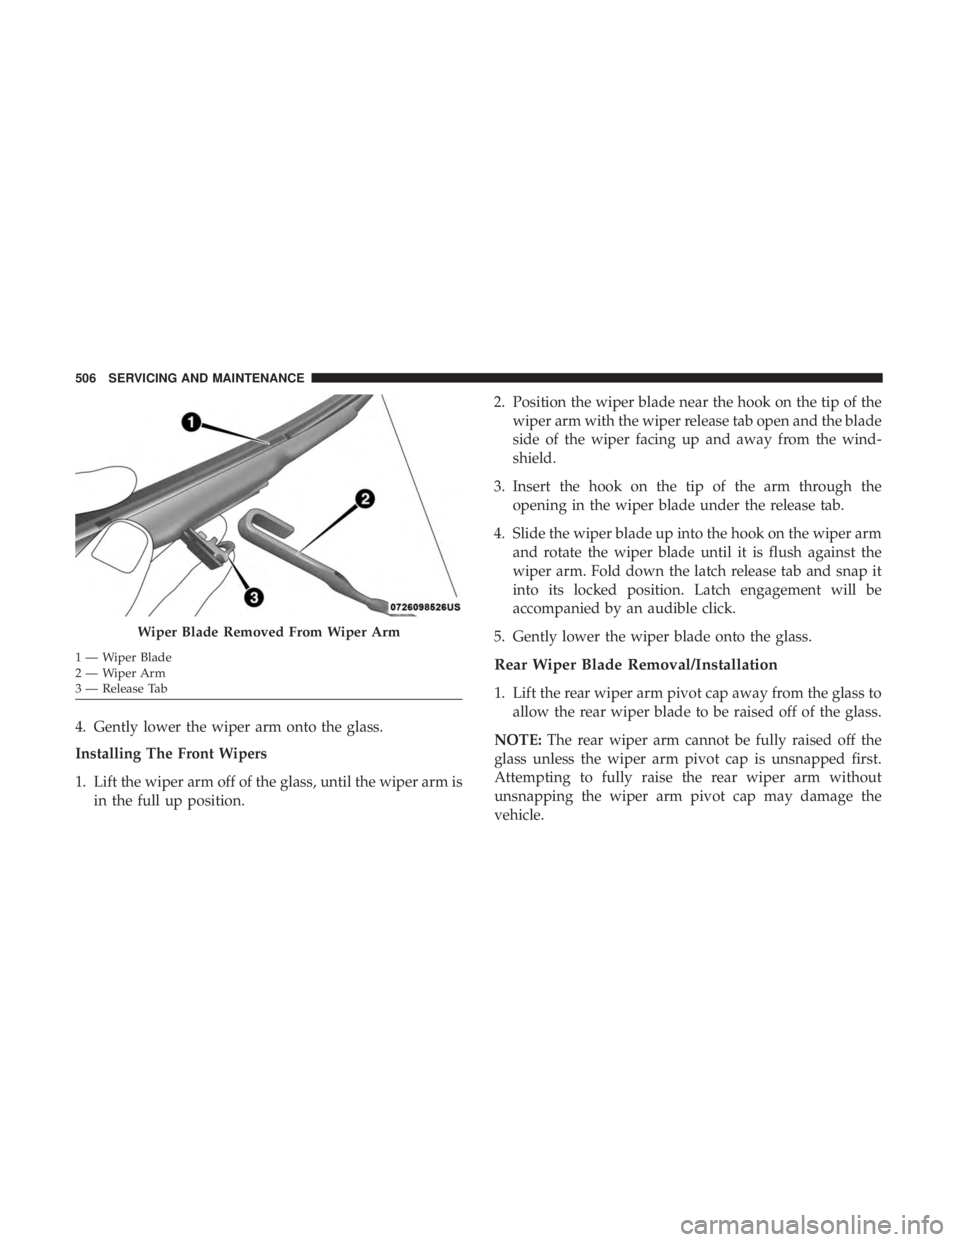
4. Gently lower the wiper arm onto the glass.
Installing The Front Wipers
1. Lift the wiper arm off of the glass, until the wiper arm isin the full up position. 2. Position the wiper blade near the hook on the tip of the
wiper arm with the wiper release tab open and the blade
side of the wiper facing up and away from the wind-
shield.
3. Insert the hook on the tip of the arm through the opening in the wiper blade under the release tab.
4. Slide the wiper blade up into the hook on the wiper arm and rotate the wiper blade until it is flush against the
wiper arm. Fold down the latch release tab and snap it
into its locked position. Latch engagement will be
accompanied by an audible click.
5. Gently lower the wiper blade onto the glass.
Rear Wiper Blade Removal/Installation
1. Lift the rear wiper arm pivot cap away from the glass to allow the rear wiper blade to be raised off of the glass.
NOTE: The rear wiper arm cannot be fully raised off the
glass unless the wiper arm pivot cap is unsnapped first.
Attempting to fully raise the rear wiper arm without
unsnapping the wiper arm pivot cap may damage the
vehicle.
Wiper Blade Removed From Wiper Arm
1—WiperBlade
2—WiperArm
3 — Release Tab 506 SERVICING AND MAINTENANCE
Page 510 of 696
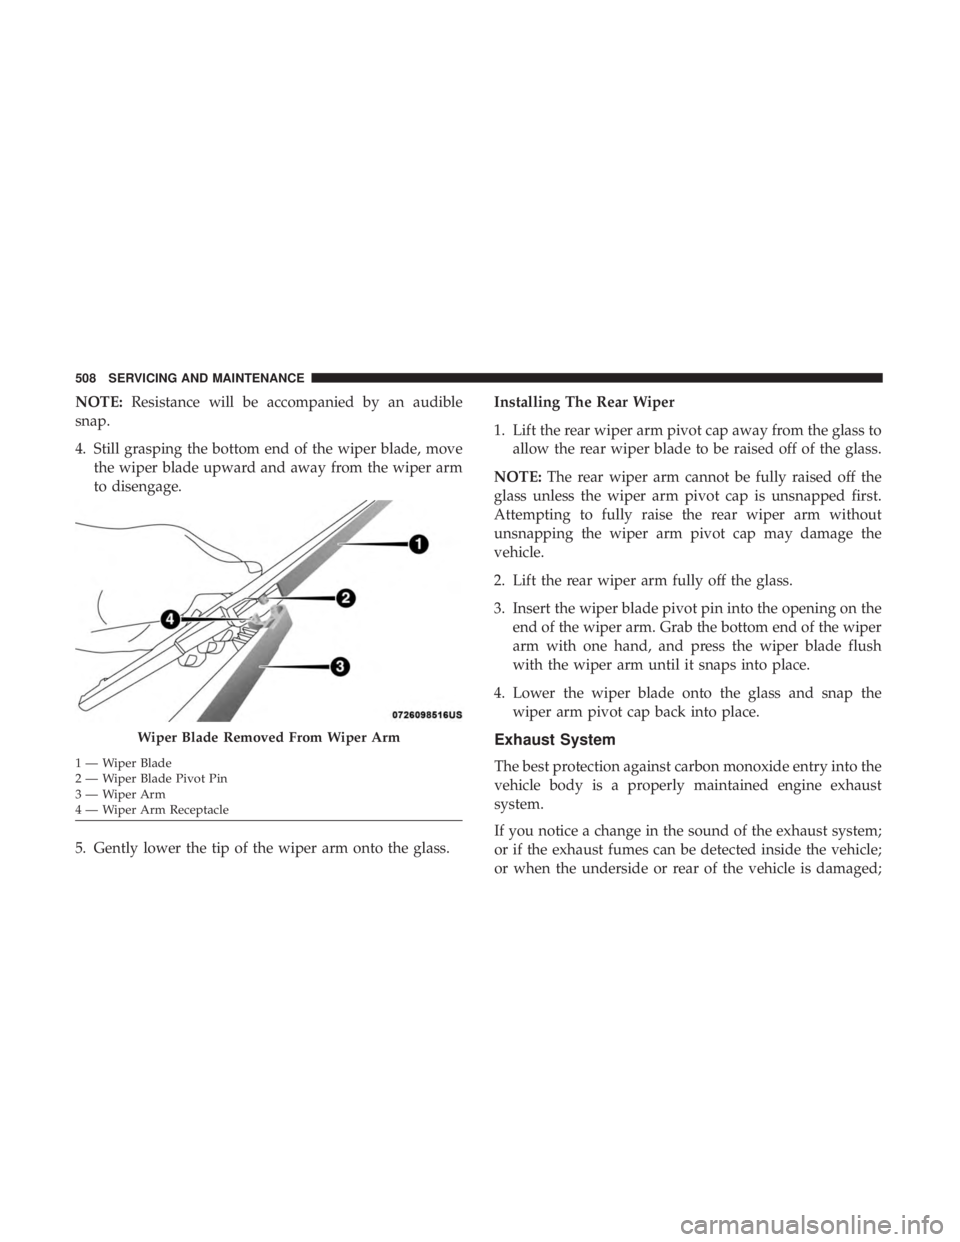
NOTE:Resistance will be accompanied by an audible
snap.
4. Still grasping the bottom end of the wiper blade, move the wiper blade upward and away from the wiper arm
to disengage.
5. Gently lower the tip of the wiper arm onto the glass. Installing The Rear Wiper
1. Lift the rear wiper arm pivot cap away from the glass to
allow the rear wiper blade to be raised off of the glass.
NOTE: The rear wiper arm cannot be fully raised off the
glass unless the wiper arm pivot cap is unsnapped first.
Attempting to fully raise the rear wiper arm without
unsnapping the wiper arm pivot cap may damage the
vehicle.
2. Lift the rear wiper arm fully off the glass.
3. Insert the wiper blade pivot pin into the opening on the end of the wiper arm. Grab the bottom end of the wiper
arm with one hand, and press the wiper blade flush
with the wiper arm until it snaps into place.
4. Lower the wiper blade onto the glass and snap the wiper arm pivot cap back into place.
Exhaust System
The best protection against carbon monoxide entry into the
vehicle body is a properly maintained engine exhaust
system.
If you notice a change in the sound of the exhaust system;
or if the exhaust fumes can be detected inside the vehicle;
or when the underside or rear of the vehicle is damaged;
Wiper Blade Removed From Wiper Arm
1—WiperBlade
2 — Wiper Blade Pivot Pin
3—WiperArm
4 — Wiper Arm Receptacle 508 SERVICING AND MAINTENANCE
Page 512 of 696
In unusual situations involving grossly malfunctioning
engine operation, a scorching odor may suggest severe and
abnormal catalyst overheating. If this occurs, stop the
vehicle, turn off the engine and allow it to cool. Service,
including a tune-up to manufacturer’s specifications,
should be obtained immediately.
To minimize the possibility of catalytic converter damage:
•Do not interrupt the ignition when the transmission is in
gear and the vehicle is in motion.
• Do not try to start the vehicle by pushing or towing the
vehicle.
• Do not idle the engine with any ignition components
disconnected or removed, such as when diagnostic
testing, or for prolonged periods during very rough idle
or malfunctioning operating conditions.
Cooling System
WARNING!
•You or others can be badly burned by hot engine
coolant (antifreeze) or steam from your radiator. If
you see or hear steam coming from under the hood,
(Continued)
WARNING! (Continued)
do not open the hood until the radiator has had time
to cool. Never open a cooling system pressure cap
when the radiator or coolant bottle is hot.
• Keep hands, tools, clothing, and jewelry away from
the radiator cooling fan when the hood is raised. The
fan starts automatically and may start at any time,
whether the engine is running or not.
• When working near the radiator cooling fan, discon-
nect the fan motor lead or turn the ignition to the
OFF mode. The fan is temperature controlled and can
start at any time the ignition is in the ON mode.
Engine Coolant Checks
Check the engine coolant (antifreeze) protection every 12
months (before the onset of freezing weather, where appli-
cable). If the engine coolant (antifreeze) is dirty, the system
should be drained, flushed, and refilled with fresh OAT
coolant (conforming to MS.90032) by an authorized dealer.
Check the front of the A/C condenser for any accumula-
tion of bugs, leaves, etc. If dirty, clean by gently spraying
water from a garden hose vertically down the face of the
condenser.
510 SERVICING AND MAINTENANCE