sport mode CHRYSLER PACIFICA 2019 Owners Manual
[x] Cancel search | Manufacturer: CHRYSLER, Model Year: 2019, Model line: PACIFICA, Model: CHRYSLER PACIFICA 2019Pages: 718, PDF Size: 8.6 MB
Page 232 of 718

BSM system sensors operate when the vehicle is in any
forward gear or REVERSE and enters stand-by mode when
the vehicle is in PARK.
The BSM detection zone covers approximately one lane
width on both sides of the vehicle 12 ft (3.8 m). The zone
length starts at the outside rear view mirror and extends
approximately 10 ft (3 m) beyond the rear bumper of the
vehicle. The BSM system monitors the detection zones on
both sides of the vehicle when the vehicle speed reaches
approximately 6 mph (10 km/h) or higher and will alert
the driver of vehicles in these areas.
NOTE:
•The BSM system DOES NOT alert the driver about
rapidly approaching vehicles that are outside the detec-
tion zones.
• The BSM system detection zone DOES NOT change if
your vehicle is towing a trailer. Therefore, visually verify
the adjacent lane is clear for both your vehicle and trailer
before making a lane change. If the trailer or other object
(i.e., bicycle, sports equipment) extends beyond the side
of your vehicle, this may result in false detections. The
BSM warning light may even remain illuminated the
entire time the vehicle is in a forward gear. •
The Blind Spot Monitoring (BSM) system may experi-
ence drop outs (blinking on and off) of the side mirror
Warning Indicator lamps when a motorcycle or any
small object remains at the side of the vehicle for
extended periods of time (more than a couple of sec-
onds).
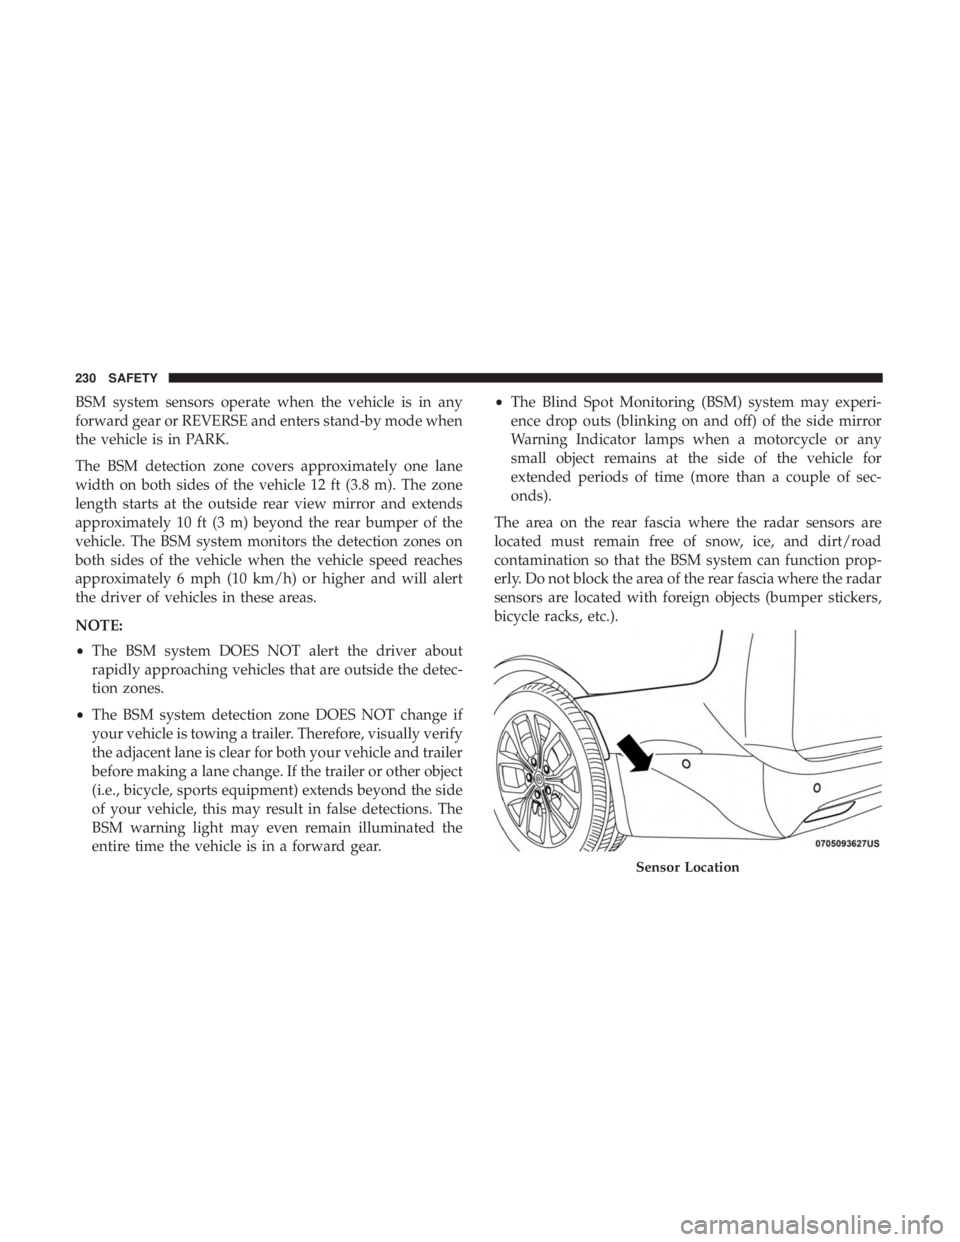
The area on the rear fascia where the radar sensors are
located must remain free of snow, ice, and dirt/road
contamination so that the BSM system can function prop-
erly. Do not block the area of the rear fascia where the radar
sensors are located with foreign objects (bumper stickers,
bicycle racks, etc.).
Sensor Location
230 SAFETY
Page 263 of 718

In Automatic Locking Mode, the shoulder belt is automati-
cally pre-locked. The seat belt will still retract to remove
any slack in the shoulder belt. Use the Automatic Locking
Mode anytime a child restraint is installed in a seating
position that has a seat belt with this feature. Children 12
years old and under should always be properly restrained
in the rear seat of a vehicle with a rear seat.
WARNING!
•Never place a rear-facing child restraint in front of an
air bag. A deploying passenger front air bag can
cause death or serious injury to a child 12 years or
younger, including a child in a rear-facing child
restraint.
• Never install a rear-facing child restraint in the front
seat of a vehicle. Only use a rear-facing child re-
straint in the rear seat. If the vehicle does not have a
rear seat, do not transport a rear-facing child restraint
in that vehicle.
How To Engage The Automatic Locking Mode
1. Buckle the combination lap and shoulder belt.
2. Grasp the shoulder portion and pull downward until the entire seat belt is extracted. 3. Allow the seat belt to retract. As the seat belt retracts,
you will hear a clicking sound. This indicates the seat
belt is now in the Automatic Locking Mode.
How To Disengage The Automatic Locking Mode
Unbuckle the combination lap/shoulder belt and allow it
to retract completely to disengage the Automatic Locking
Mode and activate the vehicle sensitive (emergency) lock-
ing mode.WARNING!
• The seat belt assembly must be replaced if the
switchable Automatic Locking Retractor (ALR) fea-
ture or any other seat belt function is not working
properly when checked according to the procedures
in the Service Manual.
• Failure to replace the seat belt assembly could in-
crease the risk of injury in collisions.
• Do not use the Automatic Locking Mode to restrain
occupants who are wearing the seat belt or children
who are using booster seats. The locked mode is only
used to install rear-facing or forward-facing child
restraints that have a harness for restraining the
child.
5
SAFETY 261
Page 489 of 718

•The Sealant Bottle is a one tire application use and needs
to be replaced after each use. Always replace these
components immediately at your original equipment
vehicle dealer.
• When the Tire Service Kit sealant is in a liquid form,
clean water, and a damp cloth will remove the material
from the vehicle or tire and wheel components. Once the
sealant dries, it can easily be peeled off and properly
discarded.
• For optimum performance, make sure the valve stem on
the wheel is free of debris before connecting the Tire
Service Kit.
• The Tire Service Kit Sealant is only intended to seal
punctures less than 1/4 inch (6 mm) diameter in the
tread/contact surface of your vehicle’s tires.
• The Tire Service Kit Sealant is not intended to seal
punctures on the tires’ side walls.
• You can use the Tire Service Kit air pump to inflate
bicycle tires. The kit also comes with two needles,
located in the Accessory Storage Compartment (on the
bottom of the air pump) for inflating sport balls, rafts, or
similar inflatable items. However, use only the Air Pump and make sure the Mode Select Knob is in the Air Mode
when inflating such items to avoid injecting sealant into
them.
• Do not lift or carry the Tire Service Kit by the hoses.
WARNING!
•Do not attempt to seal a tire on the side of the vehicle
closest to traffic. Pull far enough off the road to avoid
the danger of being hit when using the Tire Service
Kit.
• Do not use Tire Service Kit or drive the vehicle under
the following circumstances:
– If the puncture in the tire tread is approximately 1/4 inch (6 mm) or larger.
– If the tire has any sidewall damage.
– If the tire has any damage from driving with extremely low tire pressure.
– If the tire has any damage from driving on a flat tire.
– If the wheel has any damage.
– If you are unsure of the condition of the tire or the wheel.
(Continued)
7
IN CASE OF EMERGENCY 487
Page 507 of 718

CAUTION!
Recovery feature:
•Is to be used by a professional ONLY.
• Is used only to provide recovery of the vehicle.
• Is NOT to be used to recover secondary vehicle.
• Is NOT to be used for transporting the vehicle over
the road, i.e. “Flat Towing”.
Recovery load should:
• Be applied at constant speed.
• Be applied parallel to the center line of the length of
the vehicle.
• Not be an abrupt acceleration.
If you must use the accessories (wipers, defrosters, etc.)
while being towed, the ignition must be in the ON/RUN
mode, not the ACC mode.
NOTE: The Safehold feature will engage the Electric Park
Brake whenever the driver’s door is opened (if the ignition
is ON, transmission is not in PARK, and brake pedal is
released). If you are towing this vehicle with the ignition in
the ON/RUN mode, you must manually disable the Elec-
tric Park Brake each time the driver’s door is opened, by
pressing the brake pedal and then releasing the EPB. If the key fob is unavailable, or the vehicle’s battery is
discharged, refer to “Manual Park Release” in this section
for instructions on shifting the transmission out of PARK in
order to move the vehicle.
CAUTION!
•
Do not use sling-type equipment when towing.
Vehicle damage may occur.
• When securing the vehicle to a flatbed truck, do not
attach to front or rear suspension components. Dam-
age to your vehicle may result from improper towing.
• Ensure that the Electric Park Brake is released, and
remains released, while being towed.
ENHANCED ACCIDENT RESPONSE SYSTEM
(EARS)
This vehicle is equipped with an Enhanced Accident
Response System.
Please refer to “Occupant Restraint Systems” in “Safety”
for further information on the Enhanced Accident Re-
sponse System (EARS) function.
7
IN CASE OF EMERGENCY 505