remote start CHRYSLER PACIFICA 2020 User Guide
[x] Cancel search | Manufacturer: CHRYSLER, Model Year: 2020, Model line: PACIFICA, Model: CHRYSLER PACIFICA 2020Pages: 516, PDF Size: 28.69 MB
Page 56 of 516
54GETTING TO KNOW YOUR VEHICLE
NOTE:
Once a heat setting is selected, heat will be felt
within two to five minutes.
When the HI-level setting is selected, the heater
will provide a boosted heat level during the initial
stages of operation. Then, the heat output will
drop to the normal HI-level. The level of heat
selected will stay on until the operator changes it.
Ventilated Seats — If Equipped
Located in the first row seat cushions are small
fans that draw the air from the passenger
compartment and move air through fine
perforations in the seat cover to help keep the
driver and front passenger cooler in higher
ambient temperatures. The fans operate at two
speeds, HI and LO.
The front ventilated seats control buttons are
located within the climate or controls screen of
the touchscreen.
Press the ventilated seat button once to
choose HI.
Press the ventilated seat button a second
time to choose LO.
Press the ventilated seat button a third
time to turn the ventilated seat off.
NOTE:
The engine must be running for the ventilated
seats to operate.
Vehicles Equipped With Remote Start
On models that are equipped with remote start,
the ventilated seats can be programmed to
come on during a remote start.
This feature can be programmed through the
Uconnect system. Refer to “Uconnect Settings”
in “Multimedia” for further information.
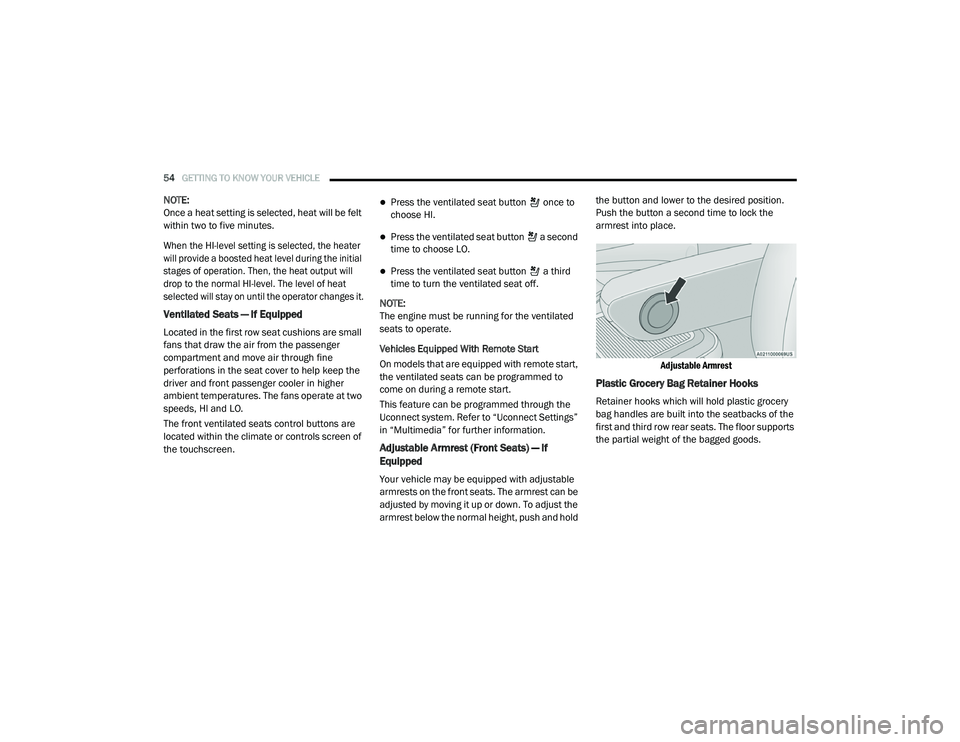
Adjustable Armrest (Front Seats) — If
Equipped
Your vehicle may be equipped with adjustable
armrests on the front seats. The armrest can be
adjusted by moving it up or down. To adjust the
armrest below the normal height, push and hold the button and lower to the desired position.
Push the button a second time to lock the
armrest into place.
Adjustable Armrest
Plastic Grocery Bag Retainer Hooks
Retainer hooks which will hold plastic grocery
bag handles are built into the seatbacks of the
first and third row rear seats. The floor supports
the partial weight of the bagged goods.
20_RU_OM_EN_US_t.book Page 54
Page 61 of 516
GETTING TO KNOW YOUR VEHICLE59
The heated steering wheel control button is
located within the Uconnect system. You can
gain access to the control button through the
climate screen or the controls screen.
Press the heated steering wheel button
once to turn the heating element on.
Press the heated steering wheel button a
second time to turn the heating element off.
NOTE:
The engine must be running for the heated
steering wheel to operate.
Vehicles Equipped With Remote Start
On models that are equipped with remote start,
the heated steering wheel can be programmed
to come on during a remote start through the
Uconnect system. Refer to “Uconnect Settings”
in “Multimedia” for further information.
MIRRORS
Inside Day/Night Mirror — If Equipped
A single ball joint mirror is used to allow the
driver to adjust up, down and left, right. Mirror
should be adjusted to center on the view
through the rear window.
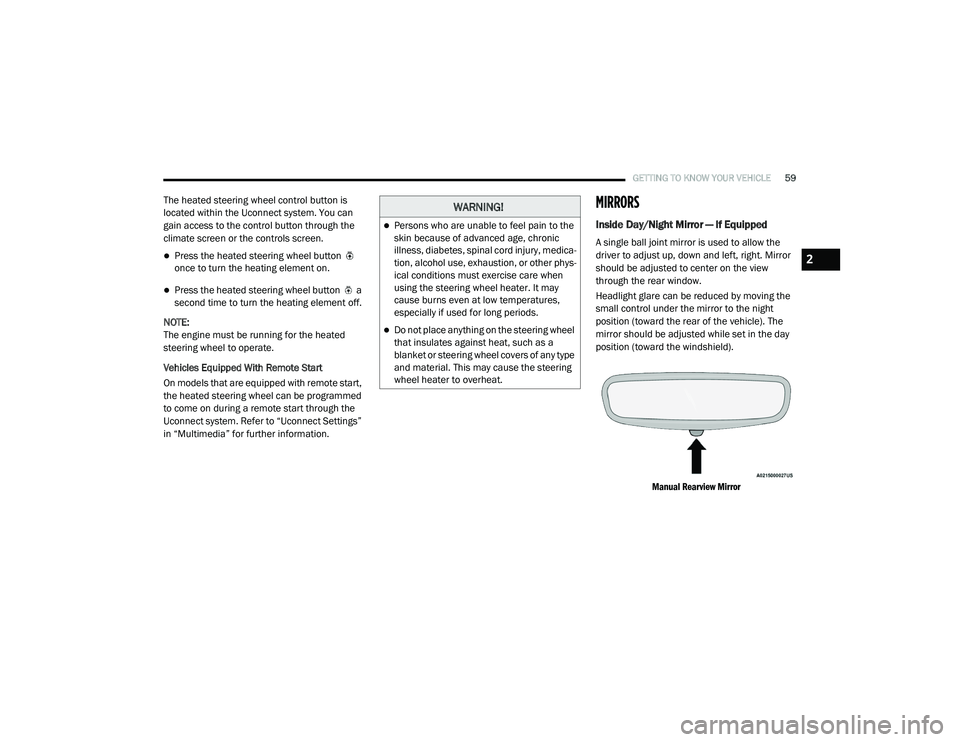
Headlight glare can be reduced by moving the
small control under the mirror to the night
position (toward the rear of the vehicle). The
mirror should be adjusted while set in the day
position (toward the windshield).
Manual Rearview Mirror
WARNING!
Persons who are unable to feel pain to the
skin because of advanced age, chronic
illness, diabetes, spinal cord injury, medica -
tion, alcohol use, exhaustion, or other phys -
ical conditions must exercise care when
using the steering wheel heater. It may
cause burns even at low temperatures,
especially if used for long periods.
Do not place anything on the steering wheel
that insulates against heat, such as a
blanket or steering wheel covers of any type
and material. This may cause the steering
wheel heater to overheat.
2
20_RU_OM_EN_US_t.book Page 59
Page 72 of 516
70GETTING TO KNOW YOUR VEHICLE
Neutral Wipe Inhibit — The Rain Sensing
feature will not operate when the ignition is
ON, when the transmission gear selector is in
the NEUTRAL position and the vehicle speed
is less than 3 mph (5 km/h), unless the wiper
control on the windshield wiper lever is
moved, the vehicle speed is greater than
3 mph (5 km/h) or the gear selector is moved
out of the NEUTRAL position.
Remote Start Mode Inhibit — On vehicles
equipped with Remote Starting system, Rain
Sensing wipers are not operational when the
vehicle is in the remote start mode. Once the
operator is in the vehicle and has placed the
ignition switch in the ON/RUN position, rain
sensing wiper operation can resume, if it has
been selected, and no other inhibit condi -
tions (mentioned previously) exist.
Rear Wiper And Washer
Rear Window Wiper Operation
Rotate the windshield wiper lever center ring
upwards to operate one of two modes for the
rear window wiper:
First detent — intermittent mode.
Second detent — continuous mode.
Rear Window Washer Operation
Pushing the windshield wiper lever forward
activates the rear window washer. If the lever is
pushed while on the intermittent setting, the
wipers will turn on and operate for several wipe
cycles after the lever is released, and then
resume the intermittent interval previously
selected. If the lever is pushed while the wipers
are in the off position, the wipers will operate
several wipe cycles, then turn off.
CLIMATE CONTROLS
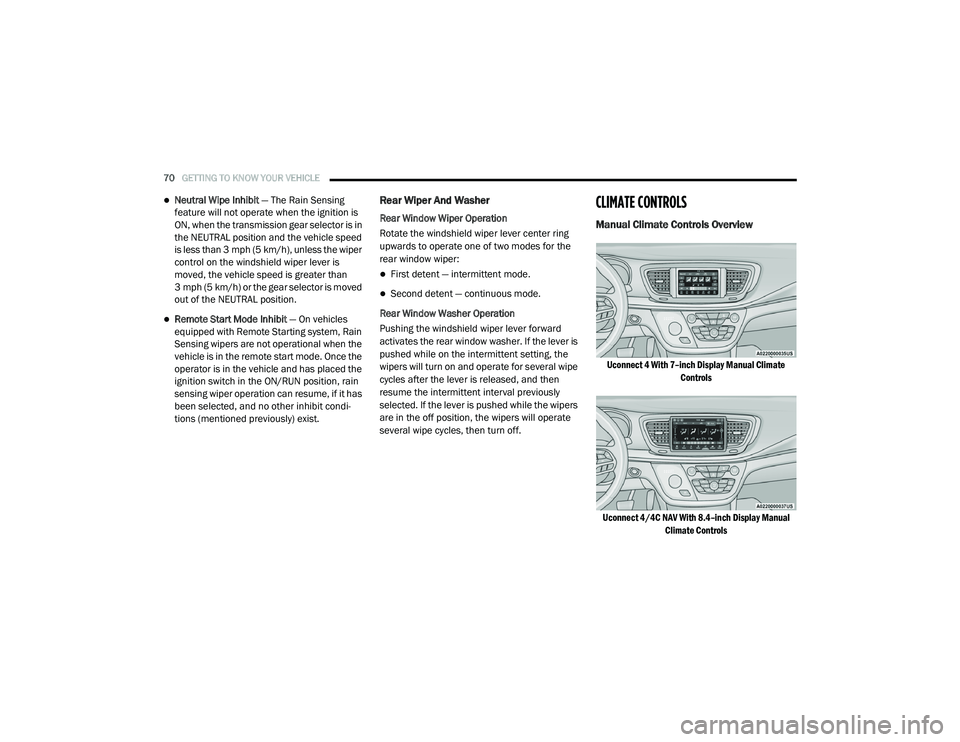
Manual Climate Controls Overview
Uconnect 4 With 7–inch Display Manual Climate Controls
Uconnect 4/4C NAV With 8.4–inch Display Manual Climate Controls
20_RU_OM_EN_US_t.book Page 70
Page 339 of 516
IN CASE OF EMERGENCY337
JUMP STARTING
If your vehicle has a discharged battery it can be
jump started using a set of jumper cables and a
battery in another vehicle or by using a portable
battery booster pack. Jump starting can be
dangerous if done improperly so please follow
the procedures in this section carefully.
NOTE:
When using a portable battery booster pack
follow the manufacturer’s operating instruc -
tions and precautions.
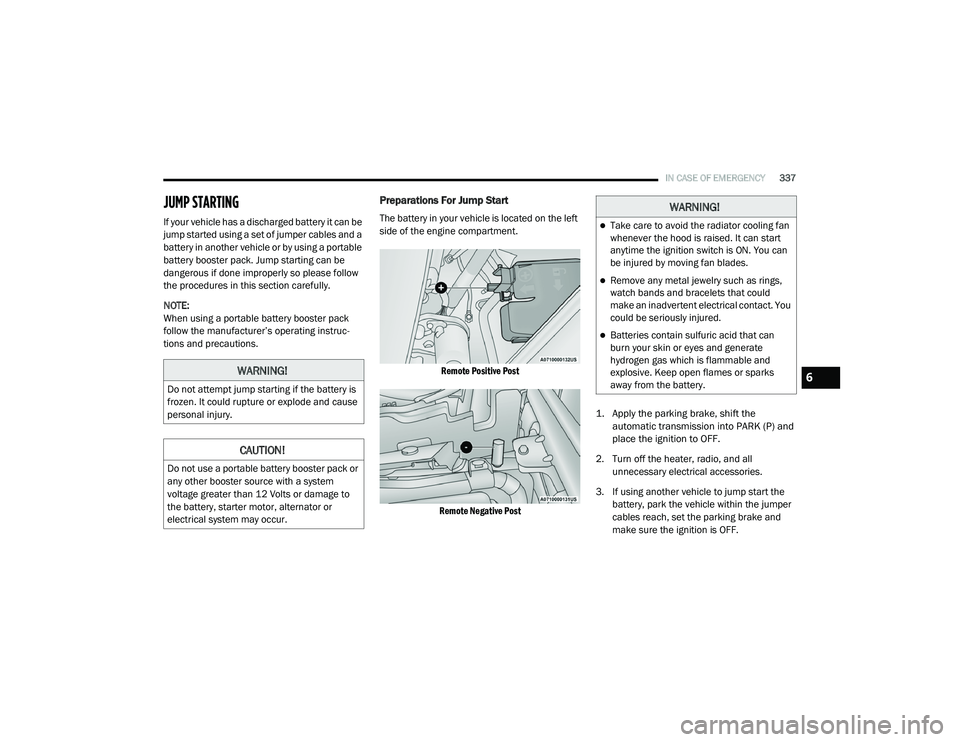
Preparations For Jump Start
The battery in your vehicle is located on the left
side of the engine compartment.
Remote Positive Post
Remote Negative Post
1. Apply the parking brake, shift the
automatic transmission into PARK (P) and
place the ignition to OFF.
2. Turn off the heater, radio, and all unnecessary electrical accessories.
3. If using another vehicle to jump start the battery, park the vehicle within the jumper
cables reach, set the parking brake and
make sure the ignition is OFF.
WARNING!
Do not attempt jump starting if the battery is
frozen. It could rupture or explode and cause
personal injury.
CAUTION!
Do not use a portable battery booster pack or
any other booster source with a system
voltage greater than 12 Volts or damage to
the battery, starter motor, alternator or
electrical system may occur.
WARNING!
Take care to avoid the radiator cooling fan
whenever the hood is raised. It can start
anytime the ignition switch is ON. You can
be injured by moving fan blades.
Remove any metal jewelry such as rings,
watch bands and bracelets that could
make an inadvertent electrical contact. You
could be seriously injured.
Batteries contain sulfuric acid that can
burn your skin or eyes and generate
hydrogen gas which is flammable and
explosive. Keep open flames or sparks
away from the battery.
6
20_RU_OM_EN_US_t.book Page 337
Page 340 of 516
338IN CASE OF EMERGENCY
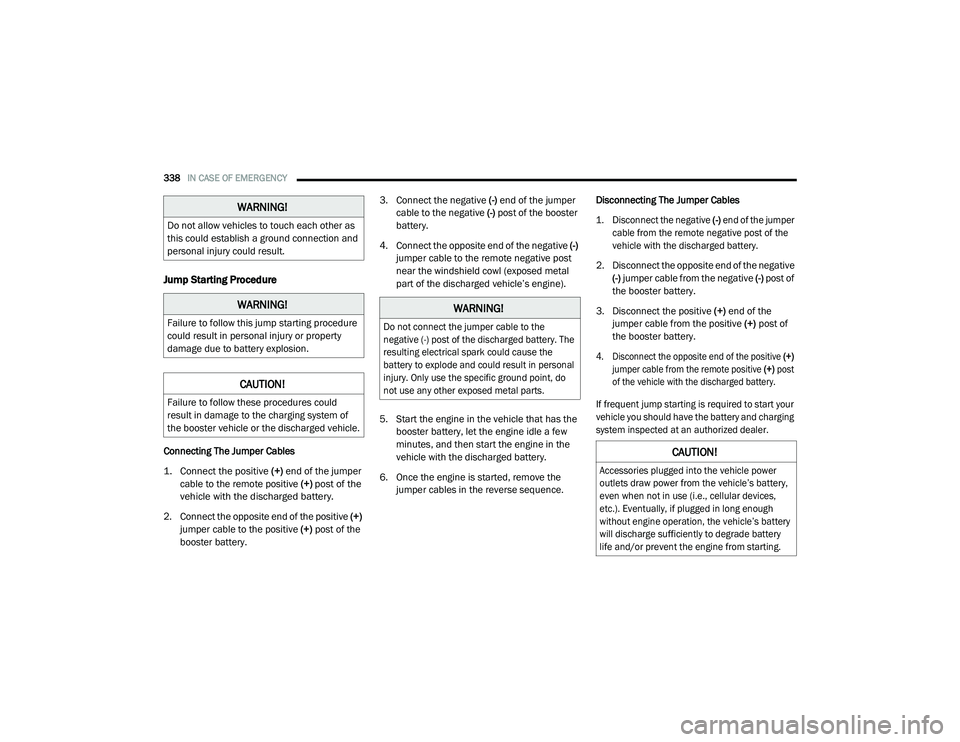
Jump Starting Procedure
Connecting The Jumper Cables
1. Connect the positive
(+) end of the jumper
cable to the remote positive (+)
post of the
vehicle with the discharged battery.
2. Connect the opposite end of the positive (+)
jumper cable to the positive (+) post of the
booster battery. 3. Connect the negative
(-) end of the jumper
cable to the negative (-) post of the booster
battery.
4. Connect the opposite end of the negative (-)
jumper cable to the remote negative post
near the windshield cowl (exposed metal
part of the discharged vehicle’s engine).
5. Start the engine in the vehicle that has the booster battery, let the engine idle a few
minutes, and then start the engine in the
vehicle with the discharged battery.
6. Once the engine is started, remove the jumper cables in the reverse sequence. Disconnecting The Jumper Cables
1. Disconnect the negative
(-)
end of the jumper
cable from the remote negative post of the
vehicle with the discharged battery.
2. Disconnect the opposite end of the negative (-) jumper cable from the negative (-) post of
the booster battery.
3. Disconnect the positive (+) end of the
jumper cable from the positive (+) post of
the booster battery.
4. Disconnect the opposite end of the positive (+)
jumper cable from the remote positive (+) post
of the vehicle with the discharged battery.
If frequent jump starting is required to start your
vehicle you should have the battery and charging
system inspected at an authorized dealer.
WARNING!
Do not allow vehicles to touch each other as
this could establish a ground connection and
personal injury could result.
WARNING!
Failure to follow this jump starting procedure
could result in personal injury or property
damage due to battery explosion.
CAUTION!
Failure to follow these procedures could
result in damage to the charging system of
the booster vehicle or the discharged vehicle.
WARNING!
Do not connect the jumper cable to the
negative (-) post of the discharged battery. The
resulting electrical spark could cause the
battery to explode and could result in personal
injury. Only use the specific ground point, do
not use any other exposed metal parts.
CAUTION!
Accessories plugged into the vehicle power
outlets draw power from the vehicle’s battery,
even when not in use (i.e., cellular devices,
etc.). Eventually, if plugged in long enough
without engine operation, the vehicle’s battery
will discharge sufficiently to degrade battery
life and/or prevent the engine from starting.
20_RU_OM_EN_US_t.book Page 338
Page 410 of 516
408MULTIMEDIA
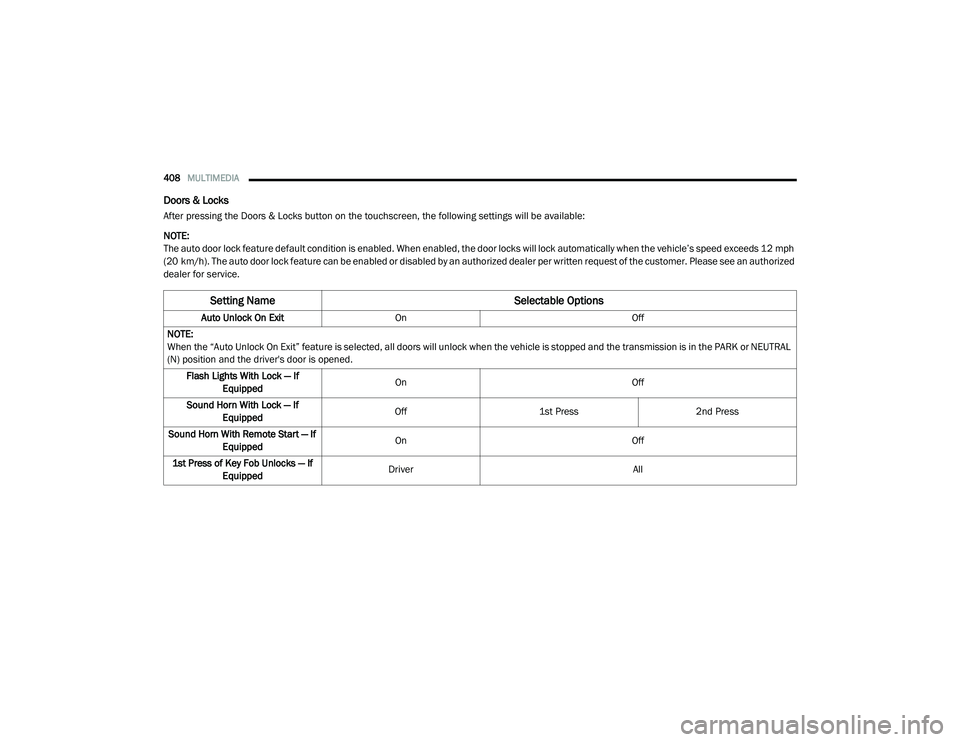
Doors & Locks
After pressing the Doors & Locks button on the touchscreen, the following settings will be available:
NOTE:
The auto door lock feature default condition is enabled. When enabled, the door locks will lock automatically when the vehicle’s speed exceeds 12 mph
(20 km/h). The auto door lock feature can be enabled or disabled by an authorized dealer per written request of the customer. Please see an authorized
dealer for service.
Setting Name Selectable Options
Auto Unlock On ExitOn Off
NOTE:
When the “Auto Unlock On Exit” feature is selected, all doors will unlock when the vehicle is stopped and the transmission is in the PARK or NEUTRAL
(N) position and the driver's door is opened. Flash Lights With Lock — If Equipped On
Off
Sound Horn With Lock — If Equipped Off
1st Press 2nd Press
Sound Horn With Remote Start — If Equipped On
Off
1st Press of Key Fob Unlocks — If Equipped Driver
All
20_RU_OM_EN_US_t.book Page 408
Page 412 of 516
410MULTIMEDIA
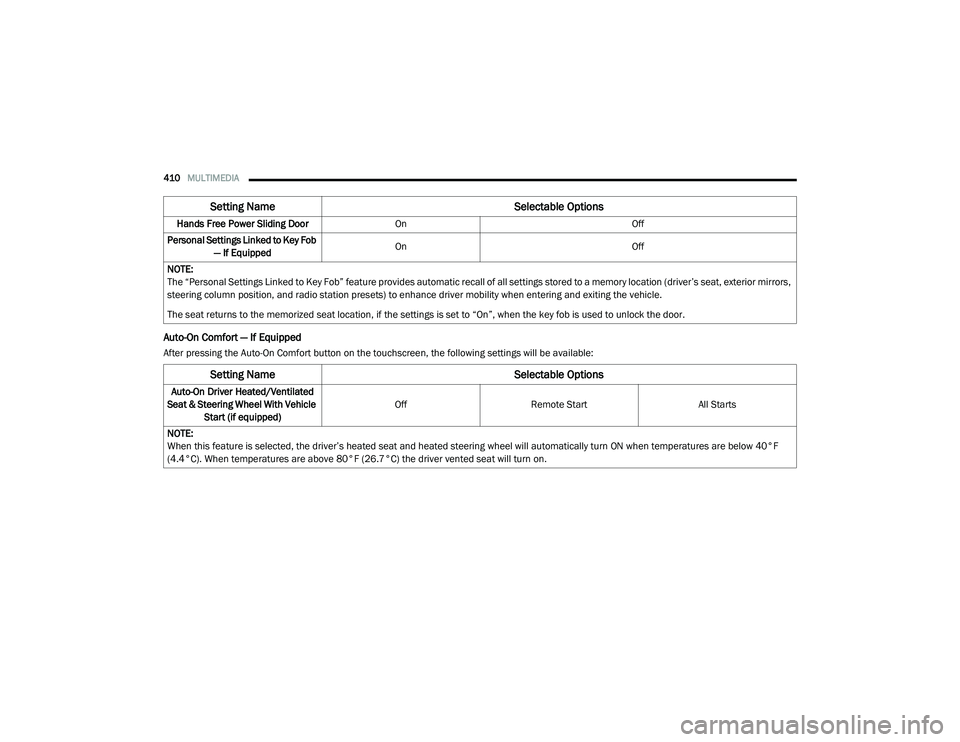
Auto-On Comfort — If Equipped
After pressing the Auto-On Comfort button on the touchscreen, the following settings will be available:Hands Free Power Sliding Door
On Off
Personal Settings Linked to Key Fob — If Equipped On
Off
NOTE:
The “Personal Settings Linked to Key Fob” feature provides automatic recall of all settings stored to a memory location (driver’s seat, exterior mirrors,
steering column position, and radio station presets) to enhance driver mobility when entering and exiting the vehicle.
The seat returns to the memorized seat location, if the settings is set to “On”, when the key fob is used to unlock the door.
Setting Name Selectable Options
Setting NameSelectable Options
Auto-On Driver Heated/Ventilated
Seat & Steering Wheel With Vehicle Start (if equipped) Off
Remote Start All Starts
NOTE:
When this feature is selected, the driver’s heated seat and heated steering wheel will automatically turn ON when temperatures are below 40°F
(4.4°C). When temperatures are above 80°F (26.7°C) the driver vented seat will turn on.
20_RU_OM_EN_US_t.book Page 410
Page 431 of 516
MULTIMEDIA429
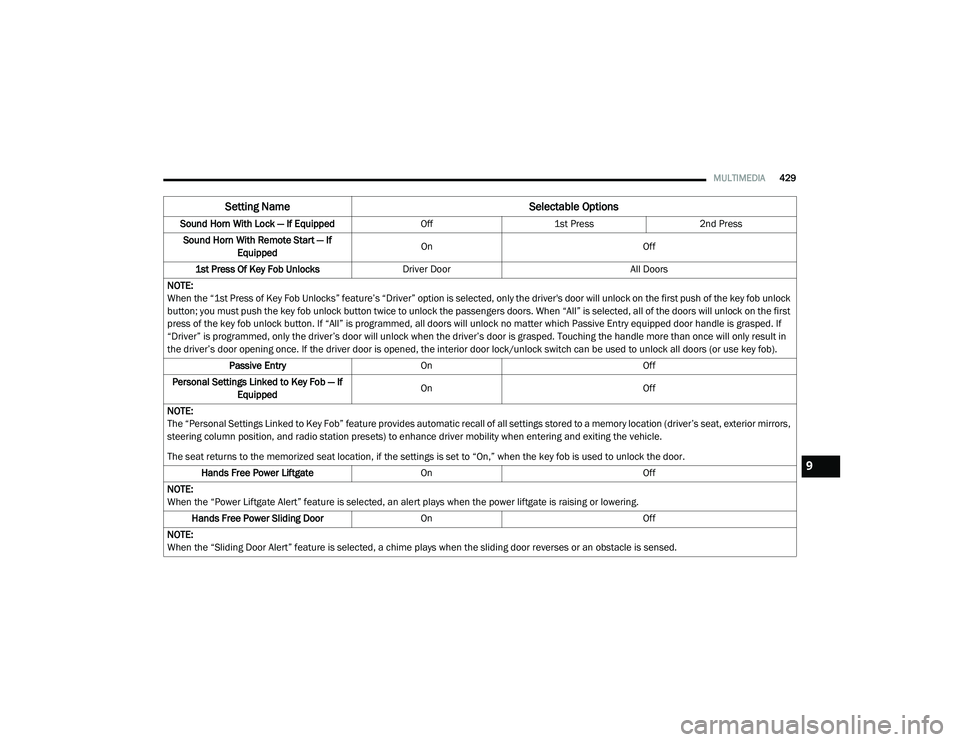
Sound Horn With Lock — If Equipped Off1st Press 2nd Press
Sound Horn With Remote Start — If Equipped On
Off
1st Press Of Key Fob Unlocks Driver Door All Doors
NOTE:
When the “1st Press of Key Fob Unlocks” feature’s “Driver” option is selected, only the driver's door will unlock on the first push of the key fob unlock
button; you must push the key fob unlock button twice to unlock the passengers doors. When “All” is selected, all of the doors will unlock on the first
press of the key fob unlock button. If “All” is programmed, all doors will unlock no matter which Passive Entry equipped door handle is grasped. If
“Driver” is programmed, only the driver’s door will unlock when the driver’s door is grasped. Touching the handle more than once will only result in
the driver’s door opening once. If the driver door is opened, the interior door lock/unlock switch can be used to unlock all doors (or use key fob). Passive Entry On Off
Personal Settings Linked to Key Fob — If Equipped On
Off
NOTE:
The “Personal Settings Linked to Key Fob” feature provides automatic recall of all settings stored to a memory location (driver’s seat, exterior mirrors,
steering column position, and radio station presets) to enhance driver mobility when entering and exiting the vehicle.
The seat returns to the memorized seat location, if the settings is set to “On,” when the key fob is used to unlock the door. Hands Free Power Liftgate On Off
NOTE:
When the “Power Liftgate Alert” feature is selected, an alert plays when the power liftgate is raising or lowering. Hands Free Power Sliding Door OnOff
NOTE:
When the “Sliding Door Alert” feature is selected, a chime plays when the sliding door reverses or an obstacle is sensed.
Setting Name Selectable Options
9
20_RU_OM_EN_US_t.book Page 429
Page 432 of 516
430MULTIMEDIA
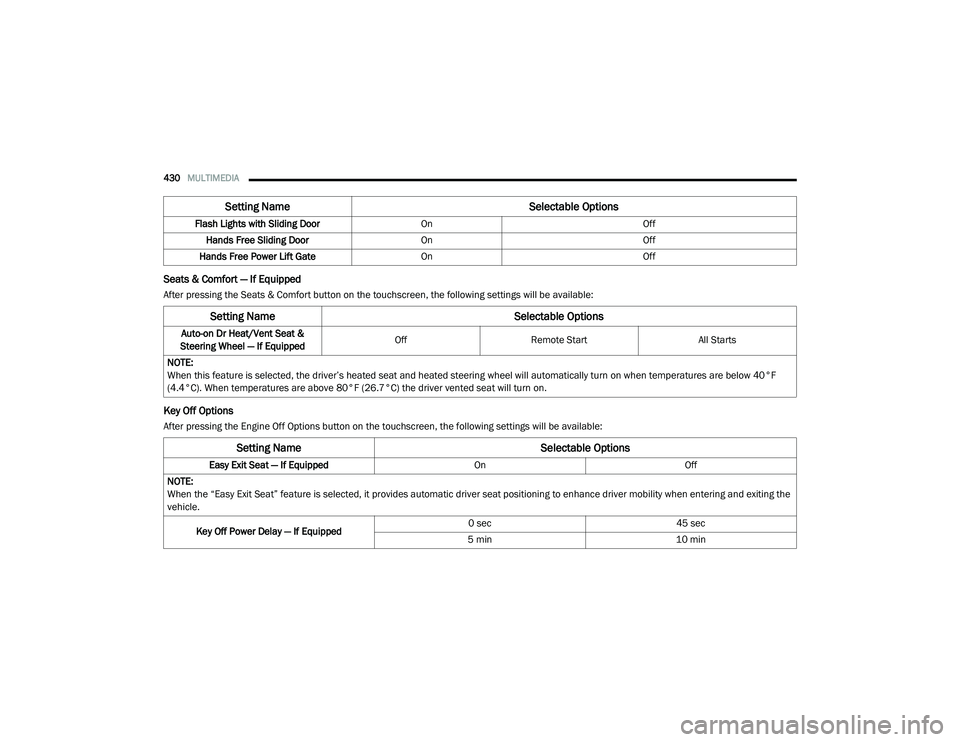
Seats & Comfort — If Equipped
After pressing the Seats & Comfort button on the touchscreen, the following settings will be available:
Key Off Options
After pressing the Engine Off Options button on the touchscreen, the following settings will be available:Flash Lights with Sliding Door
OnOff
Hands Free Sliding Door On Off
Hands Free Power Lift Gate On Off
Setting Name Selectable Options
Setting NameSelectable Options
Auto-on Dr Heat/Vent Seat &
Steering Wheel — If Equipped Off
Remote Start All Starts
NOTE:
When this feature is selected, the driver’s heated seat and heated steering wheel will automatically turn on when temperatures are below 40°F
(4.4°C). When temperatures are above 80°F (26.7°C) the driver vented seat will turn on.
Setting Name Selectable Options
Easy Exit Seat — If EquippedOnOff
NOTE:
When the “Easy Exit Seat” feature is selected, it provides automatic driver seat positioning to enhance driver mobility when entering and exiting the
vehicle.
Key Off Power Delay — If Equipped 0 sec
45 sec
5 min 10 min
20_RU_OM_EN_US_t.book Page 430
Page 471 of 516
MULTIMEDIA469
UCONNECT THEATER — IF EQUIPPED
Uconnect Theater Overview
Your Uconnect Theater is designed to give your
family years of enjoyment.
There are multiple ways to interact with your
Uconnect Theater system;
Play your favorite CDs, DVDs, or Blu-ray™
Discs
Plug and play a variety of standard video
games or devices into the HDMI port
Listen to audio over the wireless headphones
Plug and play a variety of devices into the
Video USB port
Plug in standard headphones to listen to
audio
Project your mobile phone or tablet screen
onto the rear Uconnect Theater touchscreens
Please review this Owner's Manual to become
familiar with its features and operation.
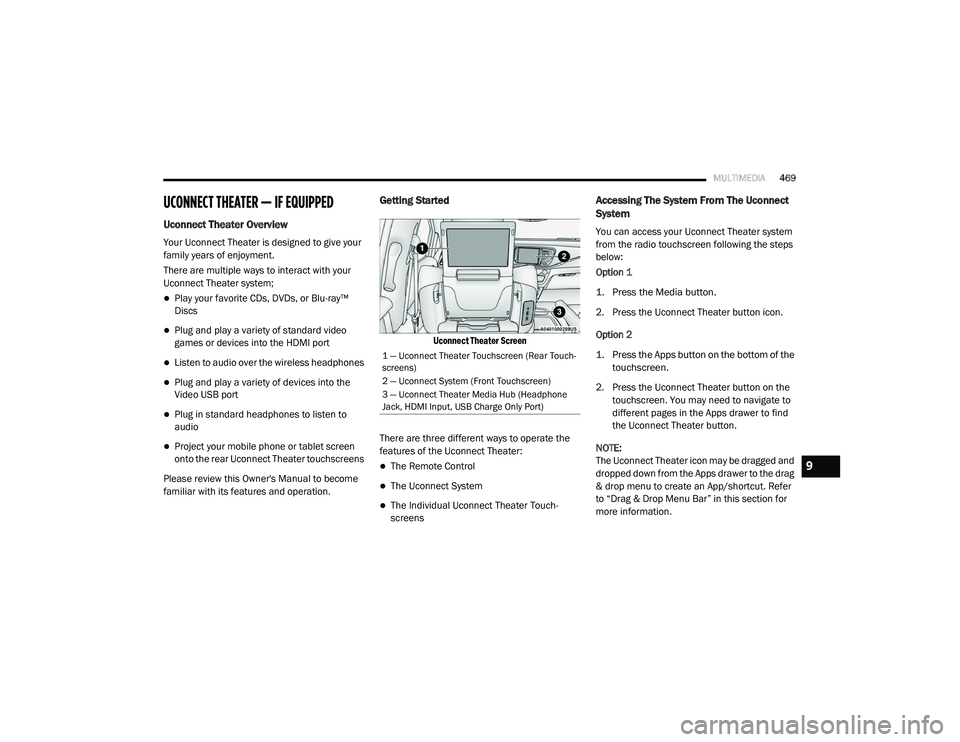
Getting Started
Uconnect Theater Screen
There are three different ways to operate the
features of the Uconnect Theater:
The Remote Control
The Uconnect System
The Individual Uconnect Theater Touch -
screens
Accessing The System From The Uconnect
System
You can access your Uconnect Theater system
from the radio touchscreen following the steps
below:
Option 1
1. Press the Media button.
2. Press the Uconnect Theater button icon.
Option 2
1. Press the Apps button on the bottom of the
touchscreen.
2. Press the Uconnect Theater button on the touchscreen. You may need to navigate to
different pages in the Apps drawer to find
the Uconnect Theater button.
NOTE:
The Uconnect Theater icon may be dragged and
dropped down from the Apps drawer to the drag
& drop menu to create an App/shortcut. Refer
to “Drag & Drop Menu Bar” in this section for
more information.
1 — Uconnect Theater Touchscreen (Rear Touch -
screens)
2 — Uconnect System (Front Touchscreen)
3 — Uconnect Theater Media Hub (Headphone
Jack, HDMI Input, USB Charge Only Port)
9
20_RU_OM_EN_US_t.book Page 469