second row seats CHRYSLER PACIFICA 2022 User Guide
[x] Cancel search | Manufacturer: CHRYSLER, Model Year: 2022, Model line: PACIFICA, Model: CHRYSLER PACIFICA 2022Pages: 384, PDF Size: 23.92 MB
Page 53 of 384
GETTING TO KNOW YOUR VEHICLE51
4. The third row power seat system includes obstacle detection. When the system detects
an obstacle, the motors will stop and reverse
direction. Should this occur, remove the
obstacle before pushing the button again.
HEATED SEATS
Front Heated Seats — If Equipped
The front heated seats control buttons
are located in the touchscreen.
You can choose from HI, LO or off heat settings.
The indicator lights in each switch indicate the
level of heat in use. Two indicator lights will
illuminate for HI, one for LO and none for off.
Press the heated seat button once to turn the
HI setting on.
Press the heated seat button a second time to
turn the LO setting on.
Press the heated seat button a third time to turn
the heating elements off.
The level of heat selected will stay on until the
operator changes it.
NOTE:
Once a heat setting is selected, heat will be felt
within two to five minutes.
The engine must be running for the heated
seats to operate. For information on use with the Remote Start
system, see Ú
page 21.
Rear Heated Seats — If Equipped
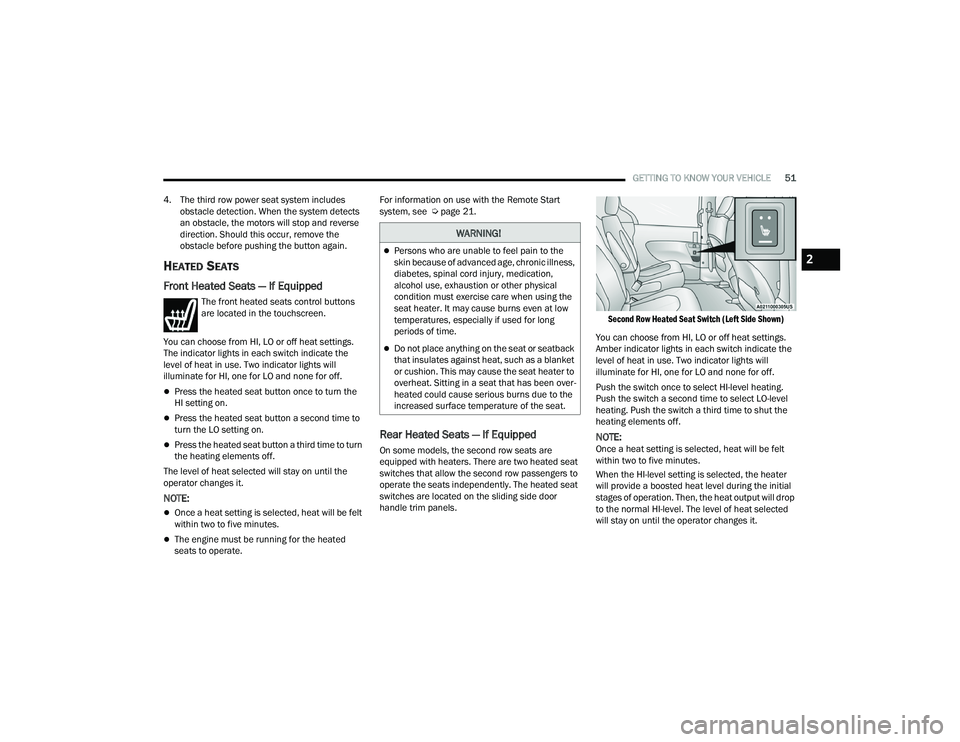
On some models, the second row seats are
equipped with heaters. There are two heated seat
switches that allow the second row passengers to
operate the seats independently. The heated seat
switches are located on the sliding side door
handle trim panels.
Second Row Heated Seat Switch (Left Side Shown)
You can choose from HI, LO or off heat settings.
Amber indicator lights in each switch indicate the
level of heat in use. Two indicator lights will
illuminate for HI, one for LO and none for off.
Push the switch once to select HI-level heating.
Push the switch a second time to select LO-level
heating. Push the switch a third time to shut the
heating elements off.
NOTE:Once a heat setting is selected, heat will be felt
within two to five minutes.
When the HI-level setting is selected, the heater
will provide a boosted heat level during the initial
stages of operation. Then, the heat output will drop
to the normal HI-level. The level of heat selected
will stay on until the operator changes it.
WARNING!
Persons who are unable to feel pain to the
skin because of advanced age, chronic illness,
diabetes, spinal cord injury, medication,
alcohol use, exhaustion or other physical
condition must exercise care when using the
seat heater. It may cause burns even at low
temperatures, especially if used for long
periods of time.
Do not place anything on the seat or seatback
that insulates against heat, such as a blanket
or cushion. This may cause the seat heater to
overheat. Sitting in a seat that has been over -
heated could cause serious burns due to the
increased surface temperature of the seat.
2
22_RUP_OM_EN_USC_t.book Page 51
Page 54 of 384
52GETTING TO KNOW YOUR VEHICLE
VENTILATED SEATS — IF EQUIPPED
Located in the first row seat cushions are
small fans that draw the air from the
passenger compartment and move air
through fine perforations in the seat
cover to help keep the driver and front passenger
cooler in higher ambient temperatures.
The fans operate at two speeds, HI and LO.
The front ventilated seats control buttons are
located in the touchscreen.
Press the ventilated seat button once to
choose HI.
Press the ventilated seat button a second time
to choose LO.
Press the ventilated seat button a third time to
turn the ventilated seat off.
NOTE:The engine must be running for the ventilated
seats to operate.
For information on use with the Remote Start
system, see Ú page 21.
ADJUSTABLE ARMREST
(F
RONT SEATS) — IF EQUIPPED
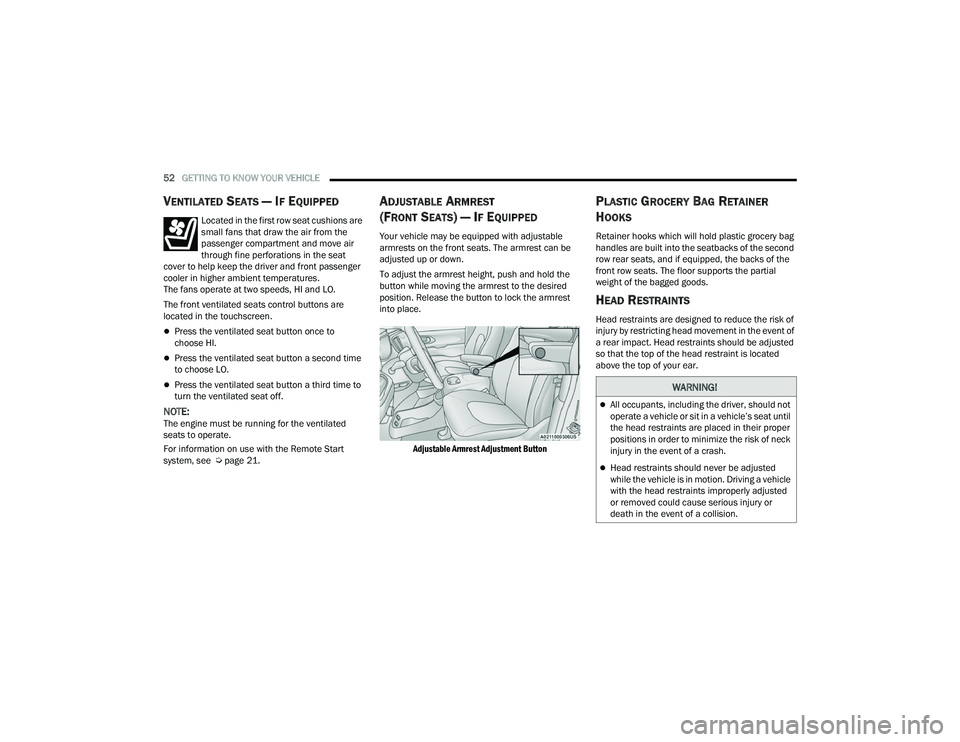
Your vehicle may be equipped with adjustable
armrests on the front seats. The armrest can be
adjusted up or down.
To adjust the armrest height, push and hold the
button while moving the armrest to the desired
position. Release the button to lock the armrest
into place.
Adjustable Armrest Adjustment Button
PLASTIC GROCERY BAG RETAINER
H
OOKS
Retainer hooks which will hold plastic grocery bag
handles are built into the seatbacks of the second
row rear seats, and if equipped, the backs of the
front row seats. The floor supports the partial
weight of the bagged goods.
HEAD RESTRAINTS
Head restraints are designed to reduce the risk of
injury by restricting head movement in the event of
a rear impact. Head restraints should be adjusted
so that the top of the head restraint is located
above the top of your ear.
WARNING!
All occupants, including the driver, should not
operate a vehicle or sit in a vehicle’s seat until
the head restraints are placed in their proper
positions in order to minimize the risk of neck
injury in the event of a crash.
Head restraints should never be adjusted
while the vehicle is in motion. Driving a vehicle
with the head restraints improperly adjusted
or removed could cause serious injury or
death in the event of a collision.
22_RUP_OM_EN_USC_t.book Page 52
Page 56 of 384
54GETTING TO KNOW YOUR VEHICLE
Head Restraints — Second Row Quad
Seats
The second row outboard head restraints, as well
as the removable 8th passenger seat (if equipped),
may have adjustable head restraints.
NOTE:If equipped with Stow ‘n Go seating, the head
restraints are non-adjustable and non-removable.
Do not pull on non-adjustable head restraints
when folding the seat.
To raise the head restraint, pull upward on the
head restraint. To lower the head restraint, push
the adjustment button, located at the base of the
head restraint, and push downward.
To remove the head restraint, raise it as far as it
can go. Then, push the release button and the
adjustment button at the base of each post while
pulling the head restraint up. Seatback angle may
need to be adjusted to fully remove the head
restraint. To reinstall the head restraint, put the
head restraint posts into the holes and push
downward. Then, adjust the head restraint to the
appropriate height.
Head Restraints — Second Row Bench
The second row bench seat is equipped with
adjustable head restraints.
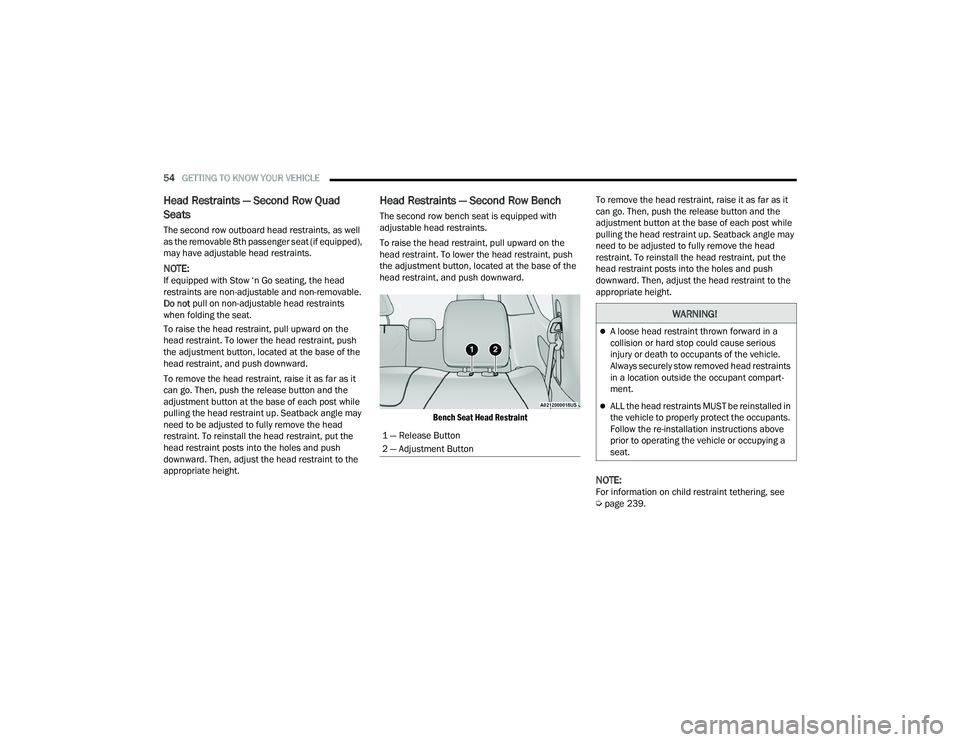
To raise the head restraint, pull upward on the
head restraint. To lower the head restraint, push
the adjustment button, located at the base of the
head restraint, and push downward.
Bench Seat Head Restraint
To remove the head restraint, raise it as far as it
can go. Then, push the release button and the
adjustment button at the base of each post while
pulling the head restraint up. Seatback angle may
need to be adjusted to fully remove the head
restraint. To reinstall the head restraint, put the
head restraint posts into the holes and push
downward. Then, adjust the head restraint to the
appropriate height.
NOTE:For information on child restraint tethering, see
Ú
page 239.
1 — Release Button
2 — Adjustment Button
WARNING!
A loose head restraint thrown forward in a
collision or hard stop could cause serious
injury or death to occupants of the vehicle.
Always securely stow removed head restraints
in a location outside the occupant compart
-
ment.
ALL the head restraints MUST be reinstalled in
the vehicle to properly protect the occupants.
Follow the re-installation instructions above
prior to operating the vehicle or occupying a
seat.
22_RUP_OM_EN_USC_t.book Page 54
Page 78 of 384

76GETTING TO KNOW YOUR VEHICLE
BI-LEVEL MODE
Press this button on the touchscreen to
change the air distribution mode to
Bi-Level Mode. In Bi-Level Mode, air
comes from both the headliner outlets
and the floor outlets.
NOTE:Bi-Level mode is designed under comfort condi -
tions to provide cooler air out of the panel outlets
and warmer air from the floor outlets.
FLOOR MODE
Press this button on the touchscreen to
change the air distribution mode to Floor
Mode. In Floor Mode, air comes from the
floor outlets.
REAR PASSENGER CLIMATE CONTROL OFF
BUTTON
Press and release the OFF button to
turn the Rear Climate Controls off.
Rear Automatic Temperature
Control (ATC) — If Equipped
The rear Automatic Temperature Control (ATC)
system has floor air outlets underneath the
passengers’ seats, and overhead outlets at
each outboard rear seating position. The system provides heated air through the floor outlets or
cool, dehumidified air through the headliner
outlets.
Rear second row occupants can only adjust the
rear ATC control when the Rear Temperature Lock
button is turned off.
The rear ATC system is located in the headliner, on
the passenger side of the vehicle.
Rear Automatic Climate Controls
1. Adjust the rear blower, rear temperature and the rear modes to suit your comfort needs.
2. ATC is selected by pushing the AUTO button.
Once the desired temperature is displayed, the
ATC System will automatically achieve and
maintain that comfort level. When the system is
set up for your comfort level, it is not necessary to change the settings. You will experience the
greatest efficiency by simply allowing the system to
function automatically.
NOTE:It is not necessary to move the temperature
settings. The system automatically adjusts the
temperature, mode and fan speed to provide
comfort as quickly as possible.
AUTO BUTTON
The AUTO button automatically controls
the interior cabin temperature by
adjusting distribution and amount of
airflow. Performing this function will
cause the system to switch between manual mode
and automatic modes Ú page 82.
REAR TEMPERATURE CONTROL
To change the temperature in the rear of
the vehicle, push temperature control up
button to raise the temperature. The rear
temperature settings are displayed in
control head.
To change the temperature in the rear of
the vehicle, push temperature control
down button to lower the temperature.
The rear temperature settings are
displayed in control head.
22_RUP_OM_EN_USC_t.book Page 76
Page 87 of 384
GETTING TO KNOW YOUR VEHICLE85
Front Seatback Storage — If Equipped
The front seatbacks have a storage pocket on
some models.
Front Seatback Storage
Second Row Floor Storage Bins
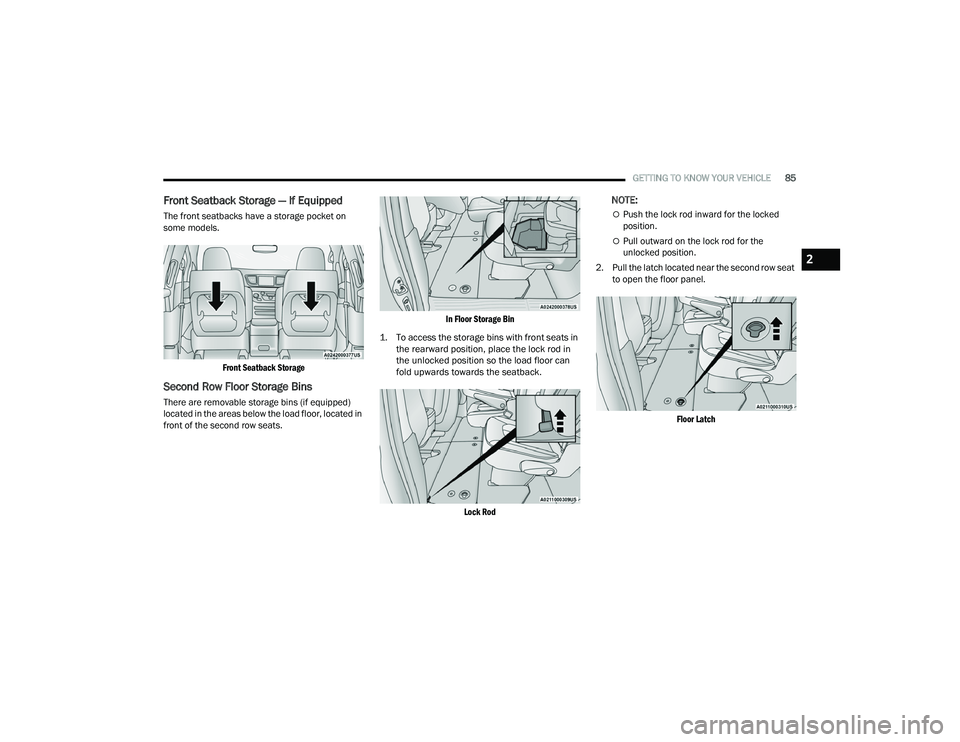
There are removable storage bins (if equipped)
located in the areas below the load floor, located in
front of the second row seats.
In Floor Storage Bin
1. To access the storage bins with front seats in the rearward position, place the lock rod in
the unlocked position so the load floor can
fold upwards towards the seatback.
Lock Rod
NOTE:
Push the lock rod inward for the locked
position.
Pull outward on the lock rod for the
unlocked position.
2. Pull the latch located near the second row seat to open the floor panel.
Floor Latch
2
22_RUP_OM_EN_USC_t.book Page 85
Page 90 of 384
88GETTING TO KNOW YOUR VEHICLE
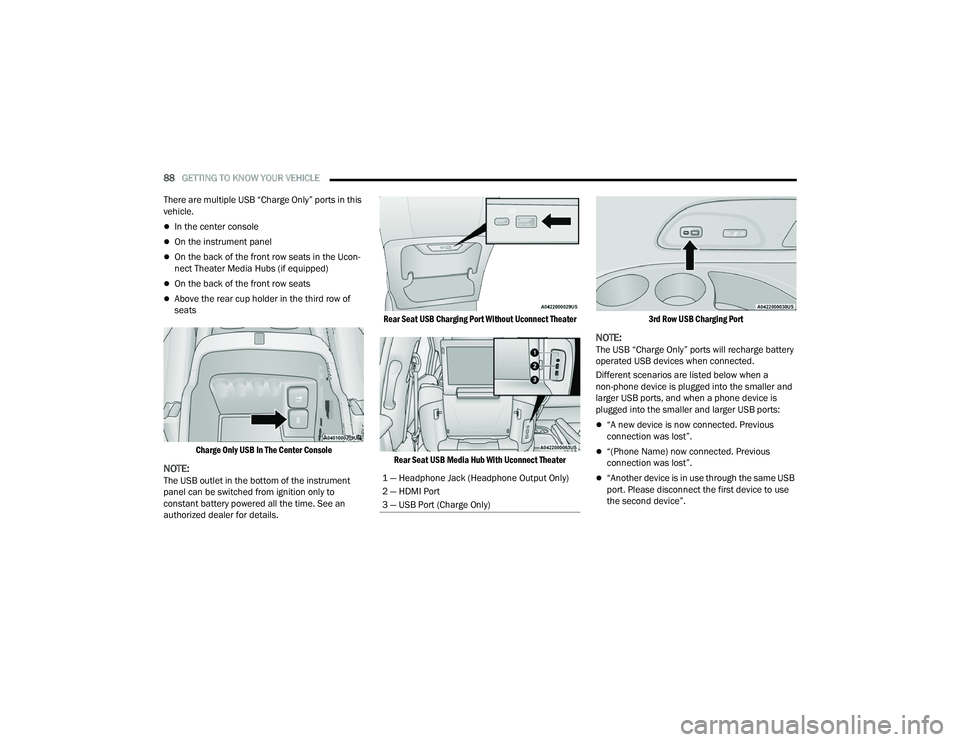
There are multiple USB “Charge Only” ports in this
vehicle.
In the center console
On the instrument panel
On the back of the front row seats in the Ucon -
nect Theater Media Hubs (if equipped)
On the back of the front row seats
Above the rear cup holder in the third row of
seats
Charge Only USB In The Center Console
NOTE:The USB outlet in the bottom of the instrument
panel can be switched from ignition only to
constant battery powered all the time. See an
authorized dealer for details.
Rear Seat USB Charging Port Without Uconnect Theater
Rear Seat USB Media Hub With Uconnect Theater 3rd Row USB Charging Port
NOTE:The USB “Charge Only” ports will recharge battery
operated USB devices when connected.
Different scenarios are listed below when a
non-phone device is plugged into the smaller and
larger USB ports, and when a phone device is
plugged into the smaller and larger USB ports:
“A new device is now connected. Previous
connection was lost”.
“(Phone Name) now connected. Previous
connection was lost”.
“Another device is in use through the same USB
port. Please disconnect the first device to use
the second device”.1 — Headphone Jack (Headphone Output Only)
2 — HDMI Port
3 — USB Port (Charge Only)
22_RUP_OM_EN_USC_t.book Page 88
Page 242 of 384
240SAFETY
(Continued)
4. Never allow children to slide the shoulder belt
behind them or under their arm.
5. You should read the instructions provided with your child restraint to make sure that you are
using it properly.
6. All occupants should always wear their lap and shoulder belts properly.
7. The driver and front passenger seats should be moved back as far as practical to allow the
front air bags room to inflate.
8. Do not lean against the door or window. If your vehicle has side air bags, and deployment
occurs, the side air bags will inflate forcefully
into the space between occupants and the
door and occupants could be injured.
9. If the air bag system in this vehicle needs to be modified to accommodate a disabled person,
see Úpage 367 for customer service contact
information.
SEAT BELT SYSTEMS
Buckle up even though you are an excellent driver,
even on short trips. Someone on the road may be
a poor driver and could cause a collision that
includes you. This can happen far away from home
or on your own street.
Research has shown that seat belts save lives, and
they can reduce the seriousness of injuries in a
collision. Some of the worst injuries happen when
people are thrown from the vehicle. Seat belts
reduce the possibility of ejection and the risk of
injury caused by striking the inside of the vehicle.
Everyone in a motor vehicle should be belted at all
times.
Enhanced Seat Belt Use Reminder System
(BeltAlert)
Driver And Passenger BeltAlert — If Equipped
BeltAlert is a feature intended to remind
the driver and outboard front seat
passenger (if equipped with outboard
front passenger seat BeltAlert) to buckle
their seat belts. The BeltAlert feature is active
whenever the ignition switch is in the START or
ON/RUN position.
Initial Indication
If the driver is unbuckled when the ignition switch
is first in the START or ON/RUN position, a chime
will signal for a few seconds. If the driver or
outboard front seat passenger (if equipped with
outboard front passenger seat BeltAlert) is
unbuckled when the ignition switch is first in the
START or ON/RUN position the Seat Belt Reminder
Light will turn on and remain on until both outboard
front seat belts are buckled. The outboard front
passenger seat BeltAlert is not active when an
outboard front passenger seat is unoccupied.
WARNING!
Never place a rear-facing child restraint in
front of an air bag. A deploying passenger
front air bag can cause death or serious injury
to a child 12 years or younger, including a
child in a rear-facing child restraint.
Never install a rear-facing child restraint in the
front seat of a vehicle. Only use a rear-facing
child restraint in the rear seat. If the vehicle
does not have a rear seat, do not transport a
rear-facing child restraint in that vehicle.
WARNING!
22_RUP_OM_EN_USC_t.book Page 240
Page 246 of 384
244SAFETY
Adjustable Upper Shoulder Belt Anchorage
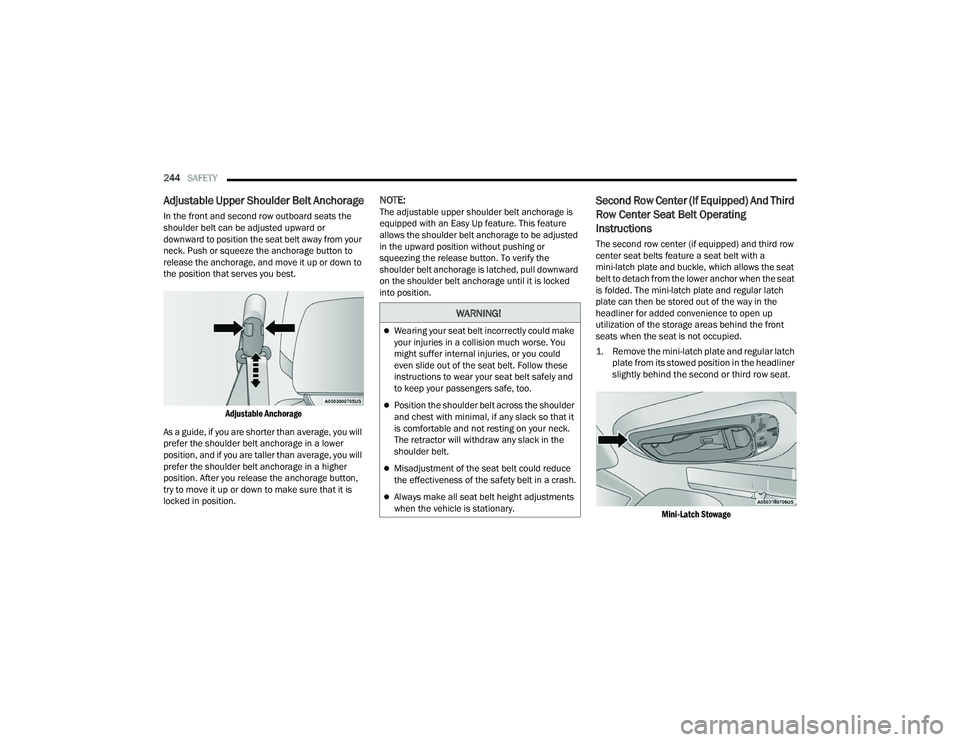
In the front and second row outboard seats the
shoulder belt can be adjusted upward or
downward to position the seat belt away from your
neck. Push or squeeze the anchorage button to
release the anchorage, and move it up or down to
the position that serves you best.
Adjustable Anchorage
As a guide, if you are shorter than average, you will
prefer the shoulder belt anchorage in a lower
position, and if you are taller than average, you will
prefer the shoulder belt anchorage in a higher
position. After you release the anchorage button,
try to move it up or down to make sure that it is
locked in position.
NOTE:The adjustable upper shoulder belt anchorage is
equipped with an Easy Up feature. This feature
allows the shoulder belt anchorage to be adjusted
in the upward position without pushing or
squeezing the release button. To verify the
shoulder belt anchorage is latched, pull downward
on the shoulder belt anchorage until it is locked
into position.Second Row Center (If Equipped) And Third
Row Center Seat Belt Operating
Instructions
The second row center (if equipped) and third row
center seat belts feature a seat belt with a
mini-latch plate and buckle, which allows the seat
belt to detach from the lower anchor when the seat
is folded. The mini-latch plate and regular latch
plate can then be stored out of the way in the
headliner for added convenience to open up
utilization of the storage areas behind the front
seats when the seat is not occupied.
1. Remove the mini-latch plate and regular latch plate from its stowed position in the headliner
slightly behind the second or third row seat.
Mini-Latch Stowage
WARNING!
Wearing your seat belt incorrectly could make
your injuries in a collision much worse. You
might suffer internal injuries, or you could
even slide out of the seat belt. Follow these
instructions to wear your seat belt safely and
to keep your passengers safe, too.
Position the shoulder belt across the shoulder
and chest with minimal, if any slack so that it
is comfortable and not resting on your neck.
The retractor will withdraw any slack in the
shoulder belt.
Misadjustment of the seat belt could reduce
the effectiveness of the safety belt in a crash.
Always make all seat belt height adjustments
when the vehicle is stationary.
22_RUP_OM_EN_USC_t.book Page 244
Page 277 of 384
SAFETY275
(Continued)
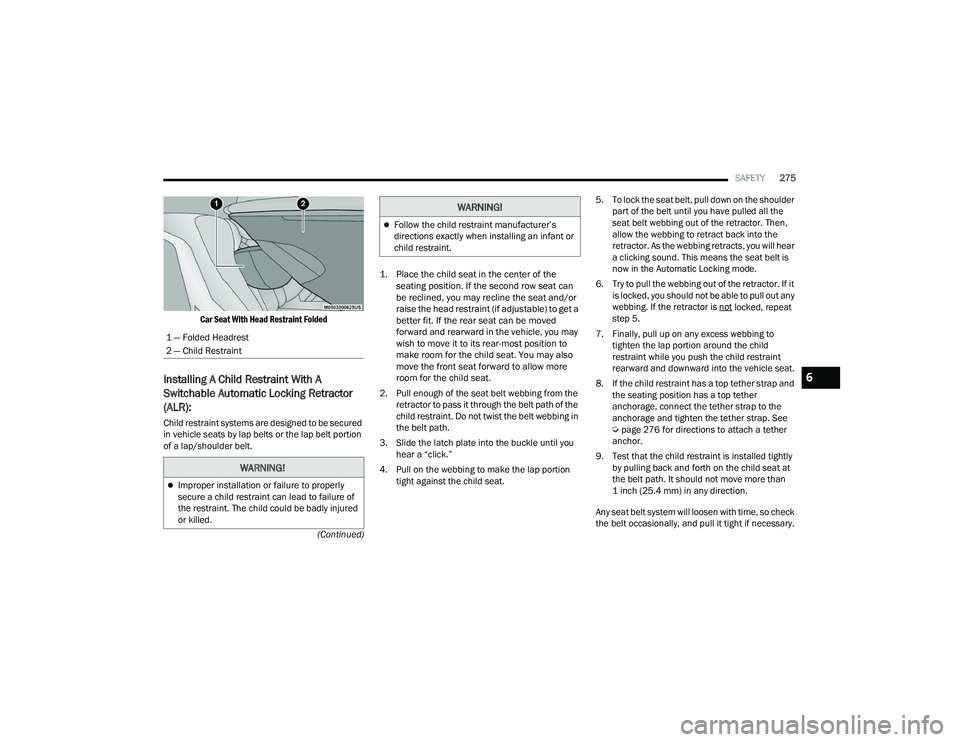
Car Seat With Head Restraint Folded
Installing A Child Restraint With A
Switchable Automatic Locking Retractor
(ALR):
Child restraint systems are designed to be secured
in vehicle seats by lap belts or the lap belt portion
of a lap/shoulder belt.
1. Place the child seat in the center of the
seating position. If the second row seat can
be reclined, you may recline the seat and/or
raise the head restraint (if adjustable) to get a
better fit. If the rear seat can be moved
forward and rearward in the vehicle, you may
wish to move it to its rear-most position to
make room for the child seat. You may also
move the front seat forward to allow more
room for the child seat.
2. Pull enough of the seat belt webbing from the retractor to pass it through the belt path of the
child restraint. Do not twist the belt webbing in
the belt path.
3. Slide the latch plate into the buckle until you hear a “click.”
4. Pull on the webbing to make the lap portion tight against the child seat. 5. To lock the seat belt, pull down on the shoulder
part of the belt until you have pulled all the
seat belt webbing out of the retractor. Then,
allow the webbing to retract back into the
retractor. As the webbing retracts, you will hear
a clicking sound. This means the seat belt is
now in the Automatic Locking mode.
6. Try to pull the webbing out of the retractor. If it is locked, you should not be able to pull out any
webbing. If the retractor is not
locked, repeat
step 5.
7. Finally, pull up on any excess webbing to tighten the lap portion around the child
restraint while you push the child restraint
rearward and downward into the vehicle seat.
8. If the child restraint has a top tether strap and the seating position has a top tether
anchorage, connect the tether strap to the
anchorage and tighten the tether strap. See
Úpage 276 for directions to attach a tether
anchor.
9. Test that the child restraint is installed tightly by pulling back and forth on the child seat at
the belt path. It should not move more than
1 inch (25.4 mm) in any direction.
Any seat belt system will loosen with time, so check
the belt occasionally, and pull it tight if necessary.
1 — Folded Headrest
2 — Child Restraint
WARNING!
Improper installation or failure to properly
secure a child restraint can lead to failure of
the restraint. The child could be badly injured
or killed.
Follow the child restraint manufacturer’s
directions exactly when installing an infant or
child restraint.
WARNING!
6
22_RUP_OM_EN_USC_t.book Page 275