8th seat CHRYSLER PACIFICA 2022 Owners Manual
[x] Cancel search | Manufacturer: CHRYSLER, Model Year: 2022, Model line: PACIFICA, Model: CHRYSLER PACIFICA 2022Pages: 384, PDF Size: 23.92 MB
Page 39 of 384
GETTING TO KNOW YOUR VEHICLE37
NOTE:
Due to the weight of the bench seat, it is recom -
mended that two people are utilized for its
removal.
When storing the removed bench seat, it is
important to keep the seatback in the folded
position.
Reinstalling The Bench Seat
1. To reinstall the bench seat, align the seats front attachments into the detent positions
on the floor.
2. Tilt seat rearward to lock the seatback into its original position.
NOTE:Push downward to ensure the rear latches are in
the locked position.
3. Lift the recline handle and return the seatback to the seating position.
Second Row Removable 8th Seat —
If Equipped
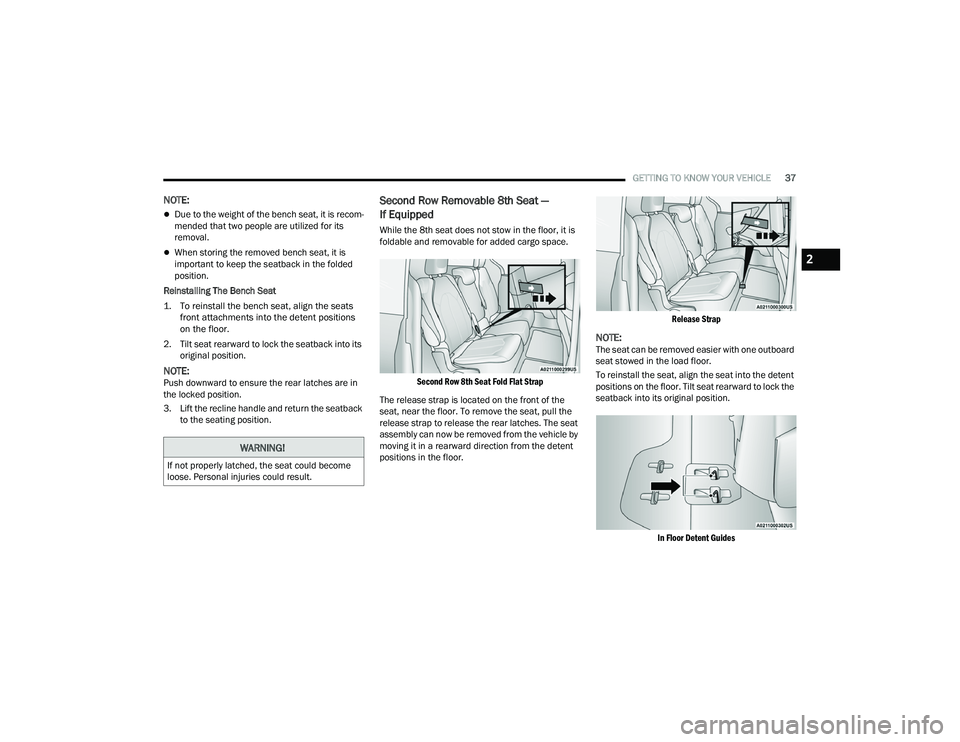
While the 8th seat does not stow in the floor, it is
foldable and removable for added cargo space.
Second Row 8th Seat Fold Flat Strap
The release strap is located on the front of the
seat, near the floor. To remove the seat, pull the
release strap to release the rear latches. The seat
assembly can now be removed from the vehicle by
moving it in a rearward direction from the detent
positions in the floor.
Release Strap
NOTE:The seat can be removed easier with one outboard
seat stowed in the load floor.
To reinstall the seat, align the seat into the detent
positions on the floor. Tilt seat rearward to lock the
seatback into its original position.
In Floor Detent Guides
WARNING!
If not properly latched, the seat could become
loose. Personal injuries could result.
2
22_RUP_OM_EN_USC_t.book Page 37
Page 56 of 384
54GETTING TO KNOW YOUR VEHICLE
Head Restraints — Second Row Quad
Seats
The second row outboard head restraints, as well
as the removable 8th passenger seat (if equipped),
may have adjustable head restraints.
NOTE:If equipped with Stow ‘n Go seating, the head
restraints are non-adjustable and non-removable.
Do not pull on non-adjustable head restraints
when folding the seat.
To raise the head restraint, pull upward on the
head restraint. To lower the head restraint, push
the adjustment button, located at the base of the
head restraint, and push downward.
To remove the head restraint, raise it as far as it
can go. Then, push the release button and the
adjustment button at the base of each post while
pulling the head restraint up. Seatback angle may
need to be adjusted to fully remove the head
restraint. To reinstall the head restraint, put the
head restraint posts into the holes and push
downward. Then, adjust the head restraint to the
appropriate height.
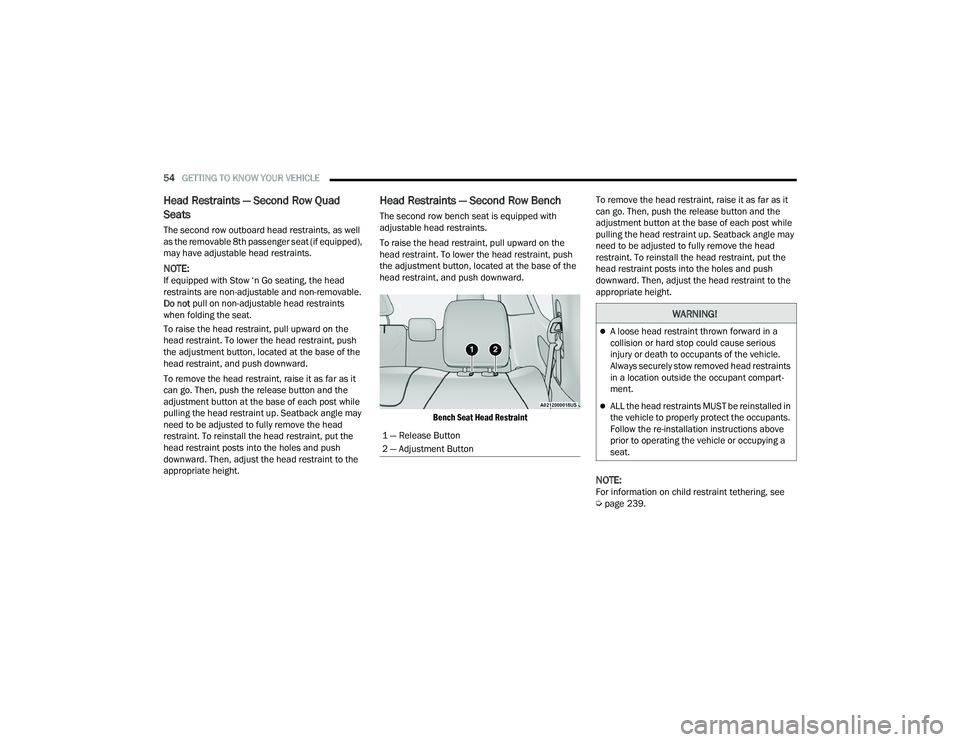
Head Restraints — Second Row Bench
The second row bench seat is equipped with
adjustable head restraints.
To raise the head restraint, pull upward on the
head restraint. To lower the head restraint, push
the adjustment button, located at the base of the
head restraint, and push downward.
Bench Seat Head Restraint
To remove the head restraint, raise it as far as it
can go. Then, push the release button and the
adjustment button at the base of each post while
pulling the head restraint up. Seatback angle may
need to be adjusted to fully remove the head
restraint. To reinstall the head restraint, put the
head restraint posts into the holes and push
downward. Then, adjust the head restraint to the
appropriate height.
NOTE:For information on child restraint tethering, see
Ú
page 239.
1 — Release Button
2 — Adjustment Button
WARNING!
A loose head restraint thrown forward in a
collision or hard stop could cause serious
injury or death to occupants of the vehicle.
Always securely stow removed head restraints
in a location outside the occupant compart
-
ment.
ALL the head restraints MUST be reinstalled in
the vehicle to properly protect the occupants.
Follow the re-installation instructions above
prior to operating the vehicle or occupying a
seat.
22_RUP_OM_EN_USC_t.book Page 54