cylinder 2 CHRYSLER PACIFICA 2023 Owners Manual
[x] Cancel search | Manufacturer: CHRYSLER, Model Year: 2023, Model line: PACIFICA, Model: CHRYSLER PACIFICA 2023Pages: 328, PDF Size: 16.37 MB
Page 21 of 328
GETTING TO KNOW YOUR VEHICLE19
VEHICLE SECURITY SYSTEM — IF EQUIPPED
The Vehicle Security system monitors the vehicle doors for
unauthorized entry and the ignition switch for
unauthorized operation. When the alarm is activated, the
interior switches for door locks, power sliding doors and
power liftgate are disabled. The Vehicle Security system
provides both audible and visible signals. If something
triggers the alarm, the Vehicle Security system will provide
the following audible and visible signals: the horn will
pulse, the parking lights and/or turn signals will flash, and
the Vehicle Security Light in the instrument cluster will
flash.
TO ARM THE SYSTEM
Follow these steps to arm the Vehicle Security system:
1. Make sure the vehicle’s ignition is placed in the OFF
position.
For vehicles equipped with Keyless Enter ‘n Go™ —
Passive Entry, make sure the vehicle ignition
system is OFF.
2. Perform one of the following methods to lock the vehicle:
Push lock on the interior power door lock switch
with the driver and/or passenger door open.
Push the lock button on the exterior Passive Entry
door handle with a valid key fob available in the
same exterior zone
Úpage 21.
Push the lock button on the key fob.
3. If any doors are open, close them.
TO DISARM THE SYSTEM
The Vehicle Security system can be disarmed using any of
the following methods:
Push the unlock button on the key fob.
Grab the Passive Entry door handle (if equipped)
Úpage 21.
Hands-Free Liftgate Passive Entry activation (if
equipped).
Cycle the vehicle ignition system out of the OFF
position.
For vehicles equipped with Keyless Enter ‘n Go™ —
Passive Entry, push the START/STOP ignition
button (requires at least one valid key fob in the
vehicle).
NOTE:
The driver's door key cylinder and the liftgate button on
the key fob cannot arm or disarm the Vehicle Security
system.
The Vehicle Security system remains armed during
power liftgate entry. Pushing the liftgate button will not
disarm the Vehicle Security system. If someone enters
the vehicle through the liftgate and opens any door, the
alarm will sound.
When the Vehicle Security system is armed, the interior
power door lock switches will not unlock the doors. The Vehicle Security system is designed to protect your
vehicle. However, you can create conditions where the
system will give you a false alarm. If one of the previously
described arming sequences has occurred, the Vehicle
Security system will arm regardless of whether you are in
the vehicle or not. If you remain in the vehicle and open a
door, the alarm will sound. If this occurs, disarm the
Vehicle Security system.
If the Vehicle Security system is armed and the battery
becomes disconnected, the Vehicle Security system will
remain armed when the battery is reconnected; the
exterior lights will flash, and the horn will sound. If this
occurs, disarm the Vehicle Security system.
REARMING OF THE SYSTEM
If something triggers the alarm and no action is taken to
disarm it, the Vehicle Security system will turn the horn off
after a 29 second cycle (with five seconds between cycles
and up to 8 cycles if the trigger remains active) and then
rearm itself.
SECURITY SYSTEM MANUAL OVERRIDE
The Vehicle Security system will not arm if you lock the
doors using the manual door lock.
2
23_RUP_OM_EN_USC_t.book Page 19
Page 105 of 328

GETTING TO KNOW YOUR INSTRUMENT PANEL103
Battery Charge Warning Light
This warning light will illuminate when the
battery is not charging properly. If it stays on
while the engine is running, there may be a
malfunction with the charging system. Contact
an authorized dealer as soon as possible.
This indicates a possible problem with the electrical
system or a related component.
Brake Warning Light
This warning light monitors various brake
functions, including brake fluid level and
parking brake application. If the brake light
turns on it may indicate that the parking brake
is applied, that the brake fluid level is low, or that there is
a problem with the Anti-Lock Brake System reservoir.
If the light remains on when the parking brake has been
disengaged, and the fluid level is at the full mark on the
master cylinder reservoir, it indicates a possible brake
hydraulic system malfunction or that a problem with the
Brake Booster has been detected by the Anti-Lock Brake
System (ABS) / Electronic Stability Control (ESC) system.
In this case, the light will remain on until the condition has
been corrected. If the problem is related to the brake
booster, the ABS pump will run when applying the brake,
and a brake pedal pulsation may be felt during each stop.
The dual brake system provides a reserve braking capacity
in the event of a failure to a portion of the hydraulic
system. A leak in either half of the dual brake system is
indicated by the Brake Warning Light, which will turn on
when the brake fluid level in the master cylinder has
dropped below a specified level. The light will remain on until the cause is corrected.
NOTE:The light may flash momentarily during sharp cornering
maneuvers, which change fluid level conditions. The
vehicle should have service performed, and the brake
fluid level checked.
If brake failure is indicated, immediate repair is necessary.
Vehicles equipped with the Anti-Lock Brake System (ABS)
are also equipped with Electronic Brake Force Distribution
(EBD). In the event of an EBD failure, the Brake Warning
Light will turn on along with the ABS Light. Immediate
repair to the ABS system is required.
Operation of the Brake Warning Light can be checked by
turning the ignition switch from the OFF position to the
ON/RUN position. The light should illuminate for
approximately two seconds. The light should then turn off
unless the parking brake is applied or a brake fault is
detected. If the light does not illuminate, have the light
inspected by an authorized dealer.
The light also will turn on when the parking brake is
applied with the ignition switch in the ON/RUN position.
NOTE:This light shows only that the parking brake is applied. It
does not show the degree of brake application.
Door Open Warning Light — If Equipped
This warning light will illuminate when a door is
ajar/open and not fully closed. This indicator
will reflect which doors are open.
NOTE:If the vehicle is moving, there will also be a single chime.
Electric Power Steering Fault Warning
Light
This warning light will turn on when there's a
fault with the Electric Power Steering (EPS)
system
Úpage 121.
WARNING!
Driving a vehicle with the red brake light on is
dangerous. Part of the brake system may have failed. It
will take longer to stop the vehicle. You could have a
collision. Have the vehicle checked immediately.
WARNING!
Continued operation with reduced assist could pose a
safety risk to yourself and others. Service should be
obtained as soon as possible.
3
23_RUP_OM_EN_USC_t.book Page 103
Page 261 of 328
259
SERVICING AND MAINTENANCE
SCHEDULED SERVICING
Your vehicle is equipped with an automatic oil change
indicator system. The oil change indicator system will
remind you that it is time to take your vehicle in for
scheduled maintenance.
Based on engine operation conditions, the oil change
indicator message will illuminate. This means that service
is required for your vehicle. Operating conditions such as
frequent short-trips, trailer towing, extremely hot or cold
ambient temperatures will influence when the “Oil Change
Required” message is displayed. Have your vehicle
serviced as soon as possible, within the next 500 miles
(805 km).An authorized dealer will reset the oil change indicator
message after completing the scheduled oil change. If a
scheduled oil change is performed by someone other than
an authorized dealer Úpage 97.
NOTE:Under no circumstances should oil change intervals
exceed 10,000 miles (16,000 km), 12 months or
350 hours of engine run time, whichever comes first. The
350 hours of engine run or idle time is generally only a
concern for fleet customers.
Once A Month Or Before A Long Trip:
Check engine oil level.
Check windshield washer fluid level.
Check tire pressure and look for unusual wear or
damage. Rotate tires at the first sign of irregular wear,
even if it occurs before the oil indicator system turns
on.
Check the fluid levels of the coolant reservoir and
brake master cylinder, fill as needed.
Check function of all interior and exterior lights.
8
23_RUP_OM_EN_USC_t.book Page 259
Page 270 of 328

268SERVICING AND MAINTENANCE
9. Once the filter is replaced, reinstall the filter cover,
making sure the retaining tabs are fully secured into
their housings.
10. Close the cabin air filter compartment cover, and reinsert the snaps into their slots. Push the snap lids
until fully attached.
11. Push the glove compartment door to the near closed position to reengage the glove compartment travel
stops. Finally, pull the glove compartment tension
tether clip down and slide it back into the slot on the
side of the glove compartment door.
BODY LUBRICATION
Locks and all body pivot points, including such items as
seat tracks, door hinge pivot points and rollers, liftgate,
tailgate, decklid, sliding doors and hood hinges, should be
lubricated periodically. Use a lithium-based grease, such
as Mopar® Spray White Lube to ensure quiet, easy
operation and to protect against rust and wear. Prior to the
application of any lubricant, the parts concerned should
be wiped clean to remove dust and grit; after lubricating,
excess oil and grease should be removed. Particular
attention should also be given to hood latching
components to ensure proper function. When performing
other underhood services, the hood latch release
mechanism, and safety catch should be cleaned and
lubricated.
The external lock cylinders should be lubricated twice a
year, preferably in the Autumn and Spring. Apply a small
amount of a high quality lubricant, such as Mopar® Lock
Cylinder Lubricant directly into the lock cylinder.
WINDSHIELD WIPER BLADES
Clean the rubber edges of the wiper blades and the
windshield periodically with a sponge or soft cloth and a
mild nonabrasive cleaner. This will remove accumulations
of salt or road film.
Operation of the wipers on dry glass for long periods may
cause deterioration of the wiper blades. Always use
washer fluid when using the wipers to remove salt or dirt
from a dry windshield.
Avoid using the wiper blades to remove frost or ice from
the windshield. Keep the blade rubber out of contact with
petroleum products such as engine oil, gasoline, etc.
NOTE:Life expectancy of wiper blades varies depending on
geographical area and frequency of use. If chattering,
marks, water lines or wet spots are present, clean the
wiper blades or replace as necessary.
The wiper blades and wiper arms should be inspected
periodically, not just when wiper performance problems
are experienced. This inspection should include the
following points:
Wear or uneven edges
Foreign material
Hardening or cracking
Deformation or fatigue
If a wiper blade or wiper arm is damaged, replace the
affected wiper arm or blade with a new unit. Do not
attempt to repair a wiper arm or blade that is damaged.
Front Wiper Blade Removal/Installation
1. Lift the wiper arm to raise the wiper blade off of the glass, until the wiper arm is in the full up position.
Wiper Blade With Release Tab In Locked Position
CAUTION!
Do not allow the wiper arm to spring back against the
glass without the wiper blade in place or the glass may
be damaged.
1 — Wiper Blade
2 — Release Tab
3 — Wiper Arm
23_RUP_OM_EN_USC_t.book Page 268
Page 276 of 328
274SERVICING AND MAINTENANCE
(Continued)
Brake Master Cylinder
The fluid in the master cylinder should be checked when
performing under hood services or immediately if the
Brake Warning Light is illuminated.
Be sure to clean the top of the master cylinder area before
removing the cap. If necessary, add fluid to bring the fluid
level up to the requirements described on the brake fluid
reservoir. With disc brakes, fluid level can be expected to
fall as the brake pads wear. Brake fluid level should be
checked when pads are replaced. However, low fluid level
may be caused by a leak and a checkup may be needed.
Use only manufacturer recommended brake fluid
Úpage 307.AUTOMATIC TRANSMISSION
Special Additives
The manufacturer strongly recommends against using any
special additives in the transmission. Automatic
Transmission Fluid (ATF) is an engineered product and its
performance may be impaired by supplemental additives.
Therefore, do not add any fluid additives to the
transmission. Avoid using transmission sealers as they
may adversely affect seals.
Fluid Level Check
The fluid level is preset at the factory and does not require
adjustment under normal operating conditions. Routine
fluid level checks are not required; therefore the
transmission has no dipstick. An authorized dealer can
check your transmission fluid level using special service
tools. If you notice fluid leakage or transmission
malfunction, visit an authorized dealer immediately to
have the transmission fluid level checked. Operating the
vehicle with an improper fluid level can cause severe
transmission damage.
Fluid And Filter Changes
Under normal operating conditions, the fluid installed at
the factory will provide satisfactory lubrication for the life
of the vehicle.
Routine fluid and filter changes are not required. However,
change the fluid and filter if the fluid becomes
contaminated (with water, etc.), or if the transmission is
disassembled for any reason.
Selection Of Lubricant
It is important to use the proper transmission fluid to
ensure optimum transmission performance and life. Use
only the manufacturer specified transmission fluid
Úpage 307. It is important to maintain the transmission
fluid at the correct level using the recommended fluid.
WARNING!
Use only manufacturer recommended brake fluid Úpage 307. Using the wrong type of brake fluid can
severely damage your brake system and/or impair its
performance. The proper type of brake fluid for your
vehicle is also identified on the original factory
installed hydraulic master cylinder reservoir.
To avoid contamination from foreign matter or mois -
ture, use only new brake fluid or fluid that has been
in a tightly closed container. Keep the master
cylinder reservoir cap secured at all times. Brake
fluid in an open container absorbs moisture from the
air resulting in a lower boiling point. This may cause
it to boil unexpectedly during hard or prolonged
braking, resulting in sudden brake failure. This could
result in a collision.
Overfilling the brake fluid reservoir can result in
spilling brake fluid on hot engine parts, causing the
brake fluid to catch fire. Brake fluid can also damage
painted and vinyl surfaces, care should be taken to
avoid its contact with these surfaces.
Do not allow petroleum-based fluid to contaminate
the brake fluid. Brake seal components could be
damaged, causing partial or complete brake failure.
This could result in a collision.
CAUTION!
Do not use chemical flushes in your transmission as the
chemicals can damage your transmission components.
Such damage is not covered by the New Vehicle Limited
Warranty.
WARNING!
CAUTION!
If a transmission fluid leak occurs, visit an authorized
dealer immediately. Severe transmission damage may
occur. An authorized dealer has the proper tools to
adjust the fluid level accurately.
23_RUP_OM_EN_USC_t.book Page 274
Page 309 of 328
TECHNICAL SPECIFICATIONS307
CHASSIS FLUIDS AND LUBRICANTS
CAUTION!
Mixing of engine coolant (antifreeze) other than specified Organic Additive Technology (OAT) engine coolant (antifreeze), may result in engine damage and may decrease corrosion
protection. Organic Additive Technology (OAT) engine coolant is different and should not be mixed with Hybrid Organic Additive Technology (HOAT) engine coolant (antifreeze) or
any “globally compatible” coolant (antifreeze). If a non-OAT engine coolant (antifreeze) is introduced into the cooling system in an emergency, the cooling system will need to be
drained, flushed, and refilled with fresh OAT coolant (conforming to MS.90032), by an authorized dealer as soon as possible.
Do not use water alone or alcohol-based engine coolant (antifreeze) products. Do not use additional rust inhibitors or antirust products, as they may not be compatible with the
radiator engine coolant and may plug the radiator.
This vehicle has not been designed for use with propylene glycol-based engine coolant (antifreeze). Use of propylene glycol-based engine coolant (antifreeze) is not recommended.
Component Fluid, Lubricant, or Genuine Part
Automatic Transmission Use only Mopar® ZF 8 & 9 Speed ATF Automatic Transmission Fluid, or equivalent.
Failure to use the correct fluid may affect the function or performance of your
transmission.
Brake Master Cylinder We recommend using Mopar® DOT 3 Brake Fluid, SAE J1703 should be used.
9
23_RUP_OM_EN_USC_t.book Page 307
Page 316 of 328
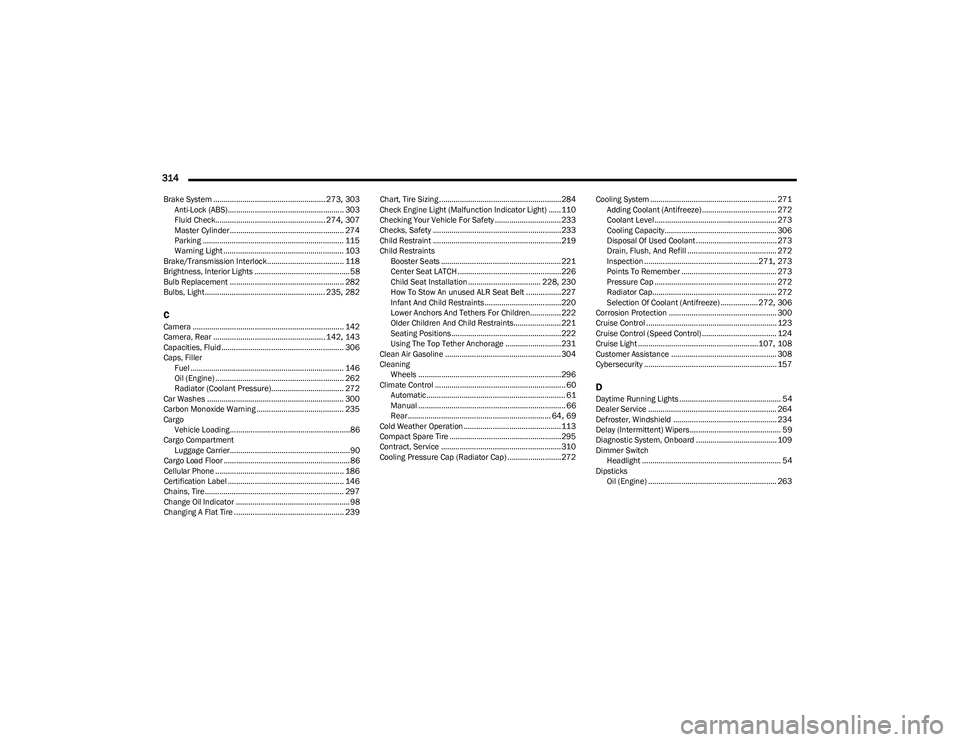
314
Brake System ...................................................... 273, 303
Anti-Lock (ABS)........................................................ 303 Fluid Check..................................................... 274
, 307
Master Cylinder ....................................................... 274
Parking .................................................................... 115
Warning Light .......................................................... 103
Brake/Transmission Interlock..................................... 118
Brightness, Interior Lights .............................................. 58
Bulb Replacement ....................................................... 282
Bulbs, Light.......................................................... 235
, 282
CCamera ......................................................................... 142
Camera, Rear ...................................................... 142, 143
Capacities, Fluid ........................................................... 306
Caps, Filler Fuel .......................................................................... 146
Oil (Engine) .............................................................. 262
Radiator (Coolant Pressure)................................... 272
Car Washes .................................................................. 300
Carbon Monoxide Warning .......................................... 235
Cargo Vehicle Loading..........................................................86
Cargo Compartment Luggage Carrier..........................................................90
Cargo Load Floor ............................................................. 86
Cellular Phone .............................................................. 186
Certification Label ........................................................ 146
Chains, Tire................................................................... 297
Change Oil Indicator ....................................................... 98
Changing A Flat Tire ..................................................... 239 Chart, Tire Sizing ...........................................................284
Check Engine Light (Malfunction Indicator Light) ...... 110
Checking Your Vehicle For Safety ................................ 233
Checks, Safety .............................................................. 233
Child Restraint .............................................................. 219
Child Restraints Booster Seats .......................................................... 221
Center Seat LATCH ..................................................226
Child Seat Installation ................................... 228
, 230
How To Stow An unused ALR Seat Belt .................227 Infant And Child Restraints ..................................... 220
Lower Anchors And Tethers For Children............... 222
Older Children And Child Restraints....................... 221
Seating Positions ..................................................... 222Using The Top Tether Anchorage ...........................231
Clean Air Gasoline ........................................................ 304
Cleaning Wheels .....................................................................296
Climate Control ............................................................... 60 Automatic ................................................................... 61
Manual ....................................................................... 66
Rear ..................................................................... 64
, 69
Cold Weather Operation ............................................... 113
Compact Spare Tire ...................................................... 295
Contract, Service .......................................................... 310
Cooling Pressure Cap (Radiator Cap) ..........................272 Cooling System ............................................................. 271
Adding Coolant (Antifreeze) .................................... 272
Coolant Level........................................................... 273
Cooling Capacity...................................................... 306
Disposal Of Used Coolant ....................................... 273
Drain, Flush, And Refill ........................................... 272
Inspection .......................................................271
, 273
Points To Remember .............................................. 273
Pressure Cap ........................................................... 272
Radiator Cap............................................................ 272
Selection Of Coolant (Antifreeze) ..................272
, 306
Corrosion Protection .................................................... 300
Cruise Control ............................................................... 123
Cruise Control (Speed Control) .................................... 124
Cruise Light ..........................................................107
, 108
Customer Assistance ................................................... 308
Cybersecurity ................................................................ 157
DDaytime Running Lights ................................................. 54 Dealer Service .............................................................. 264
Defroster, Windshield .................................................. 234
Delay (Intermittent) Wipers............................................ 59
Diagnostic System, Onboard ....................................... 109
Dimmer Switch Headlight ................................................................... 54
Dipsticks Oil (Engine) .............................................................. 263
23_RUP_OM_EN_USC_t.book Page 314