oil pressure CHRYSLER PACIFICA HYBRID 2019 Owners Manual
[x] Cancel search | Manufacturer: CHRYSLER, Model Year: 2019, Model line: PACIFICA HYBRID, Model: CHRYSLER PACIFICA HYBRID 2019Pages: 620, PDF Size: 4.92 MB
Page 173 of 620
•If one or more tires have low pressure, “Inflate Tire To
XX” is displayed with the vehicle ICON, and the tire
pressure values in each corner of the ICON with the
pressure value of the low tire displayed in a different
color than the other tire pressure value.
• If the Tire Pressure system requires service, “Service Tire
Pressure System” is displayed.
• Tire PSI is an information only function and cannot be
reset.
• Refer to “Tire Pressure Monitoring System (TPMS)”
under “Safety” for further information.
• Coolant Temperature
Displays the actual coolant temperature.
• Oil Temperature
Displays the actual oil temperature.
• Oil Pressure
Displays the actual oil pressure.
• Battery Voltage
Displays the actual battery voltage. •
Engine Hours — If Equipped
Displays the number of hours of engine operation.
• Oil Life
To reset the Oil Life, you must hold the OK button. The
“Hold OK to Reset” instruction will be displayed at all
times, but the following conditions will need to be met in
order to reset Oil Life:
The vehicle must be off
The ignition must be in the ON/RUN position
• If the conditions are met, holding the OKbutton will
reset the gauge and the numeric display will return to
100%.
• If the conditions are not met, a popup message will
display for 5 seconds, describing the required condi-
tions, and then the Oil Life screen will reappear.
NOTE: This procedure should only be performed after
scheduled maintenance is completed. Resetting oil life
other than when associated with a scheduled maintenance
may result in severe engine damage.
4
GETTING TO KNOW YOUR INSTRUMENT PANEL 171
Page 183 of 620
remains on with the vehicle running, your vehicle will
usually be drivable; however, see an authorized dealer for
service as soon as possible.
NOTE:This light may turn on if the accelerator and brake
pedals are pressed at the same time.
If the light continues to flash when the vehicle is running,
immediate service is required and you may experience
reduced performance, an elevated/rough idle, or engine
stall and your vehicle may require towing. The light will
come on when the ignition is placed in the ON/RUN or
ACC/ON/RUN position and remain on briefly as a bulb
check. If the light does not come on during starting, have
the system checked by an authorized dealer.
— Electric Power Steering Fault Warning Light
This warning light will turn on when there’s a fault with
the EPS (Electric Power Steering) system. Refer to
“Power Steering” in “Starting And Operating” for further
information.
WARNING!
Continued operation with reduced assist could pose a
safety risk to yourself and others. Service should be
obtained as soon as possible.
— Oil Temperature Warning Light
This warning light will illuminate to indicate the engine oil
temperature is high. If the light turns on while driving,
stop the vehicle and shut off the engine as soon as possible.
Wait for oil temperature to return to normal levels.
— Oil Pressure Warning Light
This warning light will illuminate to indicate low engine
oil pressure. If the light turns on while driving, stop the
vehicle, shut off the engine as soon as possible, and contact
an authorized dealer. A chime will sound when this light
turns on.
Do not operate the vehicle until the cause is corrected. This
light does not indicate how much oil is in the engine. The
engine oil level must be checked under the hood.
4
GETTING TO KNOW YOUR INSTRUMENT PANEL 181
Page 283 of 620
WARNING!(Continued)
and check the floor mat fasteners are secure to the
vehicle carpet. Fully depress each pedal to check for
interference with the accelerator, brake, or clutch
pedals then re-install the floor mats.
• It is recommended to only use mild soap and water
to clean your floor mats. After cleaning, always check
your floor mat has been properly installed and is
secured to your vehicle using the floor mat fasteners
by lightly pulling mat.
Periodic Safety Checks You Should Make Outside
The Vehicle
Tires
Examine tires for excessive tread wear and uneven wear
patterns. Check for stones, nails, glass, or other objects
lodged in the tread or sidewall. Inspect the tread for cuts
and cracks. Inspect sidewalls for cuts, cracks, and bulges.
Check the wheel nuts for tightness. Check the tires (includ-
ing spare) for proper cold inflation pressure.
Lights
Have someone observe the operation of brake lights and
exterior lights while you work the controls. Check turn
signal and high beam indicator lights on the instrument
panel.
Door Latches
Check for proper closing, latching, and locking.
Fluid Leaks
Check area under the vehicle after overnight parking for
fuel, coolant, oil, or other fluid leaks. Also, if gasoline
fumes are detected or if fuel, or brake fluid leaks are
suspected. The cause should be located and corrected
immediately.
5
SAFETY 281
Page 445 of 620
SCHEDULED SERVICING
Your vehicle is equipped with an automatic oil change
indicator system. The oil change indicator system will
remind you that it is time to take your vehicle in for
scheduled maintenance.
Based on engine operation conditions, the oil change
indicator message will illuminate. This means that service
is required for your vehicle. Operating conditions such as
frequent short-trips, or extremely hot or cold ambient
temperatures will influence when the “Oil Change Re-
quired” message is displayed. Severe Operating Condi-
tions can cause the change oil message to illuminate as
early as 3,500 miles (5,600 km) since last reset. Have your
vehicle serviced as soon as possible, within the next 500
miles (805 km).
NOTE:Even though the vehicle may not have been driven,
both the fuel in the tank and oil in the engine will still
degrade over time. Additionally, there will be a notification
to the driver if the engine is being run to maintain the oil
and fuel systems.
Your authorized dealer will reset the oil change indicator
message after completing the scheduled oil change. If a
scheduled oil change is performed by someone other than
your authorized dealer, the message can be reset by referring to “Vehicle Info” in “Instrument Cluster Display”
in “Getting To Know Your Instrument Panel”.
NOTE:
Under no circumstances should oil change inter-
vals exceed 10,000 miles (16,000 km), 12 months or 350
hours of engine run time, whichever comes first. The 350
hours of engine run or idle time is generally only a concern
for fleet customers.
Severe Duty All Models
Change Engine Oil at 4,000 miles (6,500 km) or 350 hours of
engine run time if the vehicle is operated in a dusty and off
road environment or is operated predominately at idle or
only very low engine RPM’s. This type of vehicle use is
considered Severe Duty.
Once A Month Or Before A Long Trip:
• Check engine oil level.
• Check windshield washer fluid level.
• Check tire pressure and look for unusual wear or
damage. Rotate tires at the first sign of irregular wear,
even if it occurs before the oil indicator system turns on.
• Check the fluid levels of the coolant reservoir and brake
master cylinder, fill as needed.
• Check function of all interior and exterior lights.
8
SERVICING AND MAINTENANCE 443
Page 450 of 620
Checking Oil Level
To assure proper engine lubrication, the engine oil must be
maintained at the correct level. Check the oil level at
regular intervals, such as every fuel stop. The best time to
check the engine oil level is about five minutes after a fully
warmed engine is shut OFF.
Checking the oil while the vehicle is on level ground will
improve the accuracy of the oil level readings. Maintain the
oil level between the MIN and MAX markings on the
dipstick. Adding one quart or one liter of oil when the
reading is at the MIN mark will result in a MAX reading on
these engines.
CAUTION!
•Overfilling or underfilling will cause oil aeration, or
loss of oil pressure. This could damage your engine.
• Never use Non-Detergent Oil or Straight Mineral Oil
in the engine or damage may result.
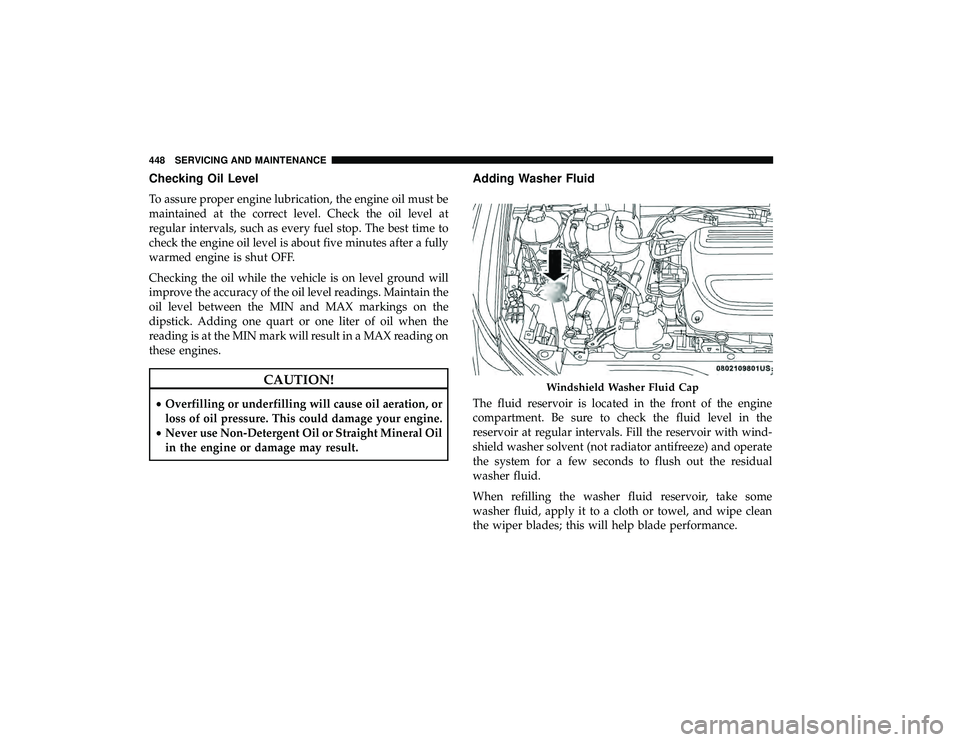
Adding Washer Fluid
The fluid reservoir is located in the front of the engine
compartment. Be sure to check the fluid level in the
reservoir at regular intervals. Fill the reservoir with wind-
shield washer solvent (not radiator antifreeze) and operate
the system for a few seconds to flush out the residual
washer fluid.
When refilling the washer fluid reservoir, take some
washer fluid, apply it to a cloth or towel, and wipe clean
the wiper blades; this will help blade performance.
Windshield Washer Fluid Cap
448 SERVICING AND MAINTENANCE
Page 456 of 620
WARNING!
•Use only refrigerants and compressor lubricants ap-
proved by the manufacturer for your air conditioning
system. Some unapproved refrigerants are flam-
mable and can explode, injuring you. Other unap-
proved refrigerants or lubricants can cause the sys-
tem to fail, requiring costly repairs. Refer to
Warranty Information Book, located in your owner ’s
information kit, for further warranty information.
• The air conditioning system contains refrigerant un-
der high pressure. To avoid risk of personal injury or
damage to the system, adding refrigerant or any
repair requiring lines to be disconnected should be
done by an experienced technician.
CAUTION!
Do not use chemical flushes in your air conditioning
system as the chemicals can damage your air condition-
ing components. Such damage is not covered by the
New Vehicle Limited Warranty.
Refrigerant Recovery And Recycling — R–1234yf
R–1234yf Air Conditioning Refrigerant is a hydrofluo-
roolefin (HFO) that is endorsed by the Environmental
Protection Agency and is an ozone-friendly substance with
a low global-warming potential. The manufacturer recom-
mends that air conditioning service be performed by
authorized dealer using recovery and recycling equipment.
NOTE: Use only manufacturer approved A/C system
POE compressor oil, and refrigerants.
Air Conditioning Filter Replacement (Cabin Air
Filter)
WARNING!
Do not remove the cabin air filter while the vehicle is
running, or while the ignition is in the ACC or ON/
RUN mode. With the cabin air filter removed and the
blower operating, the blower can contact hands and
may propel dirt and debris into your eyes, resulting in
personal injury.
454 SERVICING AND MAINTENANCE
Page 488 of 620
Keep dismounted tires in a cool, dry place with as little
exposure to light as possible. Protect tires from contact with
oil, grease, and gasoline.
Replacement Tires
The tires on your new vehicle provide a balance of many
characteristics. They should be inspected regularly for
wear and correct cold tire inflation pressures. The manu-
facturer strongly recommends that you use tires equivalent
to the originals in size, quality and performance when
replacement is needed. Refer to the paragraph on “Tread
Wear Indicators” in this section. Refer to the Tire and
Loading Information placard or the Vehicle Certification
Label for the size designation of your tire. The Load Index
and Speed Symbol for your tire will be found on the
original equipment tire sidewall.
See the Tire Sizing Chart example found in the “Tire Safety
Information” section of this manual for more information
relating to the Load Index and Speed Symbol of a tire.
It is recommended to replace the two front tires or two rear
tires as a pair. Replacing just one tire can seriously affect
your vehicle’s handling. If you ever replace a wheel, make
sure that the wheel’s specifications match those of the
original wheels.It is recommended you contact an authorized tire dealer or
original equipment dealer with any questions you may
have on tire specifications or capability. Failure to use
equivalent replacement tires may adversely affect the
safety, handling, and ride of your vehicle.
WARNING!
•
Do not use a tire, wheel size, load rating, or speed
rating other than that specified for your vehicle.
Some combinations of unapproved tires and wheels
may change suspension dimensions and perfor-
mance characteristics, resulting in changes to steer-
ing, handling, and braking of your vehicle. This can
cause unpredictable handling and stress to steering
and suspension components. You could lose control
and have a collision resulting in serious injury or
death. Use only the tire and wheel sizes with load
ratings approved for your vehicle.
• Never use a tire with a smaller load index or capacity,
other than what was originally equipped on your
vehicle. Using a tire with a smaller load index could
result in tire overloading and failure. You could lose
control and have a collision.
(Continued)
486 SERVICING AND MAINTENANCE
Page 606 of 620
Cellular Phone........................... .577
Center High Mounted Stop Light ...............403
Certification Label ......................... .384
Chains, Tire ............................. .492
Change Oil Indicator ....................... .167
Changing A Flat Tire .................... .412, 472
Charging .................................19
Chart, Tire Sizing .......................... .473
Check Engine Light (Malfunction Indicator Light). . . .191
Checking Your Vehicle For Safety ...............278
Checks, Safety ............................ .278
Child Restraint ........................... .256
Child Restraints Booster Seats ........................... .260
Center Seat LATCH ...................... .267
Child Seat Installation ................. .270, 272
How To Stow An unused ALR Seat Belt ........269
Infant And Child Restraints .................258
Lower Anchors And Tethers For Children .......262
Older Children And Child Restraints ...........259
Seating Positions ........................ .261
Using The Top Tether Anchorage .............274
Cigar Lighter ............................ .153
Clean Air Gasoline ........................ .505Cleaning
Wheels ............................... .491
Climate Control ........................... .108
Rear ..................................119
Coat Hook .............................. .149
Compact Disc (CD) Maintenance ................594
Compact Spare Tire ........................ .489
Contract, Service .......................... .598
Cooling Pressure Cap (Radiator Cap) ............467
Cooling System ........................... .463
Coolant Level .......................... .468
Cooling Capacity ........................ .508
Disposal Of Used Coolant ..................467
Drain,
Flush, And Refill ................... .465
Inspection ......................... .464, 468
Pressure Cap ........................... .467
Radiator Cap .......................... .467
Selection Of Coolant (Antifreeze) .......465, 508, 509
Corrosion Protection ....................... .496
Cruise Control (Speed Control) .................309
Cruise Light .......................... .189, 190
Customer Assistance ....................... .596
Cybersecurity ............................ .516
604 INDEX
Page 611 of 620
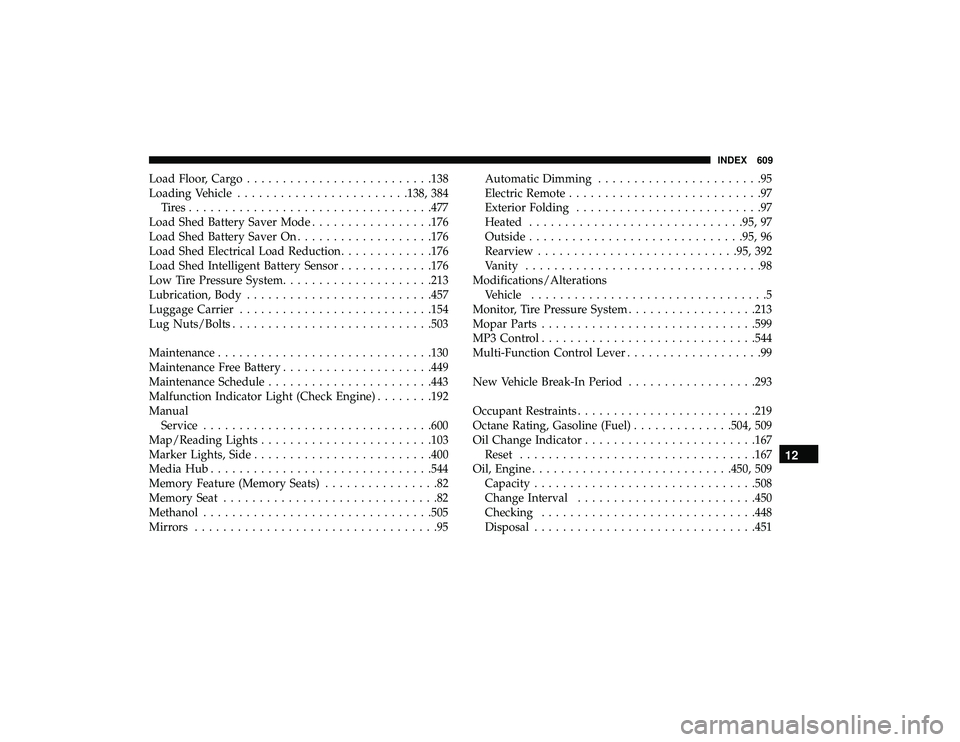
Load Floor, Cargo......................... .138
Loading Vehicle ....................... .138, 384
Tires................................. .477
Load Shed Battery Saver Mode .................176
Load Shed Battery Saver On ...................176
Load Shed Electrical Load Reduction .............176
Load Shed Intelligent Battery Sensor .............176
Low Tire Pressure System .................... .213
Lubrication, Body ......................... .457
Luggage Carrier .......................... .154
Lug Nuts/Bolts ........................... .503
Maintenance ............................. .130
Maintenance Free Battery .................... .449
Maintenance Schedule ...................... .443
Malfunction Indicator Light (Check Engine) ........192
Manual Service ............................... .600
Map/Reading Lights ....................... .103
Marker Lights, Side ........................ .400
Media Hub .............................. .544
Memory Feature (Memory Seats) ................82
Memory Seat ..............................82
Methanol ............................... .505
Mirrors ..................................95 Automatic Dimming
.......................95
Electric Remote ...........................97
Exterior Folding ..........................97
Heated ............................. .95, 97
Outside ............................. .95, 96
Rearview ........................... .95, 392
Vanity .................................98
Modifications/Alterations Vehicle .................................5
Monitor, Tire Pressure System ..................213
Mopar Parts ............................. .599
MP3 Control ............................. .544
Multi-Function Control Lever ...................99
New Vehicle Break-In Period ..................293
Occupant Restraints ........................ .219
Octane
Rating, Gasoline (Fuel) ..............504, 509
Oil Change Indicator ....................... .167
Reset ................................ .167
Oil, Engine ........................... .450, 509
Capacity .............................. .508
Change Interval ........................ .450
Checking ............................. .448
Disposal .............................. .451
12
INDEX 609
Page 612 of 620
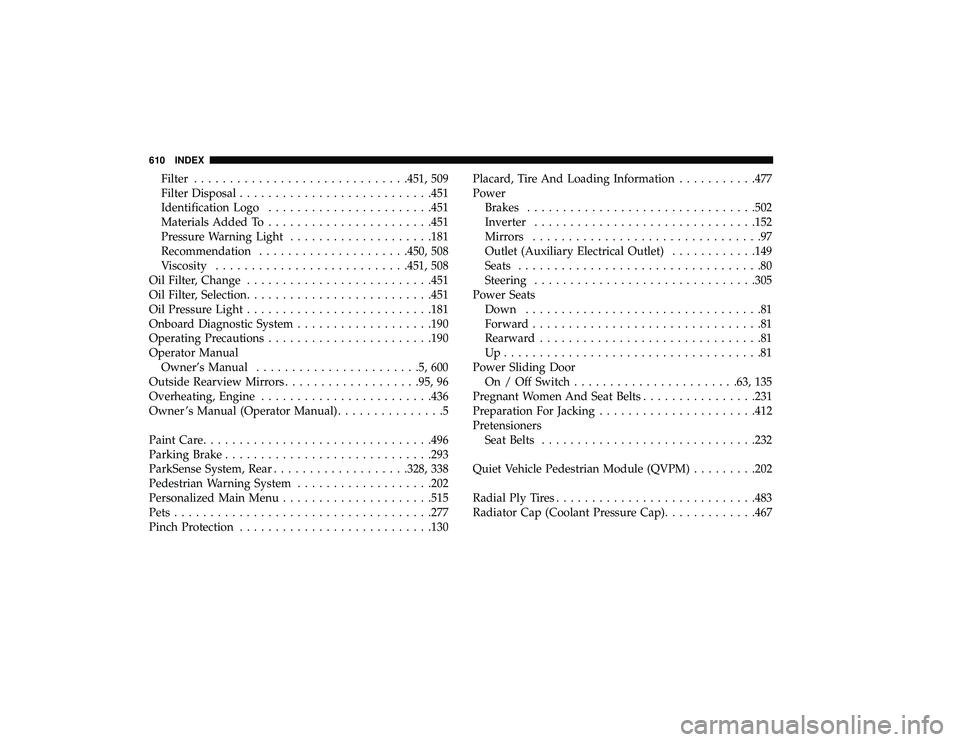
Filter............................. .451, 509
Filter Disposal .......................... .451
Identification Logo ...................... .451
Materials Added To ...................... .451
Pressure Warning Light ................... .181
Recommendation .................... .450, 508
Viscosity .......................... .451, 508
Oil Filter, Change ......................... .451
Oil Filter, Selection ......................... .451
Oil Pressure Light ......................... .181
Onboard Diagnostic System ...................190
Operating Precautions ...................... .190
Operator Manual Owner’s Manual .......................5,600
Outside Rearview Mirrors ...................95, 96
Overheating, Engine ....................... .436
Owner ’s Manual (Operator Manual) ...............5
Paint Care ............................... .496
Parking Brake ............................ .293
ParkSense System, Rear .................. .328, 338
Pedestrian Warning System ...................202
Personalized Main Menu .................... .515
Pets ................................... .277
Pinch Protection .......................... .130Placard, Tire And Loading Information
...........477
Power Brakes ............................... .502
Inverter .............................. .152
Mirrors ................................97
Outlet (Auxiliary Electrical Outlet) ............149
Seats ..................................80
Steering .............................. .305
Power Seats Down .................................81
Forward ................................81
Rearward ...............................81
Up....................................81
Power Sliding Door On / Off Switch ...................... .63, 135
Pregnant Women And Seat Belts ................231
Pr
eparation For Jacking ..................... .412
Pretensioners Seat Belts ............................. .232
Quiet Vehicle Pedestrian Module (QVPM) .........202
Radial Ply Tires ........................... .483
Radiator Cap (Coolant Pressure Cap) .............467
610 INDEX