tire pressure CHRYSLER PACIFICA HYBRID 2022 Owners Manual
[x] Cancel search | Manufacturer: CHRYSLER, Model Year: 2022, Model line: PACIFICA HYBRID, Model: CHRYSLER PACIFICA HYBRID 2022Pages: 384, PDF Size: 23.92 MB
Page 8 of 384
6
Accessing Rear Seat Entertainment
with Fire TV Built-in from the
Rear Screens ................................................. 214
First Time Starting Up
(Using the Rear Screens) .............................. 214 Rear Seat Entertainment with Fire TV
Built-in Alexa .................................................. 214
Listen Via Vehicle Speakers ......................... 215Quick Menu.................................................... 215
Parental Controls
(Using the Rear Screens) .............................. 215Pairing The Voice Remote with Alexa
(Using the Rear Screens) .............................. 215Media Sources Input (Using the Front
Radio and Rear Screens) .............................. 216Rear Seat Entertainment with Fire TV
Built-in Voice Remote with Alexa .................. 216
Rear Seat Entertainment with Fire TV
Built-in Streaming (Using the Front
Radio and Rear Screens) .............................. 217Play A Blu-ray™ or DVD — If Equipped ......... 218Fire TV Apps/Games
(Using the Rear Screens) .............................. 219 Using The Video USB Port ............................. 219
Play Video Games ......................................... 219
Headphones Operation................................. 220
Rear Climate Controls ................................... 220
Legal & Compliance ...................................... 222
RADIO OPERATION AND MOBILE
PHONES ............................................................... 222
Regulatory And Safety Information .............. 222
SAFETY
SAFETY FEATURES .............................................. 223 Anti-Lock Brake System (ABS) ..................... 223
Electronic Brake Control (EBC) System ...... 224
AUXILIARY DRIVING SYSTEMS.......................... 229
Blind Spot Monitoring (BSM) —
If Equipped..................................................... 229Forward Collision Warning (FCW) With
Mitigation — If Equipped ............................... 233
Tire Pressure Monitoring System
(TPMS)............................................................ 236
OCCUPANT RESTRAINT SYSTEMS ................... 239
Occupant Restraint Systems Features ....... 239
Important Safety Precautions ...................... 239Seat Belt Systems ........................................ 240Supplemental Restraint Systems (SRS) ...... 250Child Restraints ............................................ 262 SAFETY TIPS ........................................................ 278
Transporting Passengers.............................. 278
Transporting Pets ......................................... 279
Connected Vehicles ...................................... 279
Safety Checks You Should Make Inside
The Vehicle ................................................... 279
Periodic Safety Checks You Should
Make Outside The Vehicle ............................ 280
Exhaust Gas................................................... 281
Carbon Monoxide Warnings ....................... 281IN CASE OF EMERGENCY
HAZARD WARNING FLASHERS ......................... 282
ASSIST AND SOS MIRROR — IF EQUIPPED...... 282
JACKING AND TIRE CHANGING —
IF EQUIPPED ......................................................... 286 Preparations For Jacking ............................. 286Jack And Spare Tire Location ....................... 287
Equipment Removal ..................................... 287Jacking Instructions ..................................... 288Road Tire Installation .................................... 292
Portable Air Compressor — If Equipped ....... 293
Return Inflatable Spare Tire ........................ 294
TIRE SERVICE KIT — IF EQUIPPED ..................... 294
22_RUP_OM_EN_USC_t.book Page 6
Page 9 of 384
7
JUMP STARTING................................................... 300 Preparations For Jump Start......................... 301Jump Starting Procedure .............................. 301
REFUELING IN EMERGENCY –
IF EQUIPPED ......................................................... 302
IF YOUR ENGINE OVERHEATS ............................ 303
MANUAL PARK RELEASE .................................. 304
FREEING A STUCK VEHICLE .............................. 305
TOWING A DISABLED VEHICLE .......................... 306
All Wheel Drive (AWD) Models ...................... 308
ENHANCED ACCIDENT RESPONSE SYSTEM
(EARS) .................................................................. 308
EVENT DATA RECORDER (EDR) ......................... 308
SERVICING AND MAINTENANCE
SCHEDULED SERVICING ..................................... 309
Maintenance Plan ......................................... 310
ENGINE COMPARTMENT .................................... 313
3.6L Engine.................................................... 313
Checking Oil Level ......................................... 314
Adding Washer Fluid .................................... 314
Maintenance-Free Battery ........................... 314
Pressure Washing ......................................... 315 VEHICLE MAINTENANCE..................................... 315
Engine Oil ...................................................... 315
Engine Oil Filter ............................................. 316Engine Air Cleaner Filter ............................... 316
Accessory Drive Belt Inspection ................... 317Air Conditioner Maintenance........................ 317
Body Lubrication ........................................... 320Windshield Wiper Blades.............................. 320Exhaust System ............................................ 323
Cooling System .............................................. 324
Brake System ............................................... 327
Automatic Transmission .............................. 328Fuses.............................................................. 329
Bulb Replacement......................................... 337
TIRES ................................................................... 339
Tire Safety Information ................................. 339
Tires — General Information ......................... 346
Tire Types....................................................... 350
Spare Tires — If Equipped ............................ 350
Wheel And Wheel Trim Care ........................ 352
Snow Traction Devices ................................. 353
Tire Rotation Recommendations ................. 355 DEPARTMENT OF TRANSPORTATION
UNIFORM TIRE QUALITY GRADES .................... 355
Treadwear...................................................... 356
Traction Grades ............................................. 356Temperature Grades..................................... 356
STORING THE VEHICLE ....................................... 357
BODYWORK .......................................................... 357
Protection From Atmospheric Agents ......... 357
Body And Underbody Maintenance ............. 357
Preserving The Bodywork ............................. 357
INTERIORS ........................................................... 358
Seats And Fabric Parts ................................. 358
Plastic And Coated Parts .............................. 359
Leather Surfaces........................................... 359
Glass Surfaces ............................................. 359TECHNICAL SPECIFICATIONS
VEHICLE IDENTIFICATION NUMBER
(VIN) ....................................................................... 360
BRAKE SYSTEM ................................................... 360
WHEEL AND TIRE TORQUE
SPECIFICATIONS .................................................. 360Torque Specifications ................................... 360
22_RUP_OM_EN_USC_t.book Page 7
Page 14 of 384
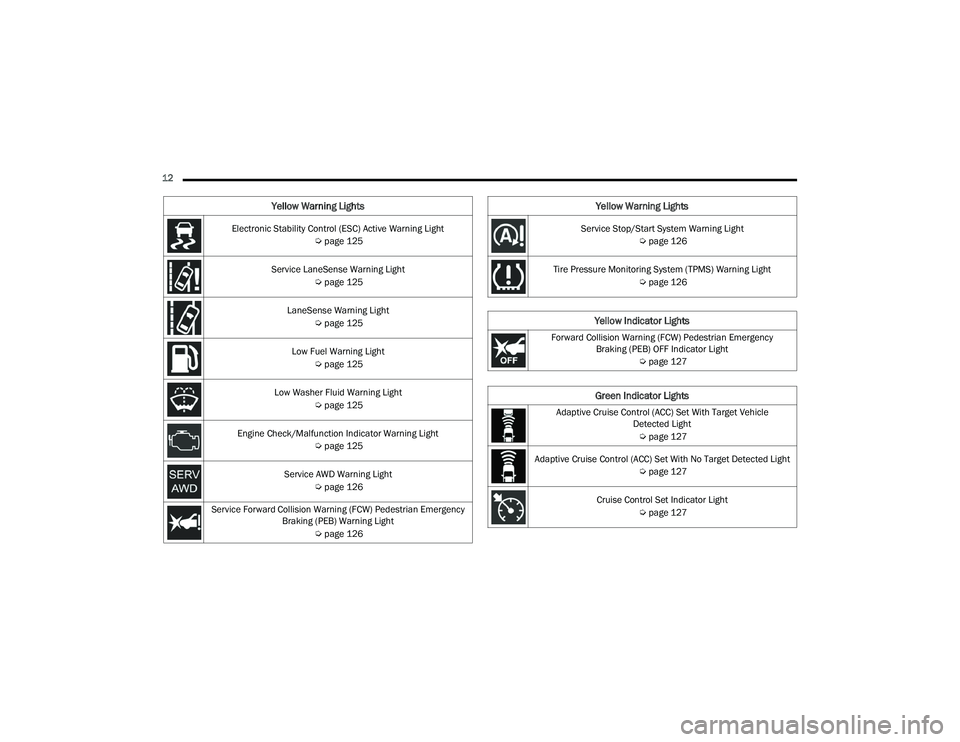
12 Electronic Stability Control (ESC) Active Warning Light Úpage 125
Service LaneSense Warning Light Úpage 125
LaneSense Warning Light Úpage 125
Low Fuel Warning Light Úpage 125
Low Washer Fluid Warning Light Úpage 125
Engine Check/Malfunction Indicator Warning Light Úpage 125
Service AWD Warning Light Úpage 126
Service Forward Collision Warning (FCW) Pedestrian Emergency Braking (PEB) Warning Light
Úpage 126
Yellow Warning Lights
Service Stop/Start System Warning Light
Úpage 126
Tire Pressure Monitoring System (TPMS) Warning Light Úpage 126
Yellow Indicator Lights
Forward Collision Warning (FCW) Pedestrian Emergency
Braking (PEB) OFF Indicator Light
Úpage 127
Green Indicator Lights
Adaptive Cruise Control (ACC) Set With Target Vehicle
Detected Light
Ú page 127
Adaptive Cruise Control (ACC) Set With No Target Detected Light Úpage 127
Cruise Control Set Indicator Light Úpage 127
Yellow Warning Lights
22_RUP_OM_EN_USC_t.book Page 12
Page 38 of 384
36GETTING TO KNOW YOUR VEHICLE
To recline the seatback, lean forward slightly, lift
the recline lever located on the outboard side of
the seat cushion, and push back to the desired
position and release the lever. Lean forward and
lift the lever to return the seatback to its normal
position. Using body pressure, lean forward and
rearward on the seat to be sure the seatback has
latched.
Recline Lever
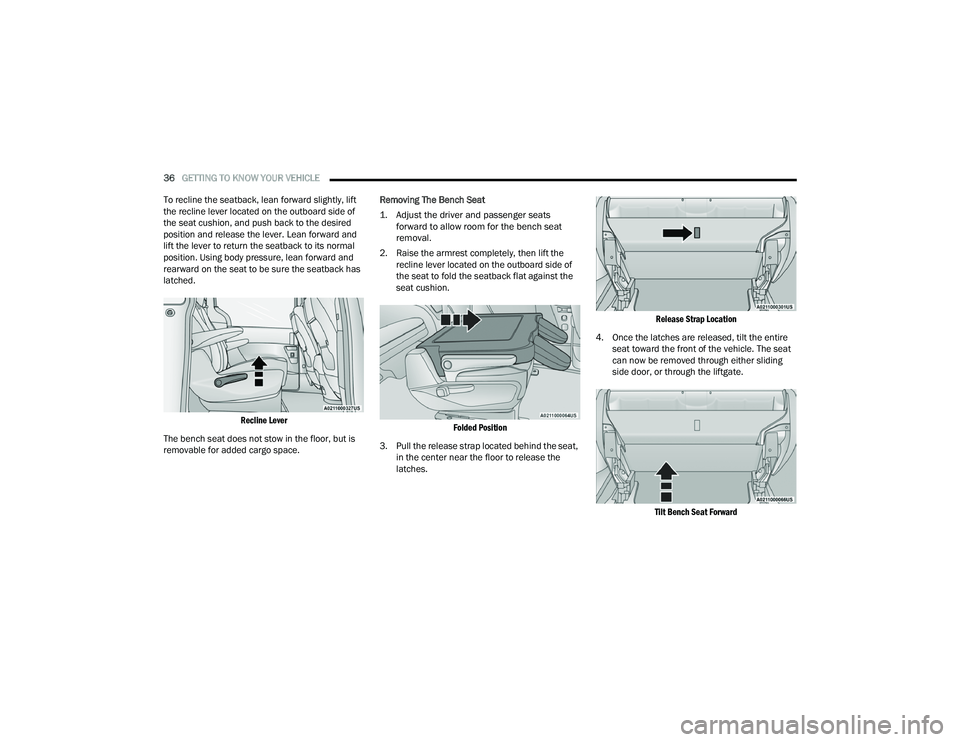
The bench seat does not stow in the floor, but is
removable for added cargo space. Removing The Bench Seat
1. Adjust the driver and passenger seats
forward to allow room for the bench seat
removal.
2. Raise the armrest completely, then lift the recline lever located on the outboard side of
the seat to fold the seatback flat against the
seat cushion.
Folded Position
3. Pull the release strap located behind the seat, in the center near the floor to release the
latches.
Release Strap Location
4. Once the latches are released, tilt the entire seat toward the front of the vehicle. The seat
can now be removed through either sliding
side door, or through the liftgate.
Tilt Bench Seat Forward
22_RUP_OM_EN_USC_t.book Page 36
Page 101 of 384

GETTING TO KNOW YOUR VEHICLE99
HANDS-FREE LIFTGATE — IF EQUIPPED
Hands-Free Liftgate Activation Zone
To open the liftgate using hands-free activation,
use a straight in and out kicking motion under the
vehicle activation zone in the general location
below the liftgate door handle. Do not move your
foot sideways or in a sweeping motion or the
sensors may not detect the motion. Vehicles Equipped With A Trailer Tow Package
NOTE:If your vehicle is equipped with the Trailer Tow
Package, the hands-free activation zone(s) for the
Power Liftgate will be located on the left and right
side of the receiver. Use a straight kicking motion
under either activation zone to open the
Hands-Free Liftgate.
Hands-Free Liftgate Trailer Tow Activation Zones
When a valid kicking motion is completed, the
liftgate will chime, the hazard lights will flash and
the liftgate will open after approximately one
second. This assumes all options are enabled in
the Uconnect system.
NOTE:To open the Hands-Free Liftgate requires a valid
Passive Entry key fob within 5 ft (1.5 m) of the door
handle. If a valid Passive Entry key fob is not within
5 ft (1.5 m), the liftgate will not respond to any
kicks.
NOTE:
The Hands-Free Liftgate will only operate when
the transmission is in PARK.
If anything obstructs the Hands-Free Liftgate
while it is opening or closing, the liftgate will
automatically reverse to the closed position,
provided it meets sufficient resistance.
There are pinch sensors attached to the side of
the liftgate opening. Light pressure anywhere
along these strips will cause the liftgate to
return to the open position.
CAUTION!
The Hands-Free Liftgate feature may be turned
on or off in Uconnect Settings. The Hands-Free
Liftgate feature should be turned off during
jacking, tire changing, and vehicle service
Ú page 188.
2
22_RUP_OM_EN_USC_t.book Page 99
Page 118 of 384
116GETTING TO KNOW YOUR INSTRUMENT PANEL
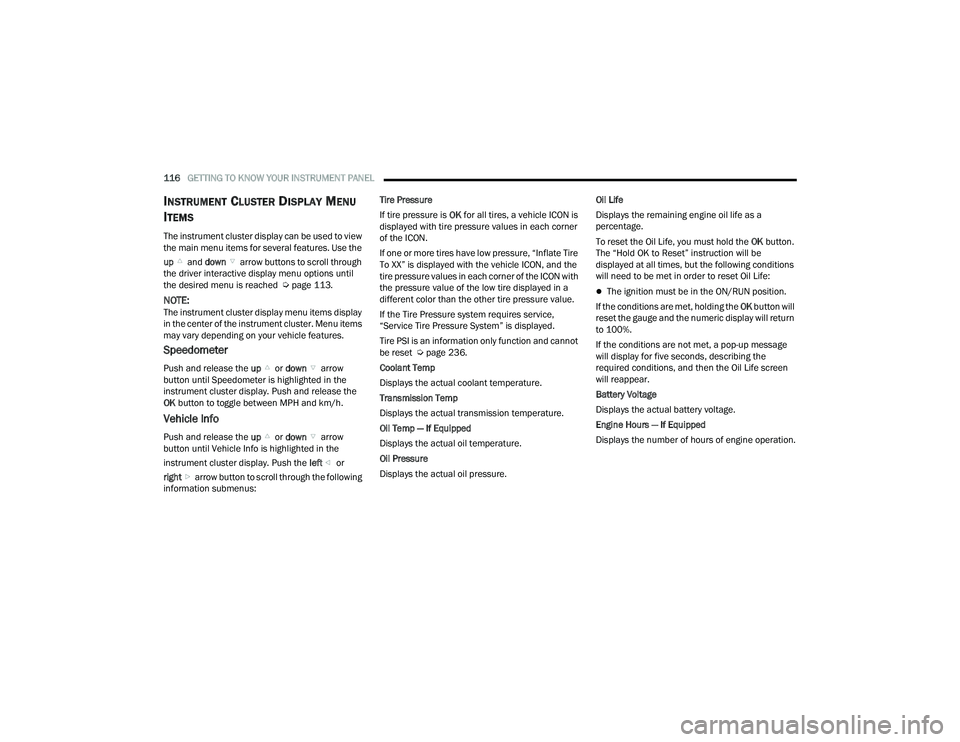
INSTRUMENT CLUSTER DISPLAY MENU
I
TEMS
The instrument cluster display can be used to view
the main menu items for several features. Use the
up and down arrow buttons to scroll through
the driver interactive display menu options until
the desired menu is reached Ú page 113.
NOTE:The instrument cluster display menu items display
in the center of the instrument cluster. Menu items
may vary depending on your vehicle features.
Speedometer
Push and release the up or down arrow
button until Speedometer is highlighted in the
instrument cluster display. Push and release the
OK button to toggle between MPH and km/h.
Vehicle Info
Push and release the up or down arrow
button until Vehicle Info is highlighted in the
instrument cluster display. Push the left or
right arrow button to scroll through the following
information submenus: Tire Pressure
If tire pressure is
OK for all tires, a vehicle ICON is
displayed with tire pressure values in each corner
of the ICON.
If one or more tires have low pressure, “Inflate Tire
To XX” is displayed with the vehicle ICON, and the
tire pressure values in each corner of the ICON with
the pressure value of the low tire displayed in a
different color than the other tire pressure value.
If the Tire Pressure system requires service,
“Service Tire Pressure System” is displayed.
Tire PSI is an information only function and cannot
be reset Ú page 236.
Coolant Temp
Displays the actual coolant temperature.
Transmission Temp
Displays the actual transmission temperature.
Oil Temp — If Equipped
Displays the actual oil temperature.
Oil Pressure
Displays the actual oil pressure. Oil Life
Displays the remaining engine oil life as a
percentage.
To reset the Oil Life, you must hold the
OK button.
The “Hold OK to Reset” instruction will be
displayed at all times, but the following conditions
will need to be met in order to reset Oil Life:
The ignition must be in the ON/RUN position.
If the conditions are met, holding the OK button will
reset the gauge and the numeric display will return
to 100%.
If the conditions are not met, a pop-up message
will display for five seconds, describing the
required conditions, and then the Oil Life screen
will reappear.
Battery Voltage
Displays the actual battery voltage.
Engine Hours — If Equipped
Displays the number of hours of engine operation.
22_RUP_OM_EN_USC_t.book Page 116
Page 128 of 384
126GETTING TO KNOW YOUR INSTRUMENT PANEL
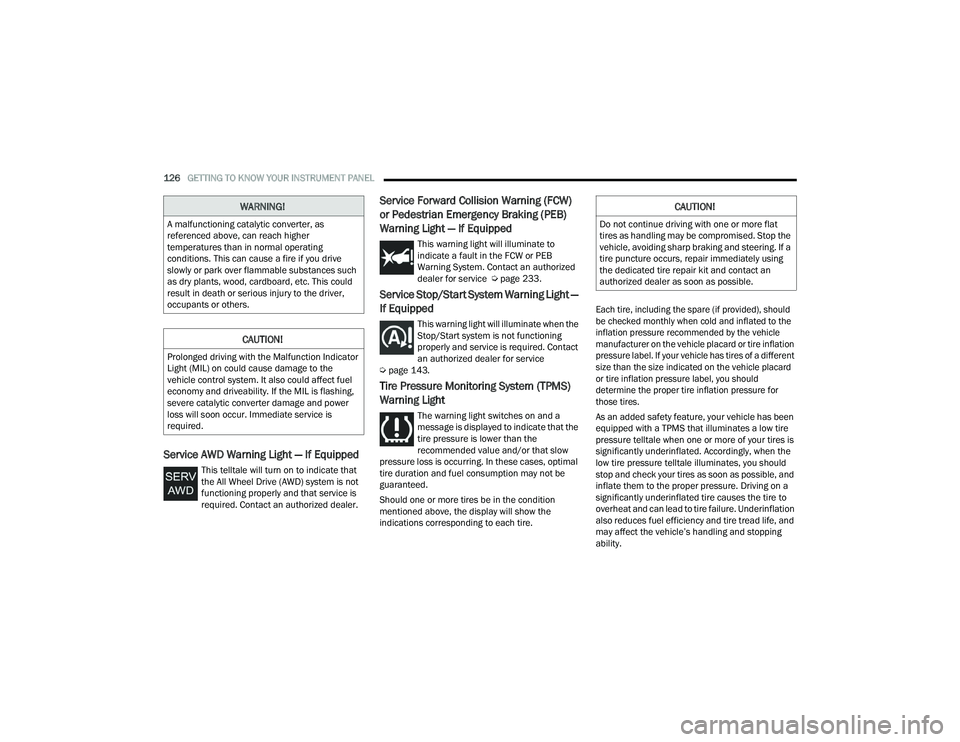
Service AWD Warning Light — If Equipped
This telltale will turn on to indicate that
the All Wheel Drive (AWD) system is not
functioning properly and that service is
required. Contact an authorized dealer.
Service Forward Collision Warning (FCW)
or Pedestrian Emergency Braking (PEB)
Warning Light — If Equipped
This warning light will illuminate to
indicate a fault in the FCW or PEB
Warning System. Contact an authorized
dealer for service Úpage 233.
Service Stop/Start System Warning Light —
If Equipped
This warning light will illuminate when the
Stop/Start system is not functioning
properly and service is required. Contact
an authorized dealer for service
Ú page 143.
Tire Pressure Monitoring System (TPMS)
Warning Light
The warning light switches on and a
message is displayed to indicate that the
tire pressure is lower than the
recommended value and/or that slow
pressure loss is occurring. In these cases, optimal
tire duration and fuel consumption may not be
guaranteed.
Should one or more tires be in the condition
mentioned above, the display will show the
indications corresponding to each tire.
Each tire, including the spare (if provided), should
be checked monthly when cold and inflated to the
inflation pressure recommended by the vehicle
manufacturer on the vehicle placard or tire inflation
pressure label. If your vehicle has tires of a different
size than the size indicated on the vehicle placard
or tire inflation pressure label, you should
determine the proper tire inflation pressure for
those tires.
As an added safety feature, your vehicle has been
equipped with a TPMS that illuminates a low tire
pressure telltale when one or more of your tires is
significantly underinflated. Accordingly, when the
low tire pressure telltale illuminates, you should
stop and check your tires as soon as possible, and
inflate them to the proper pressure. Driving on a
significantly underinflated tire causes the tire to
overheat and can lead to tire failure. Underinflation
also reduces fuel efficiency and tire tread life, and
may affect the vehicle’s handling and stopping
ability.
WARNING!
A malfunctioning catalytic converter, as
referenced above, can reach higher
temperatures than in normal operating
conditions. This can cause a fire if you drive
slowly or park over flammable substances such
as dry plants, wood, cardboard, etc. This could
result in death or serious injury to the driver,
occupants or others.
CAUTION!
Prolonged driving with the Malfunction Indicator
Light (MIL) on could cause damage to the
vehicle control system. It also could affect fuel
economy and driveability. If the MIL is flashing,
severe catalytic converter damage and power
loss will soon occur. Immediate service is
required.
CAUTION!
Do not continue driving with one or more flat
tires as handling may be compromised. Stop the
vehicle, avoiding sharp braking and steering. If a
tire puncture occurs, repair immediately using
the dedicated tire repair kit and contact an
authorized dealer as soon as possible.
22_RUP_OM_EN_USC_t.book Page 126
Page 129 of 384
GETTING TO KNOW YOUR INSTRUMENT PANEL127
Please note that the TPMS is not a substitute for
proper tire maintenance, and it is the driver’s
responsibility to maintain correct tire pressure,
even if underinflation has not reached the level to
trigger illumination of the TPMS low tire pressure
telltale.
Your vehicle has also been equipped with a TPMS
malfunction indicator to indicate when the system
is not operating properly. The TPMS malfunction
indicator is combined with the low tire pressure
telltale. When the system detects a malfunction,
the telltale will flash for approximately one minute
and then remain continuously illuminated. This
sequence will continue upon subsequent vehicle
start-ups as long as the malfunction exists. When
the malfunction indicator is illuminated, the
system may not be able to detect or signal low tire
pressure as intended. TPMS malfunctions may
occur for a variety of reasons, including the
installation of replacement or alternate tires or
wheels on the vehicle that prevent the TPMS from
functioning properly. Always check the TPMS
malfunction telltale after replacing one or more
tires or wheels on your vehicle to ensure that the
replacement or alternate tires and wheels allow
the TPMS to continue to function properly.
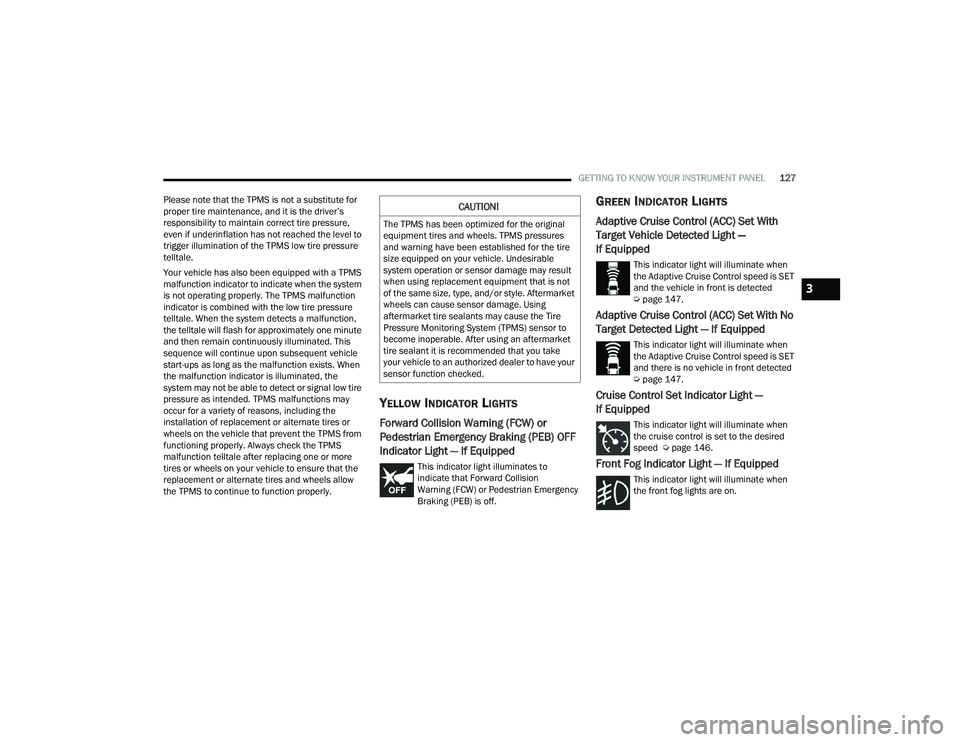
YELLOW INDICATOR LIGHTS
Forward Collision Warning (FCW) or
Pedestrian Emergency Braking (PEB) OFF
Indicator Light — If Equipped
This indicator light illuminates to
indicate that Forward Collision
Warning (FCW) or Pedestrian Emergency
Braking (PEB) is off.
GREEN INDICATOR LIGHTS
Adaptive Cruise Control (ACC) Set With
Target Vehicle Detected Light —
If Equipped
This indicator light will illuminate when
the Adaptive Cruise Control speed is SET
and the vehicle in front is detected
Ú page 147.
Adaptive Cruise Control (ACC) Set With No
Target Detected Light — If Equipped
This indicator light will illuminate when
the Adaptive Cruise Control speed is SET
and there is no vehicle in front detected
Úpage 147.
Cruise Control Set Indicator Light —
If Equipped
This indicator light will illuminate when
the cruise control is set to the desired
speed Ú page 146.
Front Fog Indicator Light — If Equipped
This indicator light will illuminate when
the front fog lights are on.
CAUTION!
The TPMS has been optimized for the original
equipment tires and wheels. TPMS pressures
and warning have been established for the tire
size equipped on your vehicle. Undesirable
system operation or sensor damage may result
when using replacement equipment that is not
of the same size, type, and/or style. Aftermarket
wheels can cause sensor damage. Using
aftermarket tire sealants may cause the Tire
Pressure Monitoring System (TPMS) sensor to
become inoperable. After using an aftermarket
tire sealant it is recommended that you take
your vehicle to an authorized dealer to have your
sensor function checked.
3
22_RUP_OM_EN_USC_t.book Page 127
Page 175 of 384
STARTING AND OPERATING173
6. Remove the fuel filler nozzle.
7. To close the fuel filler door, push the center-rear edge (3 o’clock position) of the fuel
filler door and then release. The fuel filler door
will latch closed.
NOTE:In certain cold conditions, ice may prevent the fuel
filler door from opening. If this occurs, lightly push
on the fuel filler door around the perimeter to
break the ice buildup.
VEHICLE LOADING
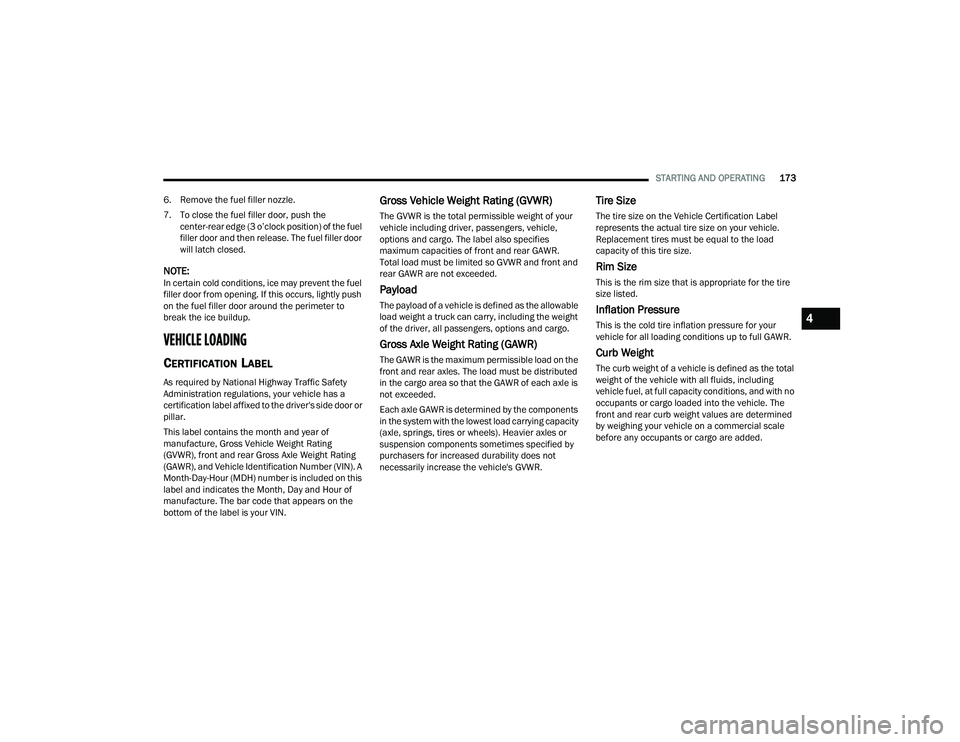
CERTIFICATION LABEL
As required by National Highway Traffic Safety
Administration regulations, your vehicle has a
certification label affixed to the driver's side door or
pillar.
This label contains the month and year of
manufacture, Gross Vehicle Weight Rating
(GVWR), front and rear Gross Axle Weight Rating
(GAWR), and Vehicle Identification Number (VIN). A
Month-Day-Hour (MDH) number is included on this
label and indicates the Month, Day and Hour of
manufacture. The bar code that appears on the
bottom of the label is your VIN.
Gross Vehicle Weight Rating (GVWR)
The GVWR is the total permissible weight of your
vehicle including driver, passengers, vehicle,
options and cargo. The label also specifies
maximum capacities of front and rear GAWR.
Total load must be limited so GVWR and front and
rear GAWR are not exceeded.
Payload
The payload of a vehicle is defined as the allowable
load weight a truck can carry, including the weight
of the driver, all passengers, options and cargo.
Gross Axle Weight Rating (GAWR)
The GAWR is the maximum permissible load on the
front and rear axles. The load must be distributed
in the cargo area so that the GAWR of each axle is
not exceeded.
Each axle GAWR is determined by the components
in the system with the lowest load carrying capacity
(axle, springs, tires or wheels). Heavier axles or
suspension components sometimes specified by
purchasers for increased durability does not
necessarily increase the vehicle's GVWR.
Tire Size
The tire size on the Vehicle Certification Label
represents the actual tire size on your vehicle.
Replacement tires must be equal to the load
capacity of this tire size.
Rim Size
This is the rim size that is appropriate for the tire
size listed.
Inflation Pressure
This is the cold tire inflation pressure for your
vehicle for all loading conditions up to full GAWR.
Curb Weight
The curb weight of a vehicle is defined as the total
weight of the vehicle with all fluids, including
vehicle fuel, at full capacity conditions, and with no
occupants or cargo loaded into the vehicle. The
front and rear curb weight values are determined
by weighing your vehicle on a commercial scale
before any occupants or cargo are added.
4
22_RUP_OM_EN_USC_t.book Page 173
Page 183 of 384
STARTING AND OPERATING181
(Continued)
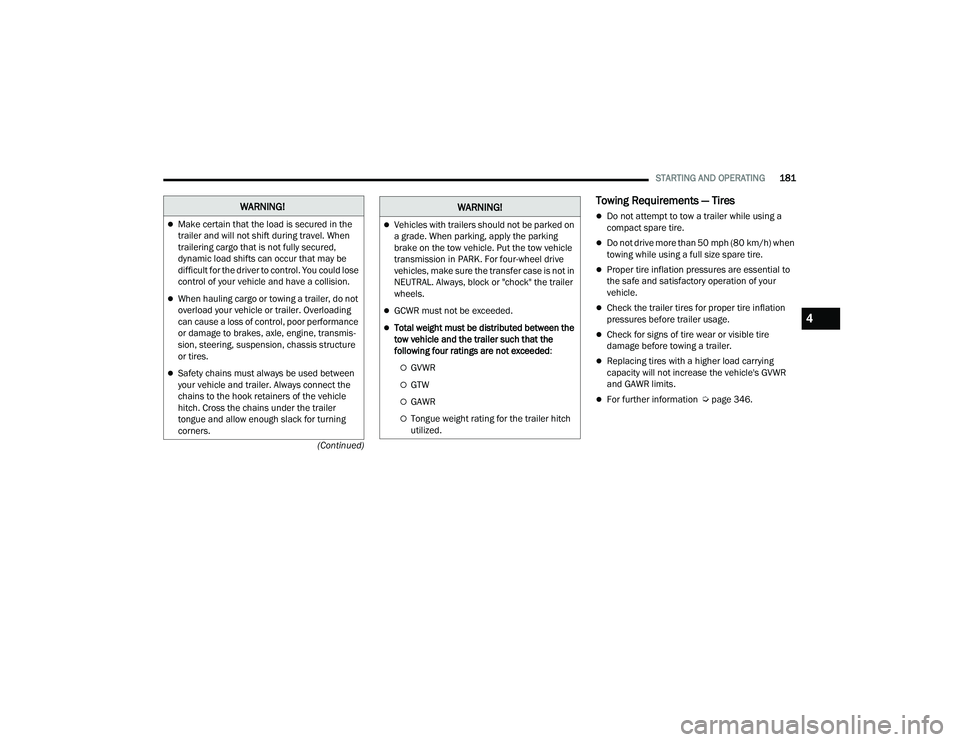
Towing Requirements — Tires
Do not attempt to tow a trailer while using a
compact spare tire.
Do not drive more than 50 mph (80 km/h) when
towing while using a full size spare tire.
Proper tire inflation pressures are essential to
the safe and satisfactory operation of your
vehicle.
Check the trailer tires for proper tire inflation
pressures before trailer usage.
Check for signs of tire wear or visible tire
damage before towing a trailer.
Replacing tires with a higher load carrying
capacity will not increase the vehicle's GVWR
and GAWR limits.
For further information Ú page 346.
WARNING!
Make certain that the load is secured in the
trailer and will not shift during travel. When
trailering cargo that is not fully secured,
dynamic load shifts can occur that may be
difficult for the driver to control. You could lose
control of your vehicle and have a collision.
When hauling cargo or towing a trailer, do not
overload your vehicle or trailer. Overloading
can cause a loss of control, poor performance
or damage to brakes, axle, engine, transmis -
sion, steering, suspension, chassis structure
or tires.
Safety chains must always be used between
your vehicle and trailer. Always connect the
chains to the hook retainers of the vehicle
hitch. Cross the chains under the trailer
tongue and allow enough slack for turning
corners.
Vehicles with trailers should not be parked on
a grade. When parking, apply the parking
brake on the tow vehicle. Put the tow vehicle
transmission in PARK. For four-wheel drive
vehicles, make sure the transfer case is not in
NEUTRAL. Always, block or "chock" the trailer
wheels.
GCWR must not be exceeded.
Total weight must be distributed between the
tow vehicle and the trailer such that the
following four ratings are not exceeded :
GVWR
GTW
GAWR
Tongue weight rating for the trailer hitch
utilized.
WARNING!
4
22_RUP_OM_EN_USC_t.book Page 181